2022 HYUNDAI KONA trans
[x] Cancel search: transPage 148 of 579

Convenient features
5-14
Immobilizer system (if equipped)
The immobilizer system helps protect
your vehicle from theft. If an improperly
coded key (or other device) is used, the
engine’s fuel system is disabled.
When the ignition switch is placed in
the ON position, the immobilizer system
indicator should come on briefly, then
go off. If the indicator starts to blink, the
system does not recognize the coding of
the key.
Place the ignition switch to the LOCK/
OFF position, then place the ignition
switch to the ON position again.
The system may not recognize your
key’s coding if another immobilizer key
or other metal object (i.e., key chain) is
near the key. The engine may not start
because the metal may interrupt the
transponder signal from transmitting
normally.
If the system repeatedly does not
recognize the coding of the key, it is
recommended that you contact your
HYUNDAI dealer.
Do not attempt to alter this system
or add other devices to it. Electrical
problems could result that may make
your vehicle inoperable.
WARNING
In order to prevent theft of your
vehicle, do not leave spare keys
anywhere in your vehicle. Your
immobilizer password is a customer
unique password and should be kept
confidential.
NOTICE
The transponder in your key is an
important part of the immobilizer
system. It is designed to give years
of trouble-free service, however you
should avoid exposure to moisture,
static electricity and rough handling.
Immobilizer system malfunction could
occur.
Information
1.
2.
3.
Page 159 of 579
![HYUNDAI KONA 2022 Owners Manual 05
5-25
OOS050002K
[1] : Door handle authentication pad
You should contact digital key (card key)
to door handle authentication pad (1,
marked position near by the lock button)
of driver’s (or fr HYUNDAI KONA 2022 Owners Manual 05
5-25
OOS050002K
[1] : Door handle authentication pad
You should contact digital key (card key)
to door handle authentication pad (1,
marked position near by the lock button)
of driver’s (or fr](/manual-img/35/41169/w960_41169-158.png)
05
5-25
OOS050002K
[1] : Door handle authentication pad
You should contact digital key (card key)
to door handle authentication pad (1,
marked position near by the lock button)
of driver’s (or front passenger’s) outside
door for 2 seconds to lock or unlock the
doors. If the Two Press Unlock feature
is applied (press twice for unlocking),
driver’s seat door will be unlocked by
contacting the digital key (card key). In
this state, if you contact one more time
within 4 seconds, all the doors unlock.
Inoperable condition
If you do not contact the digital key (card
key) to the center of the door handle
authentication pad accurately., it may
not work. In addition, if you overlap and
use the key with NFC-enabled cards such
as transportation card or credit card, it
does not work.
Note that if you try to lock your vehicle
with digital key (card key) in following
cases, the doors will not be locked and
chime will sound for 3 seconds.
The Smart Key is in the vehicle.
The Engine Start/Stop button is in
ACC or ON position.
Any of the doors, hood and trunk are
open
If the digital key (card key) does not
work, please detach the key around
4 inches (0.1 m) from the handle
authentication pad and retry to contact.
The card key may be damaged by the
impact. It would not work properly if
the key is damaged. You should buy a
new card and register again. Long-time
exposure to high temperature may cause
the card key to malfunction. Please be
careful not to expose the key to direct
sunlight or high temperature.
After unlock the door or start up the
vehicle with digital key, even though
the driver tries to lock the doors by the
central door lock switch, the door lock
will be once locked and immediately
released at the moment of door closed.
Page 160 of 579
Convenient features
5-26
After placing your registered card key
onto the interior authentication pad
(wireless charger), step on the brake and
press the Engine Start/Stop button.
WARNING
If you do not place the digital key
(card key) onto the center of the
interior authentication pad (wireless
charger) exactly, the card key may
not be recognized. If the engine is
not turned on, adjust and place the
key again.
If you overlap and use the key
with NFC-enabled cards such as
transportation card or credit card,
the card key may not be recognized.
If the digital key (card key) does not
work, please detach the key around
4 inches (0.1 m) from the handle
authentication pad and retry to
contact.
The card key may be damaged due to
impact. It would not work properly if
the key is damaged. You should buy a
new card and register again.
For more information, refer to the
Engine Start/Stop button in chapter 6.
If you do not want to use the digital key
(smartphone and card key), you can
disable the function temporarily. You
should have the smart key when you
change the settings
With Navigation screen :
From the infotainment screen menu,
go to [Setup] - [Vehicle] - [Digital Key]
- [Enable Digital Keys] (deselect)
Without navigation screen :
From cluster menu, go to [Digital Key]
- [Enable Digital Keys] (deselect)
Information
CAUTION
If you uncheck Enable digital keys, it is
impossible to lock or unlock the doors
or start up the vehicle with digital keys
such as smartphone and card key. If
you check Enable digital keys again, the
registered digital keys(smartphone and
card key) are available. Even though
you stop the digital key function, the
registered keys (smartphone and card
key) are not deleted.
Page 174 of 579
Convenient features
5-40
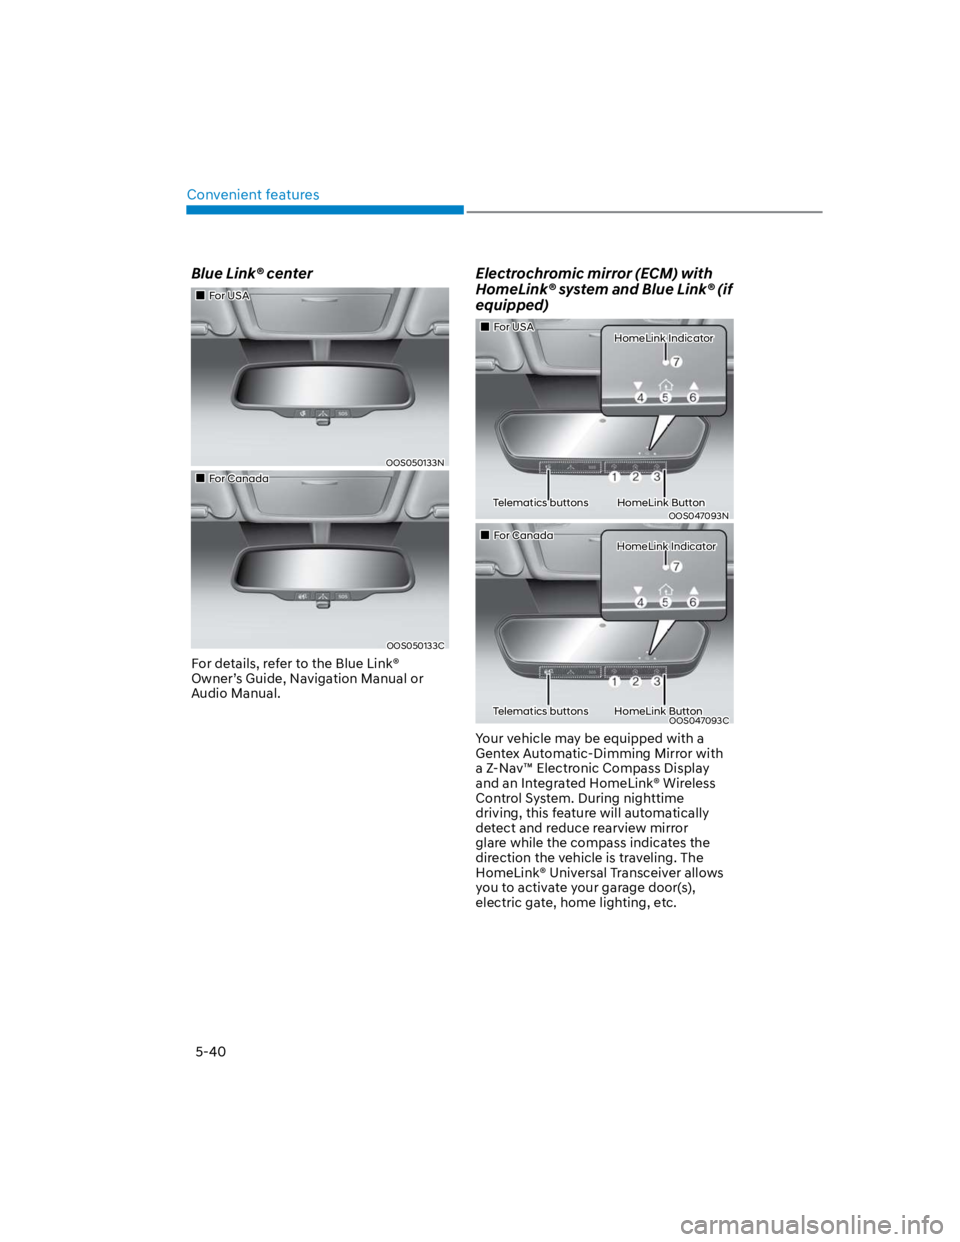
Blue Link® center
For USA
OOS050133N
For Canada
OOS050133C
For details, refer to the Blue Link®
Owner’s Guide, Navigation Manual or
Audio Manual.
Electrochromic mirror (ECM) with
HomeLink® system and Blue Link® (if
equipped)
For USA HomeLink Indicator
Telematics buttons HomeLink Button
OOS047093N
For Canada HomeLink Indicator
Telematics buttons HomeLink ButtonOOS047093C
Your vehicle may be equipped with a
Gentex Automatic-Dimming Mirror with
a Z-Nav™ Electronic Compass Display
and an Integrated HomeLink® Wireless
Control System. During nighttime
driving, this feature will automatically
detect and reduce rearview mirror
glare while the compass indicates the
direction the vehicle is traveling. The
HomeLink® Universal Transceiver allows
you to activate your garage door(s),
electric gate, home lighting, etc.
Page 175 of 579
05
5-41
(1) HomeLink Channel 1
(2) HomeLink Channel 2
(3) HomeLink Channel 3
(4) Garage Door Opener Status
Indicator : Closing or Closed
(5) HomeLink Operation Indicator
(6) Garage Door Opener Status
Indicator : Opening or Opened
(7) HomeLink User Interface Indicator
The NVS® Mirror automatically reduces
glare by monitoring light levels in the
front and the rear of the vehicle. Any
object that obstructs either light sensor
will degrade the automatic dimming
control feature.
For more information regarding NVS®
mirrors and other applications, please
refer to the Gentex website:
www.gentex.com
Your mirror will automatically dim
upon detecting glare from the vehicles
traveling behind you.
The mirror defaults to the ON position
each time the vehicle is started.
The HomeLink® Wireless Control System
provides a convenient way to replace
up to three hand held radiofrequency
transmitters used to activate compatible
devices such as gate operators, garage
door openers, entry door locks, security
systems, and home lighting.
NOTICE
HomeLink® operates while the ignition
switch is in the ACC or ON position
for safety reasons. It is to prevent
unintentional security problems from
happening when the vehicle is parked
outside the garage.
WARNING
Before programming HomeLink® to a
garage door opener or gate operator,
make sure people and objects are out
of the way of the device to prevent
potential harm or damage. Do not
use the HomeLink® with any garage
door opener that lacks the safety
stop and reverse features required
by U.S. federal safety standards (this
includes any garage door opener model
manufactured before April 1, 1982).
A garage door that cannot detect an
object - signaling the door to stop and
reverse - does not meet current U.S.
federal safety standards. Using a garage
door opener without these features
increases the risk of serious injury or
death.
For more information, contact
HomeLink® at www.homelink.com, or
call Home-Link customer support at
1-800-355-3515.
It is also recommended that a new
battery be replaced in the handheld
transmitter of the device being trained
to HomeLink® for quicker training and
accurate transmission of the radio
frequency.
Page 176 of 579
Convenient features
5-42
The following steps show how to
program HomeLink. If you have any
questions or are having difficulty
programming your HomeLink buttons,
refer to the HomeLink website or call
the HomeLink customer support tollfree
number. Do this, before going back to
the dealer who sold you the car.
Visit the HomeLink website at: www.
homelink.com. Then at the top of the
page, choose your vehicle make. Then
watch the You Tube video, and/or
access additional website information.
If you choose to access the website
via your cell phone, scan the QR code.
Or, call HomeLink customer support
at 1-800-355-3515 (Please have the
vehicle make/model AND the opener
device make/model readily available.)
1) Programming Preparation
OOS040477N
1. When programming a garage door
opener, it is advised to park the
vehicle outside of the garage.
2. It is recommended that a new battery
be placed in the handheld transmitter
of the device being programmed to
HomeLink for quicker training and
accurate transmission of the radio-
frequency signal.
3. Place the ignition switch to the ACC
(Accessory) position for programming
of HomeLink.
2) Programming a New HomeLink®
OOS040095N
1. Press and release the HomeLink
button (1), (2) or (3), you would like
to program. The HomeLink indicator
light (7) will flash orange slowly (if
not, perform the steps of “Erasing
HomeLink Buttons” section, and start
over).
Page 179 of 579
05
5-45
4) Canadian Programming
Canadian radio-frequency laws require
transmitter remote signals to “time-
out” (or quit) after a couple seconds of
transmission, which may not be long
enough for HomeLink to pick up the
signal during programming.
If you live in Canada or you are having
difficulties programming a gate operator
or garage door opener by using the
programming procedures, replace
“Programming a New HomeLink Button”
step 3 with the following:
While the HomeLink indicator light (7)
is flashing orange, press and release
(“cycle”) your device’s handheld remote
every two seconds until the HomeLink
indicator light (7) changes from orange
to green. You may now release the hand-
held remote button. Then proceed with
“Programming a New HomeLink Button”
step 4.
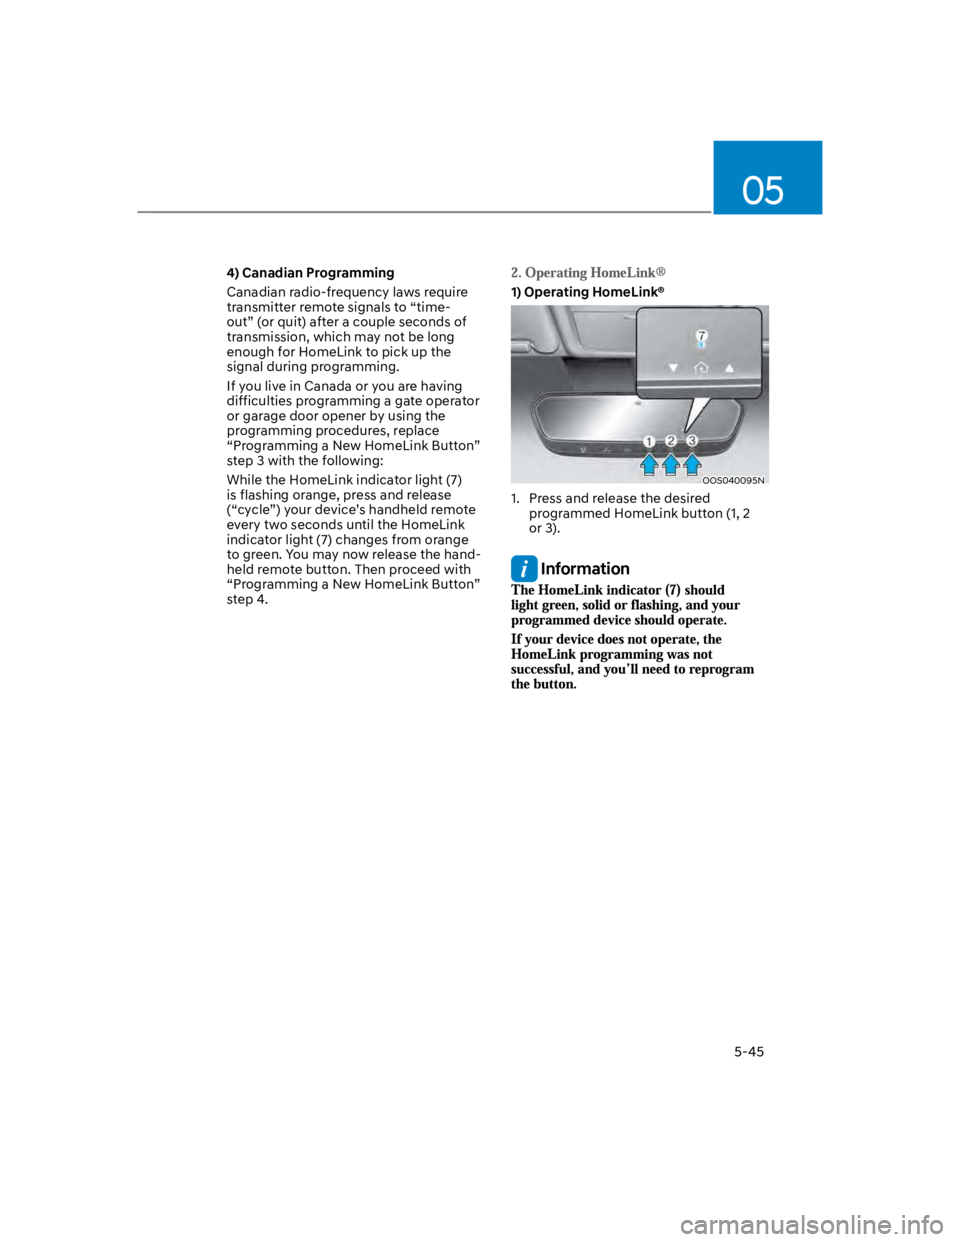
1) Operating HomeLink®
OOS040095N
1. Press and release the desired
programmed HomeLink button (1, 2
or 3).
Information
Page 182 of 579

Convenient features
5-48
FCC (USA) and ISED (Canada)
This device complies with FCC rules
part 15 and Innovation, Science, and
Economic Development Canada RSS-
210. Operation is subject to the following
two conditions: (1) This device may not
cause harmful interference, and (2) This
device must accept any interference that
may be received including interference
that may cause undesired operation.
WARNING: The transmitter has been
tested and complies with FCC and
ISED rules. Changes or modifications
not expressly approved by the party
responsible for compliance could void
the user’s authority to operate the
device.
This equipment complies with FCC
and ISED radiation exposure limits set
forth for an uncontrolled environment.
End Users must follow the specific
operating instructions for satisfying RF
exposure compliance. This transmitter
must be at least 20cm from the user and
must not be co-located or operating in
conjunction with any other antenna or
transmitter.
FCC (Htats-Unis) et ISED (Canada)
Cet appareil est conforme aux
règlements de la FCC, section 15, et
au CNR-210 d’Innovation, Sciences et
Dhveloppement économique Canada. Le
fonctionnement est assujetti aux deux
conditions suivantes : (1) cet appareil ne
doit pas causer d’interférences nuisibles
et (2) cet appareil doit accepter toute
interférence reçue, y compris celle qui
pourrait entraîner un dysfonctionnement.
MISE EN GARDE : L’émetteur a subi des
tests et est conforme aux règlements
de la FCC et d’ISDE. Les changements
ou modifications non approuvés
explicitement par la partie responsable
de la conformité pourraient rendre
caduque l’autorisation de l’utilisateur de
se servir du dispositif.
Cet appareil est conforme aux limites
d’exposition aux radiations de la FCC et
d’ISDE établies pour un environnement
non contrôlé. Les utilisateurs finaux
doivent respecter les instructions
d’utilisation spécifiques pour satisfaire
aux exigences de conformité aux
expositions de RF.
L’émetteur doit se trouver à 20 cm au
minimum de l’utilisateur et ne doit pas
être situé au même endroit que tout
autre émetteur ou antenne ni fonctionner
avec un autre émetteur ou antenne.
La operación de este equipo está sujeta
a las siguientes dos condiciones: (1) es
posible que este equipo o dispositivo
pueda no causar interferencia dañina, y
(2) este dispositivo o dispositivos deben
aceptar cualquier interferencia, que
incluye la interferencia que puede causar
su operación no deseada.