2022 HYUNDAI KONA phone
[x] Cancel search: phonePage 160 of 579
Convenient features
5-26
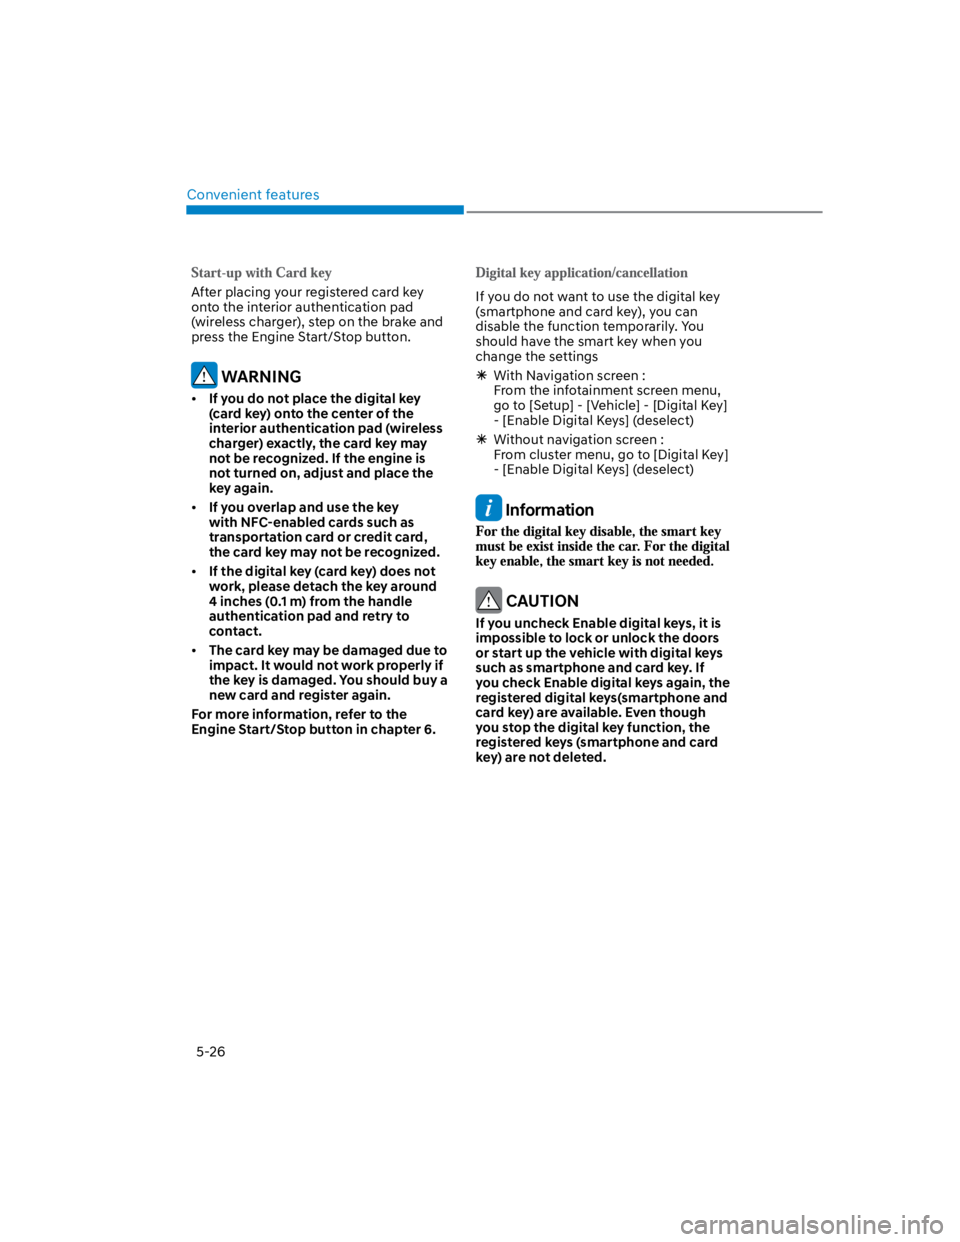
After placing your registered card key
onto the interior authentication pad
(wireless charger), step on the brake and
press the Engine Start/Stop button.
WARNING
If you do not place the digital key
(card key) onto the center of the
interior authentication pad (wireless
charger) exactly, the card key may
not be recognized. If the engine is
not turned on, adjust and place the
key again.
If you overlap and use the key
with NFC-enabled cards such as
transportation card or credit card,
the card key may not be recognized.
If the digital key (card key) does not
work, please detach the key around
4 inches (0.1 m) from the handle
authentication pad and retry to
contact.
The card key may be damaged due to
impact. It would not work properly if
the key is damaged. You should buy a
new card and register again.
For more information, refer to the
Engine Start/Stop button in chapter 6.
If you do not want to use the digital key
(smartphone and card key), you can
disable the function temporarily. You
should have the smart key when you
change the settings
With Navigation screen :
From the infotainment screen menu,
go to [Setup] - [Vehicle] - [Digital Key]
- [Enable Digital Keys] (deselect)
Without navigation screen :
From cluster menu, go to [Digital Key]
- [Enable Digital Keys] (deselect)
Information
CAUTION
If you uncheck Enable digital keys, it is
impossible to lock or unlock the doors
or start up the vehicle with digital keys
such as smartphone and card key. If
you check Enable digital keys again, the
registered digital keys(smartphone and
card key) are available. Even though
you stop the digital key function, the
registered keys (smartphone and card
key) are not deleted.
Page 161 of 579
05
5-27
Personalized profile and vehicle
settings
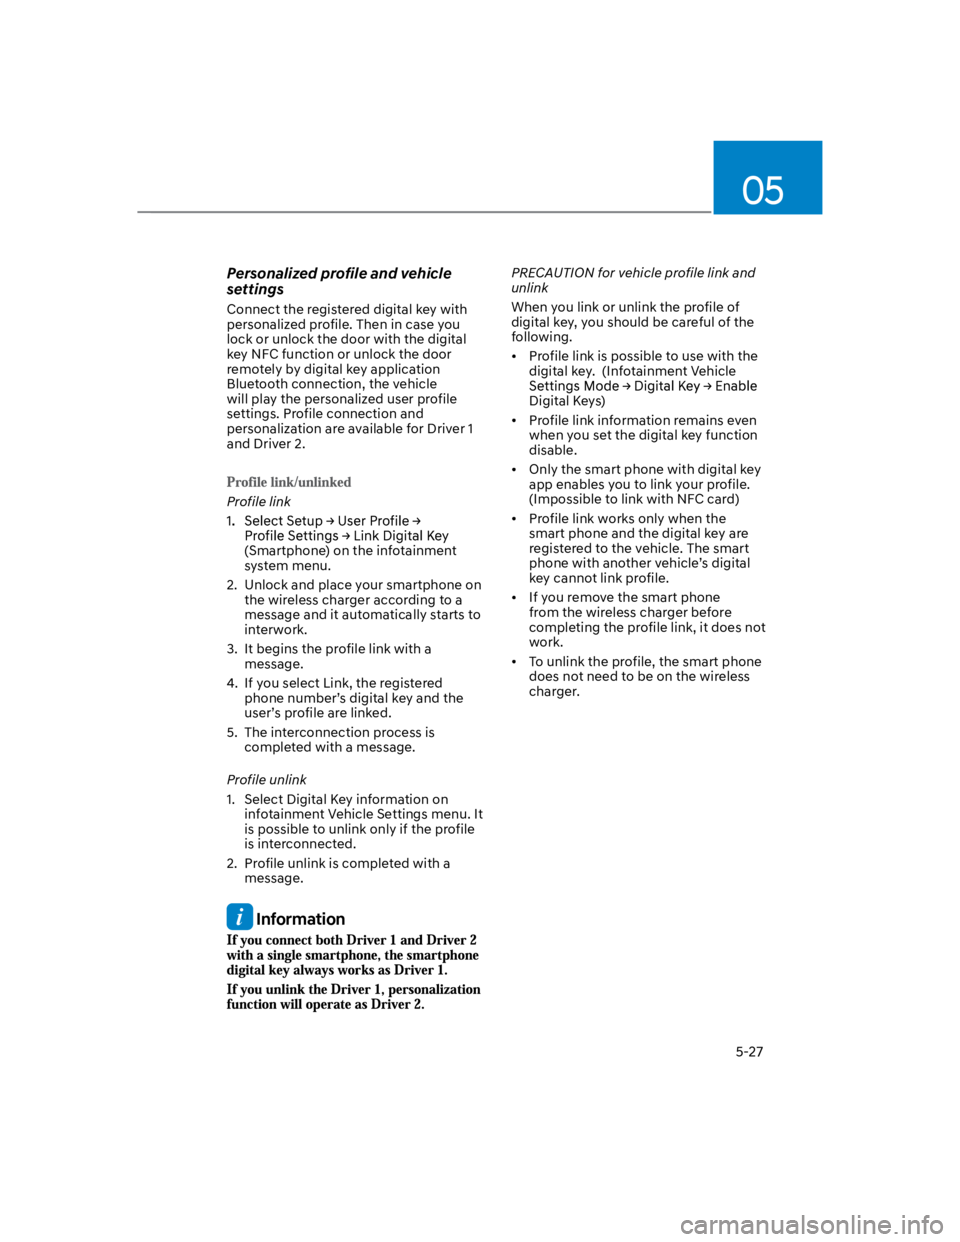
Connect the registered digital key with
personalized profile. Then in case you
lock or unlock the door with the digital
key NFC function or unlock the door
remotely by digital key application
Bluetooth connection, the vehicle
will play the personalized user profile
settings. Profile connection and
personalization are available for Driver 1
and Driver 2.
Profile link
(Smartphone) on the infotainment
system menu.
2. Unlock and place your smartphone on
the wireless charger according to a
message and it automatically starts to
interwork.
3. It begins the profile link with a
message.
4. If you select Link, the registered
phone number’s digital key and the
user’s profile are linked.
5. The interconnection process is
completed with a message.
Profile unlink
1. Select Digital Key information on
infotainment Vehicle Settings menu. It
is possible to unlink only if the profile
is interconnected.
2. Profile unlink is completed with a
message.
Information
PRECAUTION for vehicle profile link and
unlink
When you link or unlink the profile of
digital key, you should be careful of the
following.
Profile link is possible to use with the
digital key. (Infotainment Vehicle
Digital Keys)
Profile link information remains even
when you set the digital key function
disable.
Only the smart phone with digital key
app enables you to link your profile.
(Impossible to link with NFC card)
Profile link works only when the
smart phone and the digital key are
registered to the vehicle. The smart
phone with another vehicle’s digital
key cannot link profile.
If you remove the smart phone
from the wireless charger before
completing the profile link, it does not
work.
To unlink the profile, the smart phone
does not need to be on the wireless
charger.
Page 162 of 579
Convenient features
5-28
The personalization function linked with
digital key works as following conditions:
Contact the driver’s door handle with
the profile linked smart phone to lock
or unlock the doors (Personalization
does not operate when locking or
unlocking the front passenger door.)
Remote door unlock with the profile
linked smartphone digital key app.
The profile linked with digital key can be
changed manually in the infotainment
system setup screen.
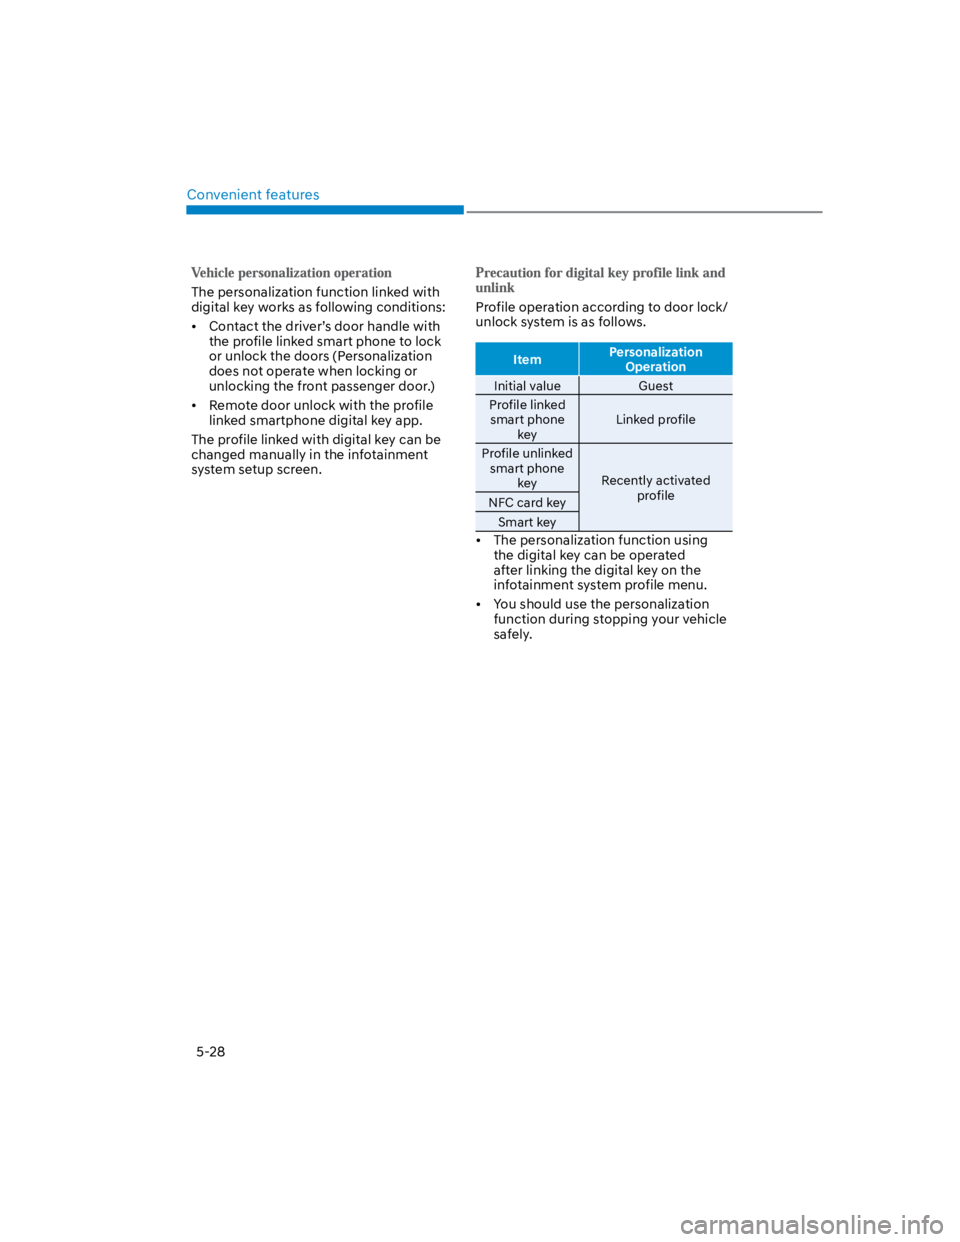
Profile operation according to door lock/
unlock system is as follows.
ItemPersonalization
Operation
Initial value Guest
Profile linked
smart phone
key
Linked profile
Profile unlinked
smart phone
keyRecently activated
profileNFC card key
Smart key
The personalization function using
the digital key can be operated
after linking the digital key on the
infotainment system profile menu.
You should use the personalization
function during stopping your vehicle
safely.
Page 163 of 579
05
5-29
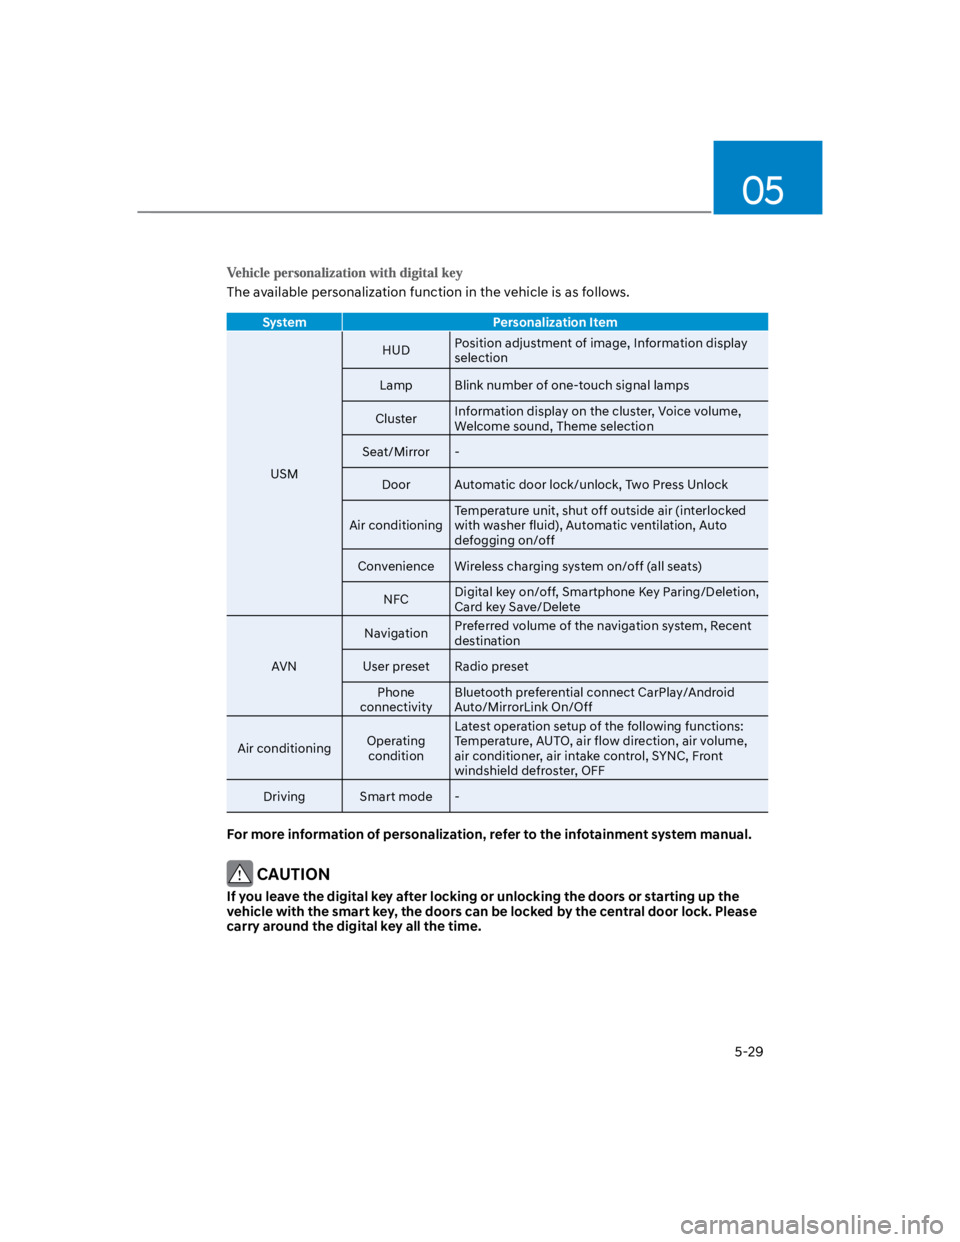
The available personalization function in the vehicle is as follows.
System Personalization Item
USM
HUDPosition adjustment of image, Information display
selection
Lamp Blink number of one-touch signal lamps
ClusterInformation display on the cluster, Voice volume,
Welcome sound, Theme selection
Seat/Mirror -
Door Automatic door lock/unlock, Two Press Unlock
Air conditioning
Temperature unit, shut off outside air (interlocked
with washer fluid), Automatic ventilation, Auto
defogging on/off
Convenience Wireless charging system on/off (all seats)
NFCDigital key on/off, Smartphone Key Paring/Deletion,
Card key Save/Delete
AVN
NavigationPreferred volume of the navigation system, Recent
destination
User preset Radio preset
Phone
connectivity
Bluetooth preferential connect CarPlay/Android
Auto/MirrorLink On/Off
Air conditioningOperating
condition
Latest operation setup of the following functions:
Temperature, AUTO, air flow direction, air volume,
air conditioner, air intake control, SYNC, Front
windshield defroster, OFF
Driving Smart mode -
For more information of personalization, refer to the infotainment system manual.
CAUTION
If you leave the digital key after locking or unlocking the doors or starting up the
vehicle with the smart key, the doors can be locked by the central door lock. Please
carry around the digital key all the time.
Page 176 of 579
Convenient features
5-42
The following steps show how to
program HomeLink. If you have any
questions or are having difficulty
programming your HomeLink buttons,
refer to the HomeLink website or call
the HomeLink customer support tollfree
number. Do this, before going back to
the dealer who sold you the car.
Visit the HomeLink website at: www.
homelink.com. Then at the top of the
page, choose your vehicle make. Then
watch the You Tube video, and/or
access additional website information.
If you choose to access the website
via your cell phone, scan the QR code.
Or, call HomeLink customer support
at 1-800-355-3515 (Please have the
vehicle make/model AND the opener
device make/model readily available.)
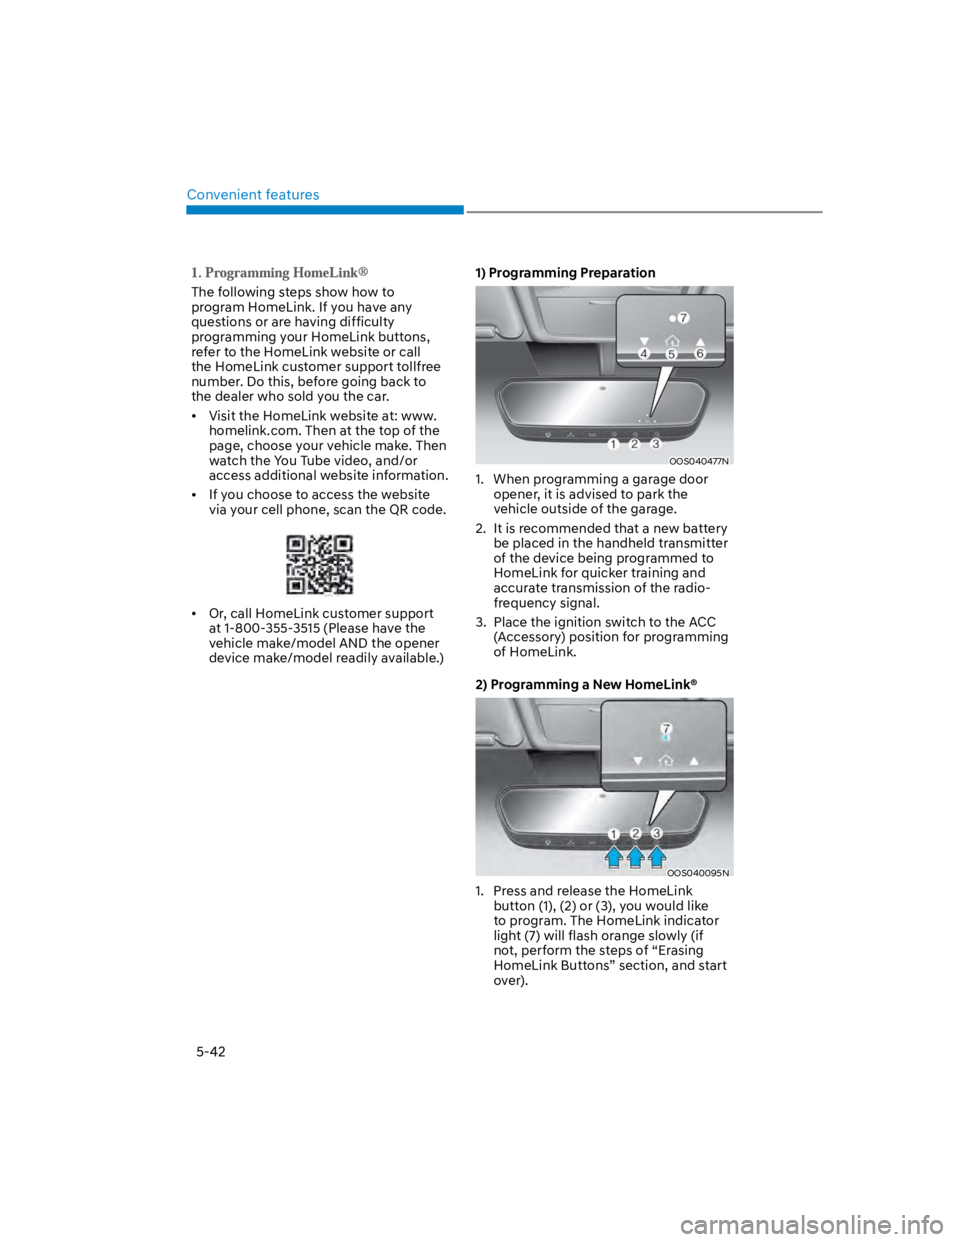
1) Programming Preparation
OOS040477N
1. When programming a garage door
opener, it is advised to park the
vehicle outside of the garage.
2. It is recommended that a new battery
be placed in the handheld transmitter
of the device being programmed to
HomeLink for quicker training and
accurate transmission of the radio-
frequency signal.
3. Place the ignition switch to the ACC
(Accessory) position for programming
of HomeLink.
2) Programming a New HomeLink®
OOS040095N
1. Press and release the HomeLink
button (1), (2) or (3), you would like
to program. The HomeLink indicator
light (7) will flash orange slowly (if
not, perform the steps of “Erasing
HomeLink Buttons” section, and start
over).
Page 199 of 579
05
5-65
Information
Closing the fuel filler door
1. To install the fuel tank cap, turn it
clockwise until it “clicks” one time.
2. Close the fuel filler door until it is
latched securely.
WARNING
Gasoline is highly flammable and
explosive. Failure to follow these
guidelines may result in SERIOUS
INJURY or DEATH:
Read and follow all warnings posted
at the gas station.
Before refueling, note the location
of the Emergency Fuel Shut-Off, if
available, at the gas station.
Before touching the fuel nozzle, you
should eliminate the potential build-
up of static electricity by touching
a metal part of the vehicle, a safe
distance away from the fuel filler
neck, nozzle, or other gas source,
with your bare hand.
Do not use cellular phones while
refueling. Electric current and/or
electronic interference from cellular
phones can potentially ignite fuel
vapors and cause a fire.
Do not get back into a vehicle
once you have begun refueling.
You can generate a buildup of
static electricity by touching,
rubbing or sliding against any item
or fabric capable of producing
static electricity. Static electricity
discharge can ignite fuel vapors
causing a fire. If you must re-enter
the vehicle, you should once again
eliminate potentially dangerous
static electricity discharge by
touching a metal part of the vehicle,
away from the fuel filler neck, nozzle
or other fuel source, with your bare
hand.
When using an approved portable
fuel container, be sure to place the
container on the ground prior to
refueling. Static electricity discharge
from the container can ignite fuel
vapors causing a fire.
Once refueling has begun, contact
between your bare hand and the
vehicle should be maintained until
the filling is complete.
Use only approved portable plastic
fuel containers designed to carry and
store fuel.
When refueling, always shift the
gear to the P (Park) position, set
the parking brake, and press the
Engine Start/Stop button to the
OFF position. Sparks produced by
electrical components related to the
engine can ignite fuel vapors causing
a fire.
Do not use matches or a lighter and
do not smoke or leave a lit cigarette
in your vehicle while at a gas station,
especially during refueling.
Page 242 of 579
Convenient features
5-108
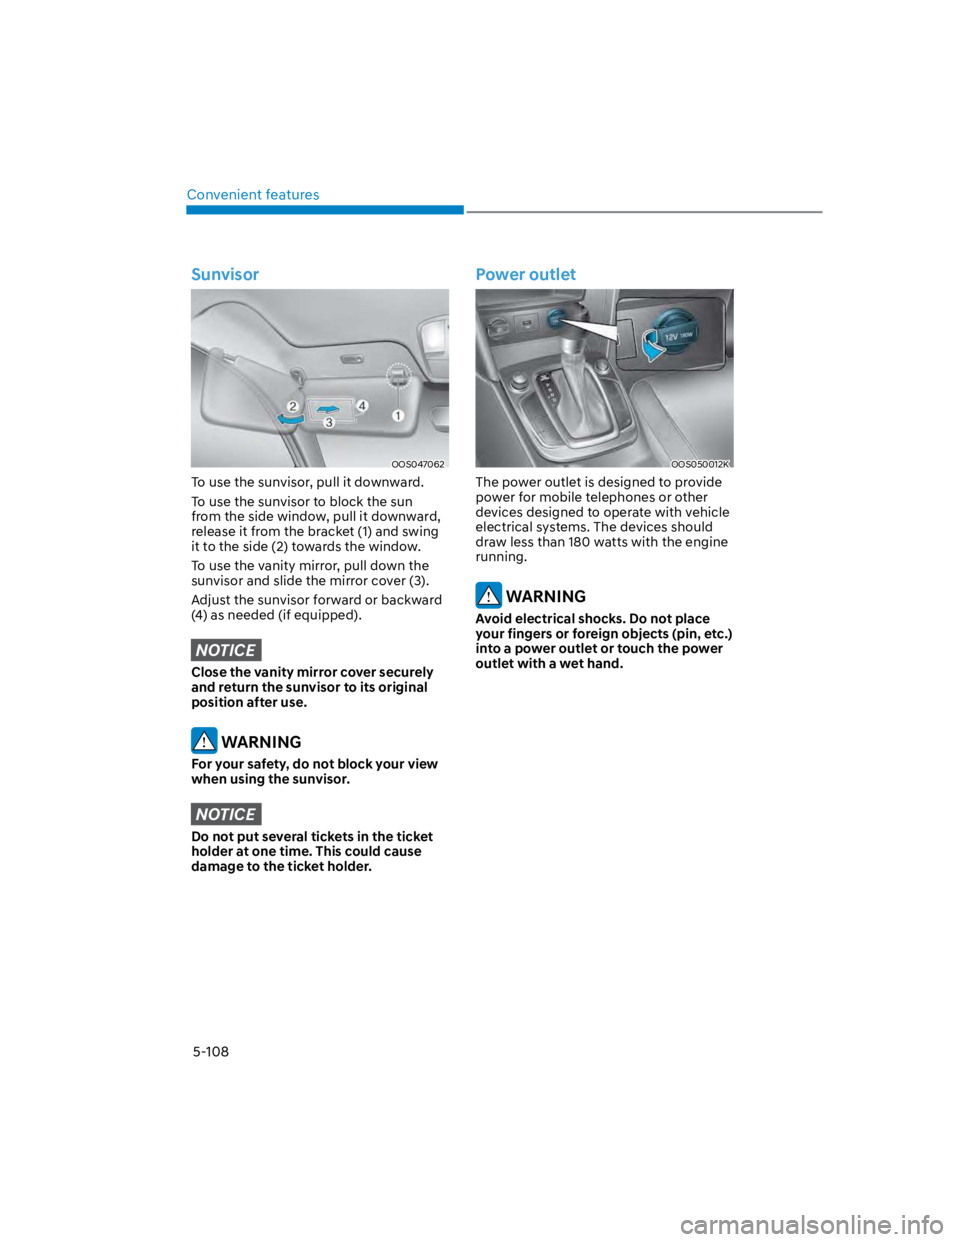
Sunvisor
OOS047062
To use the sunvisor, pull it downward.
To use the sunvisor to block the sun
from the side window, pull it downward,
release it from the bracket (1) and swing
it to the side (2) towards the window.
To use the vanity mirror, pull down the
sunvisor and slide the mirror cover (3).
Adjust the sunvisor forward or backward
(4) as needed (if equipped).
NOTICE
Close the vanity mirror cover securely
and return the sunvisor to its original
position after use.
WARNING
For your safety, do not block your view
when using the sunvisor.
NOTICE
Do not put several tickets in the ticket
holder at one time. This could cause
damage to the ticket holder.
Power outlet
OOS050012K
The power outlet is designed to provide
power for mobile telephones or other
devices designed to operate with vehicle
electrical systems. The devices should
draw less than 180 watts with the engine
running.
WARNING
Avoid electrical shocks. Do not place
your fingers or foreign objects (pin, etc.)
into a power outlet or touch the power
outlet with a wet hand.
Page 243 of 579
05
5-109
CAUTION
To prevent damage to the power
outlets:
Use the power outlet only when the
engine is running and remove the
accessory plug after use. Using the
accessory plug for prolonged periods
of time with the engine off could
cause the battery to discharge.
Only use 12 volts electric accessories
which are less than 180 watts in
electric capacity.
Adjust the air-conditioner or heater
to the lowest operating level when
using the power outlet.
Close the cover when not in use.
Some electronic devices can
cause electronic interference
when plugged into a vehicle’s
power outlet. These devices may
cause excessive audio static and
malfunctions in other electronic
systems or devices used in your
vehicle.
Push the plug in as far as it will go. If
good contact is not made, the plug
may overheat and the fuse may open.
Plug in battery equipped electrical/
electronic devices with reverse
current protection. The current
from the battery may flow into the
vehicle’s electrical/electronic system
and cause system malfunction.
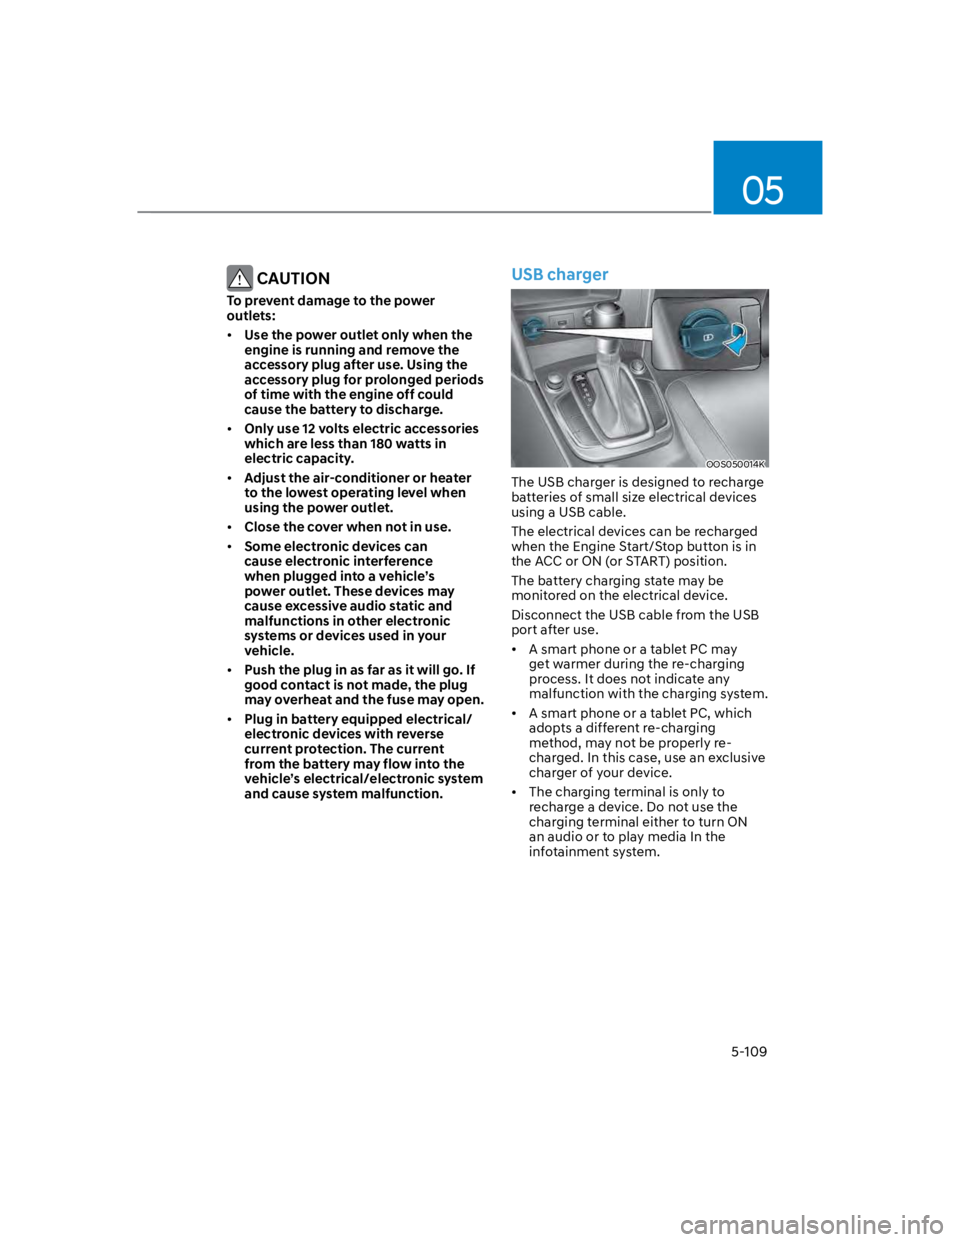
USB charger
OOS050014K
The USB charger is designed to recharge
batteries of small size electrical devices
using a USB cable.
The electrical devices can be recharged
when the Engine Start/Stop button is in
the ACC or ON (or START) position.
The battery charging state may be
monitored on the electrical device.
Disconnect the USB cable from the USB
port after use.
A smart phone or a tablet PC may
get warmer during the re-charging
process. It does not indicate any
malfunction with the charging system.
A smart phone or a tablet PC, which
adopts a different re-charging
method, may not be properly re-
charged. In this case, use an exclusive
charger of your device.
The charging terminal is only to
recharge a device. Do not use the
charging terminal either to turn ON
an audio or to play media In the
infotainment system.