2022 HYUNDAI KONA ECO mode
[x] Cancel search: ECO modePage 49 of 579
Seats & Safety System
3-18
Information
With the seat warmer switch in the ON
position, the heating system in the seat
turns off or on automatically depending on
the seat temperature.
Rear seat warmers (if equipped)
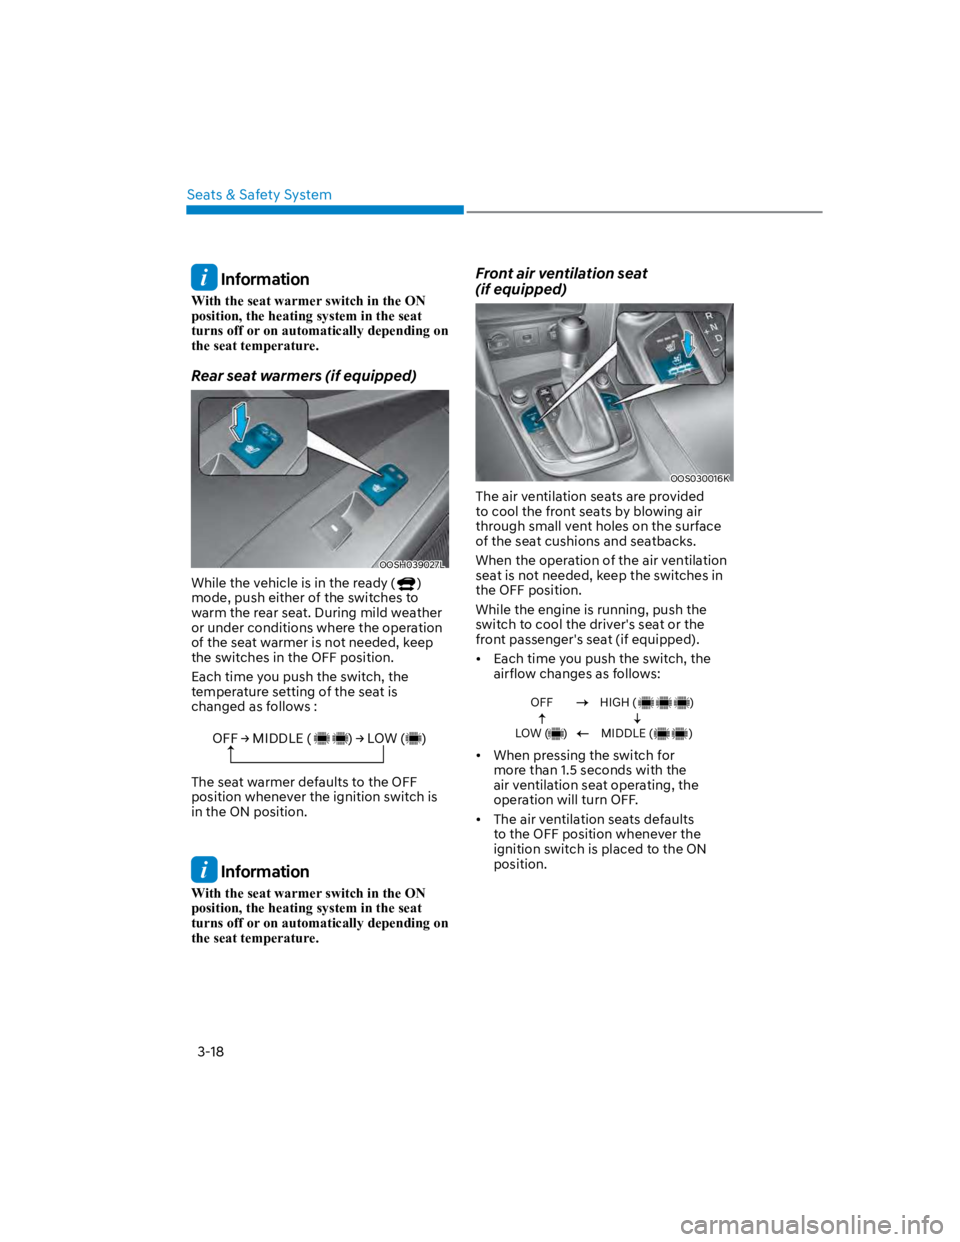
OOSH039027L
While the vehicle is in the ready ()
mode, push either of the switches to
warm the rear seat. During mild weather
or under conditions where the operation
of the seat warmer is not needed, keep
the switches in the OFF position.
Each time you push the switch, the
temperature setting of the seat is
changed as follows :
OFF MIDDLE ( ) LOW ( )
The seat warmer defaults to the OFF
position whenever the ignition switch is
in the ON position.
Information
With the seat warmer switch in the ON
position, the heating system in the seat
turns off or on automatically depending on
the seat temperature.
Front air ventilation seat
(if equipped)
OOS030016K
The air ventilation seats are provided
to cool the front seats by blowing air
through small vent holes on the surface
of the seat cushions and seatbacks.
When the operation of the air ventilation
seat is not needed, keep the switches in
the OFF position.
While the engine is running, push the
switch to cool the driver's seat or the
front passenger's seat (if equipped).
Each time you push the switch, the
airflow changes as follows:
OFF
LOW ( )
HIGH ( )
MIDDLE ( )
When pressing the switch for
more than 1.5 seconds with the
air ventilation seat operating, the
operation will turn OFF.
The air ventilation seats defaults
to the OFF position whenever the
ignition switch is placed to the ON
position.
Page 71 of 579
Seats & Safety System
3-40
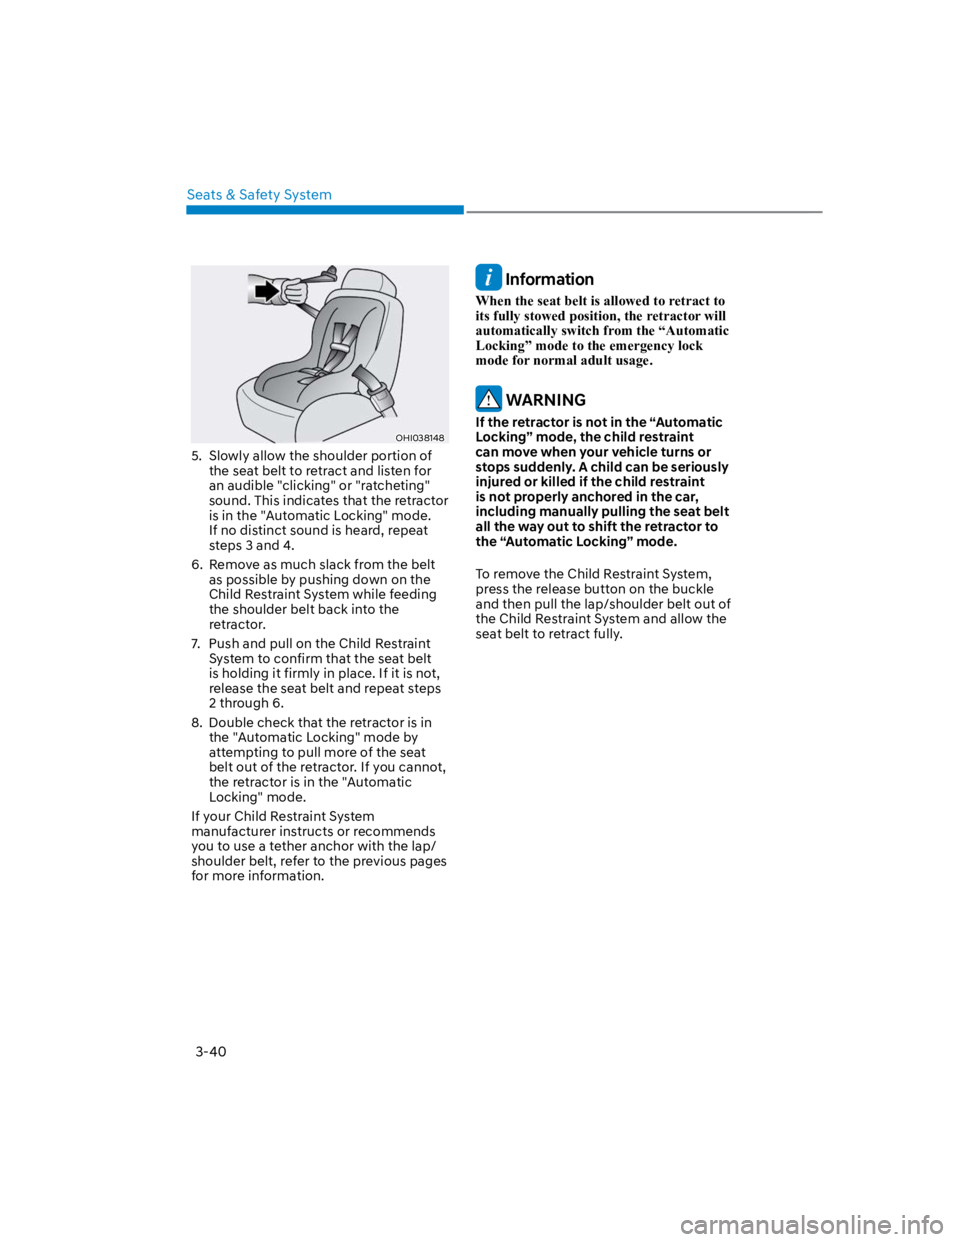
OHI038148
5. Slowly allow the shoulder portion of
the seat belt to retract and listen for
an audible "clicking" or "ratcheting"
sound. This indicates that the retractor
is in the "Automatic Locking" mode.
If no distinct sound is heard, repeat
steps 3 and 4.
6. Remove as much slack from the belt
as possible by pushing down on the
Child Restraint System while feeding
the shoulder belt back into the
retractor.
7. Push and pull on the Child Restraint
System to confirm that the seat belt
is holding it firmly in place. If it is not,
release the seat belt and repeat steps
2 through 6.
8. Double check that the retractor is in
the "Automatic Locking" mode by
attempting to pull more of the seat
belt out of the retractor. If you cannot,
the retractor is in the "Automatic
Locking" mode.
If your Child Restraint System
manufacturer instructs or recommends
you to use a tether anchor with the lap/
shoulder belt, refer to the previous pages
for more information.
Information
When the seat belt is allowed to retract to
its fully stowed position, the retractor will
automatically switch from the “Automatic
Locking” mode to the emergency lock
mode for normal adult usage.
WARNING
If the retractor is not in the “Automatic
Locking” mode, the child restraint
can move when your vehicle turns or
stops suddenly. A child can be seriously
injured or killed if the child restraint
is not properly anchored in the car,
including manually pulling the seat belt
all the way out to shift the retractor to
the “Automatic Locking” mode.
To remove the Child Restraint System,
press the release button on the buckle
and then pull the lap/shoulder belt out of
the Child Restraint System and allow the
seat belt to retract fully.
Page 74 of 579
03
3-43
Where are the air bags?
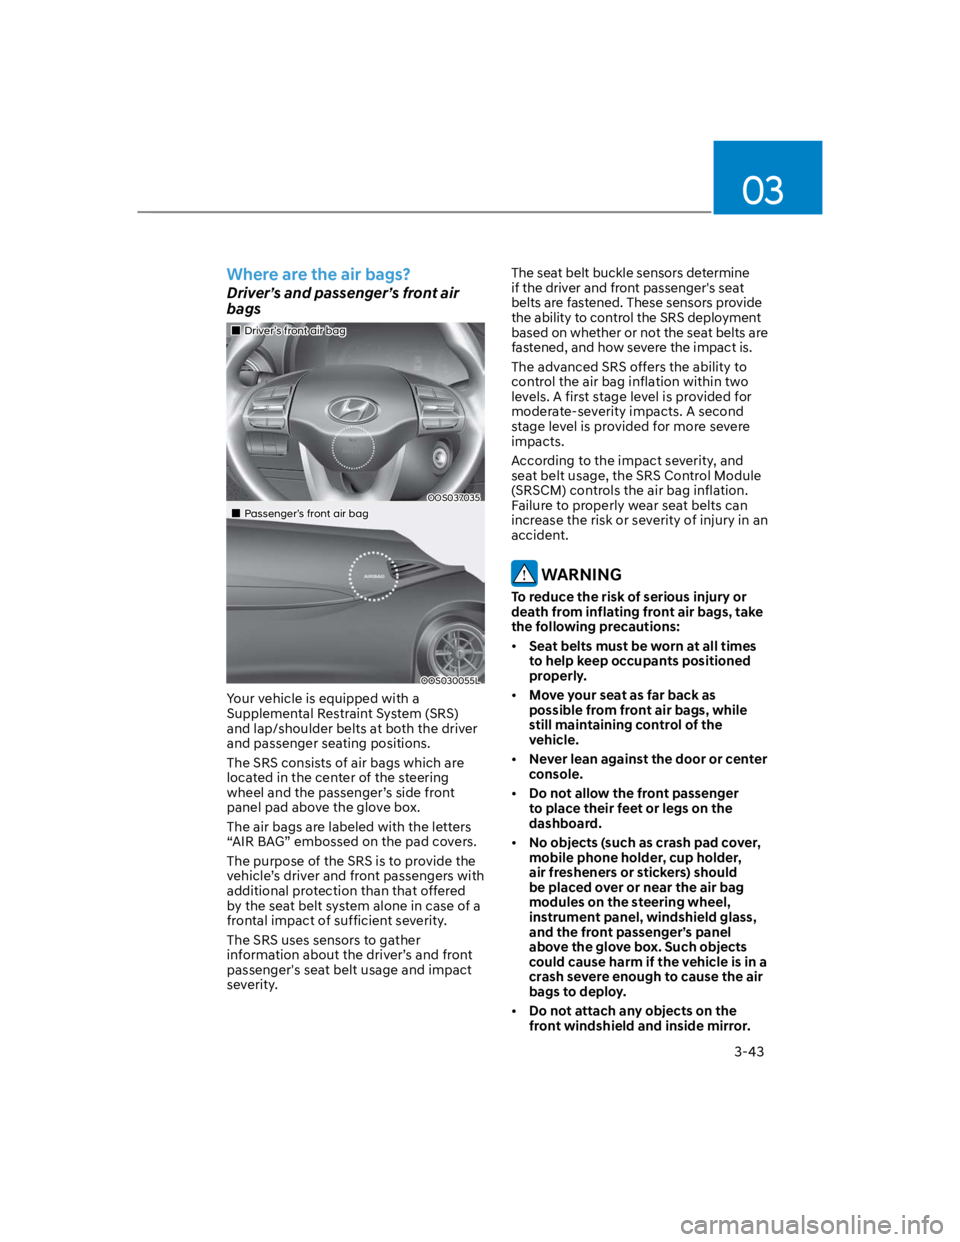
Driver’s and passenger’s front air
bags
Driver’s front air bag
OOS037035
Passenger’s front air bag
OOS030055L
Your vehicle is equipped with a
Supplemental Restraint System (SRS)
and lap/shoulder belts at both the driver
and passenger seating positions.
The SRS consists of air bags which are
located in the center of the steering
wheel and the passenger’s side front
panel pad above the glove box.
The air bags are labeled with the letters
“AIR BAG” embossed on the pad covers.
The purpose of the SRS is to provide the
vehicle’s driver and front passengers with
additional protection than that offered
by the seat belt system alone in case of a
frontal impact of sufficient severity.
The SRS uses sensors to gather
information about the driver’s and front
passenger's seat belt usage and impact
severity.
The seat belt buckle sensors determine
if the driver and front passenger's seat
belts are fastened. These sensors provide
the ability to control the SRS deployment
based on whether or not the seat belts are
fastened, and how severe the impact is.
The advanced SRS offers the ability to
control the air bag inflation within two
levels. A first stage level is provided for
moderate-severity impacts. A second
stage level is provided for more severe
impacts.
According to the impact severity, and
seat belt usage, the SRS Control Module
(SRSCM) controls the air bag inflation.
Failure to properly wear seat belts can
increase the risk or severity of injury in an
accident.
WARNING
To reduce the risk of serious injury or
death from inflating front air bags, take
the following precautions:
Seat belts must be worn at all times
to help keep occupants positioned
properly.
Move your seat as far back as
possible from front air bags, while
still maintaining control of the
vehicle.
Never lean against the door or center
console.
Do not allow the front passenger
to place their feet or legs on the
dashboard.
No objects (such as crash pad cover,
mobile phone holder, cup holder,
air fresheners or stickers) should
be placed over or near the air bag
modules on the steering wheel,
instrument panel, windshield glass,
and the front passenger’s panel
above the glove box. Such objects
could cause harm if the vehicle is in a
crash severe enough to cause the air
bags to deploy.
Do not attach any objects on the
front windshield and inside mirror.
Page 78 of 579

03
3-47
During a moderate to severe frontal
collision, sensors will detect the
vehicle’s rapid deceleration. If the rate of
deceleration is high enough, the control
unit will inflate the front air bags, at the
time and with the force needed.
The front air bags help protect the driver
and front passenger by responding to
frontal impacts in which seat belts alone
cannot provide adequate restraint. When
needed, the side air bags help provide
protection in the event of a side impact
or rollover by supporting the side upper
body area.
Air bags are activated (able to
inflate if necessary) only when the
Engine Start/Stop button is in the
ON or START position, and it can be
activated within about 3 minutes after
the engine is turned off.
Air bags inflate in the event of certain
frontal or side collisions to help
protect the occupants from serious
physical injury.
There is no single speed at which the
air bags will inflate. Generally, air bags
are designed to inflate based upon the
severity of a collision and its direction.
These two factors determine whether
the sensors produce an electronic
deployment/inflation signal.
The front air bags will completely
inflate and deflate in an instant. It is
virtually impossible for you to see the
air bags inflate during an accident. It is
much more likely that you will simply
see the deflated air bags hanging out
of their storage compartments after
the collision.
In addition to inflating in serious side
collisions, vehicles equipped with a
rollover sensor, side and/or curtain air
bags will inflate if the sensing system
detects a rollover.
When a rollover is detected, curtain
air bags will remain inflated longer to
help provide protection from ejection,
especially when used in conjunction
with the seat belts. (if equipped with a
rollover sensor)
To help provide protection, the air
bags must inflate rapidly. The speed
of air bag inflation is a consequence
of extremely short time in which
to inflate the air bag between the
occupant and the vehicle structures
before the occupant impacts those
structures. This speed of inflation
reduces the risk of serious or
lifethreatening injuries and is thus a
necessary part of air bag design.
However, the rapid air bag inflation
can also cause injuries which can
include facial abrasions, bruises and
broken bones because the inflation
speed also causes the air bags to
expand with a great deal of force.
There are even circumstances under
which contact with the air bag can
cause fatal injuries, especially if the
occupant is positioned excessively
close to the air bag.
You can take steps to reduce the risk
of being injured by an inflating air bag.
The greatest risk is sitting too close to
the air bag. An air bag needs about 10
in. (25 cm) of space to inflate. NHTSA
recommends that drivers allow at least
10 in. (25 cm) between the center of the
steering wheel and the chest.
Page 100 of 579
04
4-7
Information
WARNING
Running out of fuel can expose vehicle
occupants to danger.
You must stop and obtain additional
fuel as soon as possible after the
warning light comes on or when the
gauge indicator comes close to the “E
(Empty) or 0” level.
NOTICE
Avoid driving with an extremely low
fuel level. Running out of fuel could
cause the engine to misfire damaging
the catalytic converter.
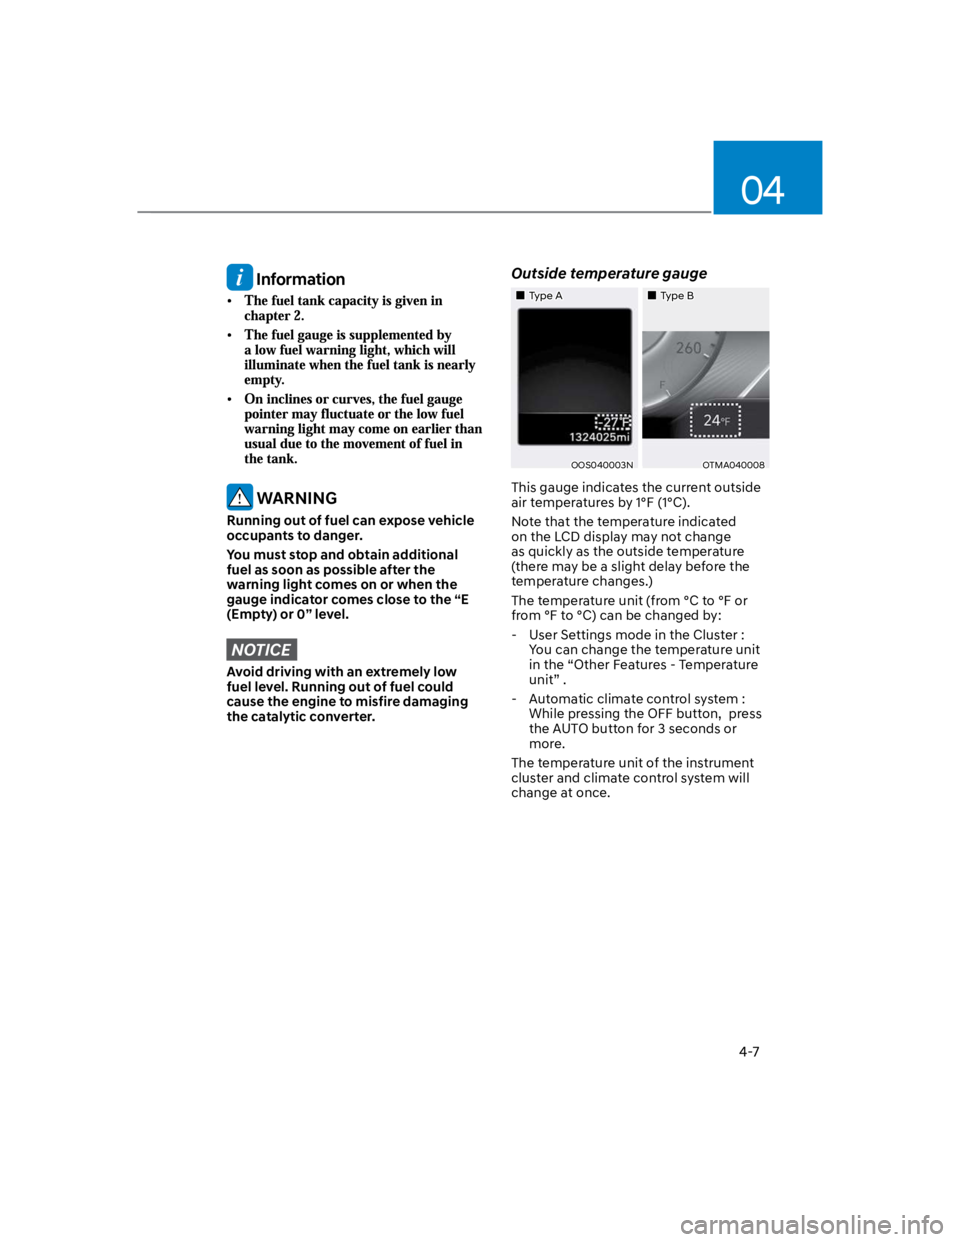
Outside temperature gauge
Type AType B
OOS040003NOTMA040008
This gauge indicates the current outside
air temperatures by 1°F (1°C).
Note that the temperature indicated
on the LCD display may not change
as quickly as the outside temperature
(there may be a slight delay before the
temperature changes.)
The temperature unit (from °C to °F or
from °F to °C) can be changed by:
- User Settings mode in the Cluster :
You can change the temperature unit
in the “Other Features - Temperature
unit” .
- Automatic climate control system :
While pressing the OFF button, press
the AUTO button for 3 seconds or
more.
The temperature unit of the instrument
cluster and climate control system will
change at once.
Page 110 of 579
04
4-17
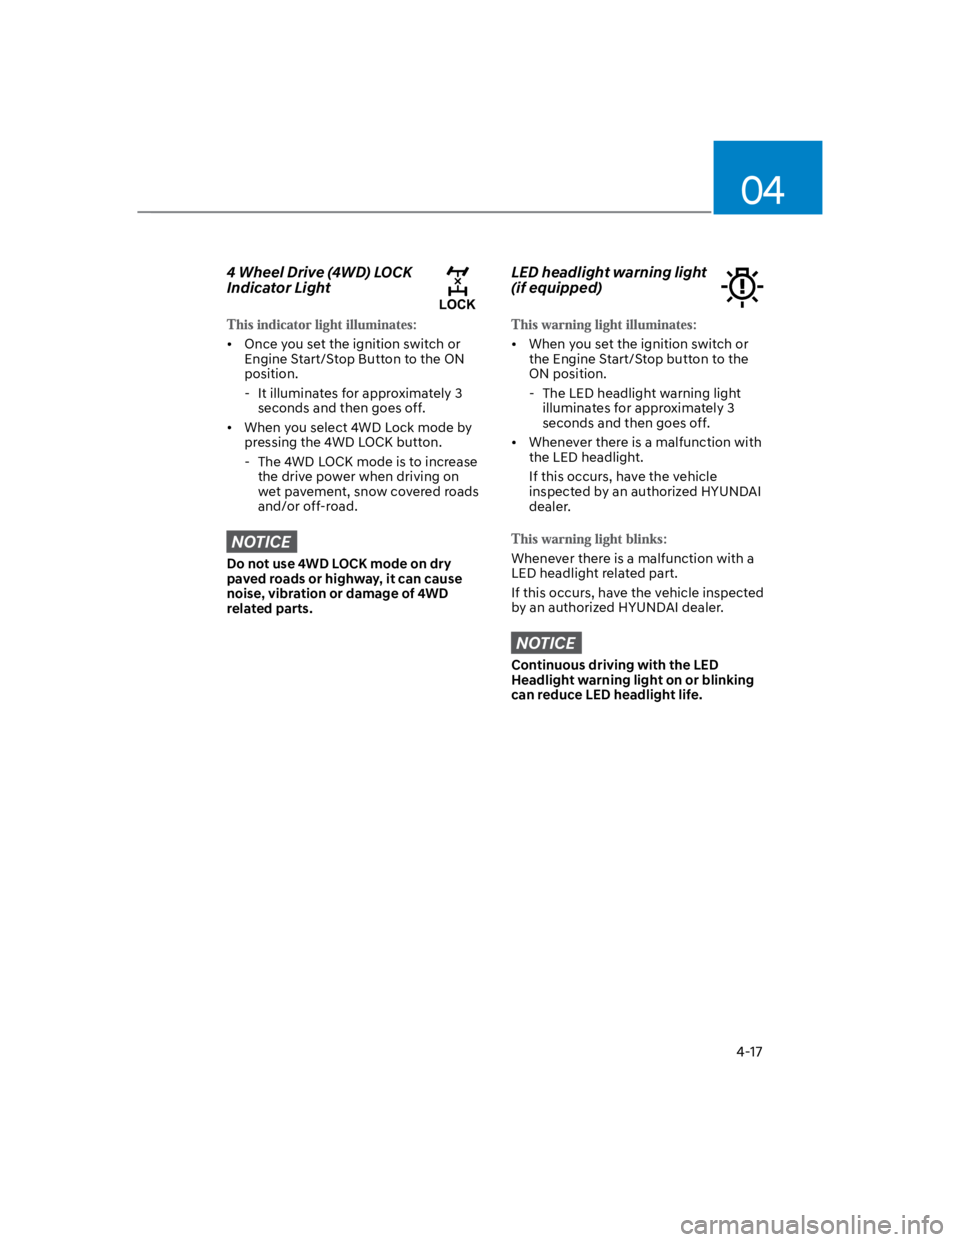
4 Wheel Drive (4WD) LOCK
Indicator Light
Once you set the ignition switch or
Engine Start/Stop Button to the ON
position.
- It illuminates for approximately 3
seconds and then goes off.
When you select 4WD Lock mode by
pressing the 4WD LOCK button.
- The 4WD LOCK mode is to increase
the drive power when driving on
wet pavement, snow covered roads
and/or off-road.
NOTICE
Do not use 4WD LOCK mode on dry
paved roads or highway, it can cause
noise, vibration or damage of 4WD
related parts.
LED headlight warning light
(if equipped)
When you set the ignition switch or
the Engine Start/Stop button to the
ON position.
- The LED headlight warning light
illuminates for approximately 3
seconds and then goes off.
Whenever there is a malfunction with
the LED headlight.
If this occurs, have the vehicle
inspected by an authorized HYUNDAI
dealer.
Whenever there is a malfunction with a
LED headlight related part.
If this occurs, have the vehicle inspected
by an authorized HYUNDAI dealer.
NOTICE
Continuous driving with the LED
Headlight warning light on or blinking
can reduce LED headlight life.
Page 122 of 579
04
4-29
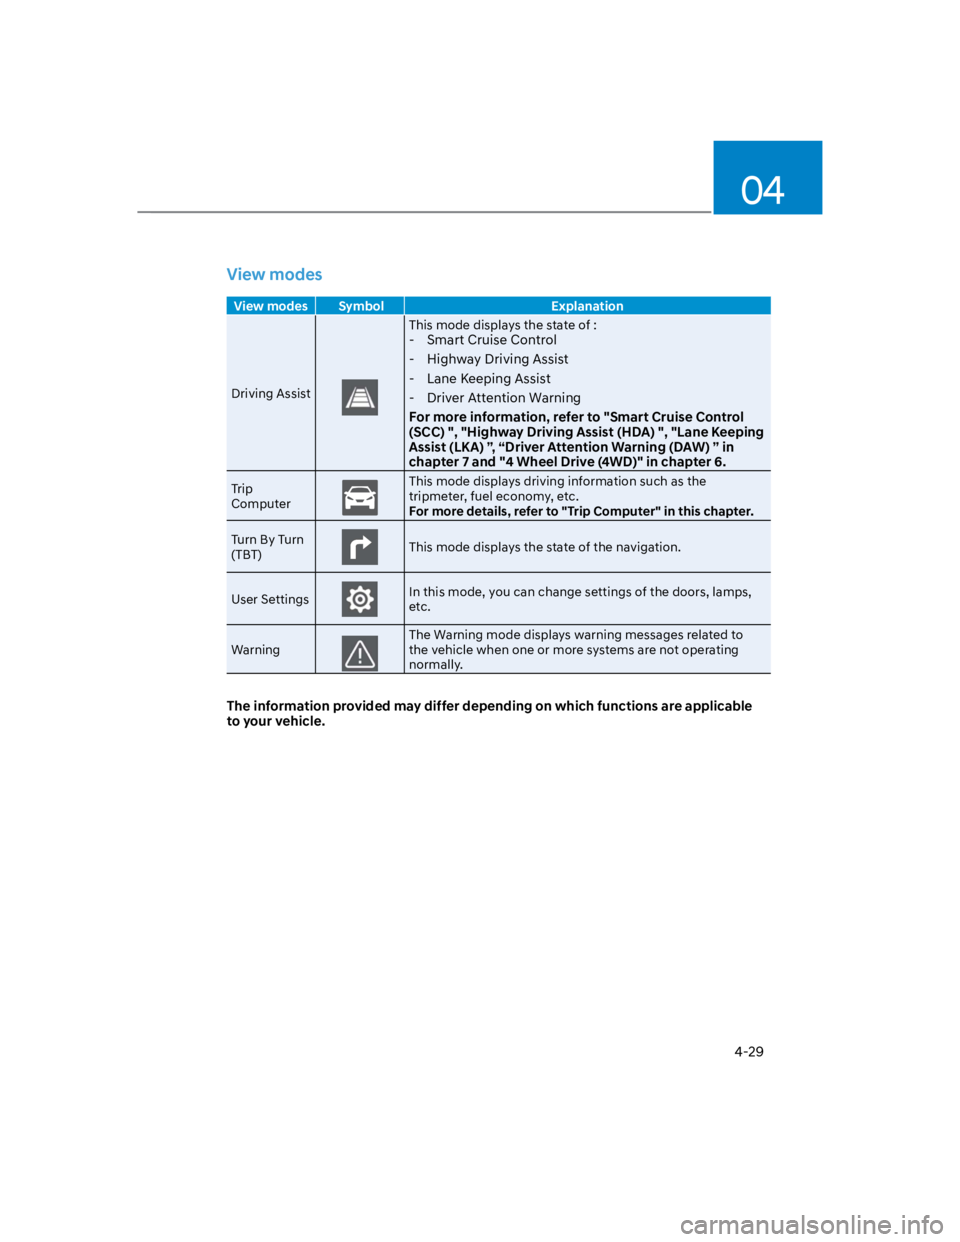
View modes
View modes Symbol Explanation
Driving Assist
This mode displays the state of :
- Smart Cruise Control
- Highway Driving Assist
- Lane Keeping Assist
- Driver Attention Warning
For more information, refer to "Smart Cruise Control
(SCC) ", "Highway Driving Assist (HDA) ", "Lane Keeping
Assist (LKA) ”, “Driver Attention Warning (DAW) ” in
chapter 7 and "4 Wheel Drive (4WD)" in chapter 6.
Trip
Computer
This mode displays driving information such as the
tripmeter, fuel economy, etc.
For more details, refer to "Trip Computer" in this chapter.
Turn By Turn
(TBT)This mode displays the state of the navigation.
User SettingsIn this mode, you can change settings of the doors, lamps,
etc.
Warning
The Warning mode displays warning messages related to
the vehicle when one or more systems are not operating
normally.
The information provided may differ depending on which functions are applicable
to your vehicle.
Page 123 of 579
Instrument cluster
4-30
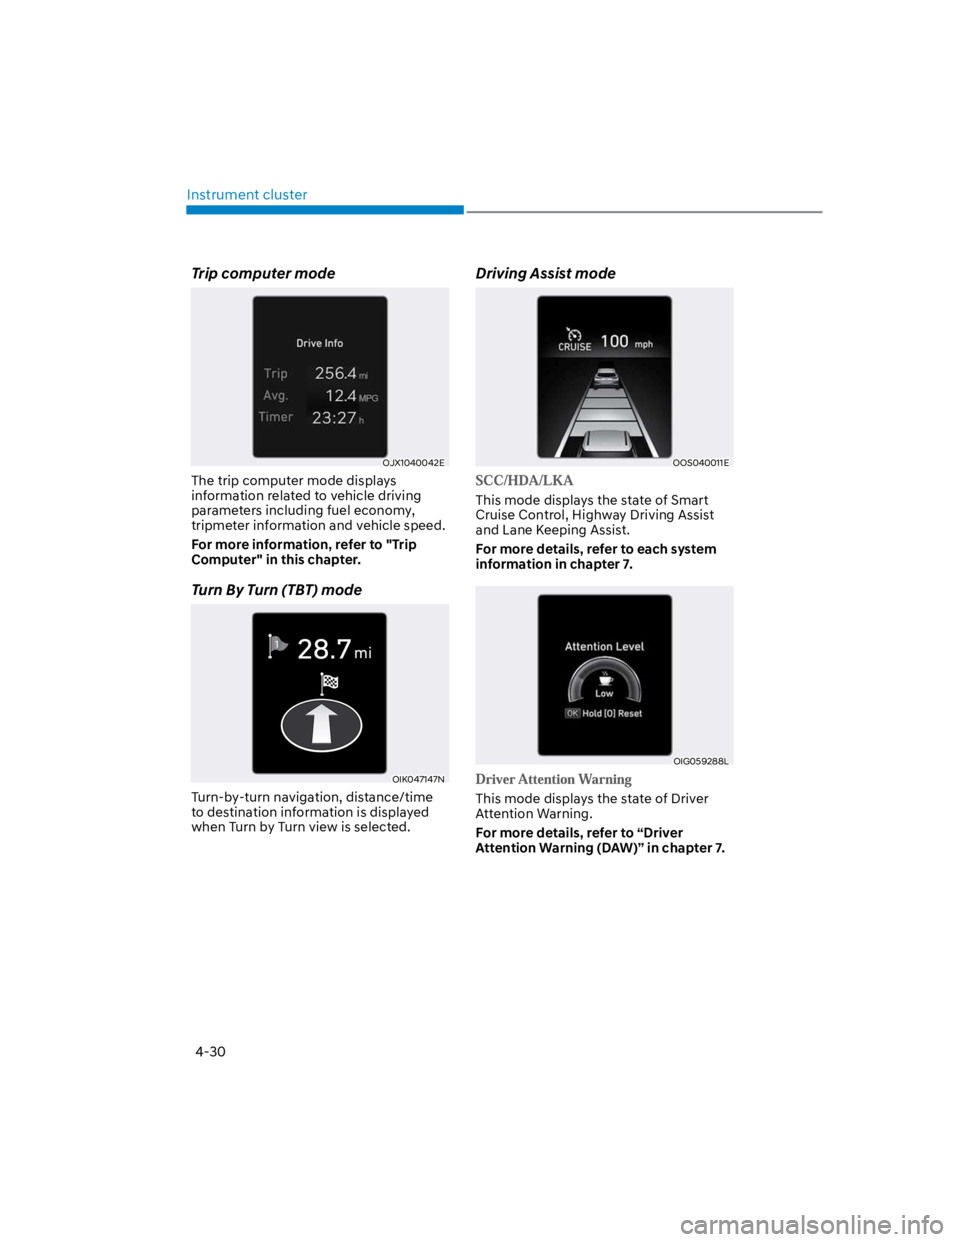
Trip computer mode
OJX1040042E
The trip computer mode displays
information related to vehicle driving
parameters including fuel economy,
tripmeter information and vehicle speed.
For more information, refer to "Trip
Computer" in this chapter.
Turn By Turn (TBT) mode
OIK047147N
Turn-by-turn navigation, distance/time
to destination information is displayed
when Turn by Turn view is selected.
Driving Assist mode
OOS040011E
This mode displays the state of Smart
Cruise Control, Highway Driving Assist
and Lane Keeping Assist.
For more details, refer to each system
information in chapter 7.
OIG059288L
This mode displays the state of Driver
Attention Warning.
For more details, refer to “Driver
Attention Warning (DAW)” in chapter 7.