2022 HYUNDAI IONIQ ELECTRIC Steering wheel lock
[x] Cancel search: Steering wheel lockPage 78 of 546
1-4
Your vehicle at a glanceI
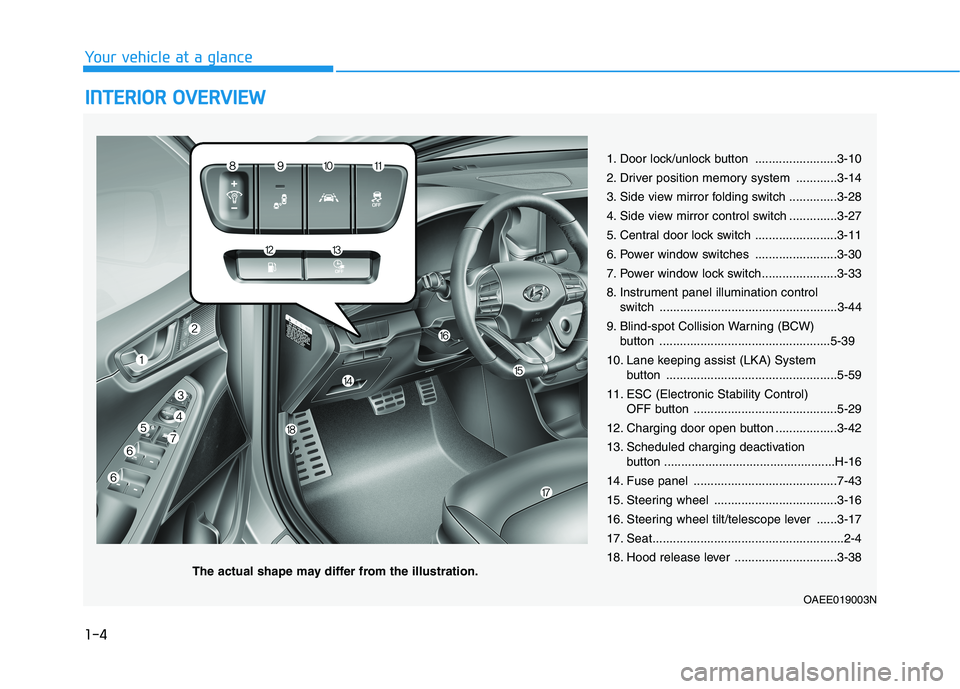
I NN TTEERR IIOO RR OO VVEERR VV IIEE WW
1. Door lock/unlock button ........................3-10
2. Driver position memory system ............3-14
3. Side view mirror folding switch ..............3-28
4. Side view mirror control switch ..............3-27
5. Central door lock switch ........................3-11
6. Power window switches ........................3-30
7. Power window lock switch......................3-33
8. Instrument panel illumination control
switch ....................................................3-44
9. Blind-spot Collision Warning (BCW) button ..................................................5-39
10. Lane keeping assist (LKA) System button ..................................................5-59
11. ESC (Electronic Stability Control) OFF button ..........................................5-29
12. Charging door open button ..................3-42
13. Scheduled charging deactivation button ..................................................H-16
14. Fuse panel ..........................................7-43
15. Steering wheel ....................................3-16
16. Steering wheel tilt/telescope lever ......3-17
17. Seat........................................................2-4
18. Hood release lever ..............................3-38
OAEE019003N
The actual shape may differ from the illustration.
Page 85 of 546
Safety Precautions
Adjusting the seats so that you are sit-
ting in a safe, comfortable position
plays an important role in driver and
passenger safety together with theseat belts and air bags in an accident.
Air bags
You can take steps to reduce the risk
of being injured by an inflating air
bag. Sitting too close to an air bag
greatly increases the risk of injury in
the event the air bag inflates.
Move your seat as far back as possi-
ble from front air bags, while still
maintaining control of the vehicle.
Do not use a cushion thatreduces friction between the seat
and the passenger. The passen-
ger's hips may slide under the
lap portion of the seat belt during
an accident or a sudden stop.Serious or fatal internal injuriescould result because the seat
belt cannot operate properly.
WARNING
To reduce the risk of serious
injury or death from an inflating
air bag, take the following pre-cautions:
•Adjust the driver's seat as far to
the rear as possible while main-taining the ability to maintain
full control of the vehicle.
Adjust the front passenger seat
as far to the rear as possible.
Hold the steering wheel by the
rim with hands at the 9 o'clock
and 3 o'clock positions to mini-
mize the risk of injuries to yourhands and arms.
NEVER place anything or any- one between the steering wheel
and the air bag.
Do not allow the front passen-
ger to place feet or legs on the
dashboard to minimize the riskof leg injuries.
WARNING
2-5
Safety system of your vehicle
2
Page 87 of 546
2-7
Safety system of your vehicle
Manual adjustment (if equipped)
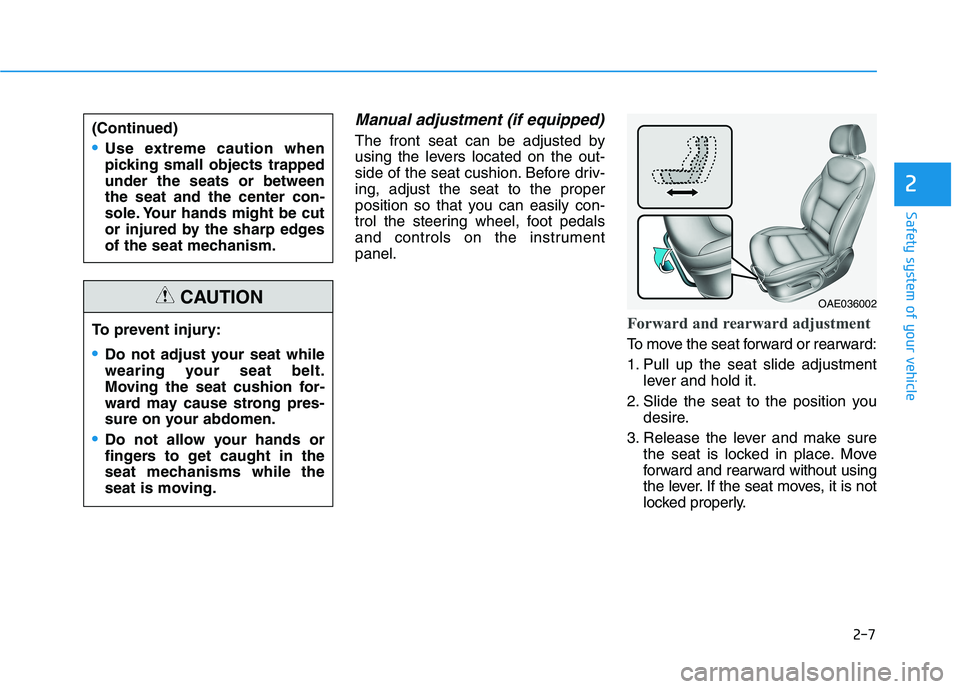
The front seat can be adjusted by
using the levers located on the out-
side of the seat cushion. Before driv-ing, adjust the seat to the proper
position so that you can easily con-
trol the steering wheel, foot pedals
and controls on the instrumentpanel.
Forward and rearward adjustment
To move the seat forward or rearward:
1. Pull up the seat slide adjustmentlever and hold it.
2. Slide the seat to the position you desire.
3. Release the lever and make sure the seat is locked in place. Move
forward and rearward without using
the lever. If the seat moves, it is not
locked properly.
2
To prevent injury:
Do not adjust your seat while
wearing your seat belt.
Moving the seat cushion for-
ward may cause strong pres-
sure on your abdomen.
Do not allow your hands or
fingers to get caught in the
seat mechanisms while the
seat is moving.
CAUTION
(Continued)
Use extreme caution when
picking small objects trappedunder the seats or betweenthe seat and the center con-
sole. Your hands might be cut
or injured by the sharp edges
of the seat mechanism.
OAE036002
Page 131 of 546
2-51
Safety system of your vehicle
2
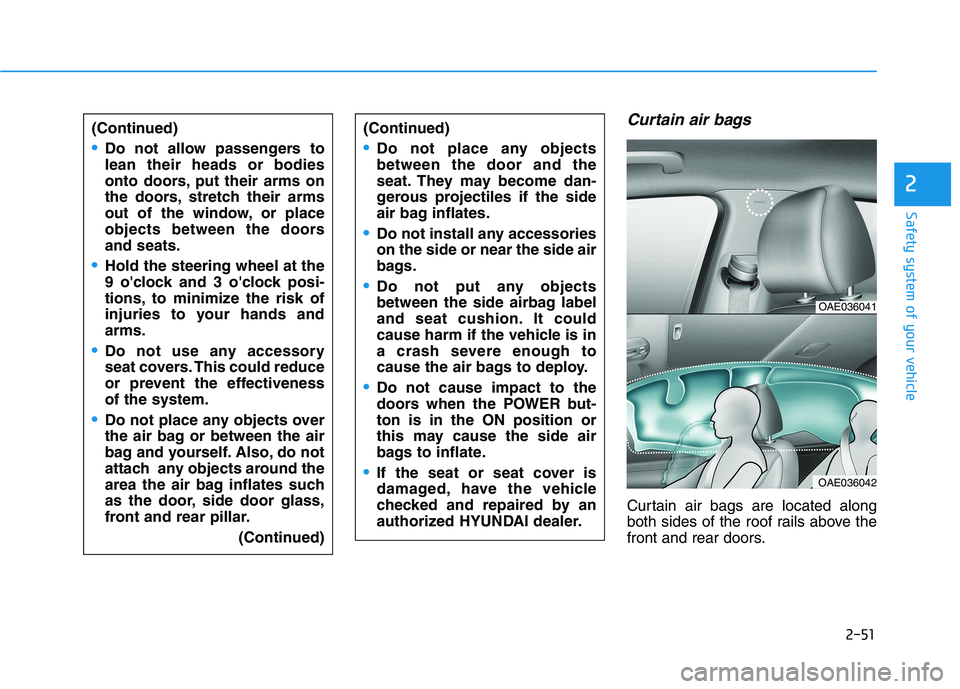
Curtain air bags
Curtain air bags are located along
both sides of the roof rails above the
front and rear doors.
(Continued)
Do not allow passengers to lean their heads or bodies
onto doors, put their arms on
the doors, stretch their arms
out of the window, or place
objects between the doorsand seats.
Hold the steering wheel at the
9 o'clock and 3 o'clock posi-
tions, to minimize the risk of
injuries to your hands andarms.
Do not use any accessory
seat covers. This could reduce
or prevent the effectivenessof the system.
Do not place any objects over
the air bag or between the air
bag and yourself. Also, do not
attach any objects around the
area the air bag inflates such
as the door, side door glass,
front and rear pillar.
(Continued)
(Continued)
Do not place any objects between the door and the
seat. They may become dan-
gerous projectiles if the side
air bag inflates.
Do not install any accessories on the side or near the side air
bags.
Do not put any objects
between the side airbag label
and seat cushion. It could
cause harm if the vehicle is in
a crash severe enough to
cause the air bags to deploy.
Do not cause impact to the
doors when the POWER but-ton is in the ON position or
this may cause the side air
bags to inflate.
If the seat or seat cover is
damaged, have the vehicle
checked and repaired by an
authorized HYUNDAI dealer.
OAE036041
OAE036042
Page 135 of 546
2-55
Safety system of your vehicle
2
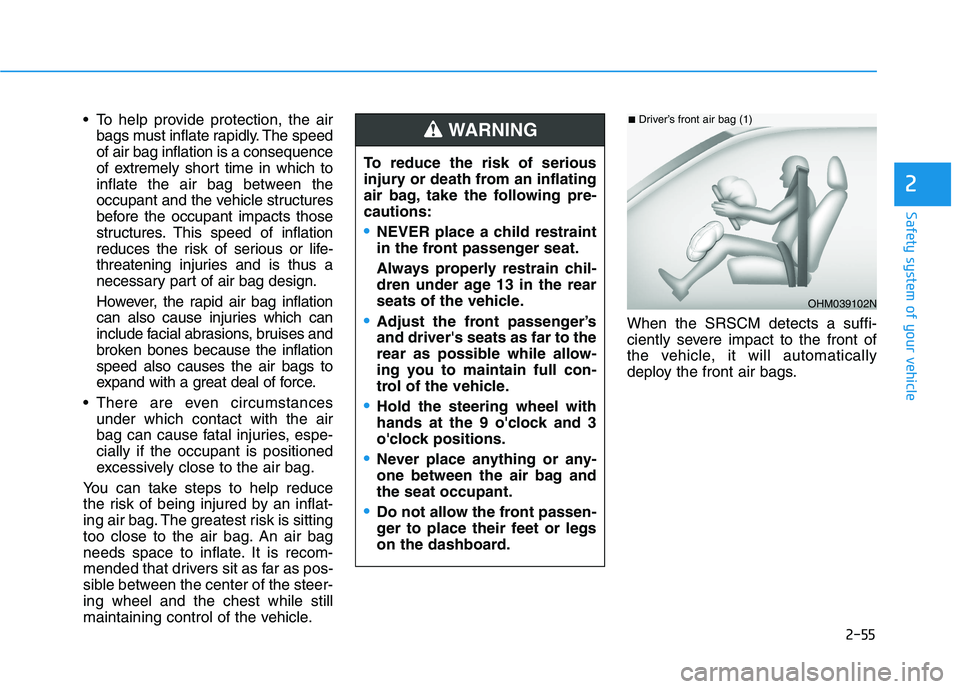
To help provide protection, the airbags must inflate rapidly. The speed of air bag inflation is a consequence
of extremely short time in which to
inflate the air bag between the
occupant and the vehicle structures
before the occupant impacts those
structures. This speed of inflation
reduces the risk of serious or life-
threatening injuries and is thus a
necessary part of air bag design.
However, the rapid air bag inflation
can also cause injuries which can
include facial abrasions, bruises and
broken bones because the inflationspeed also causes the air bags to
expand with a great deal of force.
There are even circumstances under which contact with the air
bag can cause fatal injuries, espe-cially if the occupant is positioned
excessively close to the air bag.
You can take steps to help reduce
the risk of being injured by an inflat-
ing air bag. The greatest risk is sitting
too close to the air bag. An air bag
needs space to inflate. It is recom-
mended that drivers sit as far as pos-
sible between the center of the steer-ing wheel and the chest while still
maintaining control of the vehicle. When the SRSCM detects a suffi-
ciently severe impact to the front of
the vehicle, it will automatically
deploy the front air bags.
OHM039102N
■
Driver’s front air bag (1)
To reduce the risk of serious
injury or death from an inflating
air bag, take the following pre-cautions:
NEVER place a child restraint
in the front passenger seat.
Always properly restrain chil-
dren under age 13 in the rear
seats of the vehicle.
Adjust the front passenger’s and driver's seats as far to the
rear as possible while allow-
ing you to maintain full con-
trol of the vehicle.
Hold the steering wheel with
hands at the 9 o'clock and 3
o'clock positions.
Never place anything or any-
one between the air bag andthe seat occupant.
Do not allow the front passen-
ger to place their feet or legs
on the dashboard.
WARNING
Page 151 of 546
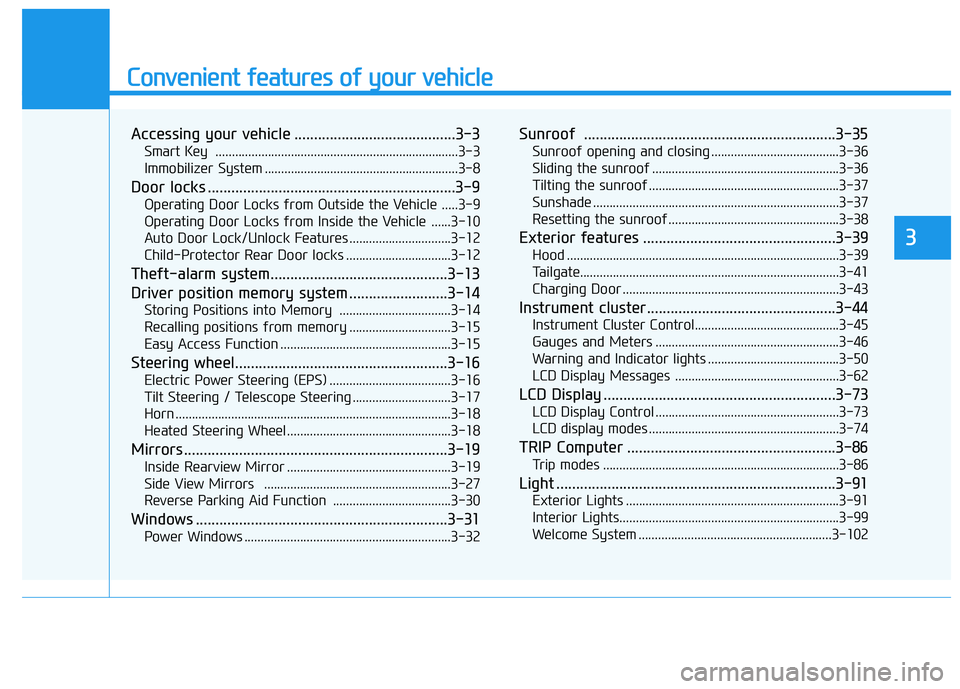
Convenient features of your vehicle
Accessing your vehicle .........................................3-3Smart Key ..........................................................................3-3
Immobilizer System ...........................................................3-8
Door locks ...............................................................3-9 Operating Door Locks from Outside the Vehicle .....3-9
Operating Door Locks from Inside the Vehicle ......3-10
Auto Door Lock/Unlock Features ...............................3-12
Child-Protector Rear Door locks ................................3-12
Theft-alarm system.............................................3-13
Driver position memory system .........................3-14 Storing Positions into Memory ..................................3-14
Recalling positions from memory ...............................3-15
Easy Access Function ....................................................3-15
Steering wheel......................................................3-16 Electric Power Steering (EPS) .....................................3-16
Tilt Steering / Telescope Steering ..............................3-17
Horn ....................................................................................3-18
Heated Steering Wheel ..................................................3-18
Mirrors ...................................................................3-19 Inside Rearview Mirror ..................................................3-19
Side View Mirrors .........................................................3-27
Reverse Parking Aid Function ....................................3-30
Windows ................................................................3-31 Power Windows ...............................................................3-32 Sunroof ................................................................3-35
Sunroof opening and closing .......................................3-36
Sliding the sunroof .........................................................3-36
Tilting the sunroof ..........................................................3-37
Sunshade ...........................................................................3-37
Resetting the sunroof ....................................................3-38
Exterior features .................................................3-39 Hood ...................................................................................3-39
Tailgate...............................................................................3-41
Charging Door ..................................................................3-43
Instrument cluster................................................3-44 Instrument Cluster Control............................................3-45
Gauges and Meters ........................................................3-46
Warning and Indicator lights ........................................3-50
LCD Display Messages ..................................................3-62
LCD Display ...........................................................3-73 LCD Display Control ........................................................3-73
LCD display modes ..........................................................3-74
TRIP Computer .....................................................3-86 Trip modes ........................................................................3-86
Light .......................................................................3-91 Exterior Lights .................................................................3-91
Interior Lights...................................................................3-99
Welcome System ...........................................................3-102
3
Page 167 of 546
3-17
Convenient features of your vehicle
3
Tilt Steering / Telescope Steering
Adjust the steering wheel so it points
toward your chest, not toward your
face. Make sure you can see the
instrument cluster warning lights and
gauges. After adjusting, push the
steering wheel both up and down to
be certain it is locked in position.
Always adjust the position of the
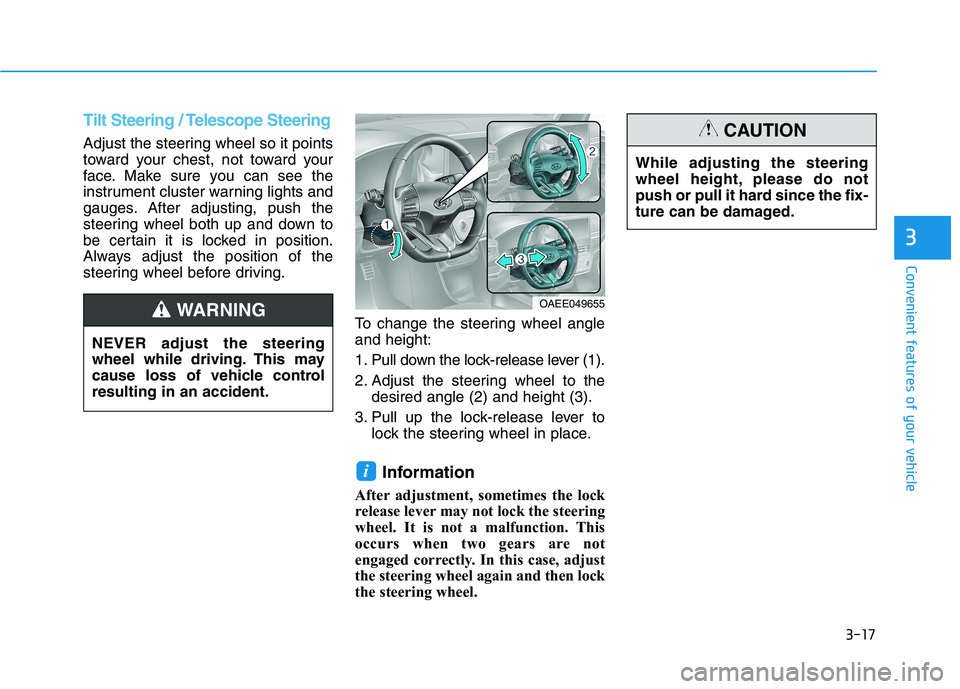
steering wheel before driving.To change the steering wheel angleand height:
1. Pull down the lock-release lever (1).
2. Adjust the steering wheel to thedesired angle (2) and height (3).
3. Pull up the lock-release lever to lock the steering wheel in place.
Information
After adjustment, sometimes the lock
release lever may not lock the steering
wheel. It is not a malfunction. This
occurs when two gears are not
engaged correctly. In this case, adjust
the steering wheel again and then lock
the steering wheel.
i
OAEE049655 While adjusting the steering
wheel height, please do not
push or pull it hard since the fix-
ture can be damaged.
CAUTION
NEVER adjust the steering
wheel while driving. This may
cause loss of vehicle controlresulting in an accident.
WARNING
Page 212 of 546
3-62
Convenient features of your vehicle
LCD Display Messages
Shift to P
This warning message is displayed if
you try to turn off the vehicle with the
gear in the N (Neutral) position.
At this time, the POWER button
changes to the ACC position (If you
press the POWER button once more,
it will turn to the ON position).
Low Key Battery
This warning message is displayed if
the battery of the smart key is dis-
charged while changing the POWER
button to the OFF position.
Press POWER button whileturning wheel
This warning message is displayed if
the steering wheel does not unlock
normally when the POWER button ispressed.
You should press the POWER button
while turning the steering wheel rightand left.
Check Steering Wheel LockSystem
This warning message is displayed if
the steering wheel does not lock nor-
mally while the POWER buttonchanges to the OFF position.
Press brake pedal to start vehicle
This warning message is displayed if
the POWER button changes to the
ACC position twice by pressing the
button repeatedly without depressing
the brake pedal.
You can start the vehicle by depress-
ing the brake pedal.
Key not in vehicle
This warning message is displayed if
the smart key is not in the vehicle
when you press the POWER button.
When attempting to start the vehicle,
always have the smart key with you.
Key not detected
This warning message is displayed if
the smart key is not detected when
you press the POWER button.
Press POWER button again
This message is displayed if you
were unable to start the vehicle when
the POWER button was pressed.
If this occurs, attempt to start the
vehicle by pressing the POWER but-ton again.
If the warning message appears
each time you press the POWER
button, have your vehicle inspected
by an authorized HYUNDAI dealer.