Page 412 of 444
10-73
10
Engine Compartment Fuse Panel (Smartstream G1.2)
Fuse Name SymbolFuse
RatingCircuit Protected
ALT125A Alternator, Multi Fuse - F3, Fuse - F32/F33/F34/F35
MDPS
80A MDPS Unit
ECU1
30A E/R Junction Block (RLY.1)
IG1
30A[With Smart Key] PDM Relay Box (IG1, ACC Relay)
[W/O Smart Key] Ignition Switch
FUEL PUMP
20A E/R Junction Block (RLY.6)
ECU3
15A ECU/PCU
ECU2
15A ECU/PCU
A/CON 1
10A E/R Junction Block (RLY.3)
BATT4
40AICU Junction Block
(Power Window Relay, Fuse - F3/F10/F11)
BATT1
50A ICU Junction Block (IPS1, IPS3, IPS5, IPS7, IPS8, IPS11)
BATT3
40AICU Junction Block (Fuse - F8/F21/F25/F29,
Long Term Load Latch Relay)
HORN
15A E/R Junction Block (RLY.11, RLY.12)
BATT2
50A ICU Junction Block (IPS2, IPS4, IPS6, IPS9, IPS10)
IG2
40AE/R Junction Block (RLY.9).
[With Smart Key] PDM Relay Box (IG2 Relay)
[W/O Smart Key] Ignition Switch
C/FAN
40A E/R Junction Block (RLY.2)
IGN COIL
20A Ignition Coil #1/#2/#3/#4
Page 413 of 444
10-74
Maintenance
Engine Compartment Fuse Panel (Smartstream G1.2)
Fuse Name SymbolFuse
RatingCircuit Protected
ECU520A ECU/PCU
SENSOR 1
10AE/R Junction Block (RLY.2/3),
Front Wheel Sensor RH,
Oil Control Valve #1/#2 (Intake/Exhaust),
Purge Control Solenoid Valve,
Variable Intake Solenoid Valve
SENSOR 2
10A Oxygen Sensor (Up/Down)
RR DEFOG
40A ICU Junction Block (Rear Defogger Relay)
ABS 1
40A ABS/ESP Control Module
ABS 2
30A ABS/ESP Control Module
BLOWER
40A E/R Junction Block (RLY.10)
WIPER 2
10A E/R Junction Block (RLY. 5), Front Wiper Motor, IBU
INJECTOR1
15AE/R Junction Block (RLY. 6),
Injector #1-1/#2-1/#3-1/#4-1
INJECTOR2
15AE/R Junction Block (RLY. 6),
Injector #1-2/#2-2/#3-2/#4-2
ECU6
15A ECU
WIPER 1
25A E/R Junction Block (RLY. 5), Front Wiper Motor
Page 415 of 444
10-76
Maintenance
Engine Compartment Fuse Panel (1.5 WGT)
Fuse Name SymbolFuse
RatingCircuit Protected
C/FAN50A E/R Junction Block (RLY.2)
SENSOR 6
15A PM Sensor
ECU5
20A ECU
SENSOR 1
10AE/R Junction Block (RLY.2/3),
Oil Control Valve #1/#2 (Intake/Exhaust),
Purge Control Solenoid Valve
SENSOR 2
10A Oxygen Sensor (Up/Down)
SENSOR 3
10A COOLING FAN, A/CON COMPRESSOR
RR DEFOG
40A ICU Junction Block (Rear Defogger Relay)
ABS 1
40A ABS/ESP Control Module
ABS 2
30A ABS/ESP Control Module
BLOWER
40A E/R Junction Block (RLY.10)
WIPER 2
10A E/R Junction Block (RLY. 5), Front Wiper Motor, IBU
SENSOR 4
10A Inlet Metering Valve, E/R Junction Block (RLY. 6)
SENSOR 5
10AAir Flow Sensor, EGR Cooling Bypass Solenoid Valve,
WGR Vacuum Modulator
WIPER 1
25A E/R Junction Block (RLY. 5), Front Wiper Motor
Page 417 of 444
10-78
Maintenance
Headlight, Position Light,
Turn signal Light bulb
replacement
Type A
OBI3090023OBI3090023
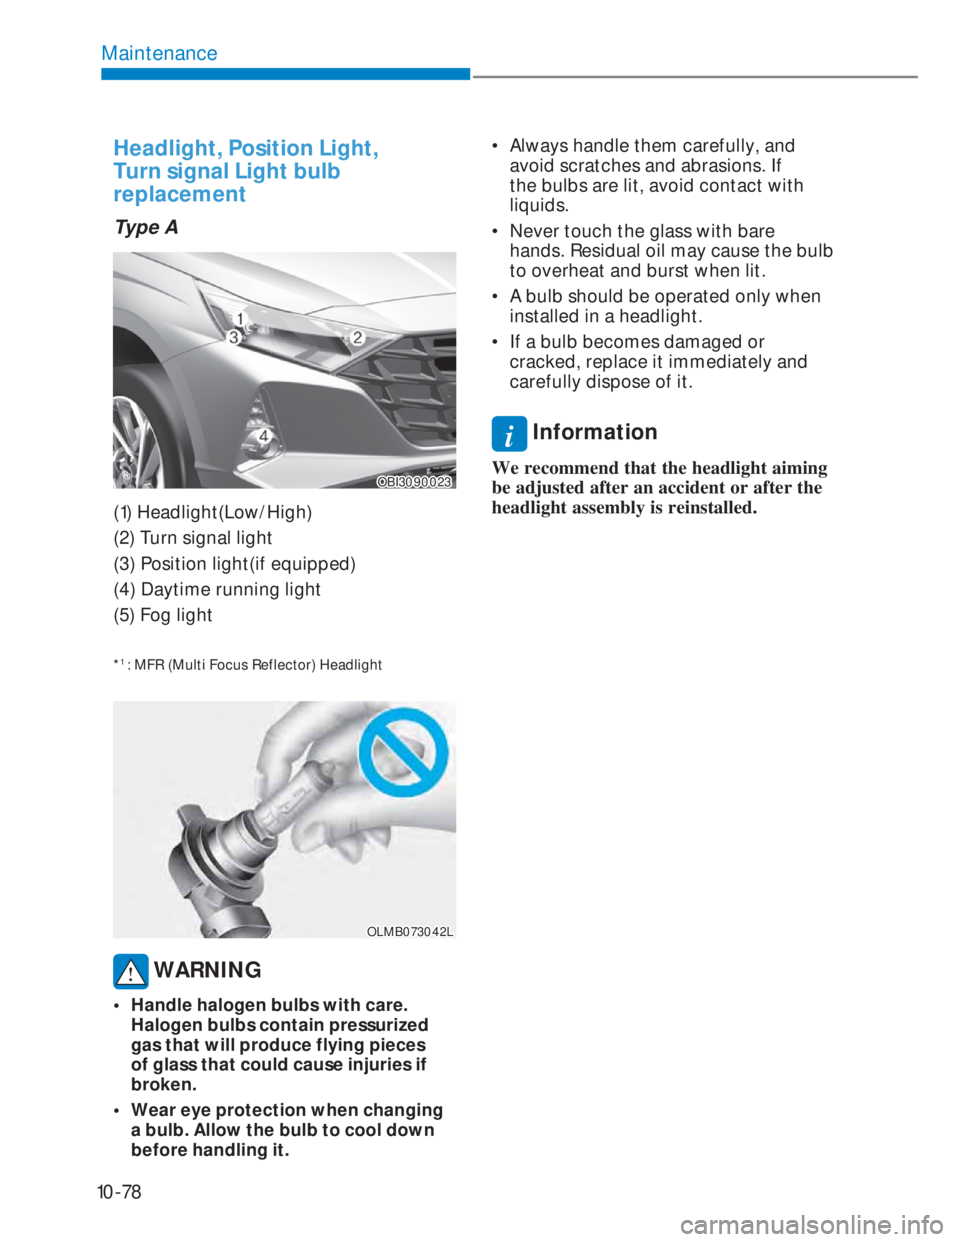
(1) Headlight(Low/High)
(2) Turn signal light
(3) Position light(if equipped)
(4) Daytime running light
(5) Fog light
*1 : MFR (Multi Focus Reflector) Headlight
OLMB073042LOLMB073042L
WARNING
• Handle halogen bulbs with care.
Halogen bulbs contain pressurized
gas that will produce flying pieces
of glass that could cause injuries if
broken.
• Wear eye protection when changing
a bulb. Allow the bulb to cool down
before handling it.• Always handle them carefully, and
avoid scratches and abrasions. If
the bulbs are lit, avoid contact with
liquids.
• Never touch the glass with bare
hands. Residual oil may cause the bulb
to overheat and burst when lit.
• A bulb should be operated only when
installed in a headlight.
• If a bulb becomes damaged or
cracked, replace it immediately and
carefully dispose of it.
i Information
We recommend that the headlight aiming
be adjusted after an accident or after the
headlight assembly is reinstalled.
Page 428 of 444

10-89
10
NOTICE
If you park your vehicle near a stainless
steel sign or glass facade building, the
vehicle’s exterior plastic parts such
as a bumper, spoiler, garnish, lamp
or outside rearview mirror might be
damaged due to sunlight reflected
from the sign or building. To prevent
damage of the exterior plastic parts,
you should avoid parking in areas
where light may be reflected or use a
car cover. (The exterior plastic parts
applied to your vehicle may vary.)
Exterior care
Exterior general caution
It is very important to follow the label
directions when using any chemical
cleaner or polish. Read all warning and
caution statements that appear on the
label.
High-pressure washing
• When using high-pressure washers,
make sure to maintain sufficient
distance from the vehicle.
Insufficient clearance or excessive
pressure can lead to component
damage or water penetration.
• Do not spray the camera, sensors or
its surrounding area directly with a
high pressure washer. Shock applied
from high pressure water may cause
the device to not operate normally.
• Do not bring the nozzle tip close to
boots (rubber or plastic covers) or
connectors as they may be damaged
if they come into contact with high
pressure water.
Finish maintenance
Washing
To help protect your vehicle’s finish
from rust and deterioration, wash it
thoroughly and frequently at least once
a month with lukewarm or cold water.
If you use your vehicle for off-road
driving, you should wash it after each
off-road trip. Pay special attention to the
removal of any accumulation of salt, dirt,
mud, and other foreign materials. Make
sure the drain holes in the lower edges
of the doors and rocker panels are kept
clear and clean.
Insects, tar, tree sap, bird droppings,
industrial pollution and similar deposits
can damage your vehicle’s finish if not
removed immediately.
Even prompt washing with plain water
may not completely remove all these
deposits. A mild soap, safe for use on
painted surfaces, may be used.
After washing, rinse the vehicle
thoroughly with lukewarm or cold water.
Do not allow soap to dry on the finish.
NOTICE
• Do not use strong soap, chemical
detergents or hot water, and do not
wash the vehicle in direct sunlight
or when the body of the vehicle is
warm.
• Be careful when washing the side
windows of your vehicle.
Especially, with high-pressure water,
water may leak through the windows
and wet the interior.
• To prevent damage to the plastic
parts and lamps, do not clean
with chemical solvents or strong
detergents.
APPEARANCE CARE
Page 429 of 444
10-90
Maintenance
WARNING
Wet brakes
After washing the vehicle, test the
brakes while driving slowly to see if
they have been affected by water. If
braking performance is impaired, dry
the brakes by applying them lightly
while maintaining a slow forward
speed.
OBI3090045LOBI3090045L
NOTICE
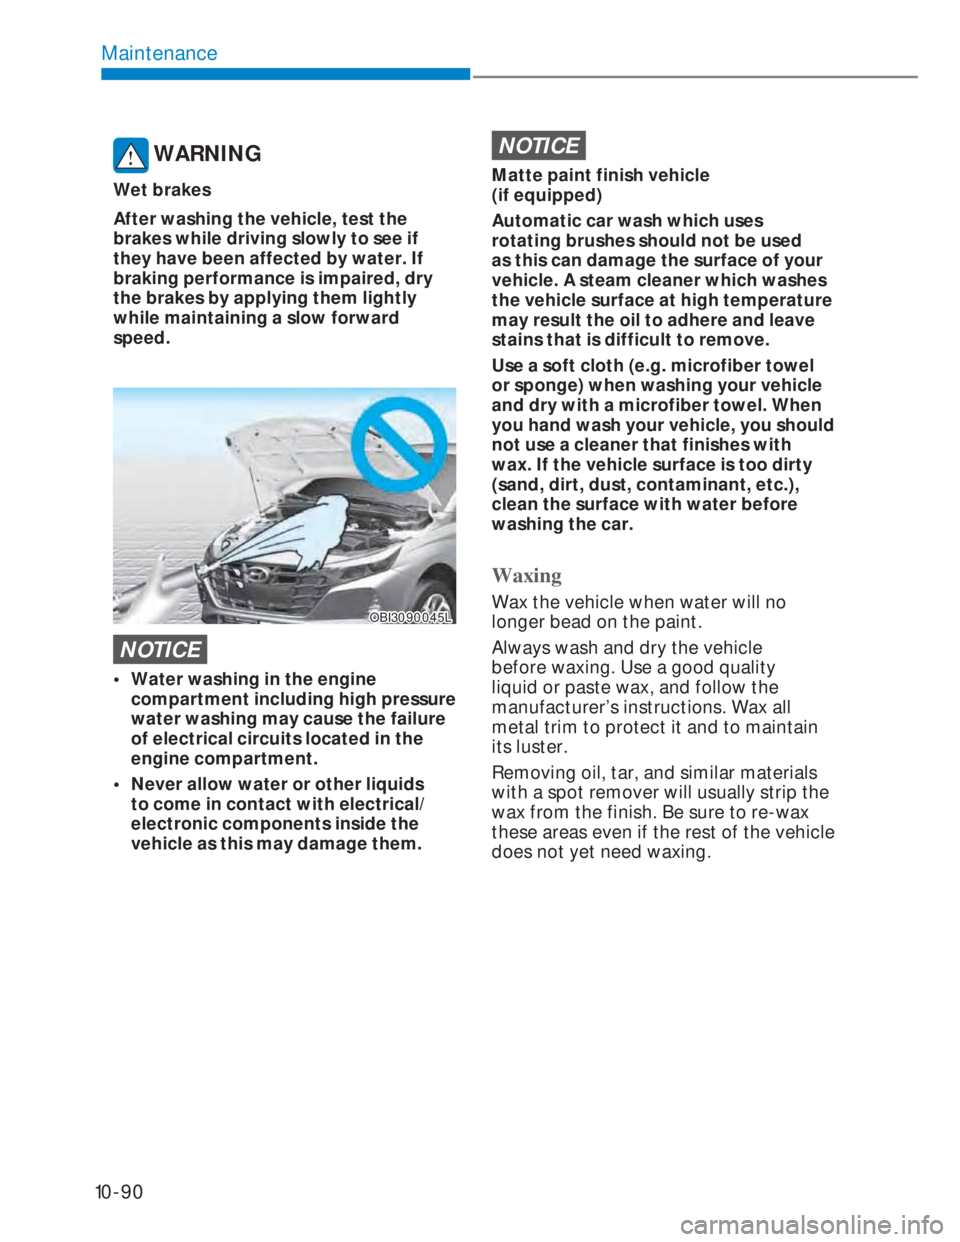
• Water washing in the engine
compartment including high pressure
water washing may cause the failure
of electrical circuits located in the
engine compartment.
• Never allow water or other liquids
to come in contact with electrical/
electronic components inside the
vehicle as this may damage them.
NOTICE
Matte paint finish vehicle
(if equipped)
Automatic car wash which uses
rotating brushes should not be used
as this can damage the surface of your
vehicle. A steam cleaner which washes
the vehicle surface at high temperature
may result the oil to adhere and leave
stains that is difficult to remove.
Use a soft cloth (e.g. microfiber towel
or sponge) when washing your vehicle
and dry with a microfiber towel. When
you hand wash your vehicle, you should
not use a cleaner that finishes with
wax. If the vehicle surface is too dirty
(sand, dirt, dust, contaminant, etc.),
clean the surface with water before
washing the car.
Waxing
Wax the vehicle when water will no
longer bead on the paint.
Always wash and dry the vehicle
before waxing. Use a good quality
liquid or paste wax, and follow the
manufacturer’s instructions. Wax all
metal trim to protect it and to maintain
its luster.
Removing oil, tar, and similar materials
with a spot remover will usually strip the
wax from the finish. Be sure to re-wax
these areas even if the rest of the vehicle
does not yet need waxing.
Page 434 of 444
10-95
10
Interior care
Interior general precautions
Prevent chemicals such as perfume,
cosmetic oil, sun cream, hand cleaner,
and air freshener from contacting the
interior parts because they may cause
damage or discoloration. If they do
contact the interior parts, wipe them off
immediately. See the instructions that
follow for the proper way to clean vinyl.
NOTICE
Never allow water or other liquids
to come in contact with electrical/
electronic components inside the
vehicle as this may damage them.
NOTICE
When cleaning leather products
(steering wheel, seats etc.), use neutral
detergents or low alcohol content
solutions. If you use high alcohol
content solutions or acid/alkaline
detergents, the color of the leather may
fade or the surface may get stripped
off.
Cleaning the upholstery and interior
trim
Vinyl (if equipped)
Remove dust and loose dirt from vinyl
with a whisk broom or vacuum cleaner.
Clean vinyl surfaces with a vinyl cleaner.
Fabric (if equipped)
Remove dust and loose dirt from
fabric with a whisk broom or vacuum
cleaner. Clean with a mild soap solution
recommended for upholstery or carpets.
Remove fresh spots immediately with
a fabric spot cleaner. If fresh spots
do not receive immediate attention,
the fabric can be stained and its color
can be affected. Also, its fire-resistant
properties can be reduced if the material
is not properly maintained.
NOTICE
Using anything but recommended
cleaners and procedures may affect the
fabric’s appearance and fire-resistant
properties.
Page 436 of 444
10-97
10
• Cleaning the leather seats
- Remove all contaminations instantly.
Refer to instructions below for
removal of each contaminant.
- Cosmetic products (sunscreen,
foundation, etc.)
Apply cleansing cream on a cloth
and wipe the contaminate spot. Wipe
off the cream with a wet cloth and
remove water with a dry cloth.
- Beverages (coffee, soft drink, etc.)
Apply a small amount of neutral
detergent and wipe until
contaminations do not smear.
- Oil
Remove oil instantly with absorbable
cloth and wipe with stain remover
used only for natural leather.
- Chewing gum
Harden the gum with ice and remove
gradually. Cleaning the lap/shoulder belt
webbing
Clean the belt webbing with any
mild soap solution recommended for
cleaning upholstery or carpet. Follow
the instructions provided with the soap.
Do not bleach or re-dye the webbing
because this may weaken it.
Cleaning the interior window glass
If the interior glass surfaces of the
vehicle become fogged (that is, covered
with an oily, greasy or waxy film), they
should be cleaned with glass cleaner.
Follow the directions on the glass
cleaner container.
NOTICE
Do not scrape or scratch the inside of
the rear window. This may result in
damage to the rear window defroster
grid.


