2022 FORD F-250 wheel size
[x] Cancel search: wheel sizePage 439 of 740
*Tread area of the tire: Area of
the perimeter of the tire that
contacts the road when mounted
on the vehicle.
*Rim: The metal support (wheel)
for a tire or a tire and tube
assembly upon which the tire
beads are seated.
TIRE REPLACEMENT
REQUIREMENTS
AGE WARNING:
Tires degrade
over time depending on many
factors such as weather, storage
conditions, and conditions of use
(load, speed, inflation pressure)
the tires experience throughout
their lives.
In general, tires should be
replaced after six years
regardless of tread wear.
However, heat caused by hot
climates or frequent high loading
conditions can accelerate the
aging process and may require
tires to be replaced more
frequently.
You should replace your spare
tire when you replace the road
tires or after six years due to
aging even if it has not been
used. U.S. DOT Tire Identification
Number
Both United States and Canada
Federal regulations require tire
manufacturers to place
standardized information on the
sidewall of all tires. This
information identifies and
describes the fundamental
characteristics of the tire and also
provides a U.S. DOT Tire
Identification Number for safety
standard certification and in case
of a recall.
This begins with the letters DOT
and indicates that the tire meets
all federal standards. The next
two numbers or letters are the
plant code designating where it
was manufactured, the next two
are the tire size code and the last
four numbers represent the week
and year the tire was built. For
example, the numbers 317 mean
the 31st week of 1997. After 2000,
the numbers go to four digits. For
example, 2501 means the 25th
week of 2001. The numbers in
between are identification codes
used for traceability. This
information is used to contact
customers if a tire defect requires
a recall.
Tire Replacement
Requirements
Your vehicle is equipped with tires
designed to provide a safe ride
and handling capability.
436
2022 Super Duty (TFE) Canada/United States of America, enUSA, Edition date: 202103, First-Printing Wheel and Tire Information
Page 440 of 740
WARNING: Only use
replacement tires and wheels
that are the same size, load
index, speed rating and type
(such as P-metric versus
LT-metric or all-season versus
all-terrain) as those originally
provided by Ford. The
recommended tire and wheel
size may be found on either the
Safety Compliance Certification
Label (affixed to either the door
hinge pillar, door-latch post, or
the door edge that meets the
door-latch post, next to the
driver's seating position), or the
Tire Label which is located on
the B-Pillar or edge of the
driver's door. If this information
is not found on these labels, then
you should contact your
authorized dealer as soon as
possible. Use of any tire or wheel
not recommended by Ford can
affect the safety and
performance of your vehicle,
which could result in an
increased risk of loss of vehicle
control, vehicle rollover, personal
injury and death. WARNING: To reduce the
risk of serious injury, when
mounting replacement tires and
wheels, you should not exceed
the maximum pressure indicated
on the sidewall of the tire to set
the beads without additional
precautions listed below. If the
beads do not seat at the
maximum pressure indicated,
re-lubricate and try again. WARNING: For a mounting
pressure more than
20 psi
(1.38 bar) greater than the
maximum pressure, a Ford
dealer or other tire service
professional should do the
mounting. WARNING:
Always inflate
steel carcass tires with a remote
air fill with the person inflating
standing at a minimum of
12 ft
(3.66 m) away from the wheel
and tire assembly. WARNING:
When inflating
the tire for mounting pressures
up to
20 psi (1.38 bar) greater
than the maximum pressure on
the tire sidewall, the following
precautions must be taken to
protect the person mounting the
tire:
• Make sure that you have the
correct tire and wheel size.
• Lubricate the tire bead and
wheel bead seat area again.
437
2022 Super Duty (TFE) Canada/United States of America, enUSA, Edition date: 202103, First-Printing Wheel and Tire Information
Page 441 of 740

•
Stand at a minimum of 12 ft
(3.66 m) away from the wheel
and tire assembly.
• Use both eye and ear
protection.
Important: Remember to replace
the wheel valve stems when the
road tires are replaced on your
vehicle.
It is recommended that the two
front tires or two rear tires
generally be replaced as a pair if
the worn tires still have usable
depth.
To avoid potential Four-Wheel
Drive (4WD) malfunction or
(4WD) system damage, it is
recommended to replace all four
tires rather than mixing
significantly worn tires with new
tires.
The tire pressure sensors mounted
in the wheels (originally installed
on your vehicle) are not designed
to be used in aftermarket wheels.
The use of wheels or tires not
recommended may affect the
operation of your tire pressure
monitoring system.
If the tire pressure monitoring
system indicator is flashing, your
system is malfunctioning. Your
replacement tire might be
incompatible with your tire
pressure monitoring system, or
some component of the system
may be damaged. Tire can be damaged during
off-road use, so inspection after
off-road use is also
recommended.
Replacing a Tire That Is
Greenhouse Gas Certified
The tires installed on this vehicle
at the factory as original
equipment are certified for
Greenhouse Gas and Fuel
Efficiency regulations.
Replacement tires must be of
equal or lower rolling resistance
level (TRRL or Crr). Consult with
your tire supplier(s) for
appropriate replacement tires.
USING SNOW CHAINS
WARNING: Do not exceed 30 mph
(50 km/h)
. Failure to follow this
instruction could result in the loss of
control of your vehicle, personal injury or
death. WARNING:
Do not use snow chains
on snow-free roads. WARNING:
Only fit snow chains to
specified tires. WARNING:
If your vehicle is fitted
with wheel trims, remove them before
fitting snow chains. WARNING:
Wheels and tires must
be the same size, load index and speed
rating as those originally fitted on the
vehicle. Use of any other tire or wheel
can affect the safety and performance
of your vehicle. Additionally, the use of
non-recommended tires and wheels can
438
2022 Super Duty (TFE) Canada/United States of America, enUSA, Edition date: 202103, First-Printing Wheel and Tire Information
Page 442 of 740
cause steering, suspension, axle, transfer
case or power transfer unit failure.
Follow the recommended tire inflation
pressures found on the Safety
Compliance Certification label, or the
Tire Label on the B-Pillar or the edge of
the driver door. Failure to follow this
instruction could result in loss of vehicle
control, vehicle rollover, or personal injury
or death.
Note: Do not use snow chains on vehicles
with LT275/65R20 or LT 285/75R18 sized
tires.
Note: The suspension insulation and
bumpers will help prevent vehicle damage.
Do not remove these components from your
vehicle when using snow tires and chains.
The tires on your vehicle have all-weather
treads to provide traction in rain and snow.
However, in some climates, you may need
to use snow tires and cables. If you need
to use cables, we recommend that you use
steel wheels of the same size and
specification, as cables may chip
aluminum wheels. Follow these guidelines when using snow
tires and chains:
•
If possible, avoid fully loading your
vehicle.
• Use only SAE Class S chains.
• Install chains securely, verifying that
the chains do not touch any wiring,
brake lines or fuel lines.
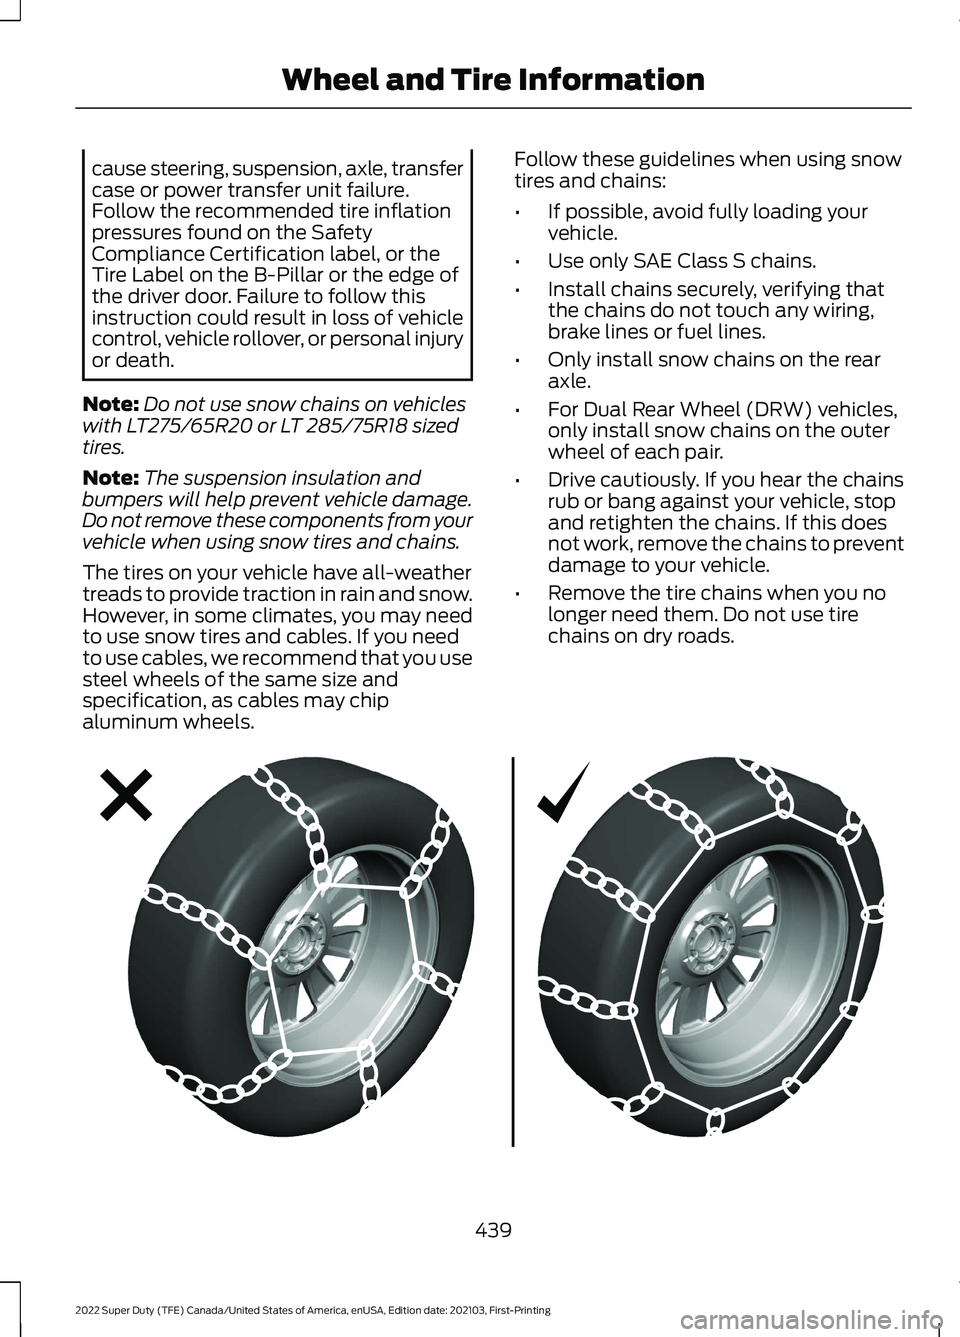
• Only install snow chains on the rear
axle.
• For Dual Rear Wheel (DRW) vehicles,
only install snow chains on the outer
wheel of each pair.
• Drive cautiously. If you hear the chains
rub or bang against your vehicle, stop
and retighten the chains. If this does
not work, remove the chains to prevent
damage to your vehicle.
• Remove the tire chains when you no
longer need them. Do not use tire
chains on dry roads. 439
2022 Super Duty (TFE) Canada/United States of America, enUSA, Edition date: 202103, First-Printing Wheel and Tire InformationE292547
Page 445 of 740
![FORD F-250 2022 Owners Manual 1. Make sure the tires are cool,
meaning they are not hot from
driving even a mile.
Note:
If you are checking tire
pressure when the tire is hot, (for
example, driven more than 1 mile
[1.6 kilometers] FORD F-250 2022 Owners Manual 1. Make sure the tires are cool,
meaning they are not hot from
driving even a mile.
Note:
If you are checking tire
pressure when the tire is hot, (for
example, driven more than 1 mile
[1.6 kilometers]](/manual-img/11/40567/w960_40567-444.png)
1. Make sure the tires are cool,
meaning they are not hot from
driving even a mile.
Note:
If you are checking tire
pressure when the tire is hot, (for
example, driven more than 1 mile
[1.6 kilometers]), never bleed or
reduce air pressure. The tires are
hot from driving and it is normal for
pressures to increase above
recommended cold pressures. A
hot tire at or below recommended
cold inflation pressure could be
significantly under-inflated.
2. Remove the cap from the valve
on one tire, then firmly press the
tire gauge onto the valve and
measure the pressure.
3. Add enough air to reach the
recommended air pressure.
Note: If you overfill the tire, release
air by pressing on the metal stem
in the center of the valve. Then
recheck the pressure with your tire
gauge.
4. Replace the valve cap.
5. Repeat this procedure for each
tire, including the spare. Note:
Some spare tires operate at
a higher inflation pressure than the
other tires. For T type mini-spare
tires, (see the Dissimilar spare
wheel and tire assembly
information for a description. Store
and maintain at 60 psi
(4.15 bar)60 psi (4.15 bar). For
full-size and dissimilar spare tires,
see the Dissimilar spare wheel and
tire assembly information for a
description. Store and maintain at
the higher of the front and rear
inflation pressure as shown on the
Safety Compliance Certification
Label or Tire Label.
Note: Do not reduce tire pressure
to change the ride characteristics
of the vehicle. If you do not
maintain the inflation pressure at
the levels specified by Ford, your
vehicle may experience a condition
known as shimmy. Shimmy is a
severe vibration and oscillation in
the steering wheel after the vehicle
travels over a bump or dip in the
road that does not dampen out by
itself. Shimmy may result from
significant under-inflation of the
tires, improper tires (load range,
size, or type), or vehicle
modifications such as lift-kits. In
the event that your vehicle
experiences shimmy, you should
slowly reduce speed by either lifting
off the accelerator pedal or lightly
applying the brakes. The shimmy
will cease as the vehicle speed
decreases.
442
2022 Super Duty (TFE) Canada/United States of America, enUSA, Edition date: 202103, First-Printing Tire Care
Page 458 of 740

CHANGING A FLAT TIRE
WARNING: If the tire pressure
monitor sensor becomes damaged it
may not function.
Note: The use of tire sealant may damage
your tire pressure monitoring system and
should only be used in roadside
emergencies.
Note: The tire pressure monitoring system
indicator light illuminates when the spare
tire is in use. To restore the full function of
the monitoring system, all road wheels
equipped with tire pressure monitoring
sensors must be mounted on this vehicle.
If you get a flat tire when driving, do not
apply the brake heavily. Instead, gradually
decrease your speed. Hold the steering
wheel firmly and slowly move to a safe
place on the side of the road.
Have a flat serviced by an authorized
dealer to prevent damage to the system
sensors.
See Tire Pressure Monitoring
System Precautions (page 449). Replace
the spare tire with a road tire as soon as
possible. During repairing or replacing the
flat tire, have the authorized dealer inspect
the system sensor for damage.
Dissimilar Spare Wheel and Tire
Assembly Information WARNING:
Failure to follow these
guidelines could result in an increased
risk of loss of vehicle control, injury or
death. If you have a dissimilar spare wheel and
tire, then it is intended for temporary use
only. This means that if you need to use it,
you should replace it as soon as possible
with a road wheel and tire assembly that
is the same size and type as the road tires
and wheels that were originally provided
by Ford. If the dissimilar spare tire or wheel
is damaged, it should be replaced rather
than repaired.
A dissimilar spare wheel and tire assembly
is defined as a spare wheel and tire
assembly that is different in brand, size or
appearance from the road tires and
wheels.
Full-size dissimilar spare
When driving with the full-size dissimilar
spare wheel and tire assembly, do not:
•
Exceed
70 mph (113 km/h).
• Use more than one dissimilar spare
wheel and tire assembly at a time.
• Use snow chains on the end of the
vehicle with the dissimilar spare wheel
and tire assembly.
When driving with the full-size dissimilar
spare wheel and tire assembly, 4WD
functionality may be limited. You may
experience the following:
• Additional noise from the transfer case
or other drive components.
• Difficulty shifting out of a mechanically
locked 4WD mode.
When driving with the full-size dissimilar
spare wheel and tire assembly, it is
recommended that you do not:
• Exceed
50 mph (80 km/h) in 4WD.
• Engage 4WD unless the vehicle is
stationary.
• Use 4WD on dry pavement.
455
2022 Super Duty (TFE) Canada/United States of America, enUSA, Edition date: 202103, First-Printing Changing a Road Wheel
Page 459 of 740
The usage of a full-size dissimilar spare
wheel and tire assembly can lead to
impairment of the following:
•
Handling, stability and braking
performance.
• Comfort and noise.
• Ground clearance and parking at curbs.
• Winter weather driving capability.
• Wet weather driving capability.
• Four-wheel drive capability. When driving with the full-size dissimilar
spare wheel and tire assembly additional
caution should be given to:
•
Towing a trailer.
• Driving vehicles equipped with a
camper body.
• Driving vehicles with a load on the
cargo rack.
Drive cautiously when using a full-size
dissimilar spare wheel and tire assembly
and seek service as soon as possible.
Location of the Spare Tire and
Tools
See the following table for their locations: Location
Item
Under the vehicle, just forward of the rearbumper.
Spare tire - pick-up trucks only
Fastened to the floor pan behind the rear-most seat on the passenger side.
Jack
Regular Cab: Fastened to floor behind thedriver seat.
Jack handle, lug wrench, lug wrench exten-
sion - only provided on dual rear wheel vehicles. Super Cab and Crew Cab: Fastened to the
floor under the rear seat on the driver's side.
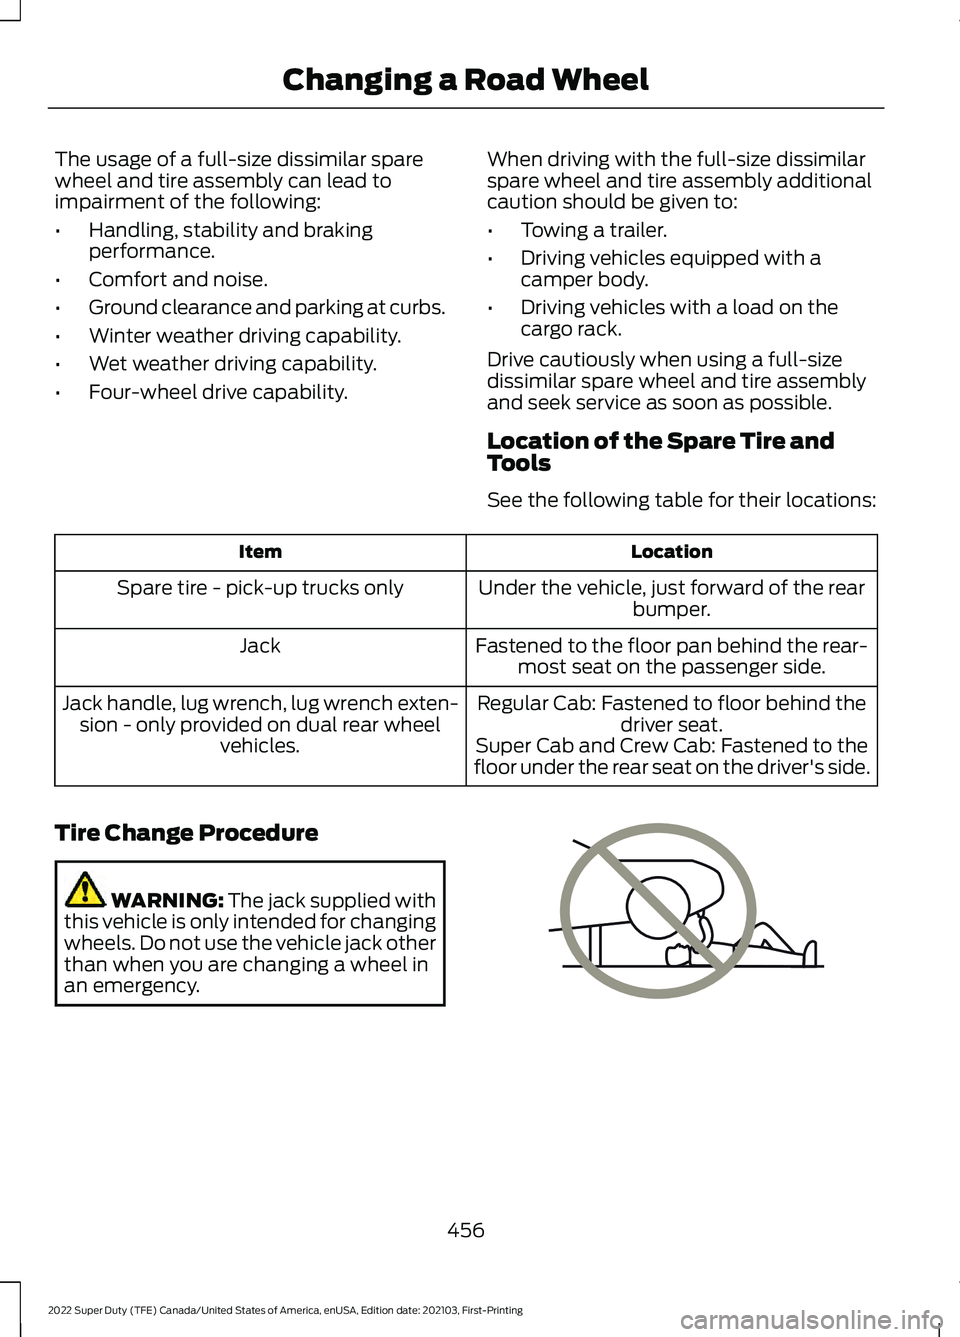
Tire Change Procedure WARNING: The jack supplied with
this vehicle is only intended for changing
wheels. Do not use the vehicle jack other
than when you are changing a wheel in
an emergency. 456
2022 Super Duty (TFE) Canada/United States of America, enUSA, Edition date: 202103, First-Printing Changing a Road WheelE166722
Page 468 of 740
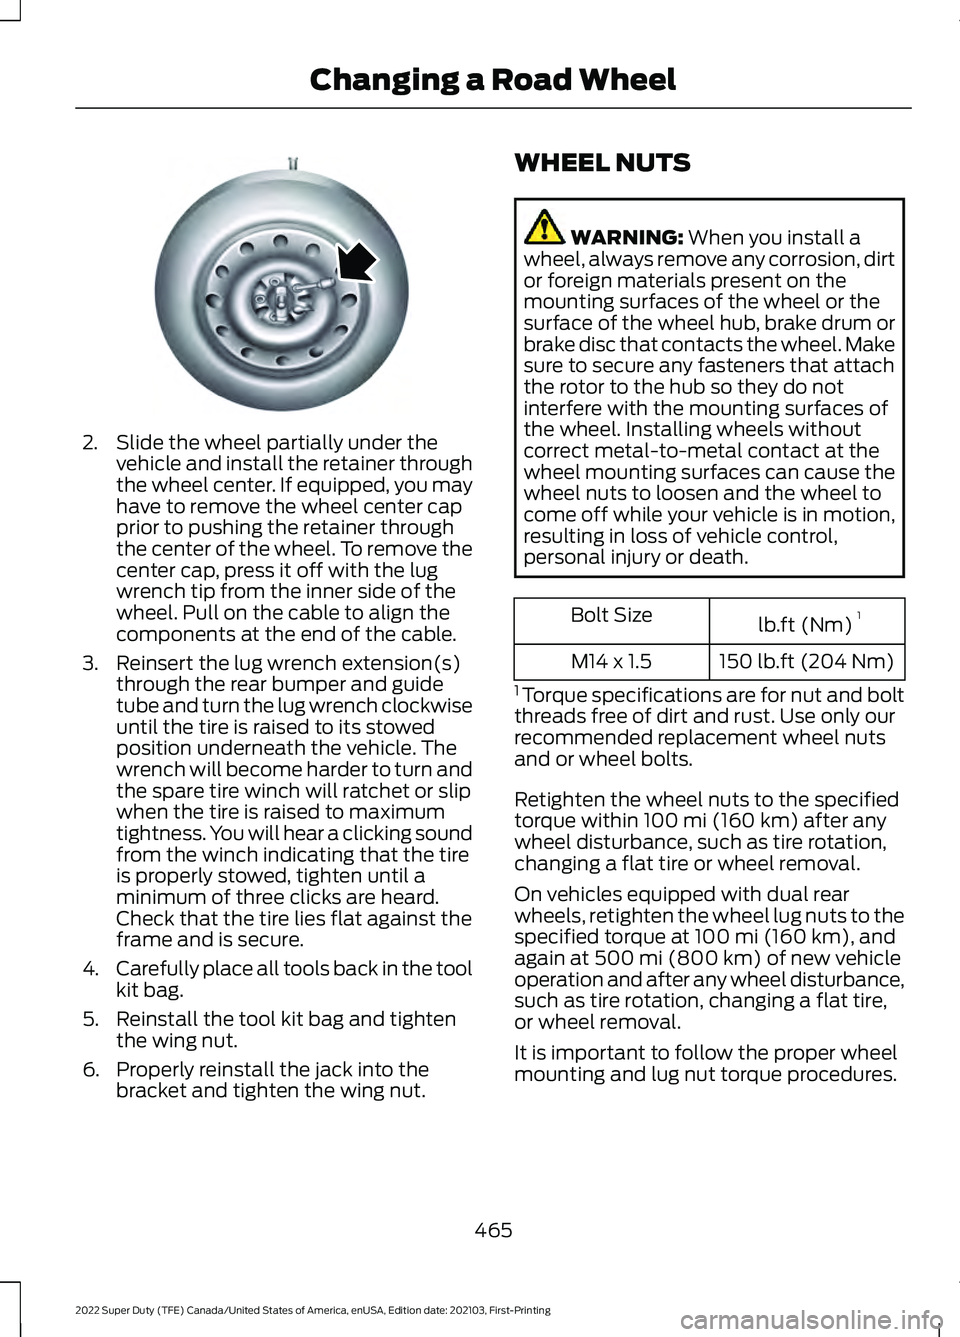
2. Slide the wheel partially under the
vehicle and install the retainer through
the wheel center. If equipped, you may
have to remove the wheel center cap
prior to pushing the retainer through
the center of the wheel. To remove the
center cap, press it off with the lug
wrench tip from the inner side of the
wheel. Pull on the cable to align the
components at the end of the cable.
3. Reinsert the lug wrench extension(s) through the rear bumper and guide
tube and turn the lug wrench clockwise
until the tire is raised to its stowed
position underneath the vehicle. The
wrench will become harder to turn and
the spare tire winch will ratchet or slip
when the tire is raised to maximum
tightness. You will hear a clicking sound
from the winch indicating that the tire
is properly stowed, tighten until a
minimum of three clicks are heard.
Check that the tire lies flat against the
frame and is secure.
4. Carefully place all tools back in the tool
kit bag.
5. Reinstall the tool kit bag and tighten the wing nut.
6. Properly reinstall the jack into the bracket and tighten the wing nut. WHEEL NUTS WARNING: When you install a
wheel, always remove any corrosion, dirt
or foreign materials present on the
mounting surfaces of the wheel or the
surface of the wheel hub, brake drum or
brake disc that contacts the wheel. Make
sure to secure any fasteners that attach
the rotor to the hub so they do not
interfere with the mounting surfaces of
the wheel. Installing wheels without
correct metal-to-metal contact at the
wheel mounting surfaces can cause the
wheel nuts to loosen and the wheel to
come off while your vehicle is in motion,
resulting in loss of vehicle control,
personal injury or death. lb.ft (Nm)
1
Bolt Size
150 lb.ft (204 Nm)
M14 x 1.5
1 Torque specifications are for nut and bolt
threads free of dirt and rust. Use only our
recommended replacement wheel nuts
and or wheel bolts.
Retighten the wheel nuts to the specified
torque within
100 mi (160 km) after any
wheel disturbance, such as tire rotation,
changing a flat tire or wheel removal.
On vehicles equipped with dual rear
wheels, retighten the wheel lug nuts to the
specified torque at
100 mi (160 km), and
again at 500 mi (800 km) of new vehicle
operation and after any wheel disturbance,
such as tire rotation, changing a flat tire,
or wheel removal.
It is important to follow the proper wheel
mounting and lug nut torque procedures.
465
2022 Super Duty (TFE) Canada/United States of America, enUSA, Edition date: 202103, First-Printing Changing a Road WheelE162800