2022 CITROEN BERLINGO VAN ECO mode
[x] Cancel search: ECO modePage 188 of 324

186
Practical information
the driver's door will display the charge level
on the instrument panel for about 20 seconds.
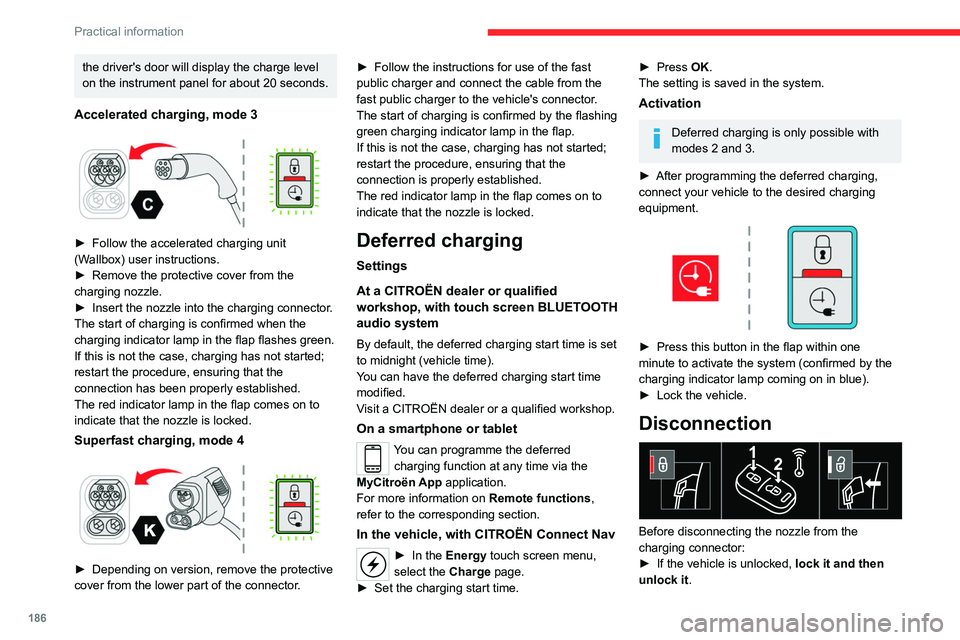
Accelerated charging, mode 3
► Follow the accelerated charging unit
(W allbox) user instructions.
►
Remove the protective cover from the
charging nozzle.
►
Insert the nozzle into the charging connector
.
The start of charging is confirmed when the
charging indicator lamp in the flap flashes green.
If this is not the case, charging has not started;
restart the procedure, ensuring that the
connection has been properly established.
The red indicator lamp in the flap comes on to
indicate that the nozzle is locked.
Superfast charging, mode 4
► Depending on version, remove the protective
cover from the lower part of the connector .►
Follow the instructions for use of the fast
public charger and connect the cable from the
fast public charger
to the vehicle's connector.
The start of charging is confirmed by the flashing
green charging indicator lamp in the flap.
If this is not the case, charging has not started;
restart the procedure, ensuring that the
connection is properly established.
The red indicator lamp in the flap comes on to
indicate that the nozzle is locked.
Deferred charging
Settings
At a CITROËN dealer or qualified
workshop, with touch screen BLUETOOTH
audio system
By default, the deferred charging start time is set
to midnight (vehicle time).
You can have the deferred charging start time
modified.
Visit a CITROËN dealer or a qualified workshop.
On a smartphone or tablet
You can programme the deferred charging function at any time via the
MyCitroën App application.
For more information on Remote functions,
refer to the corresponding section.
In the vehicle, with CITROËN Connect Nav
► In the Energy touch screen menu,
select the Charge page.
►
Set the charging start time.
► Press OK.
The setting is saved in the system.
Activation
Deferred charging is only possible with
modes 2 and 3.
►
After programming the deferred charging,
connect your vehicle to the desired charging
equipment.
► Press this button in the flap within one
minute to activate the system (confirmed by the
charging indicator lamp coming on in blue).
►
Lock the vehicle.
Disconnection
Before disconnecting the nozzle from the
charging connector:
►
If the vehicle is unlocked, lock it and then
unlock it .
Page 189 of 324

187
Practical information
7► If the vehicle is locked, unlock it.
The red indicator lamp in the flap goes out to
confirm that the charging nozzle is unlocked.
►
In modes 2 and 3, remove the charging
nozzle within 30 seconds
.
The locking of the nozzle is linked to the locking of the loading area. For more
information on Complete or selective
unlocking , refer to the corresponding
section.
The charging indicator lamp comes on in white.
With selective door unlocking activated,
press the unlocking button twice to
disconnect the charging nozzle.
When charging is complete, the green
charging indicator lamp in the flap goes
out after about 2 minutes.
Domestic charging, mode 2
The end of charging is confirmed when the green
CHARGE indicator lamp on the control unit and
the green charging indicator lamp in the flap
come on fixed.
►
Replace the protective cover on the charging
nozzle and close the charging flap.
►
Disconnect the control unit end of the
charging cable from the domestic socket.
Accelerated charging, mode 3
The end of charging is indicated by the charging
control unit and by the fixed lighting of the green
indicator lamp in the flap.
►
Hang up the nozzle on the charging unit and
close the charging flap.
Superfast charging, mode 4
The end of charging is indicated by the charger
and by the fixed lighting of the green indicator
lamp in the flap.
► You can also pause charging by
pressing this button in the flap (in mode 4
only).
►
Hang up the nozzle on the charger
.
►
Depending on version, replace the protective
cover on the lower section and close the
charging flap.
When the charging nozzle is
disconnected, a message on the
instrument panel indicates that charging is
complete, even if the charging nozzle was
disconnected before full charging was
completed.
Energy economy mode
This system manages the duration of use of
certain functions, in order to conserve a sufficient
level of charge in the battery with the ignition off.
After switching off the engine and for a maximum
cumulative period of around 30 minutes, you can
continue to use functions such as the audio and
telematics system, dipped beam headlamps or
courtesy lamps.
Selecting the mode
A confirmation message is displayed when
energy economy mode is entered, and the active
functions are placed on standby.
If a telephone call is in progress at the
time, it will be maintained for around 10
minutes via the audio system’s hands-free
system.
Exiting the mode
These functions are automatically reactivated the
next time the vehicle is used.
To restore the use of these functions
immediately, start the engine and let it run:
–
For less than 10 minutes, to use the
equipment for approximately 5 minutes.
–
For more than 10 minutes, to use the
equipment for approximately 30 minutes.
Let the engine run for the specified duration to
ensure that the battery charge is sufficient.
T
o recharge the battery, avoid repeatedly or
continuously restarting the engine.
A flat battery prevents the engine from starting.
For more information on the 12
V battery,
refer to the corresponding section.
Page 190 of 324

188
Practical information
Load reduction mode
This system manages the use of certain
functions according to the level of charge
remaining in the battery.
When the vehicle is being driven, the load
reduction function temporarily deactivates certain
functions, such as the air conditioning and the
heated rear screen.
The deactivated functions are reactivated
automatically as soon as conditions permit.
Snow chains
In wintry conditions, snow chains improve
traction as well as the behaviour of the vehicle
when braking.
Snow chains must be fitted only to the
front wheels. They must never be fitted to
"space-saver" type spare wheels.
Observe the legislation in force in your
country relating to the use of snow
chains and maximum authorised speeds.
Use only the chains designed to be fitted to the
type of wheel fitted to your vehicle:
Original tyre size Link size: (mm) 195/65 R15 9
205/60 R16
205/55 R17
215/65 R16
215/60 R17 Cannot be fitted with
chains
You can also use snow socks.
For more information, contact a CITROËN dealer
or a qualified workshop.
Installation tips
► To fit the snow chains during a journey, stop
the vehicle on a flat surface at the side of the
road.
►
Apply the parking brake and position any
wheel chocks under the wheels to prevent
movement of the vehicle.
►
Fit the snow chains following the instructions
provided by the manufacturer
.
►
Move off gently and drive for a few moments,
without exceeding 31
mph (50 km/h).
►
Stop the vehicle and check that the snow
chains are correctly tightened.
It is strongly recommended that you
practise fitting the snow chains on a level
and dry surface before setting off.
Avoid driving with snow chains on roads that have been cleared of snow to avoid
damaging the vehicle's tyres and the road
surface. If the vehicle is fitted with alloy
wheels, check that no part of the chain or its
fixings is in contact with the wheel rim.
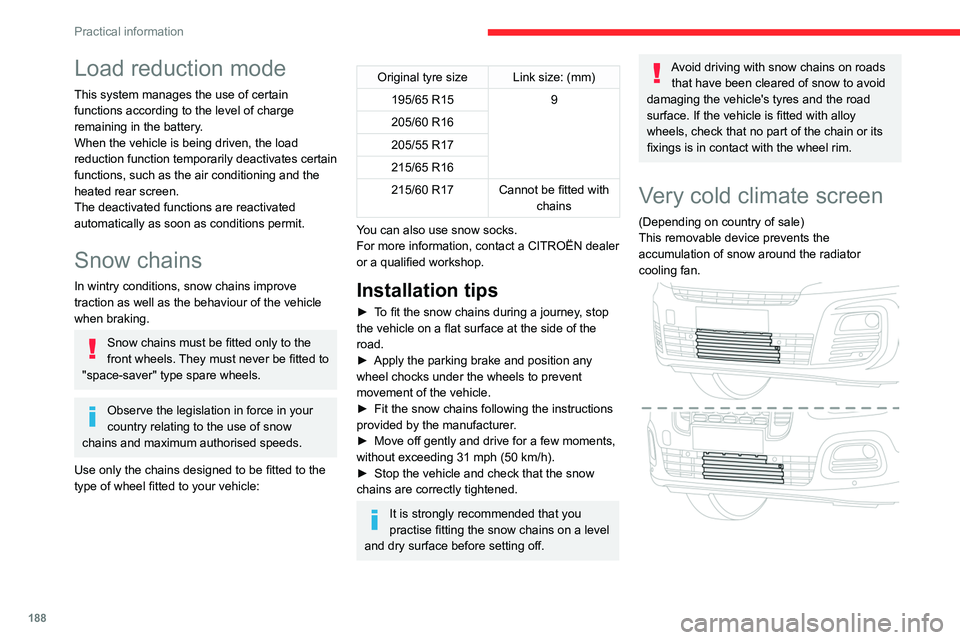
Very cold climate screen
(Depending on country of sale)
This removable device prevents the
accumulation of snow around the radiator
cooling fan.
Page 193 of 324

191
Practical information
7If the weight on board the vehicle is nearly up to
the maximum authorised value, the indicator
lamps of these buttons come on.
ON
If the weight on board the vehicle exceeds
the maximum authorised value, the indicator
lamps of these buttons come on.
Display of the measurement on the
instrument panel
If the weight on board the vehicle
exceeds the maximum authorised
value, this indicator lamp comes on.
Malfunction
Display of the malfunction in the loading
area
After the measurement is triggered from the
loading area, the LEDs of the 3 buttons flash
simultaneously for about 3 seconds and then go
out.
Contact a CITROËN dealer or a qualified
workshop.
Information displayed on the instrument
panel
These warning lamps come on, together with a
message.
Contact a CITROËN dealer or a qualified
workshop.
Roof bars / Roof rack
Recommendations
Distribute the load uniformly, taking care
to avoid overloading one of the sides.
Arrange the heaviest part of the load as close
as possible to the roof.
Secure the load firmly.
Drive gently: the vehicle will be more
susceptible to the effects of side winds and its
stability may be affected.
Regularly check the security and tight
fastening of the roof bars and racks, at least
before each trip.
Remove the roof bars once they are no longer
needed.
In the event of loading ( not exceeding
40 cm in height) on the roof, do not
exceed the following loads:
–
T
ransverse bars on longitudinal bars:
80
kg.
–
T
wo transverse bars bolted to the roof:
100
kg.
–
Three transverse bars bolted to the roof:
150
kg.
–
An aluminium rack: 120
kg.
–
A
steel rack: 115 kg.
If the height exceeds 40
cm, adapt the speed
of the vehicle to the profile of the road to
avoid damaging the roof bars or the roof rack
and the fixings on the vehicle.
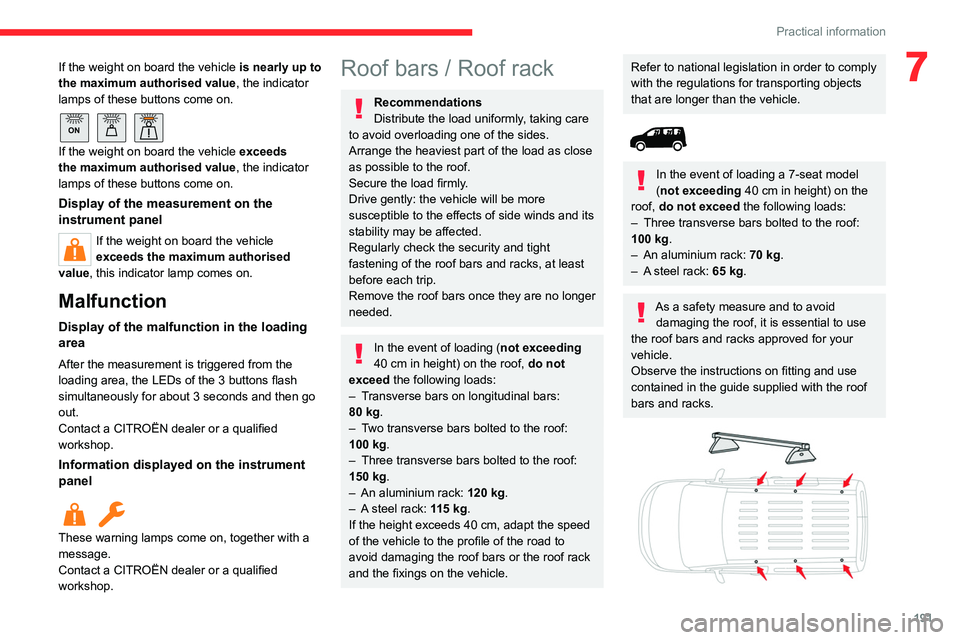
Refer to national legislation in order to comply
with the regulations for transporting objects
that are longer than the vehicle.
In the event of loading a 7-seat model
(not exceeding 40 cm in height) on the
roof, do not exceed the following loads:
–
Three transverse bars bolted to the roof:
100
kg.
–
An aluminium rack: 70
kg.
–
A
steel rack: 65 kg.
As a safety measure and to avoid damaging the roof, it is essential to use
the roof bars and racks approved for your
vehicle.
Observe the instructions on fitting and use
contained in the guide supplied with the roof
bars and racks.
Page 201 of 324

199
Practical information
7AdBlue, it is essential to wait around 5
minutes before switching on the ignition,
without opening the driver’s door,
unlocking the vehicle, inserting the key
into the ignition switch, or bringing the
key for the "Keyless Entry and Start"
system into the passenger compartment.
Switch on the ignition, then wait for 10
seconds before starting the engine.
►
Switch off the ignition and remove the key
from the switch to switch off the engine.
or
►
With Keyless Entry and Start, press the
"
START/STOP" button to switch off the engine.
► With the vehicle unlocked and the fuel filler
flap open, turn the blue cap of the AdBlue® tank
anti-clockwise and remove it.
►
With a container of
AdBlue
®: after checking
the expiry date, read the instructions on the
label carefully before pouring the contents of the
container into the vehicle's AdBlue tank.
►
With an
AdBlue® pump: insert the nozzle and
fill the tank until the nozzle automatically cuts
out.
In order not to overfill the AdBlue® tank:
–
Add between 10 and 13 litres using
AdBlue® containers.
–
Stop after the nozzle’ s first automatic cut-
out, if you are refilling at a service station.
The system only registers AdBlue
® top-ups of
5
litres or more.
If the AdBlue® tank is completely empty
– which is confirmed by the message
“Top up
AdBlue: Starting impossible ” – it is
essential to add at least 5 litres.
After refilling
► Refit the blue cap to the tank filler and turn it
clockwise, as far as it will go.
►
Close the fuel filler flap.
Do not dispose of AdBlue® bottles or
containers in the household waste.
Place them in a container reserved for this
purpose or take them back to where you
purchased them.
Free-wheeling
In certain situations, it is necessary to put the
vehicle into free-wheeling mode (e.g. towing, on
a rolling road, automatic car wash (Wash mode),
rail or sea transport).
The procedure varies according to the type of
gearbox and parking brake.
Do not leave the vehicle unattended
while coasting.
Keyless Entry and Start
You must not depress the brake pedal
while switching the ignition on again, then
switching it off. If you do, the engine will start,
requiring you to restart the procedure.
With a manual gearbox and
electric parking brake
/
To release them
► With the engine running and while depressing
the brake pedal, move the gear selector to the
neutral position.
►
While depressing the brake pedal, switch off
the engine.
►
Release the brake pedal, then switch on the
ignition.
►
While depressing the brake pedal, press the
control to release the parking brake.
►
Release the brake pedal, then switch off the
ignition.
Reverting to normal operation
► While depressing the brake pedal, restart the
engine and apply the parking brake.
Page 202 of 324

200
Practical information
With an automatic gearbox
and electric parking brake
/
To release them
► With the engine running and while depressing
the brake pedal, set the gear selector to N
.
►
While depressing the brake pedal, switch off
the engine.
►
Release the brake pedal, then switch on the
ignition again.
►
While depressing the brake pedal, press the
control lever to release the parking brake.
►
Release the brake pedal, then switch off the
ignition.
Reverting to normal operation
► While depressing the brake pedal, restart the
engine and select mode P .
With drive selector and
electric parking brake
/
Release procedure
► With the vehicle stationary and the engine
running, depress the brake pedal and select
mode
N.
Within 5
seconds:
► Depress and hold the brake pedal, then
observe this order: switch off the engine and
move the push selector forwards or backwards.
►
Release the brake pedal, then switch on the
ignition.
►
Place your foot on the brake and press the
electric parking brake control to release it.
►
Release the brake pedal, then switch off the
ignition.
A message is displayed on the instrument panel to confirm the unlocking
of the wheels for 15
minutes.
When the vehicle is free-wheeling, the
audio system cannot be updated (message
displayed on the instrument panel).
After 15 minutes or reverting to normal
operation
► While depressing the brake pedal, restart the
engine and select mode P .
Advice on care and maintenance
General recommendations
Observe the following recommendations to avoid
damaging the vehicle.
Exterior
Never use a high-pressure jet wash in
the engine compartment - risk of
damaging the electrical components!
Do not wash the vehicle in bright sunshine or
extremely cold conditions.
When washing the vehicle in an
automatic roller-brush car wash, be sure
to lock the doors and, depending on version,
move the electronic key away.
When using a pressure washer, keep the jet
nozzle at a minimum distance of 30 cm from
the vehicle (particularly when cleaning areas
containing chipped paint, sensors or seals).
Promptly clean up any stains containing
chemicals liable to damage the vehicle's
paintwork (including tree resin, bird
droppings, insect secretions, pollen and tar).
Depending on the environment, clean the
vehicle frequently to remove salty deposits
(in coastal areas), soot (in industrial areas)
and mud/salts (in wet or cold areas). These
substances can be highly corrosive.
Contact a CITROËN dealer or a qualified
workshop for advice on removing stubborn
stains requiring special products (such as tar
or insect removers).
Preferably, have paint touch-ups performed
by a CITROËN dealer or a qualified
workshop.
Page 220 of 324

218
In the event of a breakdown
Referring to the relevant section, reinitialise
certain equipment:
–
Remote control key or electronic key
(depending on version).
–
Electric windows.
–
Date and time.
–
Preset radio stations.
The Stop & Start system may not be operational during the trip following the
first engine start.
In this case, the system will only be available
again after a continuous period with the
vehicle immobilised, the duration of which
depends on the exterior temperature and the
state of charge of the battery (up to about 8
hours).
Towing
Procedure for having your vehicle towed or for
towing another vehicle using the towing eye.
General recommendations
Observe the legislation in force in the
country where you are driving.
Check that the towing vehicle is heavier than
the towed vehicle.
The driver must remain at the wheel of the
towed vehicle and must have a valid driving
licence.
When towing a vehicle with all four wheels on
the ground, always use an approved towbar;
ropes and straps are prohibited.
The towing vehicle must move off gently.
When the vehicle is towed with its engine
off, there is no longer braking and steering
assistance.
A professional recovery service must
be called in the following cases:
–
broken down on a motorway or main road;
– not possible to put the gearbox into neutral,
unlock the steering, or release the parking
brake;
–
not possible to tow a vehicle with an
automatic gearbox, with the engine running;
–
towing with only two wheels on the ground;
–
four-wheel drive vehicle;
–
no approved towbar available.
Before towing the vehicle, it is essential
to put the vehicle in free-wheeling mode.
For more information on Free-wheeling, refer
to the corresponding section.
Electric motor
An electric vehicle cannot under any
circumstances be used to tow another
vehicle.
However, it may be used, for example, to exit
a rut.
Towing constraints
Type of vehicle
(engine/gearbox) Front wheels on the
ground Rear wheels on the
ground Flatbed
4 wheels on the ground
with towbar
Internal combustion/Manual
Page 239 of 324

237
Touch screen BLUETOOTH audio system
10Touch screen BLUETOOTH audio
system
Multimedia audio system -
Bluetooth
® telephone
The functions and settings described
vary according to the vehicle version and
configuration.
For safety reasons and because they
require sustained attention by the driver,
the following operations must be carried out
with the vehicle stationary and the ignition
on:
–
Pairing the smartphone with the system in
Bluetooth mode.
–
Using the smartphone.
– Changing the system settings and
configuration.
The system is protected in such a way that it will only operate in the vehicle.
The Energy Economy Mode message is
displayed when the system is about to enter
the corresponding mode.
First steps
With the engine running, a press mutes
the sound.
With the ignition off, a press turns the system on.
Increase or decrease the volume using
the thumbwheel on the left-hand side.
To access the menus, press this button on the touch screen.
Press the back arrow to go back a level.
To clean the screen, use a soft, non-abrasive cloth (e.g. spectacles cloth)
with no additional product.
Do not use sharp objects on the screen.
Do not touch the screen with wet hands.
Certain information is displayed permanently in
the upper bar of the touch screen:
–
Air conditioning information (depending on
version).
–
Bluetooth connection.
–
Indication of location data sharing.
Selection of the audio source:
– FM/AM/DAB radio stations (depending on
equipment).
–
T
elephone connected via Bluetooth and
Bluetooth multimedia broadcast (streaming).
–
USB memory stick.
–
Media player connected via the auxiliary
socket (depending on equipment).
In very hot conditions, the volume may
be limited to protect the system. It may
go into standby (screen and sound off) for at
least 5 minutes.
The return to normal takes place when the
temperature in the passenger compartment
has dropped.
Steering mounted controls
Steering mounted controls -
Type 1
Radio:
Select the previous/next preset radio
station.
Select the previous/next item in a menu or a list.
Media:
Select the previous/next track.
Select the previous/next item in a menu or a list.
Radio: