2022 CHRYSLER PACIFICA service
[x] Cancel search: servicePage 205 of 384

MULTIMEDIA203
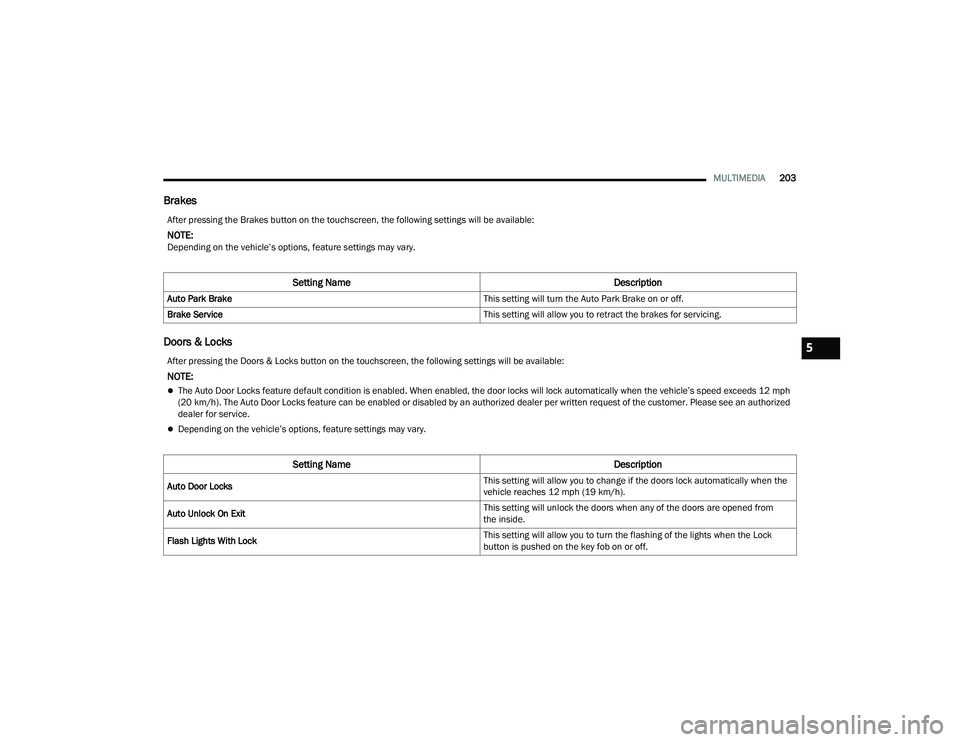
Brakes
Doors & Locks
After pressing the Brakes button on the touchscreen, the following settings will be available:
NOTE:Depending on the vehicle’s options, feature settings may vary.
Setting Name Description
Auto Park Brake This setting will turn the Auto Park Brake on or off.
Brake Service This setting will allow you to retract the brakes for servicing.
After pressing the Doors & Locks button on the touchscreen, the following settings will be available:
NOTE:
The Auto Door Locks feature default condition is enabled. When enabled, the door locks will lock automatically when the vehicle’s speed exceeds 12 mph
(20 km/h). The Auto Door Locks feature can be enabled or disabled by an authorized dealer per written request of the customer. Please see an authorized
dealer for service.
Depending on the vehicle’s options, feature settings may vary.
Setting NameDescription
Auto Door Locks This setting will allow you to change if the doors lock automatically when the
vehicle reaches 12 mph (19 km/h).
Auto Unlock On Exit This setting will unlock the doors when any of the doors are opened from
the inside.
Flash Lights With Lock This setting will allow you to turn the flashing of the lights when the Lock
button is pushed on the key fob on or off.
5
22_RUP_OM_EN_USC_t.book Page 203
Page 215 of 384

MULTIMEDIA213
REAR SEAT ENTERTAINMENT WITH
AMAZON FIRE TV BUILT-IN — IF EQUIPPED
OVERVIEW
Rear Seat Entertainment with Fire TV built-in is
designed to give your family years of enjoyment.
Fire TV lets passengers enjoy a wide variety of
content from popular apps (subscriptions may be
required). Stream videos, play games, listen to
music, get information, and watch downloaded
programs all while on the road. In addition to
streaming and downloaded content, changing the
input in Fire TV also allows users to:
Play your favorite CDs, DVDs, or Blu-ray™ Discs
Mirror what’s on your phone or tablet to Fire TV
via Miracast capable devices (see support
here):
https://www.amazon.com/gp/help/
customer/display
Plug and play a variety of standard video games
or devices into the HDMI port
Listen to audio over wireless headphones
(not included, customer will have to provide
their own)
Plug and play a variety of devices into the
Video USB port
Plug in standard headphones to listen to audio
NOTE:Vehicle must be in an active and usable cellular
range and properly equipped with a Uconnect
5 NAV system and Rear Seat Entertainment with
Fire TV package. Streaming requires a Wi-Fi
connection and registered Amazon account to run
Fire TV in the vehicle. Streaming service subscrip -
tions are not included. Certain services are subject
to change or withdrawal at any time, may not be
available in all areas and languages, and may
require separate subscriptions.
GETTING STARTED
Rear Seat Entertainment for Uconnect 5/5 NAV
There are three different ways to operate the
features of Rear Seat Entertainment with Fire TV
built-in:
Rear Seat Entertainment Voice Remote with
Alexa
Front radio screen
Individual Rear Seat Entertainment with Fire TV
built-in Touchscreens
ACCESSING REAR SEAT
E
NTERTAINMENT WITH FIRE TV BUILT-IN
FROM THE FRONT RADIO SCREEN
You can access your Rear Seat Entertainment with
Fire TV built-in system by following these steps:
Option 1
1. Press the Media button.
2. Press the Rear Seat button icon.
Option 2
1. Press the Apps button on the bottom of the
touchscreen.
2. Press the Uconnect Theater button on the touchscreen. You may need to navigate to
different pages in the Apps drawer to find the
Uconnect Theater button.
1 — Rear Seat Entertainment (Rear Touchscreen)
2 — Headphone Jack
3 — HDMI Port
4 — USB C Charging Port
5 — Uconnect System (Front Touchscreen)5
22_RUP_OM_EN_USC_t.book Page 213
Page 220 of 384

218MULTIMEDIA
Access Using the Voice Remote with Alexa and
Rear Screens
Rear passengers will be able to access Rear Seat
Entertainment with Fire TV built-in streaming by
pressing the “Prime Video”, “Partner 1”, or
“Partner 2” button on the Voice Remote with Alexa.
Selecting one of those buttons on the Voice
Remote with Alexa will take you to the home page
for that respective streaming service. Turning on
either of the rear screens will launch Fire TV.
By default, the rear screens will always launch
in Fire TV.
Fire TV
Fire TV is your source for online streaming with
Rear Seat Entertainment with Fire TV built-in.
NOTE:4G Wi-Fi Hot Spot needs to be activated on the
vehicle for streaming to be accessible. This can be
set up when Rear Seat Entertainment with Fire TV
built-in is turned on for the first time from the rear
screens. A mobile device can also be used as the
Wi-Fi Hot Spot for the vehicle. A data source needs
to be either an in-vehicle Wi-Fi plan or through a 4G
or 5G device.
To access Fire TV on the front screen, select
“Launch Source”, then “Fire TV Home” under the
Inputs selection. The top menu bar for Fire TV will have the options
for “Home”, “Library”, “Brand”, “Live”, and “Apps”.
Below the top menu bar will be streaming options
linked to your Prime account like “Prime Video”.
The front radio screen offers some options:
Power — This will turn Fire TV on or off.
Screen 1 and Screen 2 Toggle
— This toggles
between the Rear Screens (for use with front
radio screen only).
Collapse — While viewing on the front radio
screen, this will collapse the screen to dash -
board view.
Source Drawer — This will open the “Source
Drawer” and the source logo will be displayed
on the icon.
Browse Media — This will open the “Browse
Media” pop-up.
Back — This will let you go back the previous
page.
Fire TV Home — This will take you back to the
Fire TV home page.
Menu — This will open the Fire TV menu.
Remote icon — This will display the on-screen
remote.
NOTE:Front screen viewing and watching can only be
done when the vehicle is in PARK.
The rear screens will always launch with Fire TV.
PLAY A BLU-RAY™ OR DVD —
I
F EQUIPPED
Playing a Blu-ray™ or DVD from the Front Radio
Screen
1. Insert a Blu-ray™ disc or DVD disc into the
disc player with the label facing up.
NOTE:The DVD/Blu-ray™ Disc player is located under the
radio controls in the instrument panel.
2. Press the Media button on the bottom menu bar. Then press the Rear Entertainment tab on
the top menu bar. Then select “Launch
Source” on the radio touchscreen.
3. Select the Blu-ray™ or DVD under inputs in the Launch Source menu
22_RUP_OM_EN_USC_t.book Page 218
Page 226 of 384

224SAFETY
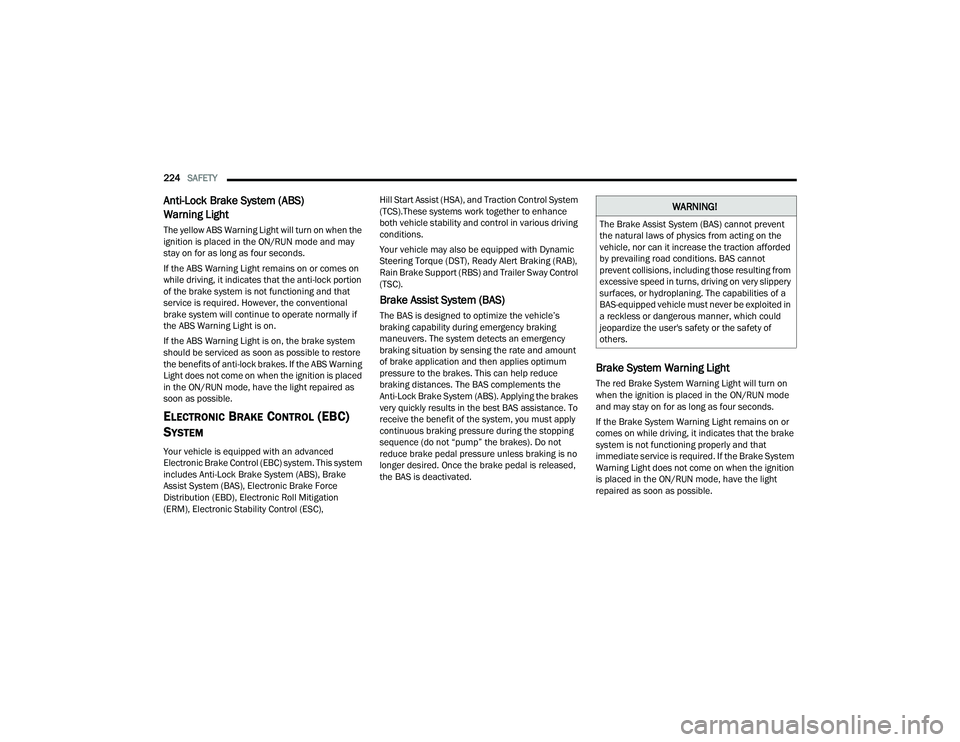
Anti-Lock Brake System (ABS)
Warning Light
The yellow ABS Warning Light will turn on when the
ignition is placed in the ON/RUN mode and may
stay on for as long as four seconds.
If the ABS Warning Light remains on or comes on
while driving, it indicates that the anti-lock portion
of the brake system is not functioning and that
service is required. However, the conventional
brake system will continue to operate normally if
the ABS Warning Light is on.
If the ABS Warning Light is on, the brake system
should be serviced as soon as possible to restore
the benefits of anti-lock brakes. If the ABS Warning
Light does not come on when the ignition is placed
in the ON/RUN mode, have the light repaired as
soon as possible.
ELECTRONIC BRAKE CONTROL (EBC)
S
YSTEM
Your vehicle is equipped with an advanced
Electronic Brake Control (EBC) system. This system
includes Anti-Lock Brake System (ABS), Brake
Assist System (BAS), Electronic Brake Force
Distribution (EBD), Electronic Roll Mitigation
(ERM), Electronic Stability Control (ESC), Hill Start Assist (HSA), and Traction Control System
(TCS).These systems work together to enhance
both vehicle stability and control in various driving
conditions.
Your vehicle may also be equipped with Dynamic
Steering Torque (DST), Ready Alert Braking (RAB),
Rain Brake Support (RBS) and Trailer Sway Control
(TSC).
Brake Assist System (BAS)
The BAS is designed to optimize the vehicle’s
braking capability during emergency braking
maneuvers. The system detects an emergency
braking situation by sensing the rate and amount
of brake application and then applies optimum
pressure to the brakes. This can help reduce
braking distances. The BAS complements the
Anti-Lock Brake System (ABS). Applying the brakes
very quickly results in the best BAS assistance. To
receive the benefit of the system, you must apply
continuous braking pressure during the stopping
sequence (do not “pump” the brakes). Do not
reduce brake pedal pressure unless braking is no
longer desired. Once the brake pedal is released,
the BAS is deactivated.
Brake System Warning Light
The red Brake System Warning Light will turn on
when the ignition is placed in the ON/RUN mode
and may stay on for as long as four seconds.
If the Brake System Warning Light remains on or
comes on while driving, it indicates that the brake
system is not functioning properly and that
immediate service is required. If the Brake System
Warning Light does not come on when the ignition
is placed in the ON/RUN mode, have the light
repaired as soon as possible.
WARNING!
The Brake Assist System (BAS) cannot prevent
the natural laws of physics from acting on the
vehicle, nor can it increase the traction afforded
by prevailing road conditions. BAS cannot
prevent collisions, including those resulting from
excessive speed in turns, driving on very slippery
surfaces, or hydroplaning. The capabilities of a
BAS-equipped vehicle must never be exploited in
a reckless or dangerous manner, which could
jeopardize the user's safety or the safety of
others.
22_RUP_OM_EN_USC_t.book Page 224
Page 233 of 384

SAFETY231
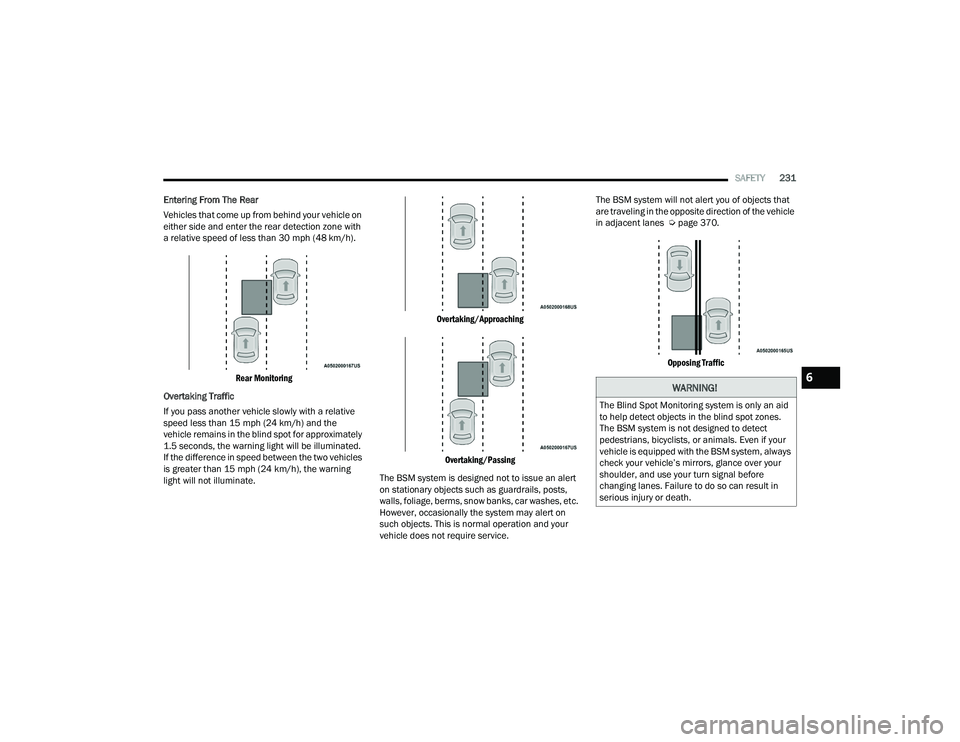
Entering From The Rear
Vehicles that come up from behind your vehicle on
either side and enter the rear detection zone with
a relative speed of less than 30 mph (48 km/h).
Rear Monitoring
Overtaking Traffic
If you pass another vehicle slowly with a relative
speed less than 15 mph (24 km/h) and the
vehicle remains in the blind spot for approximately
1.5 seconds, the warning light will be illuminated.
If the difference in speed between the two vehicles
is greater than 15 mph (24 km/h), the warning
light will not illuminate.
Overtaking/Approaching
Overtaking/Passing
The BSM system is designed not to issue an alert
on stationary objects such as guardrails, posts,
walls, foliage, berms, snow banks, car washes, etc.
However, occasionally the system may alert on
such objects. This is normal operation and your
vehicle does not require service. The BSM system will not alert you of objects that
are traveling in the opposite direction of the vehicle
in adjacent lanes Ú
page 370.
Opposing Traffic
WARNING!
The Blind Spot Monitoring system is only an aid
to help detect objects in the blind spot zones.
The BSM system is not designed to detect
pedestrians, bicyclists, or animals. Even if your
vehicle is equipped with the BSM system, always
check your vehicle’s mirrors, glance over your
shoulder, and use your turn signal before
changing lanes. Failure to do so can result in
serious injury or death.
6
22_RUP_OM_EN_USC_t.book Page 231
Page 237 of 384

SAFETY235
FCW Limited Warning
If the instrument cluster displays “ACC/FCW
Limited Functionality”, “FCW Limited
Functionality”, “ACC/FCW Limited Functionality
Clean Front Windshield”, or “FCW Limited
Functionality Clean Front Windshield”
momentarily, there may be a condition that limits
FCW functionality. Although the vehicle is still
drivable under normal conditions, the active
braking may not be fully available. Once the
condition that limited the system performance is
no longer present, the system will return to its full
performance state. If the problem persists, see an
authorized dealer.
Service FCW Warning
If the system turns off, and the instrument cluster
displays:
ACC/FCW Unavailable Service Required
FCW Unavailable Service Required
This indicates there is an internal system fault.
Although the vehicle is still drivable under normal
conditions, have the system checked by an
authorized dealer.
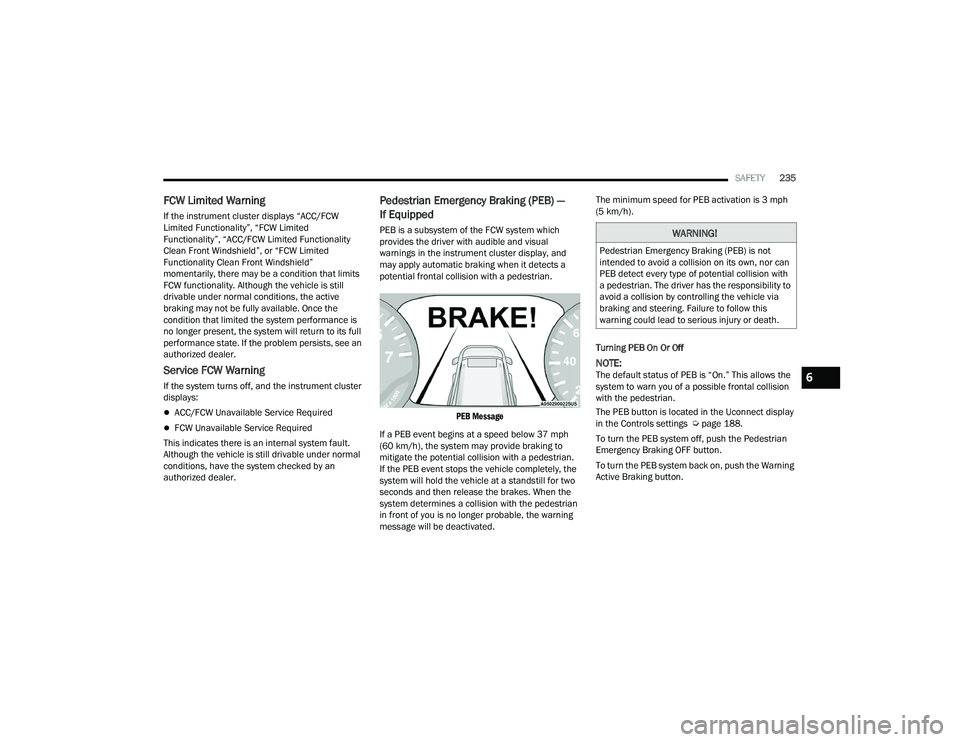
Pedestrian Emergency Braking (PEB) —
If Equipped
PEB is a subsystem of the FCW system which
provides the driver with audible and visual
warnings in the instrument cluster display, and
may apply automatic braking when it detects a
potential frontal collision with a pedestrian.
PEB Message
If a PEB event begins at a speed below 37 mph
(60 km/h), the system may provide braking to
mitigate the potential collision with a pedestrian.
If the PEB event stops the vehicle completely, the
system will hold the vehicle at a standstill for two
seconds and then release the brakes. When the
system determines a collision with the pedestrian
in front of you is no longer probable, the warning
message will be deactivated. The minimum speed for PEB activation is 3 mph
(5 km/h).
Turning PEB On Or Off
NOTE:The default status of PEB is “On.” This allows the
system to warn you of a possible frontal collision
with the pedestrian.
The PEB button is located in the Uconnect display
in the Controls settings Ú
page 188.
To turn the PEB system off, push the Pedestrian
Emergency Braking OFF button.
To turn the PEB system back on, push the Warning
Active Braking button.
WARNING!
Pedestrian Emergency Braking (PEB) is not
intended to avoid a collision on its own, nor can
PEB detect every type of potential collision with
a pedestrian. The driver has the responsibility to
avoid a collision by controlling the vehicle via
braking and steering. Failure to follow this
warning could lead to serious injury or death.
6
22_RUP_OM_EN_USC_t.book Page 235
Page 239 of 384

SAFETY237
NOTE:
The TPMS is not intended to replace normal tire
care and maintenance, or to provide warning of
a tire failure or condition.
The TPMS should not be used as a tire pressure
gauge while adjusting your tire pressure.
Driving on a significantly underinflated tire
causes the tire to overheat and can lead to tire
failure. Underinflation also reduces fuel effi -
ciency and tire tread life, and may affect the
vehicle’s handling and stopping ability.
The TPMS is not a substitute for proper tire
maintenance, and it is the driver’s responsibility
to maintain correct tire pressure using an accu -
rate tire pressure gauge, even if underinflation
has not reached the level to trigger illumination
of the TPMS Warning Light.
Seasonal temperature changes will affect tire
pressure, and the TPMS will monitor the actual
tire pressure in the tire.
Premium System
The Tire Pressure Monitoring System (TPMS) uses
wireless technology with wheel rim mounted
electronic sensors to monitor tire pressure levels.
Sensors, mounted to each wheel as part of the
valve stem, transmit tire pressure readings to the
receiver module.
NOTE:It is particularly important for you to check the tire
pressure in all of the tires on your vehicle monthly
and to maintain the proper pressure.
The TPMS consists of the following components:
Receiver module
Four Tire Pressure Monitoring System sensors
Various Tire Pressure Monitoring System
messages, which display in the instrument
cluster
Tire Pressure Monitoring System Warning Light
SERVICE TPMS WARNING
When a system fault is detected, the Tire Pressure
Monitoring System (TPMS) Warning Light will flash
on and off for 75 seconds and then remain on
solid. The system fault will also sound a chime. In
addition, the instrument cluster will display a
"SERVICE TPM SYSTEM" message for a minimum
of five seconds and then display dashes (--) in
place of the pressure value to indicate which
sensor is not being received.
CAUTION!
The TPMS has been optimized for the original
equipment tires and wheels. TPMS pressures
and warning have been established for the tire
size equipped on your vehicle. Undesirable
system operation or sensor damage may
result when using replacement equipment
that is not of the same size, type, and/or style.
The TPMS sensor is not designed for use on
aftermarket wheels and may contribute to a
poor overall system performance or sensor
damage. Customers are encouraged to use
OEM wheels to ensure proper TPMS feature
operation.
Using aftermarket tire sealants may cause the
Tire Pressure Monitoring System (TPMS)
sensor to become inoperable. After using an
aftermarket tire sealant it is recommended
that you take your vehicle to an authorized
dealer to have your sensor function checked.
After inspecting or adjusting the tire pressure
always reinstall the valve stem cap. This will
prevent moisture and dirt from entering the
valve stem, which could damage the TPMS
sensor.
6
22_RUP_OM_EN_USC_t.book Page 237
Page 240 of 384

238SAFETY
If the ignition is cycled, this sequence will repeat,
providing the system fault still exists. If the system
fault no longer exists, the TPMS Warning Light will
no longer flash, and the “SERVICE TPM SYSTEM”
message will no longer display, and a pressure
value will display in place of the dashes. A system
fault can occur due to any of the following:
Jamming due to electronic devices or driving
next to facilities emitting the same radio
frequencies as the TPMS sensors
Installing some form of aftermarket window
tinting that affects radio wave signals
Lots of snow or ice around the wheels or wheel
housings
Using tire chains on the vehicle
Using wheels/tires not equipped with TPMS
sensors
Vehicles With Compact Spare — If Equipped
1. The compact spare tire does not have a Tire Pressure Monitoring System sensor.
Therefore, the TPMS will not monitor the
pressure in the compact spare tire.
2. If you install the compact spare tire in place of a road tire that has a pressure below the
low-pressure warning limit, upon the next
ignition cycle, the TPMS Warning Light will
remain on and a chime will sound. In addition,
the graphic in the instrument cluster will still
display a different color pressure value. 3. After driving the vehicle for up to 20 minutes
above 15 mph (24 km/h), the TPMS Warning
Light will flash on and off for 75 seconds and
then remain on solid. In addition, the
instrument cluster will display a “SERVICE TPM
SYSTEM” message for five seconds and then
display dashes (--) in place of the pressure
value.
4. For each subsequent ignition cycle, a chime will sound, the TPMS Warning Light will flash
on and off for 75 seconds and then remain on
solid, and the instrument cluster will display a
“SERVICE TPM SYSTEM” message for five
seconds and then display dashes (- -) in place
of the pressure value.
5. Once you repair or replace the original road tire and reinstall it on the vehicle in place of the
compact spare, the TPMS will update automat -
ically. In addition, the TPMS Warning Light will
turn off and the graphic in the instrument
cluster will display a new pressure value
instead of dashes (--), as long as no tire
pressure is below the low-pressure warning
limit in any of the four active road tires. The
vehicle may need to be driven for up to
20 minutes above 15 mph (24 km/h) in order
for the TPMS to receive this information.
TIRE PRESSURE MONITORING SYSTEM LOW
PRESSURE WARNINGS
The TPMS Warning Light will illuminate in
the instrument cluster and a chime will
sound when tire pressure is low in one or
more of the four active road tires. In
addition, the instrument cluster will display an
"Inflate to XX" message and a graphic showing the
pressure values of each tire with the low tire
pressure values in a different color.
Tire Pressure Monitoring System
Should this occur, you should stop as soon as
possible and inflate the tires with low pressure
(those in a different color in the instrument cluster
graphic) to the vehicle’s recommended cold
placard pressure value as shown in the
"Inflate to XX" message.
22_RUP_OM_EN_USC_t.book Page 238