2022 CHRYSLER PACIFICA Console
[x] Cancel search: ConsolePage 30 of 384

28GETTING TO KNOW YOUR VEHICLE
POWER SLIDING SIDE DOOR —
I
F EQUIPPED
The power sliding door may be power opened or
closed in several ways:
Key fob
Inside or outside handles
Buttons located:
In the overhead console
Just inside the sliding door
On the outside handle
Push the button on the key fob twice
within five seconds to open, close, or
reverse a power sliding door.
The key fob and the overhead console button will
operate the door when the door is locked. All other
ways require the sliding door to be unlocked. If the
vehicle is equipped with Passive Entry, pushing the
button on the outside handle or Hands-Free
feature (if equipped) will unlock and open the
sliding door, with a valid Passive Entry key fob
within 5 ft (1.5 m) of the door handle.
Overhead Console Power Switches
There is a power sliding side door switch located on
the B-pillar trim panel on the driver’s and
passenger’s side, just in front of the power sliding
door for the rear seat passengers.
To operate the sliding door manually with the
handles or to avoid unintentional operation of the
power sliding doors from the rear seats, push the
power sliding door power off button, located in the
overhead console, to remove power to the handles
and buttons just inside the sliding doors. The power off LED, in the overhead console, will be
lit when the handles are manual. When the LED is
lit, pushing the power sliding door power off button
will return the handles to power operation.
NOTE:
If anything obstructs the power sliding side door
while it is closing or opening, the door will auto
-
matically reverse to the closed or open position
and an audible tone will sound, provided it
meets sufficient resistance. The turn signals will
flash with sliding door movements.
If the power sliding door stops in the middle due
to obstacles, it will power open on the next
command.
Power Sliding Side Door Switch (Left Side Shown)
1 — Liftgate
2 — Left Sliding Door
3 — Sliding Door Power Off
4 — Right Sliding Door
22_RUP_OM_EN_USC_t.book Page 28
Page 32 of 384

30GETTING TO KNOW YOUR VEHICLE
CHILD PROTECTION DOOR LOCK
S
YSTEM — REAR DOORS
To provide a safer environment for small children
riding in the rear seats, the sliding doors are
equipped with a Child Protection Door Lock
system.
To Engage The Child Protection Door Lock
1. Open the sliding side door.
2. On the rear of the sliding door, slide the
Child Protection Door Lock control inward
(toward the vehicle) to engage the Child
Protection Door Lock.
Child Protection Door Locks
3. Repeat Steps 1 and 2 on the opposite sliding
door.NOTE:
After engaging the Child Protection Door Lock,
always test the inside door handle with the
sliding door closed to make certain the Child
Protection Door Lock is in the locked position.
After disengaging the Child Protection Door
Lock, always test the inside door handle with the
sliding door closed to make certain the Child
Protection Door Lock is in the unlocked position.
The inside door handle will not open the sliding
door when the Child Protection Door Lock is
engaged.
The power sliding door will operate from the
switch located just inside the sliding door,
regardless of the Child Protection Door Lock
lever position.
To avoid unintentional operation of the power
sliding door from the rear seats, push the
Sliding Door Power Off button, located in the
overhead console. When the overhead console
power OFF LED is illuminated, the sliding door
may not be power opened or closed by pushing
the buttons just inside the sliding doors or
pulling on the handles. To Disengage The Child Protection Door Lock
1. Open the sliding side door.
2. Slide the Child Protection Door Lock control
outward (away from the vehicle) to disengage
the Child Protection Door Lock.
3. Repeat Steps 1 and 2 on the opposite sliding door.
NOTE:After disengaging (or engaging) the Child
Protection Door Lock, always test the inside door
handle with the sliding door closed to make certain
the Child Protection Door Lock is in the desired
position. The inside door handle will open the
sliding door when the Child Protection Door Lock is
disengaged.
WARNING!
Avoid trapping anyone in the vehicle in a
collision. Remember that the sliding doors
cannot be opened from the inside door handle
when the Child Protection Door Locks are
engaged.
22_RUP_OM_EN_USC_t.book Page 30
Page 60 of 384

58GETTING TO KNOW YOUR VEHICLE
ILLUMINATED VANITY MIRRORS —
I
F EQUIPPED
To access an illuminated vanity mirror, flip down
one of the visors and lift the cover.
Illuminated Mirror
OUTSIDE MIRRORS
The outside mirror(s) can be adjusted to the center
of the adjacent lane of traffic to achieve the
optimal view.
DRIVER'S OUTSIDE AUTOMATIC
D
IMMING MIRROR — IF EQUIPPED
The driver’s outside mirror will automatically adjust
for glare from vehicles behind you. This feature is
controlled by the inside automatic dimming mirror
and will automatically adjust for headlight glare
when the inside mirror adjusts.
CONVERSATION MIRROR
Located in the overhead console there is a
conversation mirror to view all the passengers in
the vehicle. Push the panel to release the drop
down mirror. Raise the mirror and push to latch it
back in the stowed position.
Conversation Mirror
WARNING!
Vehicles and other objects seen in an outside
convex mirror will look smaller and farther away
than they really are. Relying too much on side
convex mirrors could cause you to collide with
another vehicle or other object. Use your inside
mirror when judging the size or distance of a
vehicle seen in a side convex mirror.
22_RUP_OM_EN_USC_t.book Page 58
Page 63 of 384

GETTING TO KNOW YOUR VEHICLE61
UNIVERSAL GARAGE DOOR OPENER
(HOMELINK®)
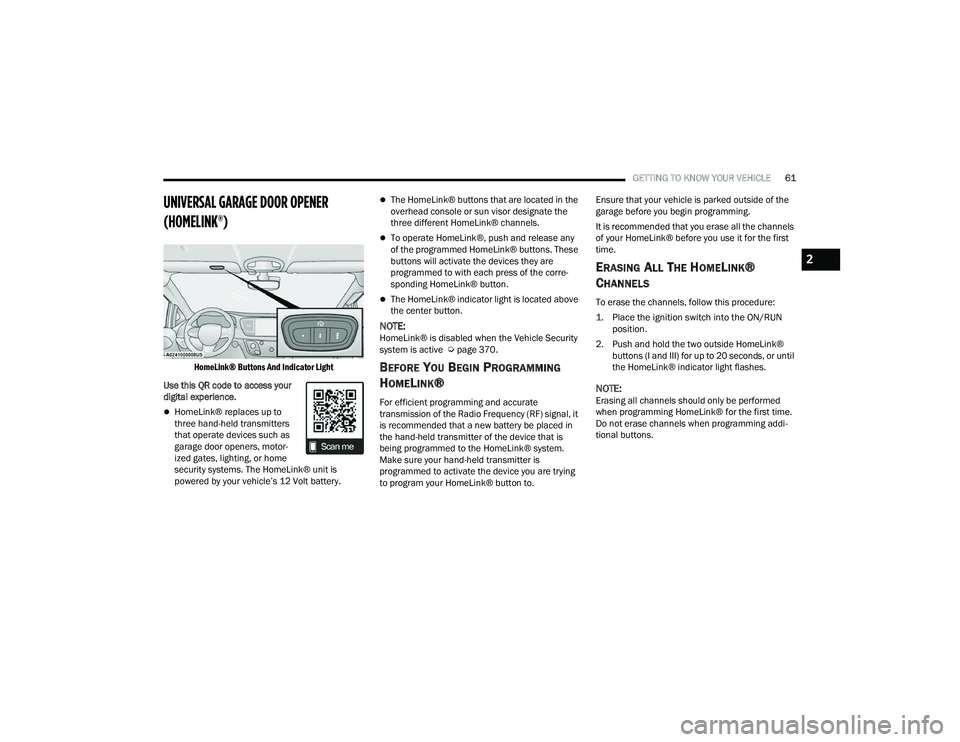
HomeLink® Buttons And Indicator Light
Use this QR code to access your
digital experience.
HomeLink® replaces up to
three hand-held transmitters
that operate devices such as
garage door openers, motor -
ized gates, lighting, or home
security systems. The HomeLink® unit is
powered by your vehicle’s 12 Volt battery.
The HomeLink® buttons that are located in the
overhead console or sun visor designate the
three different HomeLink® channels.
To operate HomeLink®, push and release any
of the programmed HomeLink® buttons. These
buttons will activate the devices they are
programmed to with each press of the corre -
sponding HomeLink® button.
The HomeLink® indicator light is located above
the center button.
NOTE:HomeLink® is disabled when the Vehicle Security
system is active Ú page 370.
BEFORE YOU BEGIN PROGRAMMING
H
OMELINK®
For efficient programming and accurate
transmission of the Radio Frequency (RF) signal, it
is recommended that a new battery be placed in
the hand-held transmitter of the device that is
being programmed to the HomeLink® system.
Make sure your hand-held transmitter is
programmed to activate the device you are trying
to program your HomeLink® button to. Ensure that your vehicle is parked outside of the
garage before you begin programming.
It is recommended that you erase all the channels
of your HomeLink® before you use it for the first
time.
ERASING ALL THE HOMELINK®
C
HANNELS
To erase the channels, follow this procedure:
1. Place the ignition switch into the ON/RUN
position.
2. Push and hold the two outside HomeLink® buttons (I and III) for up to 20 seconds, or until
the HomeLink® indicator light flashes.
NOTE:Erasing all channels should only be performed
when programming HomeLink® for the first time.
Do not erase channels when programming addi -
tional buttons.
2
22_RUP_OM_EN_USC_t.book Page 61
Page 86 of 384

84GETTING TO KNOW YOUR VEHICLE
INTERIOR STORAGE AND EQUIPMENT
STORAGE
Glove Compartment
The glove compartment is located on the
passenger side of the instrument panel.
To open the glove compartment, pull the release
handle.
Release Handle
Front Door Storage
Both interior front door panels have multiple
pockets for storage.
Overhead Sunglass Storage
At the front of the overhead console, a
compartment is provided for the storage of one
pair of sunglasses.
From the closed position, push the indentation to
open the compartment.
Overhead Sunglass Door Latch
The door will slowly rotate to the full open position.
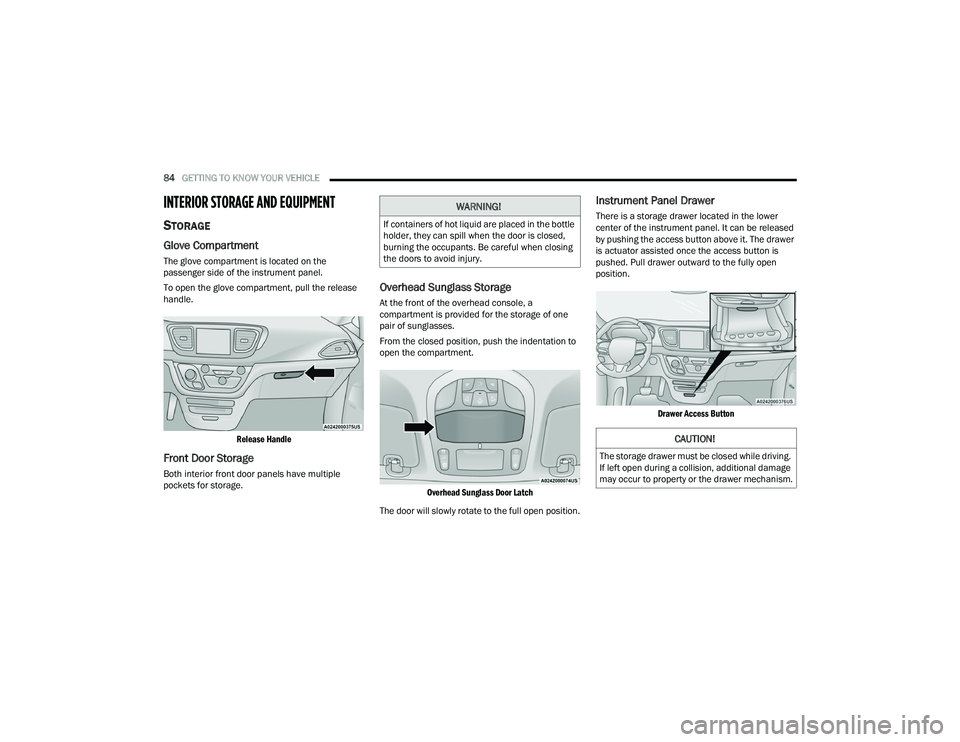
Instrument Panel Drawer
There is a storage drawer located in the lower
center of the instrument panel. It can be released
by pushing the access button above it. The drawer
is actuator assisted once the access button is
pushed. Pull drawer outward to the fully open
position.
Drawer Access Button
WARNING!
If containers of hot liquid are placed in the bottle
holder, they can spill when the door is closed,
burning the occupants. Be careful when closing
the doors to avoid injury.
CAUTION!
The storage drawer must be closed while driving.
If left open during a collision, additional damage
may occur to property or the drawer mechanism.
22_RUP_OM_EN_USC_t.book Page 84
Page 90 of 384

88GETTING TO KNOW YOUR VEHICLE
There are multiple USB “Charge Only” ports in this
vehicle.
In the center console
On the instrument panel
On the back of the front row seats in the Ucon -
nect Theater Media Hubs (if equipped)
On the back of the front row seats
Above the rear cup holder in the third row of
seats
Charge Only USB In The Center Console
NOTE:The USB outlet in the bottom of the instrument
panel can be switched from ignition only to
constant battery powered all the time. See an
authorized dealer for details.
Rear Seat USB Charging Port Without Uconnect Theater
Rear Seat USB Media Hub With Uconnect Theater 3rd Row USB Charging Port
NOTE:The USB “Charge Only” ports will recharge battery
operated USB devices when connected.
Different scenarios are listed below when a
non-phone device is plugged into the smaller and
larger USB ports, and when a phone device is
plugged into the smaller and larger USB ports:
“A new device is now connected. Previous
connection was lost”.
“(Phone Name) now connected. Previous
connection was lost”.
“Another device is in use through the same USB
port. Please disconnect the first device to use
the second device”.1 — Headphone Jack (Headphone Output Only)
2 — HDMI Port
3 — USB Port (Charge Only)
22_RUP_OM_EN_USC_t.book Page 88
Page 91 of 384

GETTING TO KNOW YOUR VEHICLE89
Plugging in a phone or another USB device may
cause the connection to a previous device to be
lost.
NOTE:Charge unsupported devices with the Charge Only
USB ports. If an unsupported device is plugged into
a Media USB port, a message will display on the
touchscreen that the device is not supported by
the system.
POWER OUTLETS
Your vehicle is equipped with 12 Volt (15 Amp)
power outlets, and 5 Volt (2.5 Amp) USB ports, that
can be used to power cellular phones, small
electronics and other low powered electrical
accessories. The power outlets can be labeled with
either a “key” or a “battery” symbol to indicate how
the outlet is powered. Power outlets labeled with a
key symbol are powered when the ignition is in the
ACC or ON/RUN position, while the outlets labeled
with a battery symbol are connected directly to the
battery and powered at all times.
NOTE:All accessories connected to the battery powered
outlets should be removed or turned off when the
vehicle is not in use to protect the battery against
discharge. Depending on the type of center console your
vehicle is equipped with, there is a front power
outlet located either on the center stack, bottom of
the instrument panel, or inside the center console.
12 Volt Front Power Outlet (On Center Stack) - If Equipped
12 Volt Front Power Outlet (In Floor Tray) - If Equipped
12 Volt Front Power Outlet (In Center Console)
CAUTION!
Power outlets are designed for accessory plugs
only. Do not insert any other object in the power
outlets as this will damage the outlet and blow
the fuse. Improper use of the power outlet can
cause damage not covered by your New Vehicle
Limited Warranty.
2
22_RUP_OM_EN_USC_t.book Page 89
Page 93 of 384

GETTING TO KNOW YOUR VEHICLE91
POWER INVERTER — IF EQUIPPED
There is a 115 Volt, 150 Watt Power Inverter outlet
located on the right side of the vehicle, before the
third row of seats to convert DC current to AC
current. The Power Inverter can power cellular
phones, electronics and other low power devices
requiring up to 150 Watts. Certain video game
consoles will exceed this power limit, as will most
power tools.
Power Inverter
The Power Inverter turns on when the device is
plugged in, and the ignition is in ON/RUN position.
It turns off when the device is unplugged or the
ignition is no longer in ON/RUN position.
The Power Inverter is designed with built-in overload
protection. If the power rating of
150 Watts is exceeded, the Power Inverter shuts
down. Once the electrical device has been removed
from the Power Inverter, it resets. To avoid
overloading the circuit, check the power ratings on
electrical devices prior to using the Power Inverter.
WIRELESS CHARGING PAD —
I
F EQUIPPED
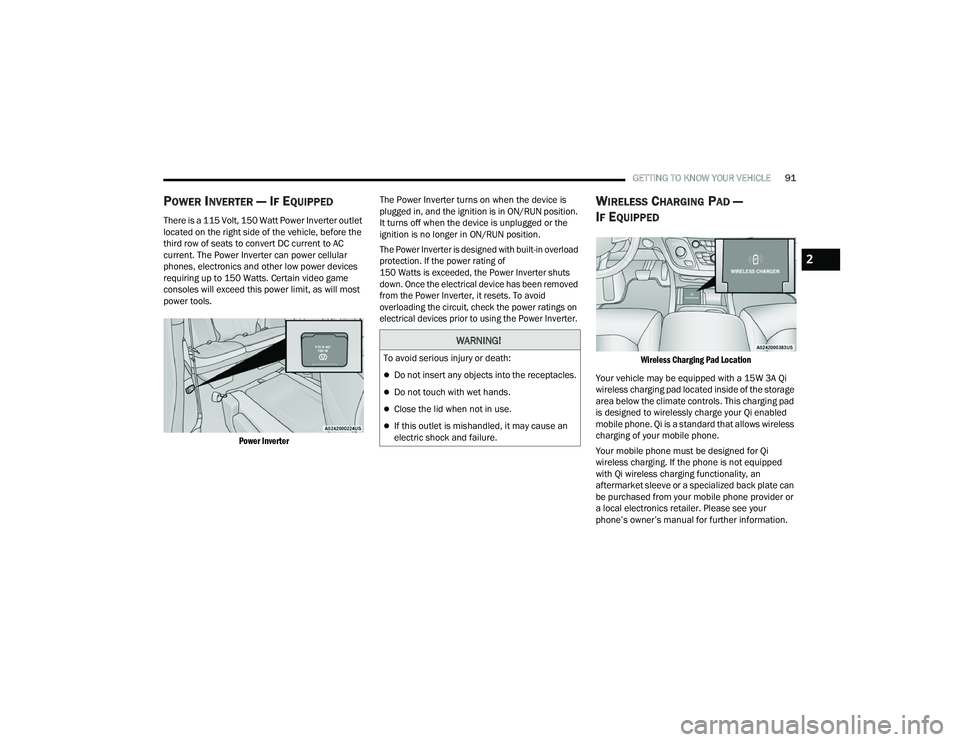
Wireless Charging Pad Location
Your vehicle may be equipped with a 15W 3A Qi
wireless charging pad located inside of the storage
area below the climate controls. This charging pad
is designed to wirelessly charge your Qi enabled
mobile phone. Qi is a standard that allows wireless
charging of your mobile phone.
Your mobile phone must be designed for Qi
wireless charging. If the phone is not equipped
with Qi wireless charging functionality, an
aftermarket sleeve or a specialized back plate can
be purchased from your mobile phone provider or
a local electronics retailer. Please see your
phone’s owner’s manual for further information.
WARNING!
To avoid serious injury or death:
Do not insert any objects into the receptacles.
Do not touch with wet hands.
Close the lid when not in use.
If this outlet is mishandled, it may cause an
electric shock and failure.
2
22_RUP_OM_EN_USC_t.book Page 91