2022 CHRYSLER PACIFICA HYBRID reset
[x] Cancel search: resetPage 148 of 384
146STARTING AND OPERATING
CRUISE CONTROL SYSTEMS — IF EQUIPPED
Your vehicle may be equipped with the Cruise
Control system, or the Adaptive Cruise Control
(ACC) system:
Cruise Control will keep your vehicle at a
constant preset speed.
Adaptive Cruise Control (ACC) will adjust the
vehicle speed up to the preset speed to main -
tain a distance with the vehicle ahead.
NOTE:
In vehicles equipped with ACC, if ACC is not
enabled, Fixed Speed Cruise Control will not
detect vehicles directly ahead of you. Always be
aware of the feature selected.
Only one Cruise Control feature can operate at a
time. For example, if Fixed Speed Cruise Control
is enabled, Adaptive Cruise Control will be
unavailable, and vice versa.
CRUISE CONTROL
When engaged, the Cruise Control takes over
accelerator operations at speeds greater than
25 mph (40 km/h).
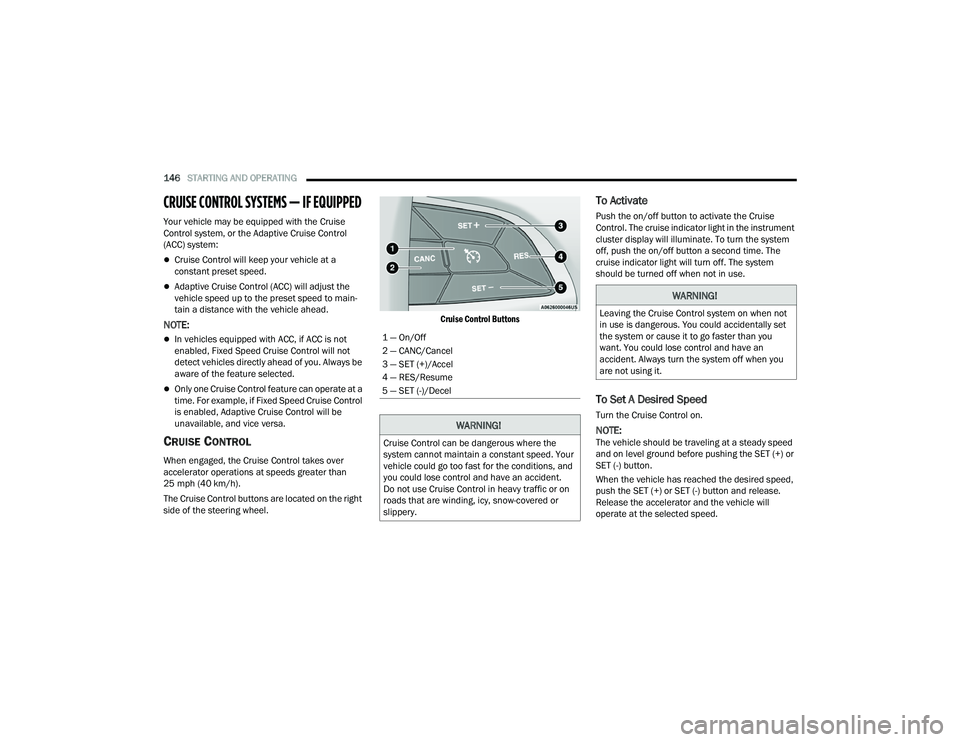
The Cruise Control buttons are located on the right
side of the steering wheel.
Cruise Control Buttons
To Activate
Push the on/off button to activate the Cruise
Control. The cruise indicator light in the instrument
cluster display will illuminate. To turn the system
off, push the on/off button a second time. The
cruise indicator light will turn off. The system
should be turned off when not in use.
To Set A Desired Speed
Turn the Cruise Control on.
NOTE:The vehicle should be traveling at a steady speed
and on level ground before pushing the SET (+) or
SET (-) button.
When the vehicle has reached the desired speed,
push the SET (+) or SET (-) button and release.
Release the accelerator and the vehicle will
operate at the selected speed.
1 — On/Off
2 — CANC/Cancel
3 — SET (+)/Accel
4 — RES/Resume
5 — SET (-)/Decel
WARNING!
Cruise Control can be dangerous where the
system cannot maintain a constant speed. Your
vehicle could go too fast for the conditions, and
you could lose control and have an accident.
Do not use Cruise Control in heavy traffic or on
roads that are winding, icy, snow-covered or
slippery.
WARNING!
Leaving the Cruise Control system on when not
in use is dangerous. You could accidentally set
the system or cause it to go faster than you
want. You could lose control and have an
accident. Always turn the system off when you
are not using it.
22_RUP_OM_EN_USC_t.book Page 146
Page 150 of 384

148STARTING AND OPERATING
(Continued)
ACC will allow you to keep Cruise Control engaged
in light to moderate traffic conditions without the
constant need to reset your Cruise Control.
ACC utilizes a radar sensor and a forward facing
camera designed to detect a vehicle directly ahead
of you.
NOTE:
If the ACC sensor detects a vehicle ahead, ACC
will apply limited braking or accelerate (not to
exceed the original set speed) automatically to
maintain a preset following distance, while
matching the speed of the vehicle ahead.
Any chassis/suspension or tire size modifica
-
tions to the vehicle will affect the performance
of the Adaptive Cruise Control and Forward Colli -
sion Warning system.
Fixed Speed Cruise Control will not detect vehi -
cles directly ahead of you. Always be aware of
the feature selected Ú page 370.
WARNING!
Adaptive Cruise Control (ACC) is a conve -
nience system. It is not a substitute for active
driver involvement. It is always the driver’s
responsibility to be attentive of road, traffic,
and weather conditions, vehicle speed,
distance to the vehicle ahead and, most
importantly, brake operation to ensure safe
operation of the vehicle under all road condi -
tions. Your complete attention is always
required while driving to maintain safe control
of your vehicle. Failure to follow these warn -
ings can result in a collision and death or
serious personal injury.
The ACC system:
Does not react to pedestrians, oncoming
vehicles, and stationary objects (e.g., a
stopped vehicle in a traffic jam or a
disabled vehicle).
Cannot take street, traffic, and weather
conditions into account, and may be
limited upon adverse sight distance
conditions.
Does not always fully recognize complex
driving conditions, which can result in
wrong or missing distance warnings.
Will bring the vehicle to a complete stop
while following a target vehicle and hold
the vehicle for approximately three
minutes in the stop position. If the target
vehicle does not start moving within three
minutes the parking brake will be acti -
vated, and the ACC system will be
canceled.
You should switch off the ACC system:
When driving in fog, heavy rain, heavy snow,
sleet, heavy traffic, and complex driving situa -
tions (i.e., in highway construction zones).
When entering a turn lane or highway
off-ramp; when driving on roads that are
winding, icy, snow-covered, slippery, or have
steep uphill or downhill slopes.
When towing a trailer up or down steep slopes.
When circumstances do not allow safe driving
at a constant speed.
WARNING!
22_RUP_OM_EN_USC_t.book Page 148
Page 190 of 384
188MULTIMEDIA
UCONNECT SETTINGS
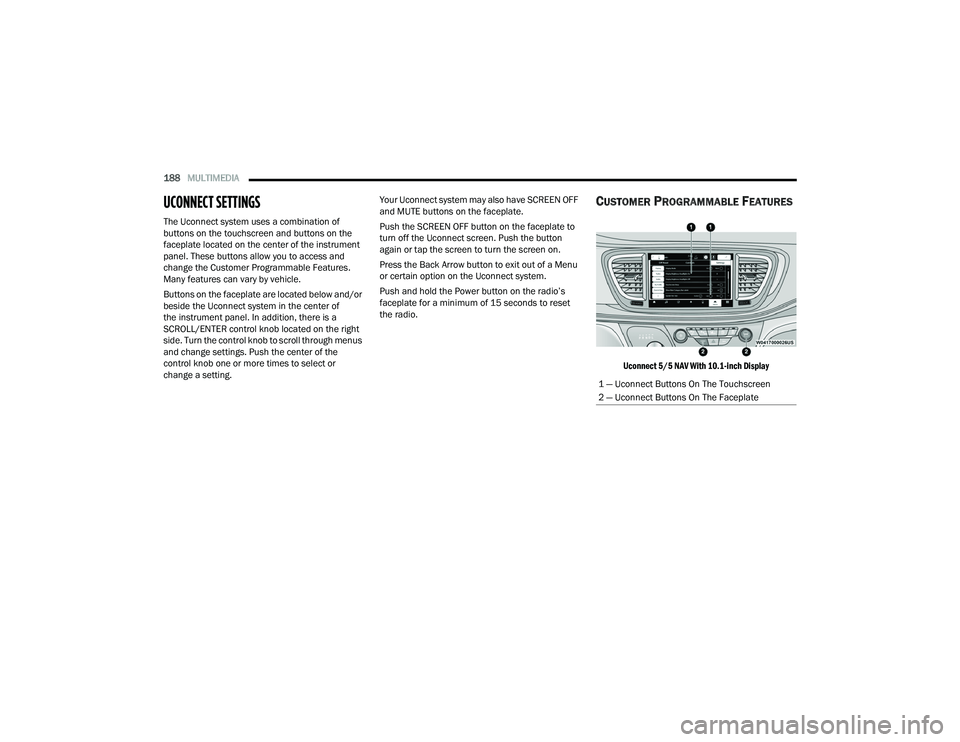
The Uconnect system uses a combination of
buttons on the touchscreen and buttons on the
faceplate located on the center of the instrument
panel. These buttons allow you to access and
change the Customer Programmable Features.
Many features can vary by vehicle.
Buttons on the faceplate are located below and/or
beside the Uconnect system in the center of
the instrument panel. In addition, there is a
SCROLL/ENTER control knob located on the right
side. Turn the control knob to scroll through menus
and change settings. Push the center of the
control knob one or more times to select or
change a setting. Your Uconnect system may also have SCREEN OFF
and MUTE buttons on the faceplate.
Push the SCREEN OFF button on the faceplate to
turn off the Uconnect screen. Push the button
again or tap the screen to turn the screen on.
Press the Back Arrow button to exit out of a Menu
or certain option on the Uconnect system.
Push and hold the Power button on the radio’s
faceplate for a minimum of 15 seconds to reset
the radio.
CUSTOMER PROGRAMMABLE FEATURES
Uconnect 5/5 NAV With 10.1-inch Display
1 — Uconnect Buttons On The Touchscreen
2 — Uconnect Buttons On The Faceplate
22_RUP_OM_EN_USC_t.book Page 188
Page 191 of 384
MULTIMEDIA189
For the Uconnect 5 With 7-inch Display and the Uconnect 5/5 NAV With 10.1-inch Display
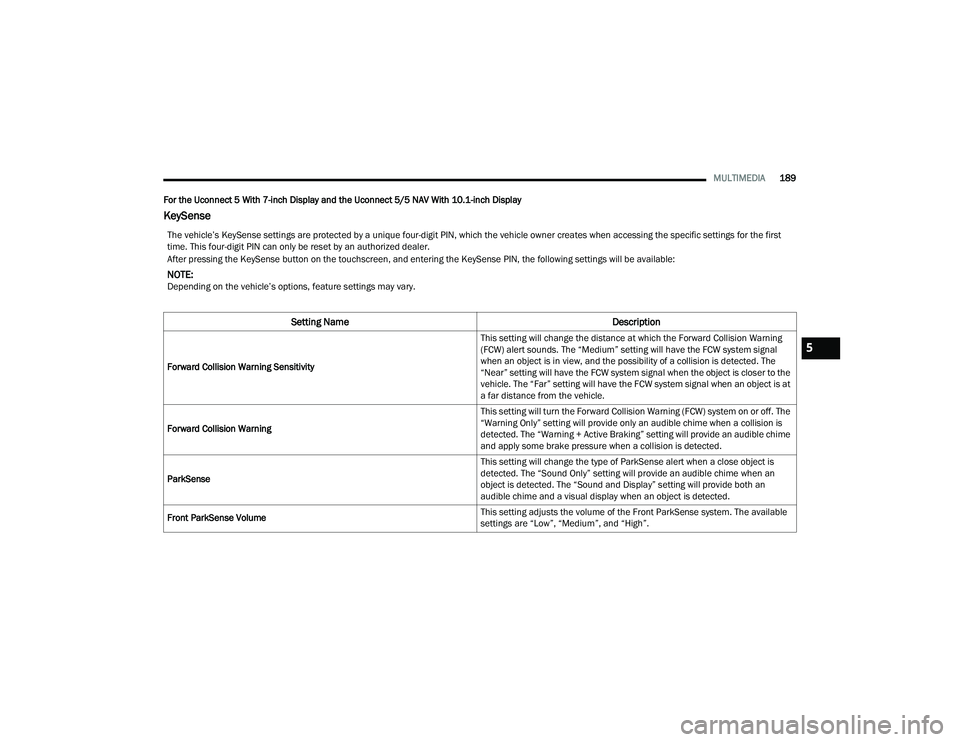
KeySense
The vehicle’s KeySense settings are protected by a unique four-digit PIN, which the vehicle owner creates when accessing the specific settings for the first
time. This four-digit PIN can only be reset by an authorized dealer.
After pressing the KeySense button on the touchscreen, and entering the KeySense PIN, the following settings will be available:
NOTE:Depending on the vehicle’s options, feature settings may vary.
Setting Name Description
Forward Collision Warning Sensitivity This setting will change the distance at which the Forward Collision Warning
(FCW) alert sounds. The “Medium” setting will have the FCW system signal
when an object is in view, and the possibility of a collision is detected. The
“Near” setting will have the FCW system signal when the object is closer to the
vehicle. The “Far” setting will have the FCW system signal when an object is at
a far distance from the vehicle.
Forward Collision Warning This setting will turn the Forward Collision Warning (FCW) system on or off. The
“Warning Only” setting will provide only an audible chime when a collision is
detected. The “Warning + Active Braking” setting will provide an audible chime
and apply some brake pressure when a collision is detected.
ParkSense This setting will change the type of ParkSense alert when a close object is
detected. The “Sound Only” setting will provide an audible chime when an
object is detected. The “Sound and Display” setting will provide both an
audible chime and a visual display when an object is detected.
Front ParkSense Volume This setting adjusts the volume of the Front ParkSense system. The available
settings are “Low”, “Medium”, and “High”.
5
22_RUP_OM_EN_USC_t.book Page 189
Page 195 of 384
MULTIMEDIA193
Missed Calls Message This setting will allow you to have pop-up notifications for missed calls. This
setting options are “On” and “Off”.
Navigation Popups This setting will allow you to have pop-up notifications for Navigation. This
setting options are “On” and “Off”.
Navigation Settings This setting will allow you to customize the settings within Navigation Mode.
Auto-On Driver Heated Seat & Steering Wheel This setting will activate the vehicle’s comfort systems and heated seats or
heated steering wheel when the vehicle is remote started or ignition is
started. The “Off” setting will not activate the comfort systems. The “Remote
Start” setting will only activate the comfort systems when using Remote Start.
The “All Start” setting will activate the comfort systems whenever the vehicle
is started.
Audio Settings This setting will take you to the audio settings for the vehicle profiles.
Reset App Drawer to Default Order This setting will reset the app drawer to its factory default layout.
Restore Settings to Default This setting will return all the previously changed settings to their
factory default.
More Profile Options This setting will give access to more profile options.
Setting NameDescription
5
22_RUP_OM_EN_USC_t.book Page 193
Page 206 of 384
204MULTIMEDIA
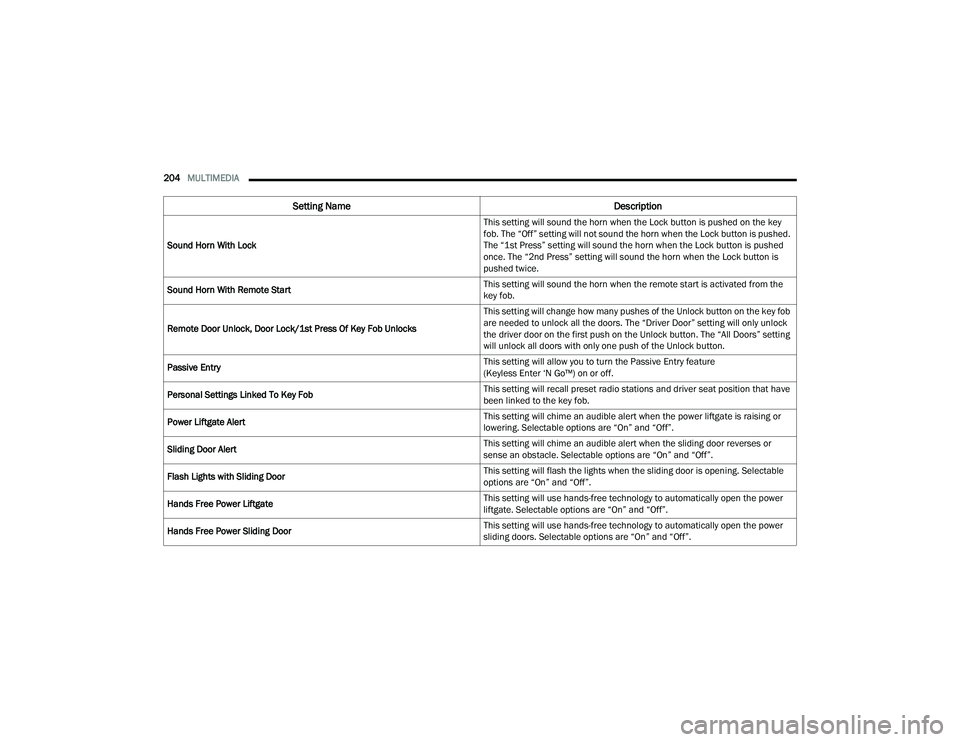
Sound Horn With Lock This setting will sound the horn when the Lock button is pushed on the key
fob. The “Off” setting will not sound the horn when the Lock button is pushed.
The “1st Press” setting will sound the horn when the Lock button is pushed
once. The “2nd Press” setting will sound the horn when the Lock button is
pushed twice.
Sound Horn With Remote Start This setting will sound the horn when the remote start is activated from the
key fob.
Remote Door Unlock, Door Lock/1st Press Of Key Fob Unlocks This setting will change how many pushes of the Unlock button on the key fob
are needed to unlock all the doors. The “Driver Door” setting will only unlock
the driver door on the first push on the Unlock button. The “All Doors” setting
will unlock all doors with only one push of the Unlock button.
Passive Entry This setting will allow you to turn the Passive Entry feature
(Keyless Enter ‘N Go™) on or off.
Personal Settings Linked To Key Fob This setting will recall preset radio stations and driver seat position that have
been linked to the key fob.
Power Liftgate Alert This setting will chime an audible alert when the power liftgate is raising or
lowering. Selectable options are “On” and “Off”.
Sliding Door Alert This setting will chime an audible alert when the sliding door reverses or
sense an obstacle. Selectable options are “On” and “Off”.
Flash Lights with Sliding Door This setting will flash the lights when the sliding door is opening. Selectable
options are “On” and “Off”.
Hands Free Power Liftgate This setting will use hands-free technology to automatically open the power
liftgate. Selectable options are “On” and “Off”.
Hands Free Power Sliding Door This setting will use hands-free technology to automatically open the power
sliding doors. Selectable options are “On” and “Off”.
Setting Name
Description
22_RUP_OM_EN_USC_t.book Page 204
Page 214 of 384

212MULTIMEDIA
Reset
When the Reset button is pressed on the touchscreen, the system displays the options related to resetting the Uconnect system back to its default settings.
These settings can clear personal data and reset selected settings from other menus.
NOTE:Depending on the vehicle’s options, feature settings may vary.
Setting Name Description
Notifications Sounds Turn this setting on or off to hear notification sounds throughout your system.
Restart Radio This setting will restart the radio.
Reset App Drawer to Default Order This setting will reset the app drawer to its factory default layout.
Restore Settings to Default This setting will return all the previously changed settings to their
factory default.
Clear Personal Data This setting will display a pop-up that gives you the option to clear all personal
data from the system, including Bluetooth® devices and presets.
Reset Wi-Fi Password for Projection This setting will reset your Wi-Fi password for projection.
Factory Reset This setting will factory reset the radio. It may cause the radio to restart
multiple times and the backup camera, radio, SOS, and several driving
assistance features will not be available. Once the system resets, you will
need to turn the vehicle off then back on to complete the process.
22_RUP_OM_EN_USC_t.book Page 212
Page 232 of 384

230SAFETY
The Blind Spot Monitoring (BSM) system may
experience dropouts (blinking on and off) of the
side mirror warning indicator lamps when a
motorcycle or any small object remains at the
side of the vehicle for extended periods of time
(more than a couple of seconds).
The area on the rear fascia/bumper where the
radar sensors are located must remain free of
snow, ice, and dirt/road contamination so that the
BSM system can function properly. Do not block
the area of the rear fascia/bumper where the
radar sensors are located with foreign objects
(bumper stickers, bicycle racks, etc.).
Sensor Location
If the system detects degraded performance due
to contamination or foreign objects, a message will
warn you of a blocked sensor and the warning
indicators in side view mirrors will be on. The
warning indicators will remain illuminated until
blockage clearing conditions are met. First clear
the fascia/bumper area around the sensors of the
blockage. After removing the blockage, cycle the
ignition from on to off and then back on again to
reset the system.
If the blockage message is still present after
cycling the ignition and driving in traffic, check
again for a blockage.
The BSM system notifies the driver of objects in the
detection zones by illuminating the BSM Warning
Light located in the outside mirrors in addition to
sounding an audible (chime) alert and reducing the
radio volume Ú
page 232.
Warning Light Location
The BSM system monitors the detection zone from
three different entry points (side, rear, front) while
driving to see if an alert is necessary. The BSM
system will issue an alert during these types of
zone entries.
Entering From The Side
Vehicles that move into your adjacent lanes from
either side of the vehicle.
Side Monitoring
22_RUP_OM_EN_USC_t.book Page 230