2022 CHRYSLER PACIFICA HYBRID climate control
[x] Cancel search: climate controlPage 84 of 384
82GETTING TO KNOW YOUR VEHICLE
REAR BLOWER CONTROL
The rear blower control can be manually
set to off, or any fixed blower speed by
pushing the blower control buttons. This
allows the rear seat occupants to control
the volume of air circulated in the rear of the
vehicle. The larger of the two icons increases
blower speed, whereas the smaller of the two icons
decreases the blower speed.
REAR MODE CONTROL
Push this button on the Rear Climate
Controls to change the air distribution
mode for the rear passengers.
PANEL MODE
Air comes from the outlets in the
headliner. Each of these outlets can be
individually adjusted to direct the flow of
air. Moving the air vanes of the outlets to
one side will shut off the airflow.
BI-LEVEL MODE
Air comes from both the headliner outlets
and the floor outlets.
NOTE:In many temperature positions, the Bi-Level mode
is designed to provide cooler air out of the head -
liner outlets and warmer air from the floor outlets.
FLOOR MODE
Air comes from the floor outlets.
REAR CLIMATE CONTROL/BLOWER OFF
To manually set the rear blower controls
to off, press the Rear Climate Control/
Blower Off button.
AUTOMATIC TEMPERATURE CONTROL
(ATC) — I
F EQUIPPED
Automatic Operation
1. Push the AUTO button on the faceplate, or the
AUTO button on the touchscreen on the
Automatic Temperature Control (ATC) Panel.
2. Next, adjust the temperature you would like the system to maintain by adjusting the driver
and passenger temperature control buttons.
Once the desired temperature is displayed, the
system will achieve and automatically
maintain that comfort level. 3. When the system is set up for your comfort
level, it is not necessary to change the
settings. You will experience the greatest
efficiency by simply allowing the system to
function automatically.
NOTE:
It is not necessary to move the temperature
settings for cold or hot vehicles. The system
automatically adjusts the temperature, mode,
and blower speed to provide comfort as quickly
as possible.
The temperature can be displayed in U.S. or
Metric units by selecting the U.S./Metric
customer-programmable feature within the
Uconnect system Ú page 188.
To provide you with maximum comfort in the
Automatic mode during cold start-ups, the blower
fan will remain on low until the engine warms up.
The blower will increase in speed and transition
into Auto mode.
Manual Operation Override
This system offers a full complement of manual
override features. The AUTO symbol in the front
Automatic Temperature Control (ATC) display will
be turned off when the system is being used in the
manual mode.
22_RUP_OM_EN_USC_t.book Page 82
Page 85 of 384

GETTING TO KNOW YOUR VEHICLE83
CLIMATE VOICE COMMANDS
Adjust vehicle temperatures hands-free and keep
everyone comfortable while you keep moving
ahead. (If vehicle is equipped with climate control.)
Push the VR button on the steering wheel. After the
beep, say one of the following commands:
“Set driver temperature to 70 degrees ”
“Set passenger temperature to 70 degrees ”
Did you know : Voice Command for Climate may only
be used to adjust the interior temperature of your
vehicle. Voice Command will not work to adjust the
heated seats or steering wheel if equipped.
OPERATING TIPS
Refer to the chart at the end of this section for
suggested control settings for various weather
conditions.
Summer Operation
The engine cooling system must be protected with
a high-quality antifreeze coolant to provide proper
corrosion protection and to protect against engine
overheating. OAT coolant (conforming to
MS.90032) is recommended.
Winter Operation
To ensure the best possible heater and defroster
performance, make sure the engine cooling
system is functioning properly and the proper amount, type, and concentration of coolant is
used. Use of the Air Recirculation mode during
Winter months is not recommended, because it
may cause window fogging.
Vacation/Storage
For information on maintaining the Climate Control
system when the vehicle is being stored for an
extended period of time, see Ú
page 357.
Window Fogging
Vehicle windows tend to fog on the inside in mild,
rainy, and/or humid weather. To clear the
windows, select Defrost or Mix mode and increase
the front blower speed. Do not use the
Recirculation mode without A/C for long periods,
as fogging may occur.
Outside Air Intake
Make sure the air intake, located directly in front of
the windshield, is free of obstructions, such as
leaves. Leaves collected in the air intake may
reduce airflow, and if they enter the air distribution
box, they could plug the water drains. In Winter
months, make sure the air intake is clear of ice,
slush, and snow.
Cabin Air Filter
The Climate Control system filters out dust and
pollen from the air. Contact an authorized dealer to
service your cabin air filter, and to have it replaced
when needed.
Stop/Start System — If Equipped
While in an Autostop, the Climate Control system
may automatically adjust airflow to maintain cabin
comfort. Customer settings will be maintained
upon return to an engine running condition.
Operating Tips Chart
WEATHER CONTROL SETTINGS
Hot Weather
And Vehicle Interior Is Very Hot Set the mode control to
(Panel Mode), (A/C) on, and blower on high. Roll down the
windows for a minute to flush out the hot air. Adjust the controls as needed to achieve comfort.
Warm
Weather Turn (A/C) on and set the
mode control to (Panel Mode).
Cool Sunny Operate in (Bi-Level Mode).
Cool &
Humid
Conditions Set the mode control to (Floor
Mode) and turn (A/C) on to keep windows clear.
Cold
Weather Set the mode control to (Floor
Mode). If windshield fogging
starts to occur, move the control
to (Mix Mode).
2
22_RUP_OM_EN_USC_t.book Page 83
Page 93 of 384
GETTING TO KNOW YOUR VEHICLE91
POWER INVERTER — IF EQUIPPED
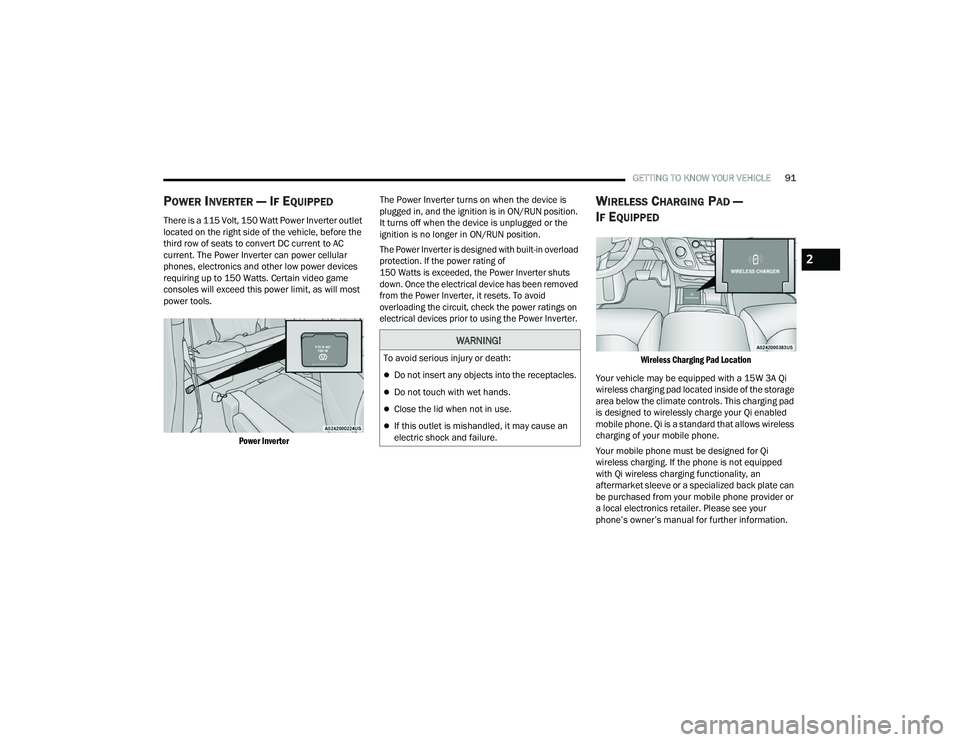
There is a 115 Volt, 150 Watt Power Inverter outlet
located on the right side of the vehicle, before the
third row of seats to convert DC current to AC
current. The Power Inverter can power cellular
phones, electronics and other low power devices
requiring up to 150 Watts. Certain video game
consoles will exceed this power limit, as will most
power tools.
Power Inverter
The Power Inverter turns on when the device is
plugged in, and the ignition is in ON/RUN position.
It turns off when the device is unplugged or the
ignition is no longer in ON/RUN position.
The Power Inverter is designed with built-in overload
protection. If the power rating of
150 Watts is exceeded, the Power Inverter shuts
down. Once the electrical device has been removed
from the Power Inverter, it resets. To avoid
overloading the circuit, check the power ratings on
electrical devices prior to using the Power Inverter.
WIRELESS CHARGING PAD —
I
F EQUIPPED
Wireless Charging Pad Location
Your vehicle may be equipped with a 15W 3A Qi
wireless charging pad located inside of the storage
area below the climate controls. This charging pad
is designed to wirelessly charge your Qi enabled
mobile phone. Qi is a standard that allows wireless
charging of your mobile phone.
Your mobile phone must be designed for Qi
wireless charging. If the phone is not equipped
with Qi wireless charging functionality, an
aftermarket sleeve or a specialized back plate can
be purchased from your mobile phone provider or
a local electronics retailer. Please see your
phone’s owner’s manual for further information.
WARNING!
To avoid serious injury or death:
Do not insert any objects into the receptacles.
Do not touch with wet hands.
Close the lid when not in use.
If this outlet is mishandled, it may cause an
electric shock and failure.
2
22_RUP_OM_EN_USC_t.book Page 91
Page 99 of 384
GETTING TO KNOW YOUR VEHICLE97
LIFTGATE
TO UNLOCK/OPEN THE LIFTGATE
The liftgate may be released in several ways:
Key fob
Liftgate Release Handle
Button on overhead console
Push the liftgate button on the key fob twice within
five seconds to release the liftgate.
The key fob and the overhead console button will
release the liftgate when the liftgate is locked. The
outside handle requires the liftgate to be unlocked.
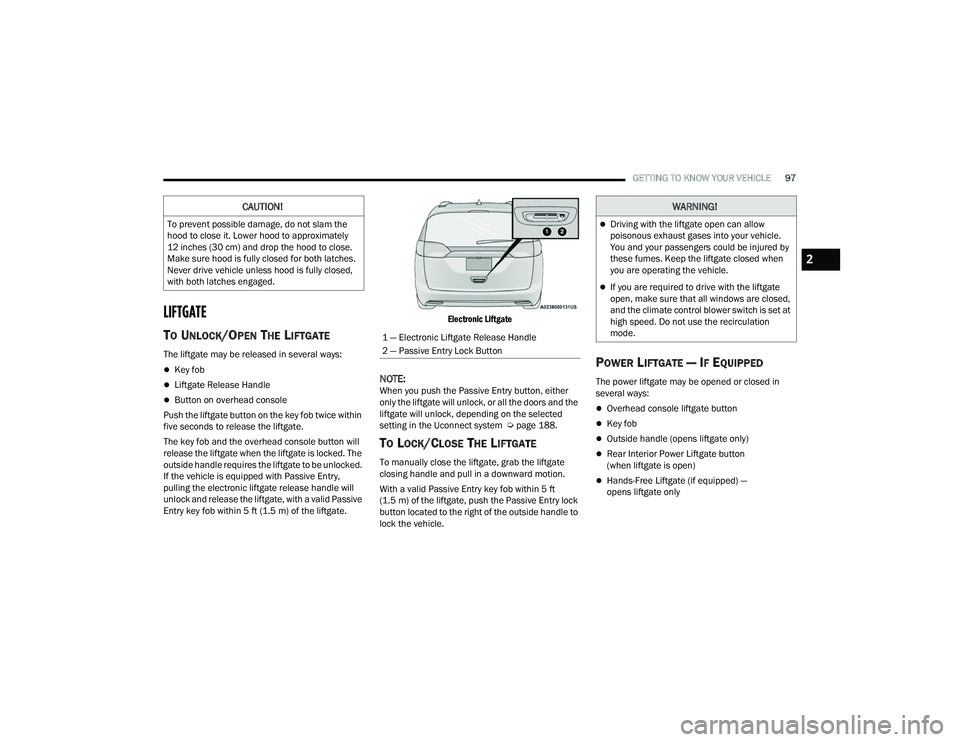
If the vehicle is equipped with Passive Entry,
pulling the electronic liftgate release handle will
unlock and release the liftgate, with a valid Passive
Entry key fob within 5 ft (1.5 m) of the liftgate.
Electronic Liftgate
NOTE:When you push the Passive Entry button, either
only the liftgate will unlock, or all the doors and the
liftgate will unlock, depending on the selected
setting in the Uconnect system Ú
page 188.
TO LOCK/CLOSE THE LIFTGATE
To manually close the liftgate, grab the liftgate
closing handle and pull in a downward motion.
With a valid Passive Entry key fob within 5 ft
(1.5 m) of the liftgate, push the Passive Entry lock
button located to the right of the outside handle to
lock the vehicle.
POWER LIFTGATE — IF EQUIPPED
The power liftgate may be opened or closed in
several ways:
Overhead console liftgate button
Key fob
Outside handle (opens liftgate only)
Rear Interior Power Liftgate button
(when liftgate is open)
Hands-Free Liftgate (if equipped) —
opens liftgate only
CAUTION!
To prevent possible damage, do not slam the
hood to close it. Lower hood to approximately
12 inches (30 cm) and drop the hood to close.
Make sure hood is fully closed for both latches.
Never drive vehicle unless hood is fully closed,
with both latches engaged.
1 — Electronic Liftgate Release Handle
2 — Passive Entry Lock Button
WARNING!
Driving with the liftgate open can allow
poisonous exhaust gases into your vehicle.
You and your passengers could be injured by
these fumes. Keep the liftgate closed when
you are operating the vehicle.
If you are required to drive with the liftgate
open, make sure that all windows are closed,
and the climate control blower switch is set at
high speed. Do not use the recirculation
mode.
2
22_RUP_OM_EN_USC_t.book Page 97
Page 102 of 384
100GETTING TO KNOW YOUR VEHICLE
If the power liftgate encounters multiple
obstructions within the same cycle, the system
will automatically stop. If this occurs, the liftgate
must be operated manually.
The power liftgate will release, but not power
open, in temperatures below −12°F (−24°C).
Be sure to remove any buildup of snow or ice
from the liftgate before opening the liftgate.
If the liftgate is left open for an extended period
of time, the liftgate may need to be closed
manually to reset power liftgate functionality.
The Hands-Free Liftgate only works to open the
liftgate. Gas props support the liftgate in the open position.
However, because the gas pressure drops with
temperature, it may be necessary to assist the
props when opening the liftgate in cold weather.
NOTE:Allow the power system to open the liftgate.
Manually pushing or pulling the liftgate may
activate the liftgate obstacle detection feature and
stop the power operation or reverse its direction.
CARGO AREA FEATURES
Cargo Area Storage
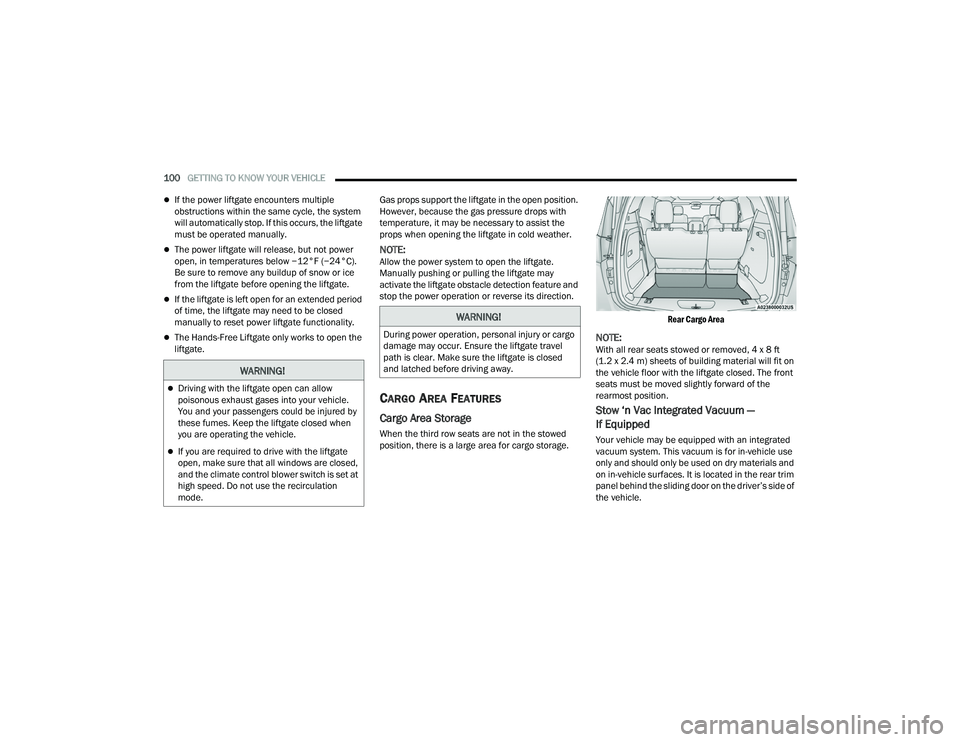
When the third row seats are not in the stowed
position, there is a large area for cargo storage.
Rear Cargo Area
NOTE:With all rear seats stowed or removed, 4 x 8 ft
(1.2 x 2.4 m) sheets of building material will fit on
the vehicle floor with the liftgate closed. The front
seats must be moved slightly forward of the
rearmost position.
Stow ‘n Vac Integrated Vacuum —
If Equipped
Your vehicle may be equipped with an integrated
vacuum system. This vacuum is for in-vehicle use
only and should only be used on dry materials and
on in-vehicle surfaces. It is located in the rear trim
panel behind the sliding door on the driver’s side of
the vehicle.
WARNING!
Driving with the liftgate open can allow
poisonous exhaust gases into your vehicle.
You and your passengers could be injured by
these fumes. Keep the liftgate closed when
you are operating the vehicle.
If you are required to drive with the liftgate
open, make sure that all windows are closed,
and the climate control blower switch is set at
high speed. Do not use the recirculation
mode.
WARNING!
During power operation, personal injury or cargo
damage may occur. Ensure the liftgate travel
path is clear. Make sure the liftgate is closed
and latched before driving away.
22_RUP_OM_EN_USC_t.book Page 100
Page 217 of 384

MULTIMEDIA215
LISTEN VIA VEHICLE SPEAKERS
A feature within Rear Seat Entertainment with Fire
TV built-in is the front radio Listen feature. On the
front radio Home screen for Fire TV, select the
Listen button in the top right corner on either card
for Screen 1 or 2. This will allow you to have either
rear screen play audio through all the speakers in
the vehicle.
QUICK MENU
Accessing the Quick Menu will give you more
options for Fire TV.
To access the Quick Menu, tap the screen, and it
will appear. The Quick Menu is also accessible by
pushing the Gear/Settings button on the Voice
Remote with Alexa.
Some options of the Quick Menu are:
Power — This will power the screen off.
On-Screen Remote — This will bring up the
on-screen remote to use with the system.
Back — This will let you go back a page.
Home — This will take you to the Home screen.
Gear/Settings — This will let you access
certain settings in the system. For more setting
options, select “Settings” within the on-screen
Gear/Settings menu.
Vehicle — This will bring up the Vehicle menu.
From here you can adjust rear climate controls
and the Are We There Yet? app.
PARENTAL CONTROLS (USING THE REAR
S
CREENS)
If parental controls were not set during the first
time start up of the system, they can be set by
following these steps:
1. Push the Gear/Settings button on the Voice
Remote with Alexa or tap the screen to access
“Settings” in the Quick Menu.
2. Select the Gear/Settings icon on the screen.
3. Select “Settings” on the screen.
4. While in Settings, select “Preferences”.
5. Select “Parental Controls”. From here you can turn Parental Controls on or off and set up a
PIN for the controls using the Voice Remote
with Alexa.
PAIRING THE VOICE REMOTE WITH
A
LEXA (USING THE REAR SCREENS)
If the Voice Remote with Alexa needs to be paired
again or a new remote is being paired, follow these
procedures:
1. Install batteries into the remote.
2. Tap the screen and select the Gear/Settings
icon on the screen.
3. Select “Settings” on the screen.
4. In Settings, select “Controllers & Bluetooth® Devices”.
5. From this menu, select “Add New Remote”.
6. Follow the on-screen steps for Voice Remote with Alexa pairing.
A long press on the Home button can also re-pair a
Voice Remote with Alexa that has become
disconnected.
NOTE:Your vehicle is included with two Voice Remotes
with Alexa. Each Voice Remote with Alexa can be
paired with each rear screen. Pairing one with
either rear screen will pair that Voice Remote with
Alexa with that screen.
5
22_RUP_OM_EN_USC_t.book Page 215
Page 222 of 384

220MULTIMEDIA
HEADPHONES OPERATION
Rear Seat Entertainment with Fire TV built-in does
not come equipped with headphones. Customers
will need to provide their own wireless headphones
that can be paired with the system using
Bluetooth®. Customers can also use their own
wired headphones and plug them into a
Headphone Jack located under one of the rear
screens. Wireless Headphones Pairing
To pair wireless headphones with Rear Seat
Entertainment with Fire TV built-in using the rear
screens, follow these steps:
1. Push the Gear/Settings button on the Voice
Remote with Alexa or tap the screen.
2. Select the Gear/Settings icon on the screen.
3. Select “Settings” on the screen.
4. While in Settings, select “Controllers & Bluetooth® Devices”.
5. Select “Other Bluetooth® Devices” and follow the on-screen steps for pairing. While multiple headphones can be paired, only one
will output audio at a time.REAR CLIMATE CONTROLS
The Rear Climate Controls can also be controlled
using Rear Seat Entertainment with Fire TV built-in
Ú
page 72.
Rear Climate Controls can be accessed by using
the Vehicle menu. Tap on either rear screen and
select the Vehicle icon or press the Vehicle button
on the Voice Remote with Alexa. Then select the
Rear Climate Controls option.
Options within Rear Climate Controls include:
Icon Description
ONClimate Control ON Button
Press and release this button to turn the Rear Climate Controls on.
OFF Climate Control OFF Button
Press and release this button to turn the Rear Climate Controls off.
SYNC SYNC Button
Pressing this button will sync both sides of the Rear Climate Controls.
AUTO Button
Automatically controls the rear interior cabin temperature by adjusting airflow distribution and amount. Toggling this function will cause the
system to switch between Manual mode and Automatic mode.
22_RUP_OM_EN_USC_t.book Page 220
Page 223 of 384
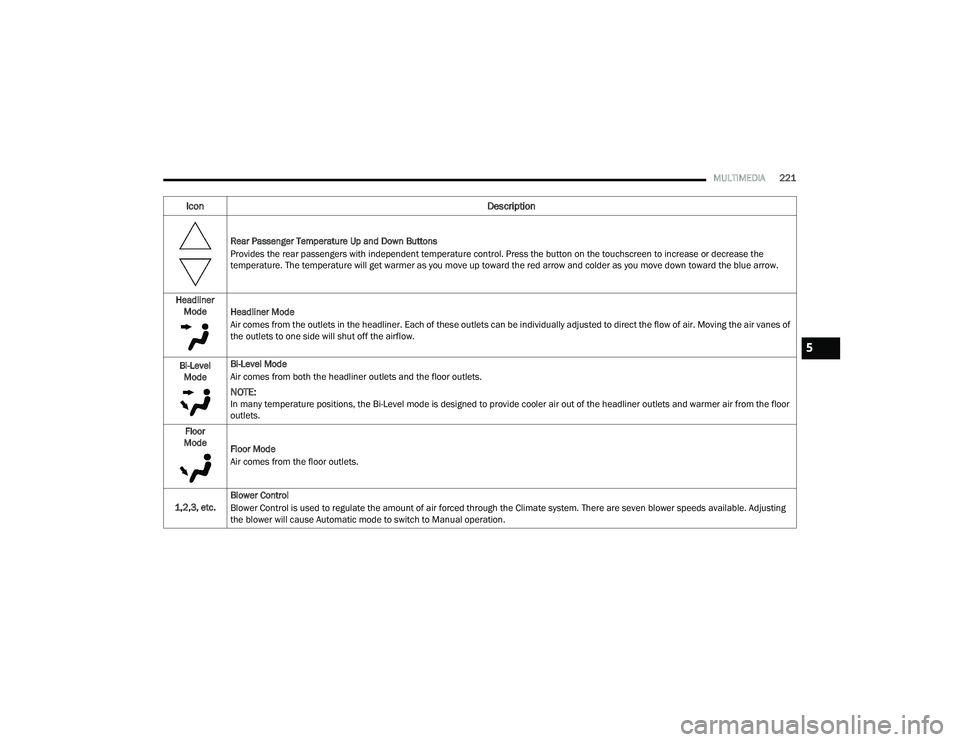
MULTIMEDIA221
Rear Passenger Temperature Up and Down Buttons
Provides the rear passengers with independent temperature control. Press the button on the touchscreen to increase or decrease the
temperature. The temperature will get warmer as you move up toward the red arrow and colder as you move down toward the blue arrow.
Headliner Mode Headliner Mode
Air comes from the outlets in the headliner. Each of these outlets can be individually adjusted to direct the flow of air. Moving the air vanes of
the outlets to one side will shut off the airflow.
Bi-Level Mode Bi-Level Mode
Air comes from both the headliner outlets and the floor outlets.
NOTE:In many temperature positions, the Bi-Level mode is designed to provide cooler air out of the headliner outlets and warmer air from the floor
outlets.
Floor
Mode Floor Mode
Air comes from the floor outlets.
1,2,3, etc. Blower Control
Blower Control is used to regulate the amount of air forced through the Climate system. There are seven blower speeds available. Adjusting
the blower will cause Automatic mode to switch to Manual operation.
Icon
Description
5
22_RUP_OM_EN_USC_t.book Page 221