2022 CHEVROLET SILVERADO 2500 instrument cluster
[x] Cancel search: instrument clusterPage 263 of 441

Chevrolet Silverado 2500 HD/3500 HD Owner Manual (GMNA-Localizing-U.
S./Canada/Mexico-15546003) - 2022 - CRC - 5/5/21
262 Driving and Operating
bumper level. These detection distances may
be shorter during warmer or humid weather.
Blocked sensors will not detect objects and
can also cause false detections. Keep the
sensors clean of mud, dirt, snow, ice, and
slush; and clean sensors after a car wash in
freezing temperatures.
{Warning
The Park Assist system does not detect
children, pedestrians, bicyclists, animals,
or objects located below the bumper or
that are too close or too far from the
vehicle. It is not available at speeds
greater than 8 km/h (5 mph). To prevent
injury, death, or vehicle damage, even
with Park Assist, always check the area
around the vehicle and check all mirrors
before moving forward or backing.
The instrument cluster may have a Park
Assist display with bars that show“distance
to object” and object location information
for the Front and Rear Park Assist system.
As the object gets closer, more bars light up
and the bars change color from yellow to
amber to red.
When an object is first detected in the rear,
one beep will be heard from the rear,
or both sides of the Safety Alert Seat will
pulse two times. When an object is very
close —<0.4 m (1.5 ft) in the vehicle rear or
<0.3 m (1 ft) in the vehicle front —five
beeps will sound from the rear or front
depending on object location, or both sides
of the Safety Alert Seat will pulse five times.
Beeps for FPA are higher pitched than
for RPA.
Turning the Features On or Off
PressXon the center stack to turn on or
off the Front and Rear Park Assist. The
indicator light next to the button comes on
when the features are on and turns off
when the features have been disabled.
Front and Rear Park Assist can be turned
Off, On, or On with Towbar. See “Park
Assist” underVehicle Personalization 0131.
If Park Assist is turned off through vehicle
personalization, the Park Assist button will
be disabled. To turn Park Assist on again,
select On in vehicle personalization. The On
with Towbar setting allows Park Assist to
work properly with a trailer hitch. Some
larger trailer hitches may not be compatible.
Turn off Park Assist when towing a trailer.
To turn the RPA symbols on or off, see
“Rear Camera Park Assist Symbols” under
Vehicle Personalization 0131.
Rear Cross Traffic Alert (RCTA)
System
If equipped, when the vehicle is shifted into
R (Reverse), RCTA shows a red warning
triangle with a left or right pointing arrow
on the infotainment display to warn of
traffic coming from the left or right. This
system detects objects coming from up to
Page 288 of 441
Chevrolet Silverado 2500 HD/3500 HD Owner Manual (GMNA-Localizing-U.
S./Canada/Mexico-15546003) - 2022 - CRC - 5/5/21
Driving and Operating 287
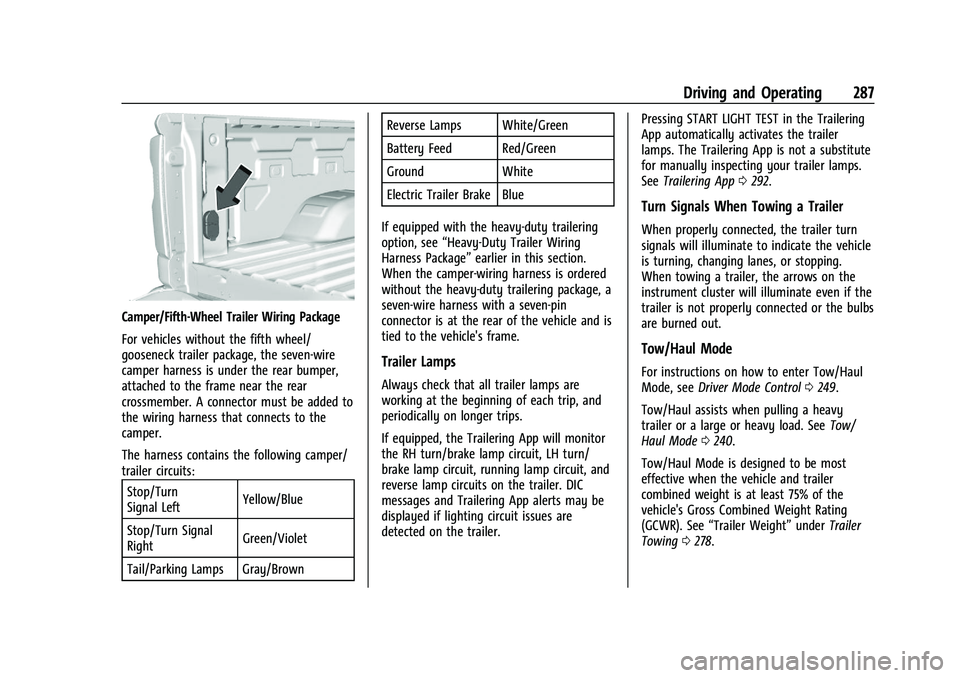
Camper/Fifth-Wheel Trailer Wiring Package
For vehicles without the fifth wheel/
gooseneck trailer package, the seven-wire
camper harness is under the rear bumper,
attached to the frame near the rear
crossmember. A connector must be added to
the wiring harness that connects to the
camper.
The harness contains the following camper/
trailer circuits:Stop/Turn
Signal Left Yellow/Blue
Stop/Turn Signal
Right Green/Violet
Tail/Parking Lamps Gray/Brown Reverse Lamps White/Green
Battery Feed Red/Green
Ground White
Electric Trailer Brake Blue
If equipped with the heavy-duty trailering
option, see “Heavy-Duty Trailer Wiring
Harness Package” earlier in this section.
When the camper-wiring harness is ordered
without the heavy-duty trailering package, a
seven-wire harness with a seven-pin
connector is at the rear of the vehicle and is
tied to the vehicle's frame.
Trailer Lamps
Always check that all trailer lamps are
working at the beginning of each trip, and
periodically on longer trips.
If equipped, the Trailering App will monitor
the RH turn/brake lamp circuit, LH turn/
brake lamp circuit, running lamp circuit, and
reverse lamp circuits on the trailer. DIC
messages and Trailering App alerts may be
displayed if lighting circuit issues are
detected on the trailer. Pressing START LIGHT TEST in the Trailering
App automatically activates the trailer
lamps. The Trailering App is not a substitute
for manually inspecting your trailer lamps.
See
Trailering App 0292.
Turn Signals When Towing a Trailer
When properly connected, the trailer turn
signals will illuminate to indicate the vehicle
is turning, changing lanes, or stopping.
When towing a trailer, the arrows on the
instrument cluster will illuminate even if the
trailer is not properly connected or the bulbs
are burned out.
Tow/Haul Mode
For instructions on how to enter Tow/Haul
Mode, see Driver Mode Control 0249.
Tow/Haul assists when pulling a heavy
trailer or a large or heavy load. See Tow/
Haul Mode 0240.
Tow/Haul Mode is designed to be most
effective when the vehicle and trailer
combined weight is at least 75% of the
vehicle's Gross Combined Weight Rating
(GCWR). See “Trailer Weight” underTrailer
Towing 0278.
Page 292 of 441
Chevrolet Silverado 2500 HD/3500 HD Owner Manual (GMNA-Localizing-U.
S./Canada/Mexico-15546003) - 2022 - CRC - 5/5/21
Driving and Operating 291
If either the CHECK TRAILER WIRING or
SERVICE TRAILER BRAKE SYSTEM message
displays while driving, the ITBC system may
not be fully functional or may not function
at all. When traffic conditions allow,
carefully pull the vehicle over to the side of
the road and turn the ignition off. Check the
wiring connection to the trailer and turn the
ignition back on. If either of these messages
continues, either the vehicle or trailer needs
service.
A GM dealer may be able to diagnose and
repair problems with the trailer. However,
any diagnosis and repair of the trailer is not
covered under the vehicle warranty. Contact
your trailer dealer for assistance with trailer
repairs and trailer warranty information.
Trailer Sway Control (TSC)
Vehicles with StabiliTrak/Electronic Stability
Control (ESC) have a Trailer Sway Control
(TSC) feature. Trailer sway is unintended
side-to-side motion of a trailer while towing.
If the vehicle is towing a trailer and the TSC
detects that sway is increasing, the vehicle
brakes are selectively applied at each wheel,
to help reduce excessive trailer sway.
If equipped with the Integrated Trailer BrakeControl (ITBC) system, and the trailer has an
electric brake system, StabiliTrak/ESC may
also apply the trailer brakes.
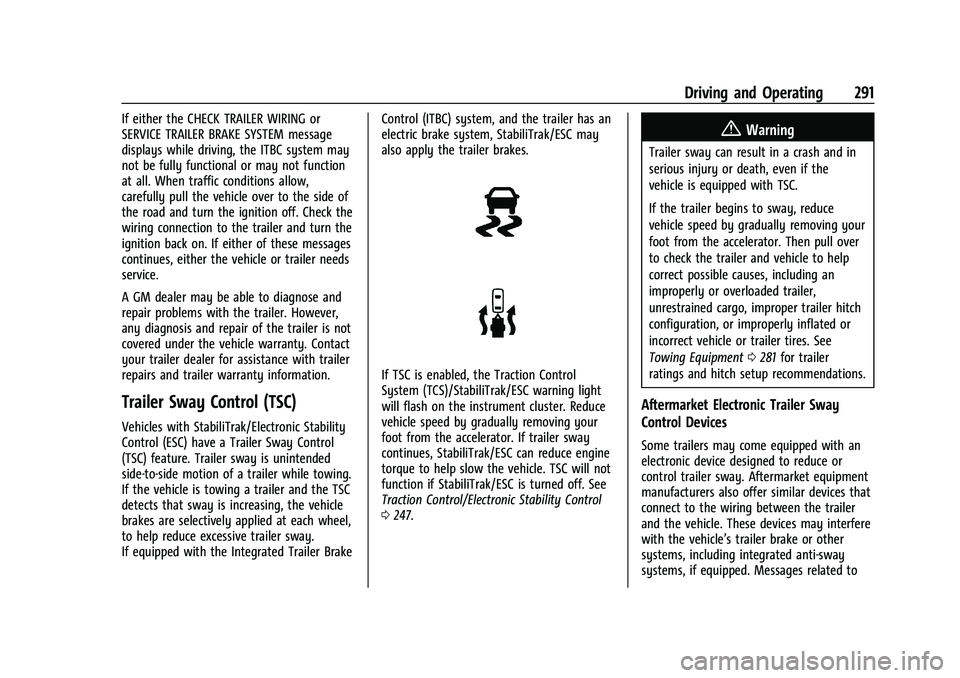
If TSC is enabled, the Traction Control
System (TCS)/StabiliTrak/ESC warning light
will flash on the instrument cluster. Reduce
vehicle speed by gradually removing your
foot from the accelerator. If trailer sway
continues, StabiliTrak/ESC can reduce engine
torque to help slow the vehicle. TSC will not
function if StabiliTrak/ESC is turned off. See
Traction Control/Electronic Stability Control
0
247.
{Warning
Trailer sway can result in a crash and in
serious injury or death, even if the
vehicle is equipped with TSC.
If the trailer begins to sway, reduce
vehicle speed by gradually removing your
foot from the accelerator. Then pull over
to check the trailer and vehicle to help
correct possible causes, including an
improperly or overloaded trailer,
unrestrained cargo, improper trailer hitch
configuration, or improperly inflated or
incorrect vehicle or trailer tires. See
Towing Equipment 0281 for trailer
ratings and hitch setup recommendations.
Aftermarket Electronic Trailer Sway
Control Devices
Some trailers may come equipped with an
electronic device designed to reduce or
control trailer sway. Aftermarket equipment
manufacturers also offer similar devices that
connect to the wiring between the trailer
and the vehicle. These devices may interfere
with the vehicle’s trailer brake or other
systems, including integrated anti-sway
systems, if equipped. Messages related to
Page 319 of 441

Chevrolet Silverado 2500 HD/3500 HD Owner Manual (GMNA-Localizing-U.
S./Canada/Mexico-15546003) - 2022 - CRC - 5/5/21
318 Vehicle Care
{Warning
Steam and scalding liquids from a hot
cooling system are under pressure.
Turning the pressure cap, even a little,
can cause them to come out at high
speed and you could be burned. Never
turn the cap when the cooling system,
including the pressure cap, is hot. Wait
for the cooling system and pressure cap
to cool.
Caution
Failure to follow the specific coolant fill
procedure could cause the engine to
overheat and could cause system
damage. If coolant is not visible in the
surge tank, contact your dealer.
If no coolant is visible in the surge tank, add
coolant.
1. Remove the coolant surge tank pressure cap when the cooling system, including
the coolant surge tank pressure cap and
upper radiator hose, is no longer hot.
Turn the pressure cap slowly
counterclockwise about one full turn. If a
hiss is heard, wait for that to stop.
A hiss means there is still some
pressure left.
2. Keep turning the pressure cap slowly, and remove it.
3. Fill the coolant surge tank with the proper mixture to the full cold mark.
4. With the coolant surge tank pressure cap off, start the engine and let it run until
the engine coolant temperature gauge
indicates approximately 90 °C (195 °F).
By this time, the coolant level inside the
coolant surge tank may be lower. If the
level is lower, add more of the proper
mixture to the coolant surge tank until
the level reaches the indicated mark.
5. Replace the pressure cap tightly.
6. Verify coolant level after the engine is shut off and the coolant is cold.
If necessary, repeat coolant fill procedure
Steps 1–6.Caution
If the pressure cap is not tightly installed,
coolant loss and engine damage may
occur. Be sure the cap is properly and
tightly secured.
Engine Overheating
If the vehicle has the Duramax diesel
engine, see the Duramax diesel supplement.
Caution
Do not run the engine if there is a leak
in the engine cooling system. This can
cause a loss of all coolant and can
damage the system and vehicle. Have
any leaks fixed right away.
The vehicle has several indicators to warn of
engine overheating.
There is a coolant temperature gauge in the
vehicle's instrument cluster. See Engine
Coolant Temperature Gauge 0113.
In addition, there are ENGINE OVERHEATED
STOP ENGINE, ENGINE OVERHEATED IDLE
ENGINE, and ENGINE POWER IS REDUCED
messages in the Driver Information
Center (DIC).
Page 344 of 441

Chevrolet Silverado 2500 HD/3500 HD Owner Manual (GMNA-Localizing-U.
S./Canada/Mexico-15546003) - 2022 - CRC - 5/5/21
Vehicle Care 343
FusesUsage
F22 Heated Steering Wheel
F23 MISC R/C
F24 Power Take Off/Reflective Light Auxiliary Display/
Instrument Panel Cluster/
Central Gateway Module/
Inside Rear View Mirror/
Overhead Console Module
Ignition
F25 Heating, Ventilation, and Air Conditioning Ignition/
Heating, Ventilation, and
Air Conditioning Auxiliary
F26 USB Ports/Special Equipment Option Retained
Accessory Power
F27 Accessory Power Outlet/ Retained Accessory Power
F28 Accessory Power Outlet/ Battery
F30 Sensing and Diagnostic Module/Parking Brake
F31 Body Control Module 4 Fuses
Usage
F32 Special Equipment Option/ Data Link Connection
F33 Body Control Module 8
F34 Cargo Lamp
F40 CGM –Central Gateway
Module
F41 Infotainment 1
F42 TCP –Telematics
Connectivity Platform
F43 –
F44 –
F45 Body Control Module 2
F46 Heating, Ventilation, and Air Conditioning/Battery 1
F47 Instrument Panel Cluster/ Battery
F48 Transmission Control Module
F49 Body Control Module 1 F50 –
F51 Battery 1
F52 Battery 2 Fuses
Usage
F53 –
F54 Sunroof F55 Driver Power Seat
F56 DC DC TRANS 1 F57 DC DC TRANS 2
F58 Infotainment 2
Circuit
Breakers Usage
1 Accessory Power Outlet 2
2 Accessory Power Outlet 1/ Cigarette Lighter
3 –
4 –
Relays Usage
K1 Run/Crank
K2 Retained Accessory Power/ Accessory 1
K4 –
K5 –
Page 352 of 441
Chevrolet Silverado 2500 HD/3500 HD Owner Manual (GMNA-Localizing-U.
S./Canada/Mexico-15546003) - 2022 - CRC - 5/5/21
Vehicle Care 351
sequence will continue upon subsequent
vehicle start-ups as long as the malfunction
exists.
When the malfunction indicator is
illuminated, the system may not be able to
detect or signal low tire pressure as
intended. TPMS malfunctions may occur for
a variety of reasons, including the
installation of replacement or alternate tires
or wheels on the vehicle that prevent the
TPMS from functioning properly. Always
check the TPMS malfunction telltale after
replacing one or more tires or wheels on
your vehicle to ensure that the replacement
or alternate tires and wheels allow the
TPMS to continue to function properly.
SeeTire Pressure Monitor Operation 0351.
See Radio Frequency Statement 0417.
Tire Pressure Monitor Operation
This vehicle may have a Tire Pressure
Monitor System (TPMS). The TPMS is
designed to warn the driver when a low tire
pressure condition exists. TPMS sensors are
mounted onto each tire and wheel
assembly, excluding the spare tire and
wheel assembly. The TPMS sensors monitor the air pressure in the tires and transmit the
tire pressure readings to a receiver located
in the vehicle.
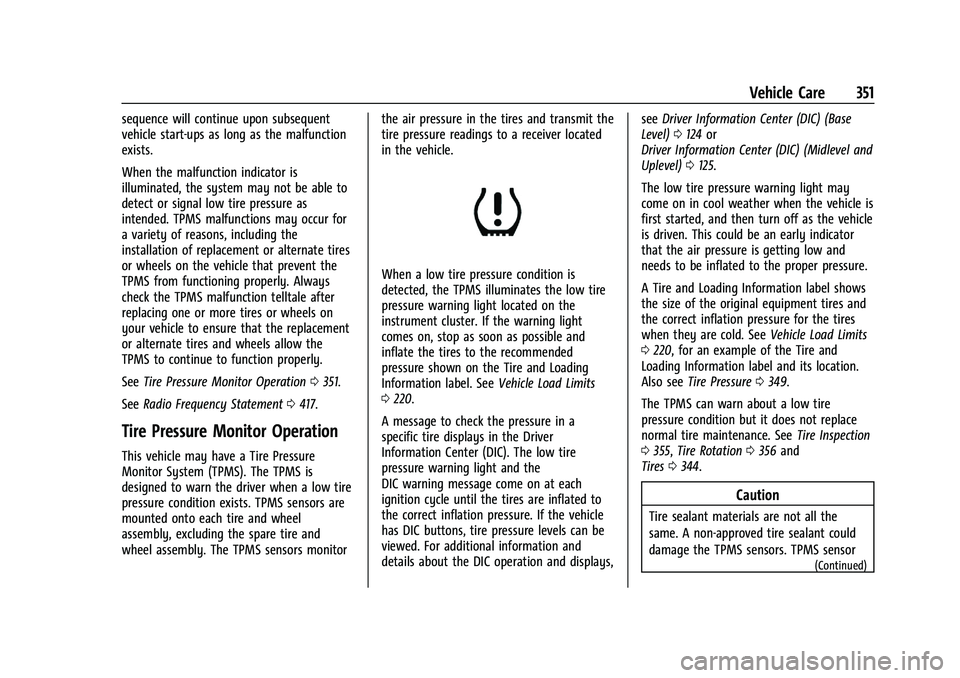
When a low tire pressure condition is
detected, the TPMS illuminates the low tire
pressure warning light located on the
instrument cluster. If the warning light
comes on, stop as soon as possible and
inflate the tires to the recommended
pressure shown on the Tire and Loading
Information label. See
Vehicle Load Limits
0 220.
A message to check the pressure in a
specific tire displays in the Driver
Information Center (DIC). The low tire
pressure warning light and the
DIC warning message come on at each
ignition cycle until the tires are inflated to
the correct inflation pressure. If the vehicle
has DIC buttons, tire pressure levels can be
viewed. For additional information and
details about the DIC operation and displays, see
Driver Information Center (DIC) (Base
Level) 0124 or
Driver Information Center (DIC) (Midlevel and
Uplevel) 0125.
The low tire pressure warning light may
come on in cool weather when the vehicle is
first started, and then turn off as the vehicle
is driven. This could be an early indicator
that the air pressure is getting low and
needs to be inflated to the proper pressure.
A Tire and Loading Information label shows
the size of the original equipment tires and
the correct inflation pressure for the tires
when they are cold. See Vehicle Load Limits
0 220, for an example of the Tire and
Loading Information label and its location.
Also see Tire Pressure 0349.
The TPMS can warn about a low tire
pressure condition but it does not replace
normal tire maintenance. See Tire Inspection
0 355, Tire Rotation 0356 and
Tires 0344.
Caution
Tire sealant materials are not all the
same. A non-approved tire sealant could
damage the TPMS sensors. TPMS sensor
(Continued)
Page 382 of 441
Chevrolet Silverado 2500 HD/3500 HD Owner Manual (GMNA-Localizing-U.
S./Canada/Mexico-15546003) - 2022 - CRC - 5/5/21
Vehicle Care 381
7. Shift the transfer case to 2m(Two-Wheel
Drive High). When the shift to 2
m
(Two-Wheel Drive High) is complete, the
light in the instrument cluster will stop
flashing and stay lit. See
Four-Wheel-Drive Light 0119.
8. Start the engine. Check that the vehicle is in 2
m(Two-Wheel Drive High) by
starting the engine and shifting the
transmission to D (Drive) and then to
R (Reverse). There should be movement
of the vehicle while shifting.
9. Shift the transmission to P (Park) and turn off the ignition.
10. Release the parking brake and remove the wheel blocks.
11. Reset any lost presets. The outside temperature display will
default to 0 °C (32 °F) but will reset with
normal usage.
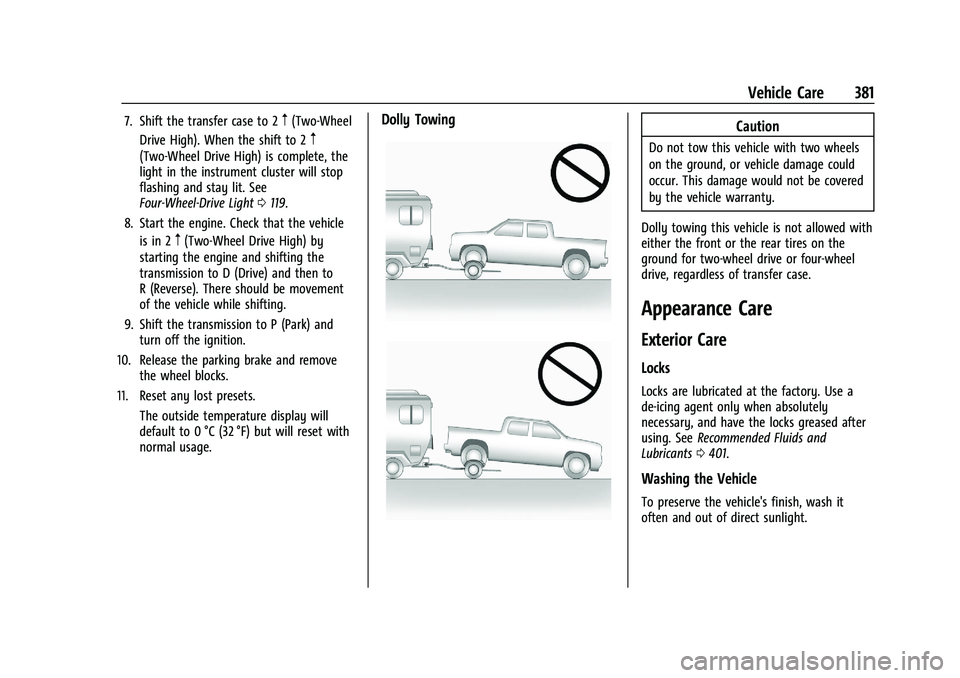
Dolly TowingCaution
Do not tow this vehicle with two wheels
on the ground, or vehicle damage could
occur. This damage would not be covered
by the vehicle warranty.
Dolly towing this vehicle is not allowed with
either the front or the rear tires on the
ground for two-wheel drive or four-wheel
drive, regardless of transfer case.
Appearance Care
Exterior Care
Locks
Locks are lubricated at the factory. Use a
de-icing agent only when absolutely
necessary, and have the locks greased after
using. See Recommended Fluids and
Lubricants 0401.
Washing the Vehicle
To preserve the vehicle's finish, wash it
often and out of direct sunlight.
Page 390 of 441
Chevrolet Silverado 2500 HD/3500 HD Owner Manual (GMNA-Localizing-U.
S./Canada/Mexico-15546003) - 2022 - CRC - 5/5/21
Vehicle Care 389
Instrument Panel, Leather, Vinyl, Other
Plastic Surfaces, Low Gloss Paint
Surfaces, and Natural Open Pore Wood
Surfaces
Use a soft bristle brush to remove dust from
knobs and crevices on the instrument
cluster. Use a soft microfiber cloth
dampened with water to remove dust and
loose dirt. For a more thorough cleaning,
use a soft microfiber cloth dampened with a
mild soap and water solution.
Caution
Soaking or saturating leather, especially
perforated leather, as well as other
interior surfaces, may cause permanent
damage. Wipe excess moisture from
these surfaces after cleaning and allow
them to dry naturally. Never use heat,
steam, or spot removers. Do not use
liquids that contain alcohol or solvents on
leather seats. Do not use cleaners that
contain silicone or wax-based products.
Cleaners containing these solvents can
permanently change the appearance and
feel of leather or soft trim, and are not
recommended.Do not use cleaners that increase gloss,
especially on the instrument panel. Reflected
glare can decrease visibility through the
windshield under certain conditions.
Caution
Use of air fresheners may cause
permanent damage to plastics and
painted surfaces. If an air freshener
comes in contact with any plastic or
painted surface in the vehicle, blot
immediately and clean with a soft cloth
dampened with a mild soap solution.
Damage caused by air fresheners would
not be covered by the vehicle warranty.
Care of Seat Belts
Keep belts clean and dry.
{Warning
Do not bleach or dye seat belt webbing.
It may severely weaken the webbing. In
a crash, they might not be able to
provide adequate protection. Clean and
rinse seat belt webbing only with mild
soap and lukewarm water. Allow the
webbing to dry.
Floor Mats
{Warning
If a floor mat, a liner, or a liner insert is
the wrong size or is not properly
installed, it can interfere with the pedals.
Interference with the pedals can cause
unintended acceleration and/or increased
stopping distance, which can cause a
crash and injury. Make sure the floor
mat, liner, or liner insert does not
interfere with the pedals.
Use the following guidelines for proper floor
mat/liner use:
.The original equipment floor mats are
designed for your vehicle. If the floor
mats need to be replaced, it is
recommended that GM-certified floor
mats are purchased. Non-GM floor mats
may not fit properly and may interfere
with the pedals. Always check that the
floor mats do not interfere with the
pedals.
.Do not use a floor mat/liner if the vehicle
is not equipped with a floor mat retainer
on the driver side floor.