2022 CHEVROLET SILVERADO 1500 tow
[x] Cancel search: towPage 251 of 461
Chevrolet Silverado 1500 Owner Manual (GMNA-Localizing-U.S./Canada/
Mexico/Paraguay-14632303) - 2021 - CRC - 11/9/20
250 Driving and Operating
A blinking HDC light indicates the system is
actively applying the brakes to maintain
vehicle speed. HDC can maintain vehicle
speeds between 1 and 22 km/h (1 and
14 mph) on grades greater than or equal
to 10%.
If HDC is to be used for more than
three minutes or on grades steeper than
25%, the transfer case should be put into
Four-Wheel Drive Low (4
n) to reduce the
possibility of brake overheating.
Noise from the Electronic Brake Control
Module (EBCM) is normal when HDC is
active.
When HDC is activated, the initial HDC
speed is set to the current driving speed.
It can be increased or decreased by pressing
+RES or SET- on the steering wheel, or by
applying the accelerator or brake pedal. This
adjusted speed becomes the new set speed.
HDC will remain enabled between 30 and
60 km/h (19 and 37 mph); however, vehicle
speed cannot be set or maintained in this
range. HDC will automatically disable if the
vehicle speed is above 80 km/h (50 mph) or
above 60 km/h (37 mph) for at least
30 seconds.
5must be pressed again to re-enable HDC.
HDC may disable after an extended period
of use. If this happens, HDC will require
time to cool down. The length of time HDC
remains active depends on road conditions,
grade, set speed, vehicle loading, and
outside temperature.
When enabled, if the vehicle speed is above
30 km/h (19 mph) and below 60 km/h
(37 mph), a DIC message will display.
Driver Mode Control
Driver Mode Control (DMC) allows the driver
to adjust the overall driving experience to
better suit preference by adjusting multiple
systems to fit specific driving needs. Drive
mode availability and affected vehicle
subsystems are dependent upon vehicle trim
level, region, and optional features.
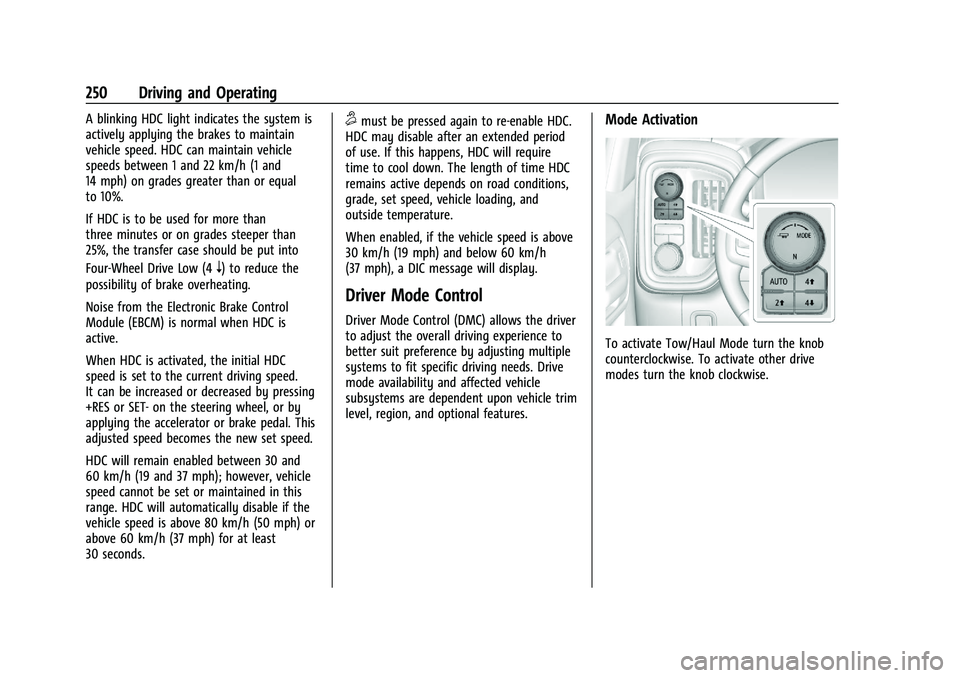
Mode Activation
To activate Tow/Haul Mode turn the knob
counterclockwise. To activate other drive
modes turn the knob clockwise.
Page 252 of 461
Chevrolet Silverado 1500 Owner Manual (GMNA-Localizing-U.S./Canada/
Mexico/Paraguay-14632303) - 2021 - CRC - 11/9/20
Driving and Operating 251
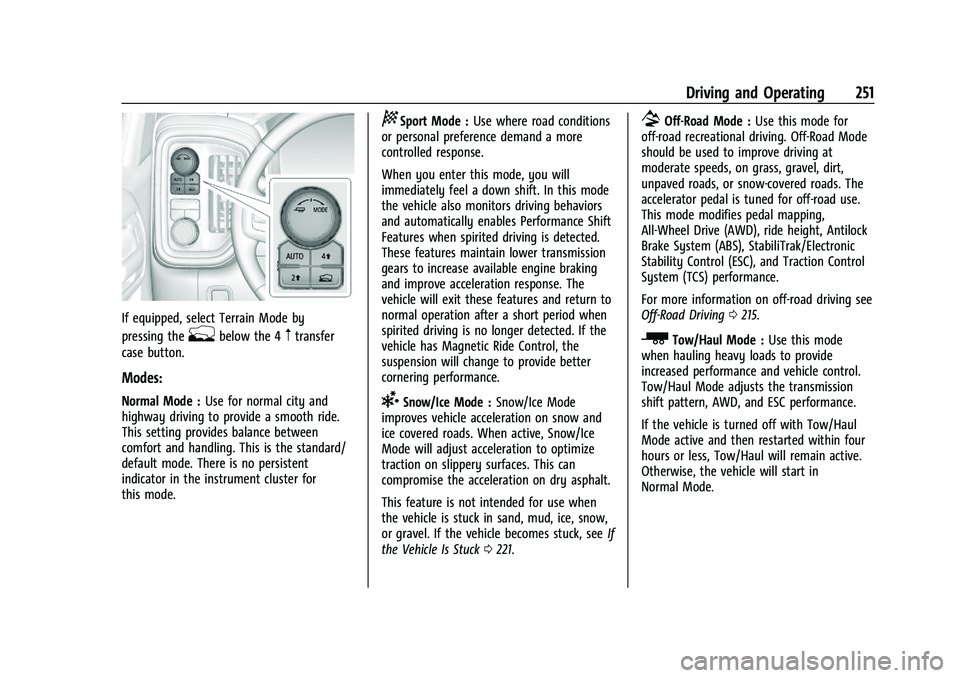
If equipped, select Terrain Mode by
pressing the
gbelow the 4mtransfer
case button.
Modes:
Normal Mode : Use for normal city and
highway driving to provide a smooth ride.
This setting provides balance between
comfort and handling. This is the standard/
default mode. There is no persistent
indicator in the instrument cluster for
this mode.
8Sport Mode : Use where road conditions
or personal preference demand a more
controlled response.
When you enter this mode, you will
immediately feel a down shift. In this mode
the vehicle also monitors driving behaviors
and automatically enables Performance Shift
Features when spirited driving is detected.
These features maintain lower transmission
gears to increase available engine braking
and improve acceleration response. The
vehicle will exit these features and return to
normal operation after a short period when
spirited driving is no longer detected. If the
vehicle has Magnetic Ride Control, the
suspension will change to provide better
cornering performance.
6Snow/Ice Mode : Snow/Ice Mode
improves vehicle acceleration on snow and
ice covered roads. When active, Snow/Ice
Mode will adjust acceleration to optimize
traction on slippery surfaces. This can
compromise the acceleration on dry asphalt.
This feature is not intended for use when
the vehicle is stuck in sand, mud, ice, snow,
or gravel. If the vehicle becomes stuck, see If
the Vehicle Is Stuck 0221.
7Off-Road Mode : Use this mode for
off-road recreational driving. Off-Road Mode
should be used to improve driving at
moderate speeds, on grass, gravel, dirt,
unpaved roads, or snow-covered roads. The
accelerator pedal is tuned for off-road use.
This mode modifies pedal mapping,
All-Wheel Drive (AWD), ride height, Antilock
Brake System (ABS), StabiliTrak/Electronic
Stability Control (ESC), and Traction Control
System (TCS) performance.
For more information on off-road driving see
Off-Road Driving 0215.
_Tow/Haul Mode : Use this mode
when hauling heavy loads to provide
increased performance and vehicle control.
Tow/Haul Mode adjusts the transmission
shift pattern, AWD, and ESC performance.
If the vehicle is turned off with Tow/Haul
Mode active and then restarted within four
hours or less, Tow/Haul will remain active.
Otherwise, the vehicle will start in
Normal Mode.
Page 253 of 461
Chevrolet Silverado 1500 Owner Manual (GMNA-Localizing-U.S./Canada/
Mexico/Paraguay-14632303) - 2021 - CRC - 11/9/20
252 Driving and Operating
If the vehicle has a diesel engine, exhaust
braking is automatically activated when
Tow/Haul Mode is selected. It maintains
vehicle speed by automatically
implementing a shift pattern that uses the
engine and the transmission to slow the
vehicle. The system will command
downshifts and use the turbocharger on the
engine to reduce vehicle speed when the
brake is applied. The normal tow/haul shift
pattern will return once the vehicle is on a
low grade or when the accelerator pedal is
pressed.
While in the Electronic Range Select (ERS)
Mode (see“manual mode”), grade breaking
is deactivated, allowing the driver to select a
range and limiting the highest gear
available.
For more information on trailer weight
specifications, see Towing Equipment 0296. g
Terrain Mode : Use for finer control
during low speed, off-road driving. When
using this mode it will mimic the
characteristics of four-wheel-drive low (4
n)
without the torque capabilities.
Use when:
.Traveling on very rough roads at very low
speeds, such as a two-track or heavily
rutted road.
.Traveling slowly in grassy fields.
.Pulling a boat out of the water on a
trailer.
.Using the vehicle for public off-road
recreational driving. See Off-Road Driving
0 215 and
Hill and Mountain Roads 0219. When in Terrain Mode, the vehicle will shift
automatically but may hold a lower gear
longer to maximize engine torque. The
steering will change to provide more precise
control. A unique pedal map, transmission
shift pattern, and rpm control are utilized to
give better control at lower speeds and over
rough terrain. When the vehicle comes to a
stop, Vehicle Hold is engaged. TCS will be
optimized for maximum torque transfer
across axles, and Active Braking During Lift
Throttle will be engaged.
Active Braking During Lift Throttle:.Automatically applies light braking,
similar to heavy engine braking of
four-wheel-drive low.
.Applies light braking in D (Drive) until the
vehicle is at idle speeds. In Manual L1 and
Manual L2, moderate braking may stop
the vehicle.
.Reduces trailer braking.
Page 256 of 461
Chevrolet Silverado 1500 Owner Manual (GMNA-Localizing-U.S./Canada/
Mexico/Paraguay-14632303) - 2021 - CRC - 11/9/20
Driving and Operating 255
Setting Cruise Control
If
5is on when not in use, SET−or +RES
could get pressed and go into cruise when
not desired. Keep
5off when cruise is not
being used.
1. Press
5to turn the cruise system on.
2. Get up to the desired speed.
3. Press and release SET−.
4. Remove your foot from the accelerator.
The cruise control indicator on the
instrument cluster turns green after cruise
control has been set to the desired speed.
See Instrument Cluster 0106.
Resuming a Set Speed
If the cruise control is set at a desired speed
and then the brakes are applied or
*is
pressed, the cruise control is disengaged
without erasing the set speed from memory.
Once the vehicle reaches about 40 km/h
(25 mph) or more, press RES+ up briefly. The
vehicle returns to the previously set speed.
Increasing Speed While Using Cruise Control
Do one of the following:
.Press and hold +RES up until the desired
speed is reached, then release it.
.To increase vehicle speed in small
increments, press +RES up briefly. For
each press, the vehicle goes about 1 km/h
(1 mph) faster.
The speedometer reading can be displayed
in either English or metric units. See
Instrument Cluster 0106. The increment
value used depends on the units displayed.
Reducing Speed While Using Cruise Control
Do one of the following:
.Press and hold SET– down until the
desired lower speed is reached, then
release it.
.To slow down in small increments, press
SET– down briefly. For each press, the
vehicle goes about 1 km/h (1 mph) slower.
The speedometer reading can be displayed
in either English or metric units. See
Instrument Cluster 0106. The increment
value used depends on the units displayed.
Passing Another Vehicle While Using Cruise
Control
Use the accelerator pedal to increase the
vehicle speed. When you take your foot off
the pedal, the vehicle will slow down to the
previously set cruise speed. While pressing
the accelerator pedal or shortly following the release to override cruise control, briefly
pressing SET–
will result in cruise control set
to the current vehicle speed.
Using Cruise Control on Hills
How well the cruise control works on hills
depends on the vehicle speed, the load, and
the steepness of the hills. When going up
steep hills, pressing the accelerator pedal
may be necessary to maintain vehicle speed.
While going downhill, cruise braking helps
maintain driver selected speed.
Cruise Grade Braking is enabled when the
vehicle is started and cruise control is active.
It is not enabled in Range Selection Mode.
It assists in maintaining driver selected
speed when driving on downhill grades by
using the engine and transmission to slow
the vehicle.
For other forms of descent control, see Hill
Descent Control (HDC) 0249, Automatic
Transmission 0238, and Tow/Haul Mode
0 241.
Ending Cruise Control
There are four ways to end cruise control:
.Step lightly on the brake pedal.
.Press*.
Page 257 of 461
Chevrolet Silverado 1500 Owner Manual (GMNA-Localizing-U.S./Canada/
Mexico/Paraguay-14632303) - 2021 - CRC - 11/9/20
256 Driving and Operating
.Shift the transmission to N (Neutral).
.To turn off cruise control, press5.
Erasing Speed Memory
The cruise control set speed is erased from
memory if
5is pressed or the ignition is
turned off.
Adaptive Cruise Control (Camera)
If equipped, Adaptive Cruise Control (ACC)
allows the cruise control set speed and
following gap to be selected. Read this
entire section before using this system. The
following gap is the following time between
your vehicle and a vehicle detected directly
ahead in your path, moving in the same
direction. If no vehicle is detected in your
path, ACC works like regular cruise control.
ACC uses a windshield mounted front
camera sensor.
If a vehicle is detected in your path, ACC can
apply acceleration or limited, moderate
braking to maintain the selected following
gap. To disengage ACC, apply the brake.
If ACC is controlling the vehicle speed when
the Traction Control System (TCS) or
StabiliTrak/Electronic Stability Control (ESC)
system activates, ACC may automatically disengage. See
Traction Control/Electronic
Stability Control 0248. When road
conditions allow ACC to be safely used, ACC
can be turned back on. Disabling the TCS or
StabiliTrak/ESC system will disengage and
prevent engagement of ACC.
ACC can reduce the need for you to
frequently brake and accelerate, especially
when used on expressways, freeways, and
interstate highways. When used on other
roads, you may need to take over the
control of braking or acceleration more
often.
{Warning
ACC has limited braking ability and may
not have time to slow the vehicle down
enough to avoid a collision with another
vehicle you are following. This can occur
when vehicles suddenly slow or stop
ahead, or enter your lane. Also see
“Alerting the Driver” later in this section.
Complete attention is always required
while driving and you should be ready to
take action and apply the brakes. See
Defensive Driving 0213.
{Warning
ACC will not detect or brake for children,
pedestrians, animals, or other objects.
Do not use ACC when:
.On winding and hilly roads or when
the camera sensor is blocked by snow,
ice, or dirt. The system may not
detect a vehicle ahead. Keep the
windshield and headlamps clean.
.When visibility is poor due to rain,
snow, fog, dirt, insect residue, or dust;
when other foreign objects obscure
the camera’s view; or when the
vehicle in front or oncoming traffic
causes additional environmental
obstructions, such as road spray. ACC
performance is limited under these
conditions.
.On slippery roads where fast changes
in tire traction can cause excessive
wheel slip
.With extremely heavy cargo loaded in
the cargo area or rear seat
.When towing a trailer
Page 264 of 461
Chevrolet Silverado 1500 Owner Manual (GMNA-Localizing-U.S./Canada/
Mexico/Paraguay-14632303) - 2021 - CRC - 11/9/20
Driving and Operating 263
Other Vehicle Lane Changes
ACC will not detect a vehicle ahead until it
is completely in the lane. The brakes may
need to be manually applied.
Objects Not Directly in Front of Your Vehicle
The detection of objects in front of the
vehicle may not be possible if:
.The vehicle or object ahead is not within
your lane.
.The vehicle ahead is shifted, not centered,
or is shifted to one side of the lane.
Driving in Narrow Lanes
Vehicles in adjacent traffic lanes or roadside
objects may be incorrectly detected when
located along the roadway. Do Not Use ACC on Hills and When Towing a
Trailer
Do not use ACC when driving on steep hills
or when towing a trailer. ACC will not detect
a vehicle in the lane while driving on steep
hills. If the brakes are applied, ACC
disengages.
Disengaging ACC
There are three ways to disengage ACC:
.Step lightly on the brake pedal.
.Press*.
.PressJ.
Erasing Speed Memory
The ACC set speed is erased from memory if
Jis pressed or if the ignition is turned off. Weather Conditions Affecting ACC
If the interior temperature is extremely
high, the instrument cluster may indicate
that ACC is temporarily unavailable. This can
be caused by extreme hot weather
conditions with direct sunlight on the front
camera. ACC will return to normal operation
once the cabin temperature is lower.
Conditions that are associated with low
visibility, such as fog, rain, snow, or road
spray, may limit ACC performance. Water
droplets from rain or snow that remain on
the windshield may also limit ACC’s ability
to detect objects.
{Warning
Camera visibility may be limited and the
ACC system may not work properly if the
windshield is not clear. Do not use ACC if
moisture is present on the inside of the
windshield or the windshield washer is
used in cold weather. Turn on the front
defroster and make sure the windshield is
clear before using ACC. Before driving,
check that the windshield wipers are in
good condition and replace them if worn.
Page 271 of 461
Chevrolet Silverado 1500 Owner Manual (GMNA-Localizing-U.S./Canada/
Mexico/Paraguay-14632303) - 2021 - CRC - 11/9/20
270 Driving and Operating
Trailer View, Left Transparent Trailer
View or Right Transparent Trailer
View. The Transparent Trailer View is
shown when the position of the trailer
is relatively straight behind the
vehicle. The Left or Right Transparent
Trailer View is shown when the
position of the trailer is too far to the
left or right. When the system is not
calibrated or trailer position is not
known the Transparent Trailer
Picture-in-Picture View will be shown.
11. Rear Trailer View/Rear Side View withAvailable Articulation Functionality/
Picture-in-Picture Side View
.Rear Trailer View provides a view
of the area behind the trailer. the
feature is available when a trailer
is connected. The feature requires
user installation of an accessory
trailer camera on the rear exterior
surface of the trailer per the
accessory trailer camera
installation instructions (see your
dealer for accessory trailer
camera(s) and information). To
select, touch Rear Trailer View/Rear
Side View with Available
Articulation Functionality/
Picture-in-Pictue Side View on the infotainment display when a
camera view is active. Each touch
will toggle through the Rear Trailer
View, Trailer Tow Mirror View and
Combo View. To access this view
when in a forward gear above
12 km/h (8 mph), touch CAMERA
on the infotainment display and
touch the Interior Rear Trailer
View/Rear Side View with Available
Articulation Functionality/
Picture-in-Picture Side View icon.
Touch X to exit.
.Rear Side View with Available
Articulation Functionality provides
a rearward split view of the left
and right sides of the vehicle and
trailer. When in a forward gear the
view well automatically pan to
show more of the left or right side
based on the position of the
trailer. The feature is available
when a trailer is connected. To
select, touch Rear trailer View/Rear
Side View with Available
Articulation Functionality/
Picture-in-Picture Side View on the
infotainment display when a
camera view is active. Each touch
will toggle through the Rear Trailer
View, trailer tow Mirror view and
Combo View. To access this view
when in a forward gear above
12 km/h (8 mph), Touch CAMERA
on the infotainment display and
touch the Rear Trailer View/Rear
Side View with Available
Articulation Functionality/
Picture-in-Picture Side icon. Touch X
to exit.
.Provides a rearward split view of
the left and right sides of the
vehicle and trailer with an overlay
view of the area behind the trailer.
The feature is available when a
trailer is connected. the feature
requires user installation of an
accessory trailer camera on the
rear exterior surface of the trailer
per the accessory trailer camera
installation instructions (see your
dealer for accessory trailer
camera(s) and information). To
select, touch Rear Trailer View/Rear
Side View with Available
Articulation Functionality/
Picture-in-Picture Side view on the
infotainment display when a
camera view is active. Each press
of the button will toggle through
Page 272 of 461
Chevrolet Silverado 1500 Owner Manual (GMNA-Localizing-U.S./Canada/
Mexico/Paraguay-14632303) - 2021 - CRC - 11/9/20
Driving and Operating 271
the Rear Trailer View, Trailer Tow
mirror View and Combo View. To
access this view when in a forward
gear above 12 km/h (8 mph), touch
CAMERA on the infotainment
display and touch the Rear Trailer
View/Rear Side View with Available
Articulation Functionality/
Picture-in-Picture Side View icon.
Touch X to exit.
HD Surround Vision with Trailer Camera
Provisions
If equipped, this feature provides additional
views to aid in trailering/towing. The
system shows multiple views in the
infotainment display using five cameras
mounted around the vehicle and up to two
additional accessory cameras that can be
mounted on or in a trailer. The front camera
is in the grille under the front emblem, the
side cameras are on the bottom of the
outside mirrors, the rear camera is in the
tailgate handle and the bed camera is
mounted on the rear of the cab.
Additionally, up to two accessory cameras
can be mounted to the rear and/or interior
of the trailer. See your dealer for accessory
trailer cameras. To access, touch CAMERA on
the infotainment display or shift to R (Reverse). To return to the previous screen
when not in reverse, touch the Home or
Back buttons on the infotainment display.
Certain trailer views require a compatible
trailer profile be configured and selected.
A compatible trailer is a box type trailer
(cargo, camper, etc.) with a conventional
hitch.
Available camera views:
.Front/Rear Standard View
.Front/Rear Top-Down View
.Rear Bowl View
.Front/Rear Side View
.Hitch View
.Bed View
.Rear trailer View
.Rear Side view with a available
articulation functionality
.Picture-in-Picture Side View
.Interior Trailer View
.Transparent trailer View
.Surround View
.Guidance Lines
.Hitch Guidance
Surround Vision (360 Degrees)
If equipped, the Surround Vision system can
display various views surrounding the
vehicle in the infotainment display using
four cameras mounted around the vehicle.
The front camera is in the grille under the
front emblem, the side cameras are on the
bottom of the outside mirrors, and the rear
camera is in the tailgate handle.
The Surround Vision system can be accessed
by selecting CAMERA in the infotainment
display or when the vehicle is shifted into
R (Reverse). To return to the previous screen
sooner, when not in R (Reverse), press the
Home or Back button on the infotainment
system, shift into P (Park), or, while in D
(Drive), reach a vehicle speed of
approximately 12 km/h (8 mph).
Available camera views:
.Front/Rear Standard View
.Front/Rear Top-Down View
.Rear Bowl View
.Front/Rear Side View
.Hitch View
.Surround View
.Guidance Lines
.Hitch Guidance