2022 CHEVROLET SILVERADO 1500 parking brake
[x] Cancel search: parking brakePage 302 of 461
Chevrolet Silverado 1500 Owner Manual (GMNA-Localizing-U.S./Canada/
Mexico/Paraguay-14632303) - 2021 - CRC - 11/9/20
Driving and Operating 301
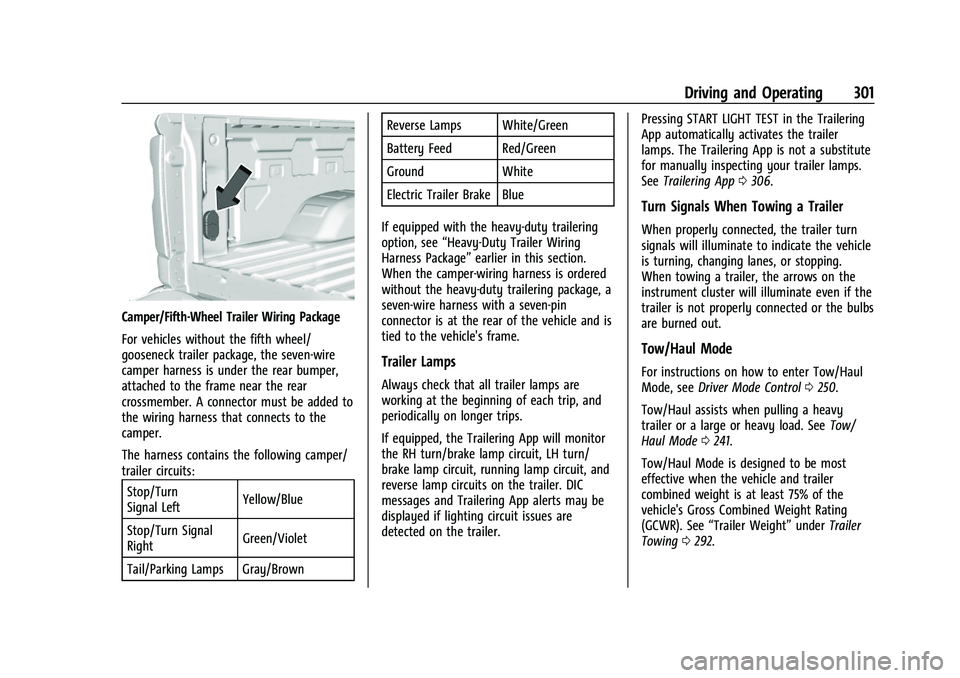
Camper/Fifth-Wheel Trailer Wiring Package
For vehicles without the fifth wheel/
gooseneck trailer package, the seven-wire
camper harness is under the rear bumper,
attached to the frame near the rear
crossmember. A connector must be added to
the wiring harness that connects to the
camper.
The harness contains the following camper/
trailer circuits:Stop/Turn
Signal Left Yellow/Blue
Stop/Turn Signal
Right Green/Violet
Tail/Parking Lamps Gray/Brown Reverse Lamps White/Green
Battery Feed Red/Green
Ground White
Electric Trailer Brake Blue
If equipped with the heavy-duty trailering
option, see “Heavy-Duty Trailer Wiring
Harness Package” earlier in this section.
When the camper-wiring harness is ordered
without the heavy-duty trailering package, a
seven-wire harness with a seven-pin
connector is at the rear of the vehicle and is
tied to the vehicle's frame.
Trailer Lamps
Always check that all trailer lamps are
working at the beginning of each trip, and
periodically on longer trips.
If equipped, the Trailering App will monitor
the RH turn/brake lamp circuit, LH turn/
brake lamp circuit, running lamp circuit, and
reverse lamp circuits on the trailer. DIC
messages and Trailering App alerts may be
displayed if lighting circuit issues are
detected on the trailer. Pressing START LIGHT TEST in the Trailering
App automatically activates the trailer
lamps. The Trailering App is not a substitute
for manually inspecting your trailer lamps.
See
Trailering App 0306.
Turn Signals When Towing a Trailer
When properly connected, the trailer turn
signals will illuminate to indicate the vehicle
is turning, changing lanes, or stopping.
When towing a trailer, the arrows on the
instrument cluster will illuminate even if the
trailer is not properly connected or the bulbs
are burned out.
Tow/Haul Mode
For instructions on how to enter Tow/Haul
Mode, see Driver Mode Control 0250.
Tow/Haul assists when pulling a heavy
trailer or a large or heavy load. See Tow/
Haul Mode 0241.
Tow/Haul Mode is designed to be most
effective when the vehicle and trailer
combined weight is at least 75% of the
vehicle's Gross Combined Weight Rating
(GCWR). See “Trailer Weight” underTrailer
Towing 0292.
Page 303 of 461
Chevrolet Silverado 1500 Owner Manual (GMNA-Localizing-U.S./Canada/
Mexico/Paraguay-14632303) - 2021 - CRC - 11/9/20
302 Driving and Operating
Tow/Haul Mode is most useful when towing
a heavy trailer or carrying a large or
heavy load:
.Through rolling terrain.
.In stop-and-go traffic.
.In busy parking lots.
Operating the vehicle in Tow/Haul Mode
when lightly loaded or not towing will not
cause damage; however, it is not
recommended and may result in unpleasant
engine and transmission driving
characteristics, heavy or light steering
efforts, and reduced fuel economy.
Integrated Trailer Brake Control System
The vehicle may have an Integrated Trailer
Brake Control (ITBC) system for use with
electric trailer brakes or most electric over
hydraulic trailer brake systems. These
instructions apply to both types of electric
trailer brakes.
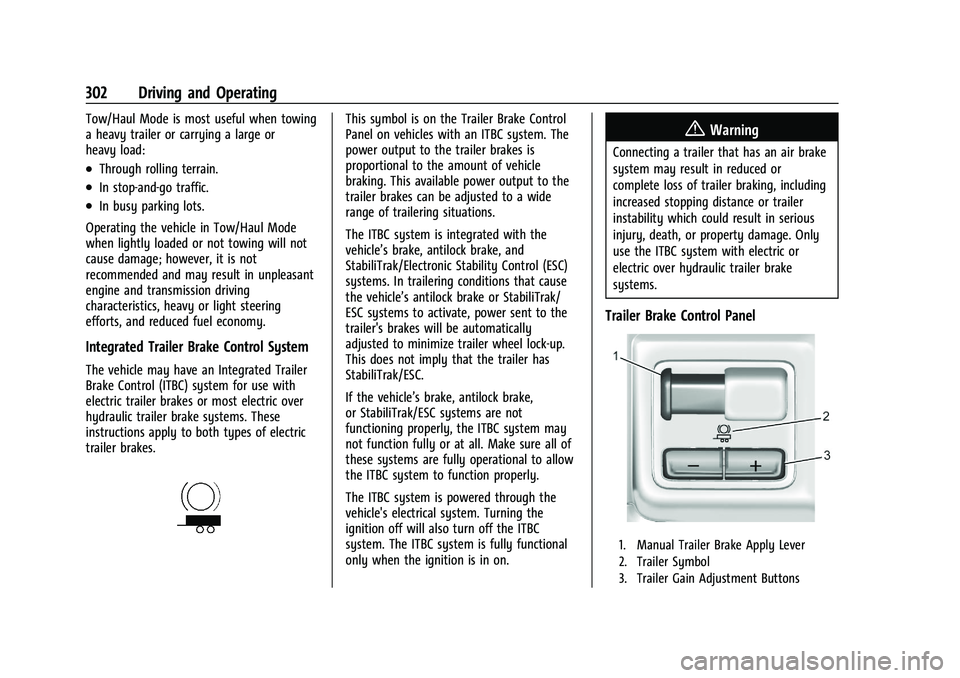
This symbol is on the Trailer Brake Control
Panel on vehicles with an ITBC system. The
power output to the trailer brakes is
proportional to the amount of vehicle
braking. This available power output to the
trailer brakes can be adjusted to a wide
range of trailering situations.
The ITBC system is integrated with the
vehicle’s brake, antilock brake, and
StabiliTrak/Electronic Stability Control (ESC)
systems. In trailering conditions that cause
the vehicle’s antilock brake or StabiliTrak/
ESC systems to activate, power sent to the
trailer's brakes will be automatically
adjusted to minimize trailer wheel lock-up.
This does not imply that the trailer has
StabiliTrak/ESC.
If the vehicle’s brake, antilock brake,
or StabiliTrak/ESC systems are not
functioning properly, the ITBC system may
not function fully or at all. Make sure all of
these systems are fully operational to allow
the ITBC system to function properly.
The ITBC system is powered through the
vehicle's electrical system. Turning the
ignition off will also turn off the ITBC
system. The ITBC system is fully functional
only when the ignition is in on.{Warning
Connecting a trailer that has an air brake
system may result in reduced or
complete loss of trailer braking, including
increased stopping distance or trailer
instability which could result in serious
injury, death, or property damage. Only
use the ITBC system with electric or
electric over hydraulic trailer brake
systems.
Trailer Brake Control Panel
1. Manual Trailer Brake Apply Lever
2. Trailer Symbol
3. Trailer Gain Adjustment Buttons
Page 321 of 461
Chevrolet Silverado 1500 Owner Manual (GMNA-Localizing-U.S./Canada/
Mexico/Paraguay-14632303) - 2021 - CRC - 11/9/20
320 Vehicle Care
Vehicle Care
General Information
General Information . . . . . . . . . . . . . . . . . . . 321
California Proposition 65 Warning . . . . . 321
California Perchlorate MaterialsRequirements . . . . . . . . . . . . . . . . . . . . . . . . 321
Accessories and Modifications . . . . . . . . . 322
Vehicle Checks
Doing Your Own Service Work . . . . . . . . . 322
Hood . . . . . . . . . . . . . . . . . . . . . . . . . . . . . . . . . . 322
Engine Compartment Overview . . . . . . . . 324
Engine Oil . . . . . . . . . . . . . . . . . . . . . . . . . . . . . 329
Engine Oil Life System . . . . . . . . . . . . . . . . . 331
Automatic Transmission Fluid . . . . . . . . . . 332
Engine Air Filter Life System . . . . . . . . . . . 332
Engine Air Cleaner/Filter . . . . . . . . . . . . . . . 333
Cooling System . . . . . . . . . . . . . . . . . . . . . . . . 334
Engine Overheating . . . . . . . . . . . . . . . . . . . . 337
Overheated Engine Protection Operating Mode . . . . . . . . . . . . . . . . . . . . . 339
Engine Fan . . . . . . . . . . . . . . . . . . . . . . . . . . . . 339
Washer Fluid . . . . . . . . . . . . . . . . . . . . . . . . . . 339
Brakes . . . . . . . . . . . . . . . . . . . . . . . . . . . . . . . . 340
Brake Pad Life System . . . . . . . . . . . . . . . . . 341
Brake Fluid . . . . . . . . . . . . . . . . . . . . . . . . . . . . 342
Battery - North America . . . . . . . . . . . . . . . 342 Four-Wheel Drive . . . . . . . . . . . . . . . . . . . . . . 345
Front Axle . . . . . . . . . . . . . . . . . . . . . . . . . . . . . 345
Rear Axle . . . . . . . . . . . . . . . . . . . . . . . . . . . . . . 345
Starter Switch Check . . . . . . . . . . . . . . . . . . 346
Automatic Transmission Shift Lock
Control Function Check . . . . . . . . . . . . . . 346
Ignition Transmission Lock Check . . . . . . 346
Park Brake and P (Park) Mechanism Check . . . . . . . . . . . . . . . . . . . . . . . . . . . . . . . 346
Wiper Blade Replacement . . . . . . . . . . . . . 347
Glass Replacement . . . . . . . . . . . . . . . . . . . . 347
Windshield Replacement . . . . . . . . . . . . . . 347
Gas Strut(s) . . . . . . . . . . . . . . . . . . . . . . . . . . . 348
Headlamp Aiming
Front Headlamp Aiming . . . . . . . . . . . . . . . 349
Bulb Replacement
Bulb Replacement . . . . . . . . . . . . . . . . . . . . . 349
Halogen Bulbs . . . . . . . . . . . . . . . . . . . . . . . . . 349
LED Lighting . . . . . . . . . . . . . . . . . . . . . . . . . . . 349
Headlamps, Front Turn Signal, Sidemarker, and Parking Lamps . . . . . 349
Taillamps, Turn Signal, Stoplamps, and Back-Up Lamps . . . . . . . . . . . . . . . . . . . . . . 350
Center High-Mounted Stoplamp (CHMSL) and Cargo Lamp . . . . . . . . . . . . 352
License Plate Lamp . . . . . . . . . . . . . . . . . . . . 352
Electrical System
Electrical System Overload . . . . . . . . . . . . . 352
Fuses and Circuit Breakers . . . . . . . . . . . . . 353
Engine Compartment Fuse Block . . . . . . . 353
Instrument Panel Fuse Block (Left) . . . . . 357
Instrument Panel Fuse Block (Right) . . . 358
Wheels and Tires
Tires . . . . . . . . . . . . . . . . . . . . . . . . . . . . . . . . . . . 361
All-Season Tires . . . . . . . . . . . . . . . . . . . . . . . . 361
Winter Tires . . . . . . . . . . . . . . . . . . . . . . . . . . . 362
All-Terrain Tires . . . . . . . . . . . . . . . . . . . . . . . 362
Tire Sidewall Labeling . . . . . . . . . . . . . . . . . 362
Tire Designations . . . . . . . . . . . . . . . . . . . . . . 364
Tire Terminology and Definitions . . . . . . 365
Tire Pressure . . . . . . . . . . . . . . . . . . . . . . . . . . 367
Tire Pressure Monitor System . . . . . . . . . 368
Tire Pressure Monitor Operation . . . . . . 369
Tire Inspection . . . . . . . . . . . . . . . . . . . . . . . . 374
Tire Rotation . . . . . . . . . . . . . . . . . . . . . . . . . . 374
When It Is Time for New Tires . . . . . . . . 375
Buying New Tires . . . . . . . . . . . . . . . . . . . . . 376
Different Size Tires and Wheels . . . . . . . . 377
Uniform Tire Quality Grading . . . . . . . . . . 377
Wheel Alignment and Tire Balance . . . . 379
Wheel Replacement . . . . . . . . . . . . . . . . . . . 379
Tire Chains . . . . . . . . . . . . . . . . . . . . . . . . . . . . 379
If a Tire Goes Flat . . . . . . . . . . . . . . . . . . . . . 380
Tire Changing . . . . . . . . . . . . . . . . . . . . . . . . . . 381
Full-Size Spare Tire . . . . . . . . . . . . . . . . . . . . . 391
Page 337 of 461
Chevrolet Silverado 1500 Owner Manual (GMNA-Localizing-U.S./Canada/
Mexico/Paraguay-14632303) - 2021 - CRC - 11/9/20
336 Vehicle Care
Check to see if coolant is visible in the
coolant surge tank. If the coolant inside the
coolant surge tank is boiling, wait until it
cools down. The coolant level should be at
or above the indicated mark. If it is not,
there may be a leak in the cooling system.
If coolant is visible but the coolant level is
not at or above the indicated mark, see the
following sections on how to add coolant to
the coolant surge tank following.
Automatic Coolant Service Fill
Instructions (L3B Engine)
This feature assists in filling and removing
air from the cooling system after service of
components or when coolant is added after
being too low.
To activate the fill and air removal process:1. Remove the coolant surge tank pressure cap when the cooling system, including
the coolant surge tank pressure cap and
upper radiator hose, is no longer hot.
Turn the pressure cap; slowly
counterclockwise about one full turn. If a
hiss is heard, wait for that to stop.
A hiss means there is still some
pressure left.
2. Keep turning the pressure cap slowly, and remove it. 3. Fill the coolant surge tank with the
proper mixture to the indicated mark.
4. Connect the vehicle to a battery charger.
5. Set the ignition to service mode, see Ignition Positions (Keyless Access) 0230
or
Ignition Positions (Key Access) 0229.
6. Turn off the air conditioning.
7. Set the parking brake.
8. At the same time, press the accelerator and the brake for automatic vehicles for
two seconds, then release.
9. Listen for pump activation and movement of the control valves while
watching the level of the coolant in the
surge tank. Add fluid as the level drops
below the indicated mark on the surge
tank. Allow 15 minutes for the fill and air
removal process to complete.
10. Reinstall the surge tank cap.
If the tank empties, turn the ignition off,
allow the Electronic Control Module (ECM) to
go to sleep, about two minutes, refill to the
indicated mark, and repeat Steps 5–9.
How to Add Coolant to the Coolant
Surge Tank for Gasoline Engines
Except L3B
If the vehicle has a diesel engine, see
“Cooling System” in the Duramax diesel
supplement for the proper coolant fill
procedure.
{Warning
Spilling coolant on hot engine parts can
burn you. Coolant contains ethylene
glycol and it will burn if the engine parts
are hot enough.
{Warning
Plain water, or other liquids such as
alcohol, can boil before the proper
coolant mixture will. With plain water or
the wrong mixture, the engine could get
too hot but there would not be an
overheat warning. The engine could catch
fire and you or others could be burned.
Page 347 of 461
Chevrolet Silverado 1500 Owner Manual (GMNA-Localizing-U.S./Canada/
Mexico/Paraguay-14632303) - 2021 - CRC - 11/9/20
346 Vehicle Care
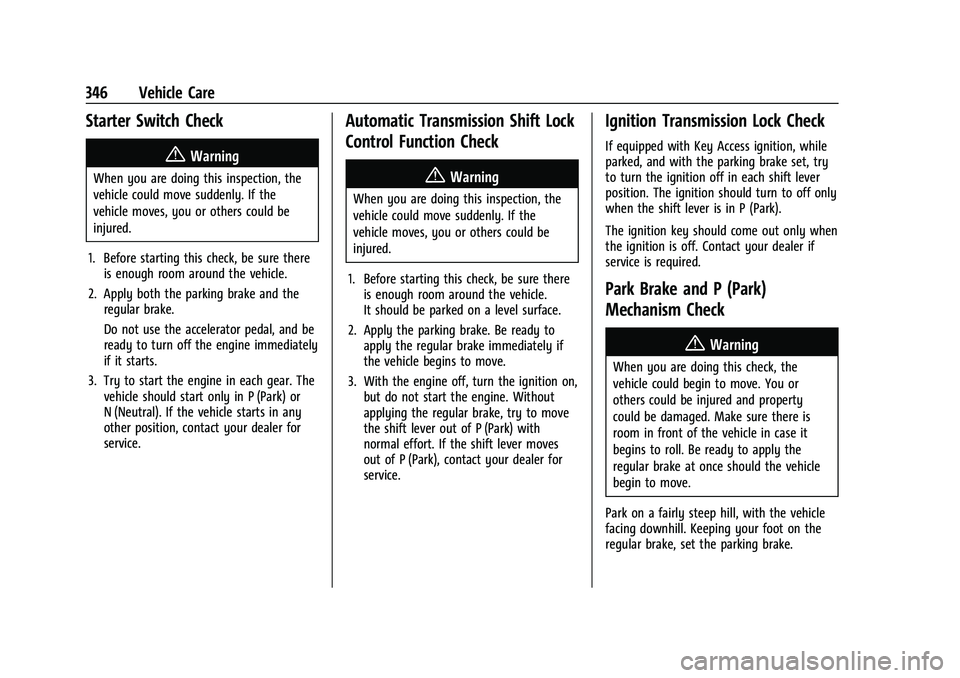
Starter Switch Check
{Warning
When you are doing this inspection, the
vehicle could move suddenly. If the
vehicle moves, you or others could be
injured.
1. Before starting this check, be sure there is enough room around the vehicle.
2. Apply both the parking brake and the regular brake.
Do not use the accelerator pedal, and be
ready to turn off the engine immediately
if it starts.
3. Try to start the engine in each gear. The vehicle should start only in P (Park) or
N (Neutral). If the vehicle starts in any
other position, contact your dealer for
service.
Automatic Transmission Shift Lock
Control Function Check
{Warning
When you are doing this inspection, the
vehicle could move suddenly. If the
vehicle moves, you or others could be
injured.
1. Before starting this check, be sure there is enough room around the vehicle.
It should be parked on a level surface.
2. Apply the parking brake. Be ready to apply the regular brake immediately if
the vehicle begins to move.
3. With the engine off, turn the ignition on, but do not start the engine. Without
applying the regular brake, try to move
the shift lever out of P (Park) with
normal effort. If the shift lever moves
out of P (Park), contact your dealer for
service.
Ignition Transmission Lock Check
If equipped with Key Access ignition, while
parked, and with the parking brake set, try
to turn the ignition off in each shift lever
position. The ignition should turn to off only
when the shift lever is in P (Park).
The ignition key should come out only when
the ignition is off. Contact your dealer if
service is required.
Park Brake and P (Park)
Mechanism Check
{Warning
When you are doing this check, the
vehicle could begin to move. You or
others could be injured and property
could be damaged. Make sure there is
room in front of the vehicle in case it
begins to roll. Be ready to apply the
regular brake at once should the vehicle
begin to move.
Park on a fairly steep hill, with the vehicle
facing downhill. Keeping your foot on the
regular brake, set the parking brake.
Page 348 of 461
Chevrolet Silverado 1500 Owner Manual (GMNA-Localizing-U.S./Canada/
Mexico/Paraguay-14632303) - 2021 - CRC - 11/9/20
Vehicle Care 347
.To check the parking brake's holding
ability: With the engine running and the
transmission in N (Neutral), slowly remove
foot pressure from the regular brake
pedal. Do this until the vehicle is held by
the parking brake only.
.To check the P (Park) mechanism's holding
ability: With the engine running, shift to
P (Park). Then release the parking brake
followed by the regular brake.
Contact your dealer if service is required.
Wiper Blade Replacement
Windshield wiper blades should be replaced
periodically. See Maintenance Schedule
0 409.
Replacement blades come in different types
and are removed in different ways. For
proper type and length, see Maintenance
Replacement Parts 0419.
Caution
Allowing the wiper arm to touch the
windshield when no wiper blade is
installed could damage the windshield.
Any damage that occurs would not be
(Continued)
Caution (Continued)
covered by the vehicle warranty. Do not
allow the wiper arm to touch the
windshield.
Front Wiper Blade Replacement
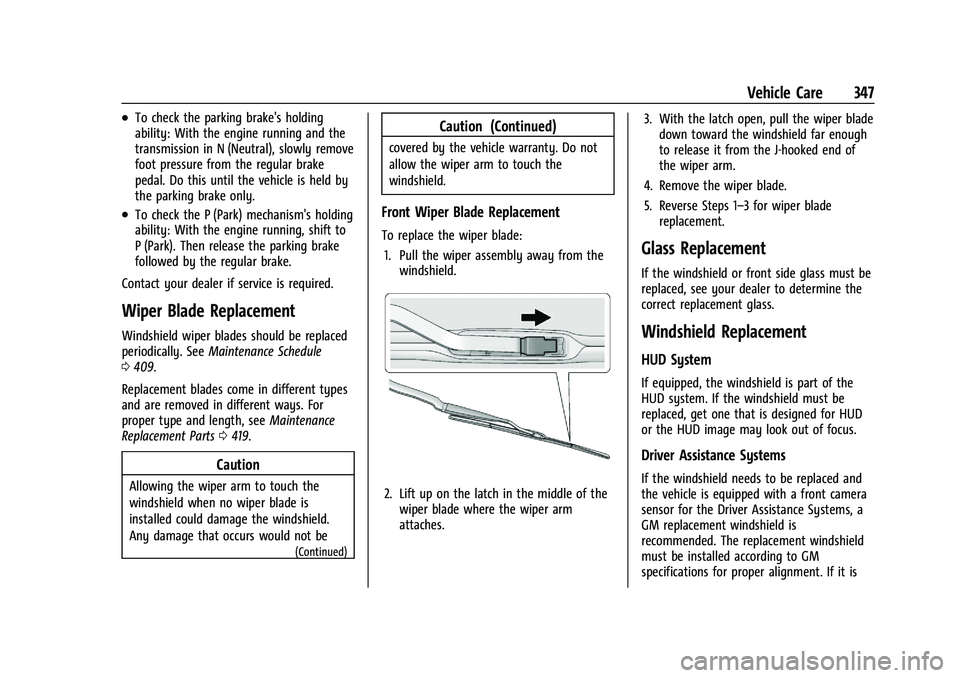
To replace the wiper blade:
1. Pull the wiper assembly away from the windshield.
2. Lift up on the latch in the middle of the
wiper blade where the wiper arm
attaches. 3. With the latch open, pull the wiper blade
down toward the windshield far enough
to release it from the J-hooked end of
the wiper arm.
4. Remove the wiper blade.
5. Reverse Steps 1–3 for wiper blade replacement.
Glass Replacement
If the windshield or front side glass must be
replaced, see your dealer to determine the
correct replacement glass.
Windshield Replacement
HUD System
If equipped, the windshield is part of the
HUD system. If the windshield must be
replaced, get one that is designed for HUD
or the HUD image may look out of focus.
Driver Assistance Systems
If the windshield needs to be replaced and
the vehicle is equipped with a front camera
sensor for the Driver Assistance Systems, a
GM replacement windshield is
recommended. The replacement windshield
must be installed according to GM
specifications for proper alignment. If it is
Page 357 of 461
Chevrolet Silverado 1500 Owner Manual (GMNA-Localizing-U.S./Canada/
Mexico/Paraguay-14632303) - 2021 - CRC - 11/9/20
356 Vehicle Care
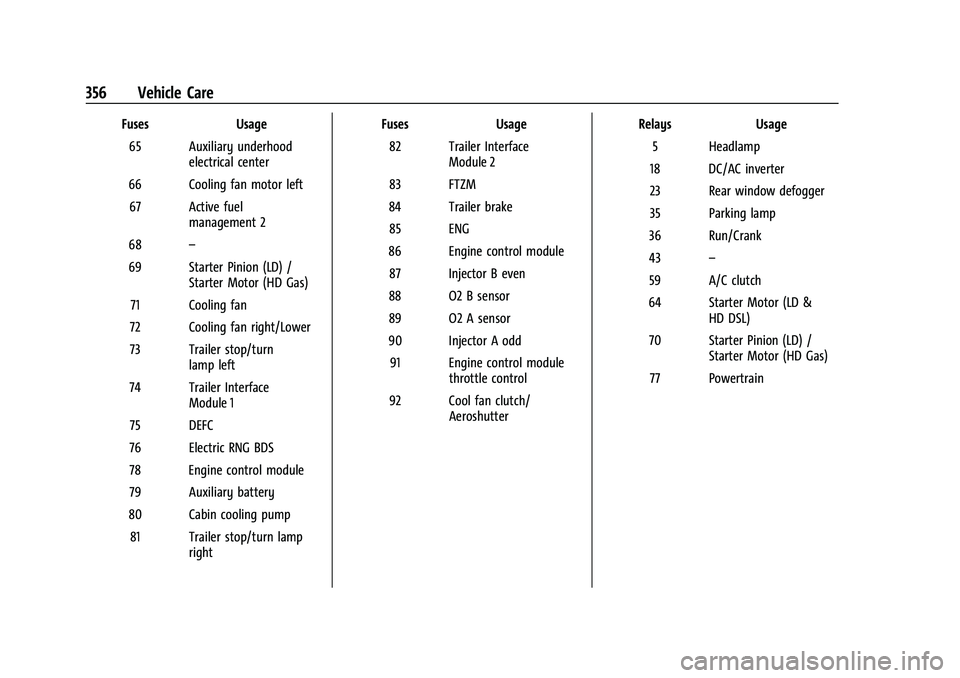
FusesUsage
65 Auxiliary underhood electrical center
66 Cooling fan motor left 67 Active fuel management 2
68 –
69 Starter Pinion (LD) / Starter Motor (HD Gas)
71 Cooling fan
72 Cooling fan right/Lower
73 Trailer stop/turn lamp left
74 Trailer Interface Module 1
75 DEFC
76 Electric RNG BDS
78 Engine control module
79 Auxiliary battery
80 Cabin cooling pump 81 Trailer stop/turn lamp right Fuses
Usage
82 Trailer Interface Module 2
83 FTZM
84 Trailer brake 85 ENG
86 Engine control module 87 Injector B even
88 O2 B sensor
89 O2 A sensor
90 Injector A odd 91 Engine control module throttle control
92 Cool fan clutch/ Aeroshutter Relays
Usage
5 Headlamp
18 DC/AC inverter
23 Rear window defogger
35 Parking lamp
36 Run/Crank
43 –
59 A/C clutch
64 Starter Motor (LD & HD DSL)
70 Starter Pinion (LD) / Starter Motor (HD Gas)
77 Powertrain
Page 361 of 461
Chevrolet Silverado 1500 Owner Manual (GMNA-Localizing-U.S./Canada/
Mexico/Paraguay-14632303) - 2021 - CRC - 11/9/20
360 Vehicle Care
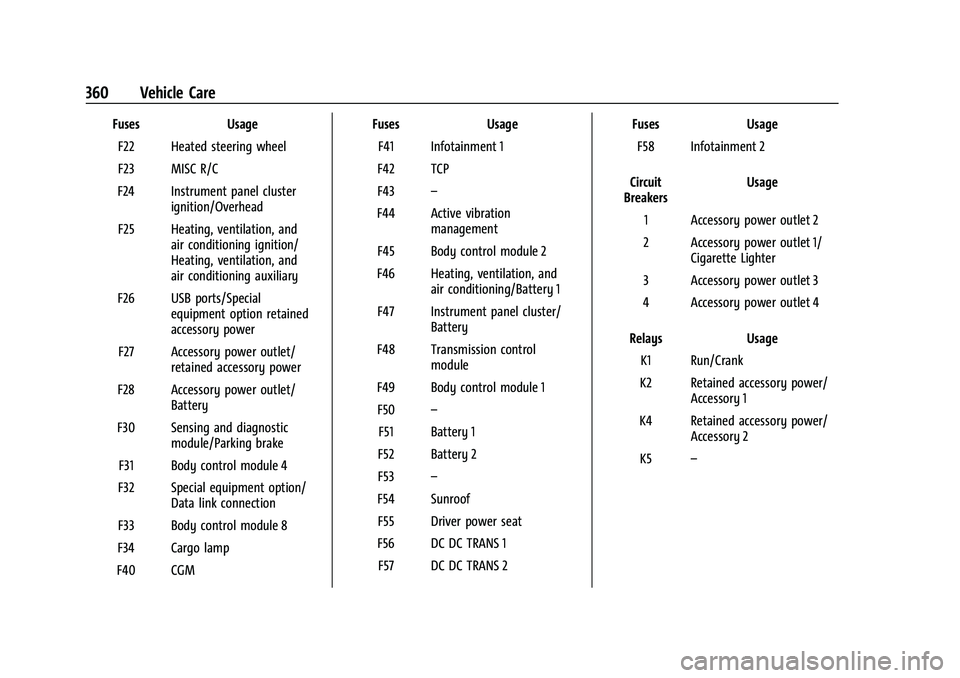
FusesUsage
F22 Heated steering wheel
F23 MISC R/C
F24 Instrument panel cluster ignition/Overhead
F25 Heating, ventilation, and air conditioning ignition/
Heating, ventilation, and
air conditioning auxiliary
F26 USB ports/Special equipment option retained
accessory power
F27 Accessory power outlet/ retained accessory power
F28 Accessory power outlet/ Battery
F30 Sensing and diagnostic module/Parking brake
F31 Body control module 4
F32 Special equipment option/ Data link connection
F33 Body control module 8
F34 Cargo lamp
F40 CGM Fuses
Usage
F41 Infotainment 1
F42 TCP
F43 –
F44 Active vibration management
F45 Body control module 2
F46 Heating, ventilation, and air conditioning/Battery 1
F47 Instrument panel cluster/ Battery
F48 Transmission control module
F49 Body control module 1 F50 –
F51 Battery 1
F52 Battery 2
F53 –
F54 Sunroof F55 Driver power seat
F56 DC DC TRANS 1 F57 DC DC TRANS 2 Fuses
Usage
F58 Infotainment 2
Circuit
Breakers Usage
1 Accessory power outlet 2
2 Accessory power outlet 1/ Cigarette Lighter
3 Accessory power outlet 3
4 Accessory power outlet 4
Relays Usage
K1 Run/Crank
K2 Retained accessory power/ Accessory 1
K4 Retained accessory power/ Accessory 2
K5 –