2022 CHEVROLET SILVERADO 1500 key
[x] Cancel search: keyPage 241 of 461
Chevrolet Silverado 1500 Owner Manual (GMNA-Localizing-U.S./Canada/
Mexico/Paraguay-14632303) - 2021 - CRC - 11/9/20
240 Driving and Operating
Downshifting the transmission in slippery
road conditions could result in skidding. See
“Skidding”underLoss of Control 0215.
The vehicle has a shift stabilization feature
that adjusts the transmission shifting to the
current driving conditions in order to reduce
rapid upshifts and downshifts. This shift
stabilization feature is designed to
determine, before making an upshift, if the
engine is able to maintain vehicle speed by
analyzing things such as vehicle speed,
throttle position, and vehicle load. If the
shift stabilization feature determines that a
current vehicle speed cannot be maintained,
the transmission does not upshift and
instead holds the current gear. In some
cases, this could appear to be a delayed
shift, however the transmission is operating
normally.
The transmission uses adaptive shift
controls. The adaptive shift control process
continually compares key shift parameters
to pre-programmed ideal shifts stored in the
transmission’s computer. The transmission
constantly makes adjustments to improve
vehicle performance according to how the
vehicle is being used, such as with a heavy
load or when the temperature changes. During this adaptive shift control process,
shifting might feel different as the
transmission determines the best settings.
When temperatures are very cold, the
transmission's gear shifting could be delayed
providing more stable shifts until the engine
warms up. Shifts could be more noticeable
with a cold transmission. This difference in
shifting is normal.
If equipped with the 2.7L L4 engine, engine
speeds may be increased while driving at
highway speeds while the engine is still
warming up.
L :
This position allows selection of a range
of gears appropriate for current driving
conditions. If equipped, see “Range Selection
Mode” underManual Mode 0240.
Caution
Spinning the tires or holding the vehicle
in one place on a hill using only the
accelerator pedal may damage the
transmission. The repair will not be
covered by the vehicle warranty. If the
vehicle is stuck, do not spin the tires.
When stopping on a hill, use the brakes
to hold the vehicle in place.
Manual Mode
Electronic Range Select (ERS)
Caution
Driving with the engine at a high rpm
without upshifting while using Manual
Mode, could damage the vehicle. Always
upshift when necessary while using
Manual Mode.
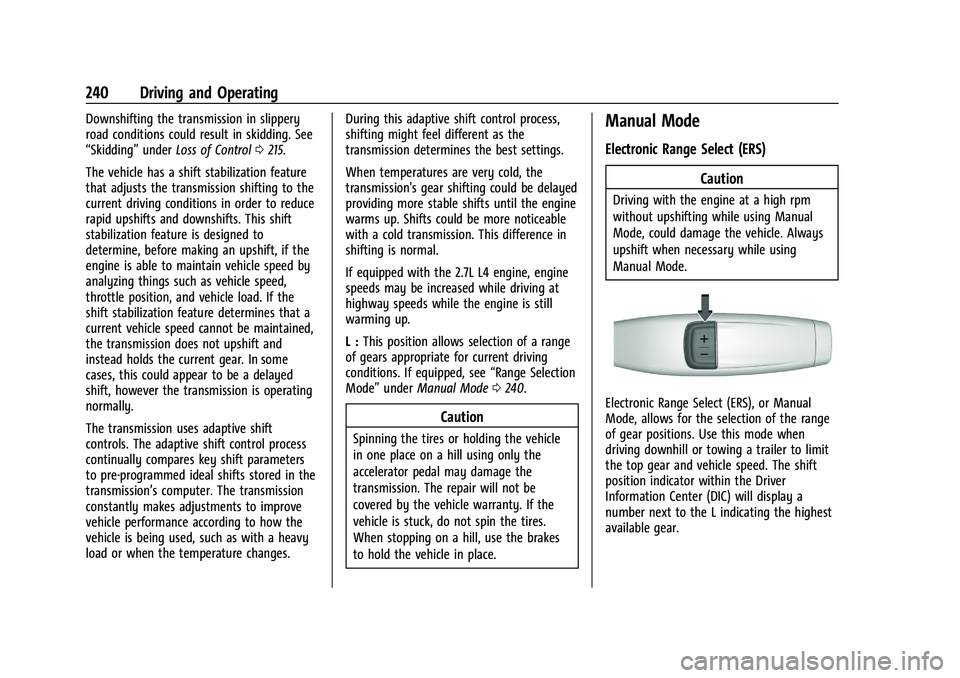
Electronic Range Select (ERS), or Manual
Mode, allows for the selection of the range
of gear positions. Use this mode when
driving downhill or towing a trailer to limit
the top gear and vehicle speed. The shift
position indicator within the Driver
Information Center (DIC) will display a
number next to the L indicating the highest
available gear.
Page 245 of 461
Chevrolet Silverado 1500 Owner Manual (GMNA-Localizing-U.S./Canada/
Mexico/Paraguay-14632303) - 2021 - CRC - 11/9/20
244 Driving and Operating
With the vehicle moving less than
5 km/h (3 mph) and the transmission in
N (Neutral), attempt the shift again.
Shifting Out of 4
n
1. The vehicle must be stopped or movingless than 5 km/h (3 mph) with the
transmission in N (Neutral) and the
ignition on. It is best for the vehicle to
be moving 1.6 to 3.2 km/h (1 to 2 mph).
2. Press 4
m, AUTO, or 2m. The actual 4x4
shift request is only made after the
button is released. The 4x4 graphic will
remain flashing until the shift request
has completed. A DIC message displays
to indicate the state of the request.
Once the 4x4 shift has completed, the
DIC message disappears, the 4x4 graphic
stops flashing, and the current setting is
indicated.
If vehicle speed is higher when shift
request occurs, a DIC message displays.
Reduce vehicle speed.
If the transmission is not in N (Neutral)
when shift request occurs, DIC messages will
display. The vehicle will allow 20 seconds for
this shift to occur. After this time, a graphic
in the instrument cluster will indicate that
the transfer case is in 4
n.
Caution
Shifting the transmission into gear before
the requested mode indicator light has
stopped flashing could damage the
transfer case.
If the transmission is not shifted into
N (Neutral) or the vehicle has not slowed to
5 km/h (3 mph) within 20 seconds, the
transfer case will remain in its original state.
This will be indicated in the instrument
cluster.
With the vehicle moving less than 5 km/h
(3 mph), and the transmission in N (Neutral),
attempt the shift again.
Shifting Into N (Neutral)
To shift into N (Neutral): 1. Start the vehicle.
2. Shift the transmission to N (Neutral).
3. Shift the transfer case to 2
m.
4. Apply the parking brake and/or brake pedal.
5. Press 2
mfive times in 10 seconds until
the N (Neutral) graphic starts flashing in
the instrument cluster. When the shift is
complete, the graphic stops flashing. If the parking brake and/or brake pedal
is not applied within 20 seconds, the
transfer case will remain in the original
state.
6. If the transmission is not shifted into N (Neutral) or the vehicle has not slowed
to 5 km/h (3 mph) within 20 seconds,
the transfer case will remain in its
original state. This will be indicated in
the instrument cluster.
Shifting Out of N (Neutral)
To shift out of N (Neutral): 1. Turn the ignition on with the engine off. See Ignition Positions (Keyless Access)
0 230 or
Ignition Positions (Key Access) 0229.
2. Set the parking brake. See Electric
Parking Brake 0246.
3. Shift the transmission to N (Neutral).
4. Shift the transfer case to 2
m. Transfer
case shifts out of N (Neutral) can only be
made into 2
m. When the shift to 2mis
complete, the graphic in the instrument
cluster will stop flashing. If the transfer
case cannot complete a shift, the graphic
will return to the previously selected
setting.
Page 288 of 461
Chevrolet Silverado 1500 Owner Manual (GMNA-Localizing-U.S./Canada/
Mexico/Paraguay-14632303) - 2021 - CRC - 11/9/20
Driving and Operating 287
Warning (Continued)
.Keep children away from the fuel
pump and never let children
pump fuel.
.Before touching the fill nozzle, touch a
metallic object to discharge static
electricity from your body.
.Fuel can spray out if the fuel cap is
opened too quickly. This spray can
happen if the tank is nearly full, and is
more likely in hot weather. Open the
fuel cap slowly and wait for any hiss
noise to stop, then unscrew the cap all
the way.
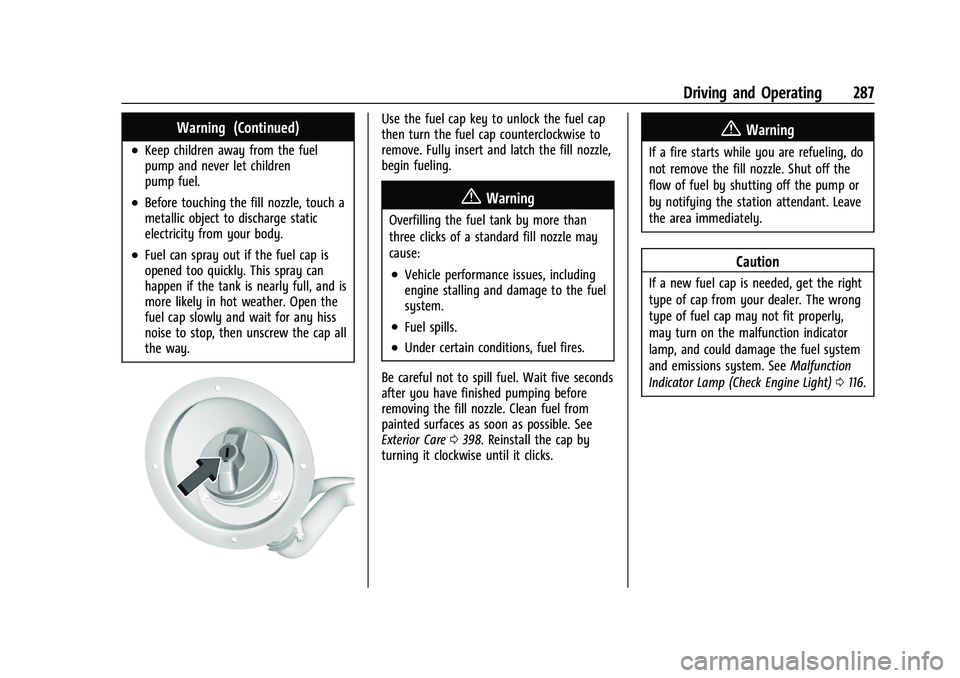
Use the fuel cap key to unlock the fuel cap
then turn the fuel cap counterclockwise to
remove. Fully insert and latch the fill nozzle,
begin fueling.
{Warning
Overfilling the fuel tank by more than
three clicks of a standard fill nozzle may
cause:
.Vehicle performance issues, including
engine stalling and damage to the fuel
system.
.Fuel spills.
.Under certain conditions, fuel fires.
Be careful not to spill fuel. Wait five seconds
after you have finished pumping before
removing the fill nozzle. Clean fuel from
painted surfaces as soon as possible. See
Exterior Care 0398. Reinstall the cap by
turning it clockwise until it clicks.
{Warning
If a fire starts while you are refueling, do
not remove the fill nozzle. Shut off the
flow of fuel by shutting off the pump or
by notifying the station attendant. Leave
the area immediately.
Caution
If a new fuel cap is needed, get the right
type of cap from your dealer. The wrong
type of fuel cap may not fit properly,
may turn on the malfunction indicator
lamp, and could damage the fuel system
and emissions system. See Malfunction
Indicator Lamp (Check Engine Light) 0116.
Page 316 of 461
Chevrolet Silverado 1500 Owner Manual (GMNA-Localizing-U.S./Canada/
Mexico/Paraguay-14632303) - 2021 - CRC - 11/9/20
Driving and Operating 315
On the Learn Sensors screen. Touch Relearn
to overwrite the current sensors and begin
the relearning process. See“Trailer Tire
Pressure Setup” previously in this section.
On the Learn Sensors screen, touch Next to
go to the Edit Recommended Tire Pressure
screen.
On the Edit Recommended Tire Pressure
screen, touch a number on the keypad to
change the
Recommended Tire Pressure for the trailer’s
tires. This will change the number at which
the vehicle displays alerts related to trailer
tire pressure. Touch Done to return to the
Trailer Profile view.
Trailer Maintenance
Touch to view a list of maintenance
reminders for the Trailer Profile.
Touch a reminder to view, reset, delete,
or edit it.
Reset Reminder
Touch Maintenance Complete in the
reminder view to reset the reminder. On the
pop-up, touch Reset to reset the time and
mileage values for the reminder. Touch
Cancel to return to the previous view and
nothing will change. Edit Reminder
Touch to edit the mileage or time settings
for the reminder. Touch Save to save the
new settings to the Trailer Profile.
Delete Reminder
Touch to delete the maintenance reminder.
On the pop-up, touch Delete to delete the
reminder or touch Cancel to return to the
previous view and nothing will change.
New Maintenance Reminder
Touch + New Maintenance Reminder to set
up a new reminder. Suggested reminders
that were previously set will have
checkmarks next to them. Suggested
reminders that have not been set will have
empty boxes next to them. The maximum
number of reminders is 50.
Edit Mileage
Touch to edit the Trailer Profile’s mileage.
Touch Reset to reset trailer mileage to zero,
or enter a new value and touch Save.
Touching back will return to the Trailer
Profile view.
Effect on Maintenance Reminders
If the mileage is reset or changed, and
mileage has already accumulated, any
maintenance reminders that have been set
up will be adjusted accordingly.
Reset Average Fuel Economy
Touch to reset the average fuel economy for
the Trailer Profile. Touch Reset to change,
or touch Cancel to go back to the
previous view.
Delete/Remove Trailer
Touch to remove the Trailer Profile and all
of its settings.
On the pop-up, touch Remove to remove the
Trailer Profile from the vehicle. Touch Cancel
to dismiss the pop-up and return to the
previous view.
Remove will be displayed if there is a
connected OnStar plan active with the
vehicle. Removing a trailer profile will
remove the profile from the vehicle but the
profile will still be associated with the user
account. However, if there is not a
connected OnStar plan then the remove
button will read DELETE and the profile will
be deleted permanently.
Page 322 of 461
Chevrolet Silverado 1500 Owner Manual (GMNA-Localizing-U.S./Canada/
Mexico/Paraguay-14632303) - 2021 - CRC - 11/9/20
Vehicle Care 321
Jump Starting
Jump Starting - North America . . . . . . . . 391
Towing the Vehicle
Towing the Vehicle . . . . . . . . . . . . . . . . . . . . 394
Recreational Vehicle Towing . . . . . . . . . . . 395
Appearance Care
Exterior Care . . . . . . . . . . . . . . . . . . . . . . . . . . 398
Interior Care . . . . . . . . . . . . . . . . . . . . . . . . . . 403
Floor Mats . . . . . . . . . . . . . . . . . . . . . . . . . . . . 405
General Information
For service and parts needs, visit your
dealer. You will receive genuine GM parts
and GM-trained and supported service
people.
Genuine GM parts have one of these marks:
California Proposition 65 Warning
{Warning
Most motor vehicles, including this one,
as well as many of its service parts and
fluids, contain and/or emit chemicals
known to the State of California to cause(Continued)
Warning (Continued)
cancer and birth defects or other
reproductive harm. Engine exhaust, many
parts and systems, many fluids, and
some component wear by-products
contain and/or emit these chemicals. For
more information go to
www.P65Warnings.ca.gov/
passenger-vehicle.
See Battery - North America 0342 and
Jump Starting - North America 0391 and the
back cover.
California Perchlorate Materials
Requirements
Certain types of automotive applications,
such as airbag initiators, seat belt
pretensioners, and lithium batteries
contained in electronic keys, may contain
perchlorate materials. Perchlorate Material –
special handling may apply. See
www.dtsc.ca.gov/hazardouswaste/
perchlorate.
Page 337 of 461
Chevrolet Silverado 1500 Owner Manual (GMNA-Localizing-U.S./Canada/
Mexico/Paraguay-14632303) - 2021 - CRC - 11/9/20
336 Vehicle Care
Check to see if coolant is visible in the
coolant surge tank. If the coolant inside the
coolant surge tank is boiling, wait until it
cools down. The coolant level should be at
or above the indicated mark. If it is not,
there may be a leak in the cooling system.
If coolant is visible but the coolant level is
not at or above the indicated mark, see the
following sections on how to add coolant to
the coolant surge tank following.
Automatic Coolant Service Fill
Instructions (L3B Engine)
This feature assists in filling and removing
air from the cooling system after service of
components or when coolant is added after
being too low.
To activate the fill and air removal process:1. Remove the coolant surge tank pressure cap when the cooling system, including
the coolant surge tank pressure cap and
upper radiator hose, is no longer hot.
Turn the pressure cap; slowly
counterclockwise about one full turn. If a
hiss is heard, wait for that to stop.
A hiss means there is still some
pressure left.
2. Keep turning the pressure cap slowly, and remove it. 3. Fill the coolant surge tank with the
proper mixture to the indicated mark.
4. Connect the vehicle to a battery charger.
5. Set the ignition to service mode, see Ignition Positions (Keyless Access) 0230
or
Ignition Positions (Key Access) 0229.
6. Turn off the air conditioning.
7. Set the parking brake.
8. At the same time, press the accelerator and the brake for automatic vehicles for
two seconds, then release.
9. Listen for pump activation and movement of the control valves while
watching the level of the coolant in the
surge tank. Add fluid as the level drops
below the indicated mark on the surge
tank. Allow 15 minutes for the fill and air
removal process to complete.
10. Reinstall the surge tank cap.
If the tank empties, turn the ignition off,
allow the Electronic Control Module (ECM) to
go to sleep, about two minutes, refill to the
indicated mark, and repeat Steps 5–9.
How to Add Coolant to the Coolant
Surge Tank for Gasoline Engines
Except L3B
If the vehicle has a diesel engine, see
“Cooling System” in the Duramax diesel
supplement for the proper coolant fill
procedure.
{Warning
Spilling coolant on hot engine parts can
burn you. Coolant contains ethylene
glycol and it will burn if the engine parts
are hot enough.
{Warning
Plain water, or other liquids such as
alcohol, can boil before the proper
coolant mixture will. With plain water or
the wrong mixture, the engine could get
too hot but there would not be an
overheat warning. The engine could catch
fire and you or others could be burned.
Page 344 of 461
Chevrolet Silverado 1500 Owner Manual (GMNA-Localizing-U.S./Canada/
Mexico/Paraguay-14632303) - 2021 - CRC - 11/9/20
Vehicle Care 343
Stop/Start System
Vehicles equipped with a 2.7L L3B, 3.0L LM2,
5.3L L84 or 6.2L L87 are equipped with a
Stop/Start system to shut off the engine to
help conserve fuel. SeeStop/Start System
0 233.
Vehicles with the Stop/Start system have an
Absorbed Glass Mat (AGM) 12-volt battery.
Installation of a standard 12-volt battery will
result in reduced 12-volt battery life. When
using a 12-volt battery charger on the 12-volt
AGM battery, some chargers have an AGM
battery setting on the charger. If available,
use the AGM setting on the charger to limit
charge voltage to 14.8 volts. Follow the
charger manufacturer’s instructions.
{Warning
WARNING: Battery posts, terminals, and
related accessories contain lead and lead
compounds, chemicals known to the
State of California to cause cancer and
birth defects or other reproductive harm.
Batteries also contain other chemicals
known to the State of California to cause
cancer. WASH HANDS AFTER HANDLING.
(Continued)
Warning (Continued)
For more information go to
www.P65Warnings.ca.gov/
passenger-vehicle.
See California Proposition 65 Warning 0321
and the back cover.
Vehicle Storage
{Warning
Batteries have acid that can burn you and
gas that can explode. You can be badly
hurt if you are not careful. See Jump
Starting - North America 0391 for tips on
working around a battery without
getting hurt.
Infrequent Usage: Remove the black,
negative (−) cable from the battery to keep
the battery from running down.
Extended Storage: Remove the black,
negative (−) cable from the battery or use a
battery trickle charger.
Negative Battery Cable Disconnection
{Warning
Before disconnecting the negative battery
cable, turn off all features, turn the
ignition off, and remove the key,
if equipped, from the vehicle. If this is
not done, you or others could be injured,
and the vehicle could be damaged.
Caution
If the battery is disconnected with the
ignition on or the vehicle in Retained
Accessory Power (RAP), the OnStar
back-up battery will be permanently
discharged and will need to be replaced.
1. Make sure the lamps, features, and accessories are turned off.
2. Turn the ignition off and remove the key, if equipped.
Page 347 of 461
Chevrolet Silverado 1500 Owner Manual (GMNA-Localizing-U.S./Canada/
Mexico/Paraguay-14632303) - 2021 - CRC - 11/9/20
346 Vehicle Care
Starter Switch Check
{Warning
When you are doing this inspection, the
vehicle could move suddenly. If the
vehicle moves, you or others could be
injured.
1. Before starting this check, be sure there is enough room around the vehicle.
2. Apply both the parking brake and the regular brake.
Do not use the accelerator pedal, and be
ready to turn off the engine immediately
if it starts.
3. Try to start the engine in each gear. The vehicle should start only in P (Park) or
N (Neutral). If the vehicle starts in any
other position, contact your dealer for
service.
Automatic Transmission Shift Lock
Control Function Check
{Warning
When you are doing this inspection, the
vehicle could move suddenly. If the
vehicle moves, you or others could be
injured.
1. Before starting this check, be sure there is enough room around the vehicle.
It should be parked on a level surface.
2. Apply the parking brake. Be ready to apply the regular brake immediately if
the vehicle begins to move.
3. With the engine off, turn the ignition on, but do not start the engine. Without
applying the regular brake, try to move
the shift lever out of P (Park) with
normal effort. If the shift lever moves
out of P (Park), contact your dealer for
service.
Ignition Transmission Lock Check
If equipped with Key Access ignition, while
parked, and with the parking brake set, try
to turn the ignition off in each shift lever
position. The ignition should turn to off only
when the shift lever is in P (Park).
The ignition key should come out only when
the ignition is off. Contact your dealer if
service is required.
Park Brake and P (Park)
Mechanism Check
{Warning
When you are doing this check, the
vehicle could begin to move. You or
others could be injured and property
could be damaged. Make sure there is
room in front of the vehicle in case it
begins to roll. Be ready to apply the
regular brake at once should the vehicle
begin to move.
Park on a fairly steep hill, with the vehicle
facing downhill. Keeping your foot on the
regular brake, set the parking brake.