2022 CHEVROLET EQUINOX brake light
[x] Cancel search: brake lightPage 210 of 360
Chevrolet Equinox Owner Manual (GMNA-Localizing-U.S./Canada-
16540728) - 2023 - crc - 6/16/22
Driving and Operating 209
The speedometer reading can be displayed
in either English or metric units. See
Instrument Cluster (Base and Midlevel)087
or
Instrument Cluster (Uplevel) 090. The
increment value used depends on the units
displayed.
Reducing Speed While Using Cruise Control
If the cruise control system is already
activated:
.Press and hold -SET until the desired
lower speed is reached, then release it.
.To slow down in small increments, briefly
press -SET. For each press, the vehicle
goes about 1 km/h (1 mph) slower.
The speedometer reading can be displayed
in either English or metric units. See
Instrument Cluster (Base and Midlevel) 087
or
Instrument Cluster (Uplevel) 090. The
increment value used depends on the units
displayed.
Passing Another Vehicle While Using Cruise
Control
Use the accelerator pedal to increase the
vehicle speed. When you take your foot off
the pedal, the vehicle will slow down to the
previous set cruise speed. While pressing the accelerator pedal or shortly following the
release to override cruise control, briefly
pressing -SET will result in cruise control set
to the current vehicle speed.
Using Cruise Control on Hills
How well the cruise control works on hills
depends upon the vehicle speed, load, and
the steepness of the hills. When going up
steep hills, you might have to step on the
accelerator pedal to maintain the vehicle
speed. When going downhill, you might
have to brake or shift to a lower gear to
keep your speed down. If the brake pedal is
applied, cruise control will disengage.
Ending Cruise Control
There are four ways to end cruise control:
.Step lightly on the brake pedal.
.Press*.
.Shift the transmission to N (Neutral).
.To turn off cruise control, press5.
Erasing Speed Memory
The cruise control set speed is erased from
memory if
5is pressed or if the ignition is
turned off.
Adaptive Cruise Control (Camera)
If equipped, Adaptive Cruise Control (ACC)
allows the cruise control set speed and
following gap to be selected. Read this
entire section before using this system. The
following gap is the following time between
your vehicle and a vehicle detected directly
ahead in your path, moving in the same
direction. If no vehicle is detected in your
path, ACC works like regular cruise control.
ACC uses a windshield mounted front
camera sensor.
If a vehicle is detected in your path, ACC can
apply acceleration or limited, moderate
braking to maintain the selected following
gap. To disengage ACC, apply the brake.
If ACC is controlling the vehicle speed when
the Traction Control System (TCS) or
StabiliTrak/Electronic Stability Control (ESC)
system activates, ACC may automatically
disengage. See Traction Control/Electronic
Stability Control 0204. When road
conditions allow ACC to be safely used, ACC
can be turned back on. Disabling the TCS or
StabiliTrak/ESC system will disengage and
prevent engagement of ACC.
ACC can reduce the need for you to
frequently brake and accelerate, especially
when used on expressways, freeways, and
Page 216 of 360
Chevrolet Equinox Owner Manual (GMNA-Localizing-U.S./Canada-
16540728) - 2023 - crc - 6/16/22
Driving and Operating 215
Warning (Continued)
ahead changing lanes. Your vehicle may
not stop and could cause a crash. Use
caution when using ACC. Your complete
attention is always required while driving
and you should be ready to take action
and apply the brakes.
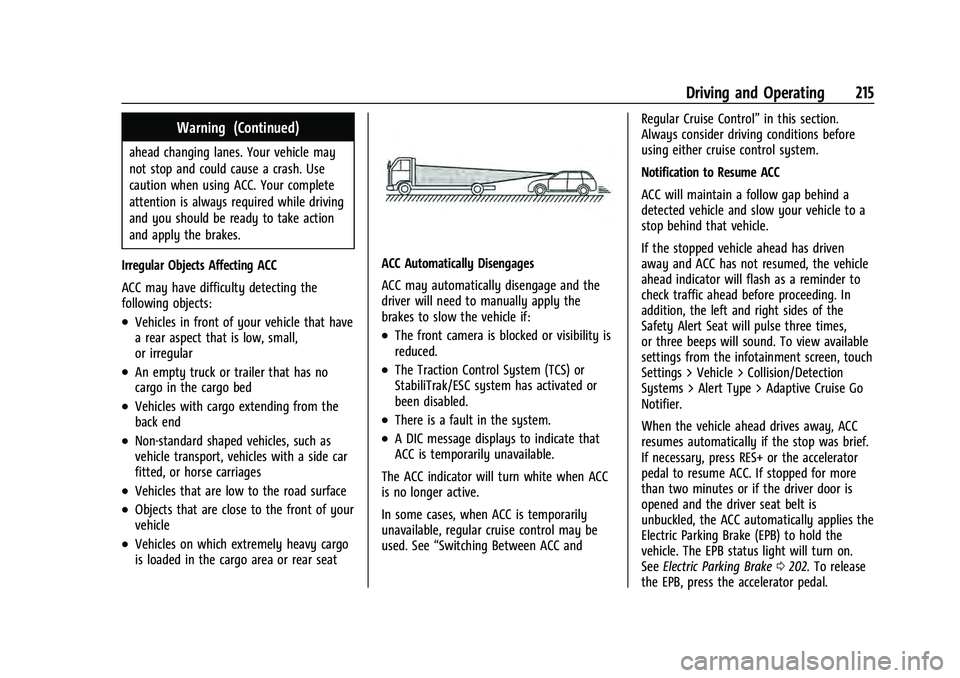
Irregular Objects Affecting ACC
ACC may have difficulty detecting the
following objects:
.Vehicles in front of your vehicle that have
a rear aspect that is low, small,
or irregular
.An empty truck or trailer that has no
cargo in the cargo bed
.Vehicles with cargo extending from the
back end
.Non-standard shaped vehicles, such as
vehicle transport, vehicles with a side car
fitted, or horse carriages
.Vehicles that are low to the road surface
.Objects that are close to the front of your
vehicle
.Vehicles on which extremely heavy cargo
is loaded in the cargo area or rear seat
ACC Automatically Disengages
ACC may automatically disengage and the
driver will need to manually apply the
brakes to slow the vehicle if:
.The front camera is blocked or visibility is
reduced.
.The Traction Control System (TCS) or
StabiliTrak/ESC system has activated or
been disabled.
.There is a fault in the system.
.A DIC message displays to indicate that
ACC is temporarily unavailable.
The ACC indicator will turn white when ACC
is no longer active.
In some cases, when ACC is temporarily
unavailable, regular cruise control may be
used. See “Switching Between ACC and Regular Cruise Control”
in this section.
Always consider driving conditions before
using either cruise control system.
Notification to Resume ACC
ACC will maintain a follow gap behind a
detected vehicle and slow your vehicle to a
stop behind that vehicle.
If the stopped vehicle ahead has driven
away and ACC has not resumed, the vehicle
ahead indicator will flash as a reminder to
check traffic ahead before proceeding. In
addition, the left and right sides of the
Safety Alert Seat will pulse three times,
or three beeps will sound. To view available
settings from the infotainment screen, touch
Settings > Vehicle > Collision/Detection
Systems > Alert Type > Adaptive Cruise Go
Notifier.
When the vehicle ahead drives away, ACC
resumes automatically if the stop was brief.
If necessary, press RES+ or the accelerator
pedal to resume ACC. If stopped for more
than two minutes or if the driver door is
opened and the driver seat belt is
unbuckled, the ACC automatically applies the
Electric Parking Brake (EPB) to hold the
vehicle. The EPB status light will turn on.
See Electric Parking Brake 0202. To release
the EPB, press the accelerator pedal.
Page 218 of 360
Chevrolet Equinox Owner Manual (GMNA-Localizing-U.S./Canada-
16540728) - 2023 - crc - 6/16/22
Driving and Operating 217
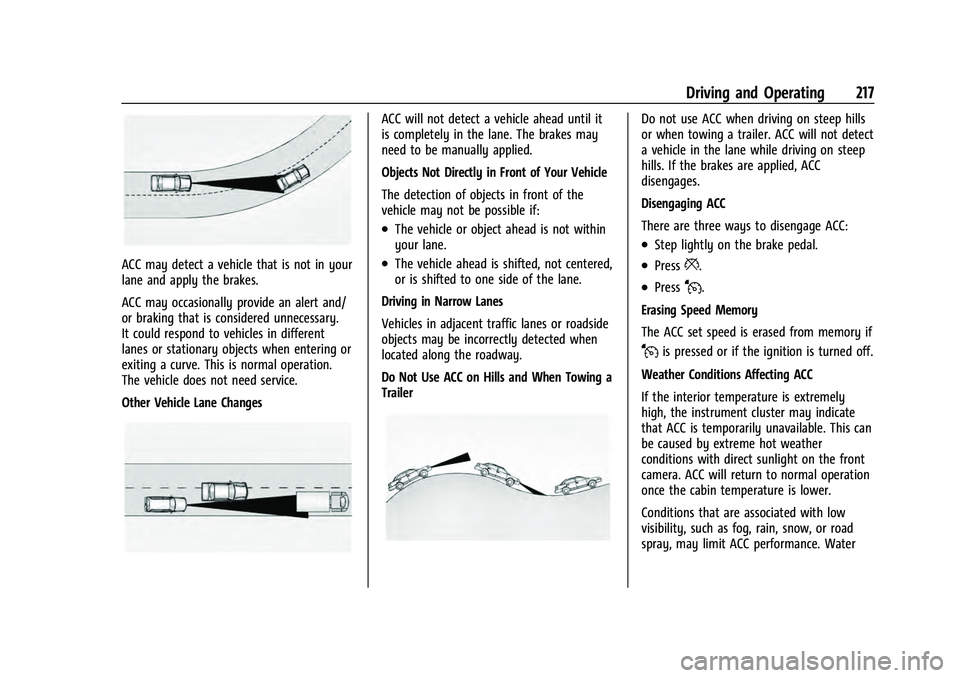
ACC may detect a vehicle that is not in your
lane and apply the brakes.
ACC may occasionally provide an alert and/
or braking that is considered unnecessary.
It could respond to vehicles in different
lanes or stationary objects when entering or
exiting a curve. This is normal operation.
The vehicle does not need service.
Other Vehicle Lane Changes
ACC will not detect a vehicle ahead until it
is completely in the lane. The brakes may
need to be manually applied.
Objects Not Directly in Front of Your Vehicle
The detection of objects in front of the
vehicle may not be possible if:
.The vehicle or object ahead is not within
your lane.
.The vehicle ahead is shifted, not centered,
or is shifted to one side of the lane.
Driving in Narrow Lanes
Vehicles in adjacent traffic lanes or roadside
objects may be incorrectly detected when
located along the roadway.
Do Not Use ACC on Hills and When Towing a
Trailer
Do not use ACC when driving on steep hills
or when towing a trailer. ACC will not detect
a vehicle in the lane while driving on steep
hills. If the brakes are applied, ACC
disengages.
Disengaging ACC
There are three ways to disengage ACC:
.Step lightly on the brake pedal.
.Press*.
.PressJ.
Erasing Speed Memory
The ACC set speed is erased from memory if
Jis pressed or if the ignition is turned off.
Weather Conditions Affecting ACC
If the interior temperature is extremely
high, the instrument cluster may indicate
that ACC is temporarily unavailable. This can
be caused by extreme hot weather
conditions with direct sunlight on the front
camera. ACC will return to normal operation
once the cabin temperature is lower.
Conditions that are associated with low
visibility, such as fog, rain, snow, or road
spray, may limit ACC performance. Water
Page 228 of 360
Chevrolet Equinox Owner Manual (GMNA-Localizing-U.S./Canada-
16540728) - 2023 - crc - 6/16/22
Driving and Operating 227
Assistance Systems for Driving
If equipped, when driving the vehicle in a
forward gear, Forward Collision Alert (FCA),
Lane Keep Assist (LKA), Side Blind Zone Alert
(SBZA), Lane Change Alert (LCA), Automatic
Emergency Braking (AEB), and/or the Front
Pedestrian Braking (FPB) System can help to
avoid a crash or reduce crash damage.
Forward Collision Alert (FCA)
System
If equipped, the FCA system may help to
avoid or reduce the harm caused by
front-end crashes. When approaching a
vehicle ahead too quickly, FCA provides a
red flashing alert on the windshield and
rapidly beeps or pulses the driver seat. FCA
also lights an amber visual alert if following
another vehicle much too closely.
FCA detects vehicles within a distance of
approximately 60 m (197 ft) and operates at
speeds above 8 km/h (5 mph).
{Warning
FCA is a warning system and does not
apply the brakes. When approaching a
slower-moving or stopped vehicle ahead(Continued)
Warning (Continued)
too rapidly, or when following a vehicle
too closely, FCA may not provide a
warning with enough time to help avoid
a crash. It also may not provide any
warning at all. FCA does not warn of
pedestrians, animals, signs, guardrails,
bridges, construction barrels, or other
objects. Be ready to take action and
apply the brakes. SeeDefensive Driving
0 178.
FCA can be disabled through vehicle
personalization. To view available settings
from the infotainment screen, touch Settings
> Vehicle > Collision/Detection Systems.
Detecting the Vehicle Ahead
FCA warnings will not occur unless the FCA
system detects a vehicle ahead. When a
vehicle is detected, the vehicle ahead
indicator will display green. Vehicles may not be detected on curves, highway exit
ramps, or hills, due to poor visibility; or if a
vehicle ahead is partially blocked by
pedestrians or other objects. FCA will not
detect another vehicle ahead until it is
completely in the driving lane.
{Warning
FCA does not provide a warning to help
avoid a crash, unless it detects a vehicle.
FCA may not detect a vehicle ahead if
the FCA sensor is blocked by dirt, snow,
or ice, or if the windshield is damaged.
It may also not detect a vehicle on
winding or hilly roads, or in conditions
that can limit visibility such as fog, rain,
or snow, or if the headlamps or
windshield are not cleaned or in proper
condition. Keep the windshield,
headlamps, and FCA sensors clean and in
good repair.
Page 248 of 360
Chevrolet Equinox Owner Manual (GMNA-Localizing-U.S./Canada-
16540728) - 2023 - crc - 6/16/22
Vehicle Care 247
Vehicle Care
General Information
General Information . . . . . . . . . . . . . . . . . . . 248
California Perchlorate MaterialsRequirements . . . . . . . . . . . . . . . . . . . . . . . . 248
Accessories and Modifications . . . . . . . . . 248
Vehicle Checks
Doing Your Own Service Work . . . . . . . . 248
Hood . . . . . . . . . . . . . . . . . . . . . . . . . . . . . . . . . . 249
Engine Compartment Overview . . . . . . . . 251
Engine Oil . . . . . . . . . . . . . . . . . . . . . . . . . . . . . 252
Engine Oil Life System . . . . . . . . . . . . . . . . 254
Automatic Transmission Fluid . . . . . . . . . . 255
Engine Air Filter Life System . . . . . . . . . . . 255
Engine Air Cleaner/Filter . . . . . . . . . . . . . . . 255
Cooling System . . . . . . . . . . . . . . . . . . . . . . . . 257
Engine Overheating . . . . . . . . . . . . . . . . . . . 259
Washer Fluid . . . . . . . . . . . . . . . . . . . . . . . . . . 260
Brakes . . . . . . . . . . . . . . . . . . . . . . . . . . . . . . . . . 261
Brake Fluid . . . . . . . . . . . . . . . . . . . . . . . . . . . . 262
Battery - North America . . . . . . . . . . . . . . . 263
All-Wheel Drive . . . . . . . . . . . . . . . . . . . . . . . . 263
Park Brake and P (Park) Mechanism Check . . . . . . . . . . . . . . . . . . . . . . . . . . . . . . . . 263
Wiper Blade Replacement . . . . . . . . . . . . . 264
Windshield Replacement . . . . . . . . . . . . . . 265
Gas Strut(s) . . . . . . . . . . . . . . . . . . . . . . . . . . . 265
Headlamp Aiming
Front Headlamp Aiming . . . . . . . . . . . . . . . 266
Bulb Replacement
Bulb Replacement . . . . . . . . . . . . . . . . . . . . . 266
Halogen Bulbs . . . . . . . . . . . . . . . . . . . . . . . . 266
High Intensity Discharge (HID) Lighting . . . . . . . . . . . . . . . . . . . . . . . . . . . . . 267
LED Lighting . . . . . . . . . . . . . . . . . . . . . . . . . . . 267
Headlamps . . . . . . . . . . . . . . . . . . . . . . . . . . . . 267
Front Turn Signal and Fog Lamps . . . . . 268
Taillamps . . . . . . . . . . . . . . . . . . . . . . . . . . . . . . 268
License Plate Lamp . . . . . . . . . . . . . . . . . . . . 268
Electrical System
Electrical System Overload . . . . . . . . . . . . 269
Fuses and Circuit Breakers . . . . . . . . . . . . . 271
Engine Compartment Fuse Block . . . . . . . 271
Instrument Panel Fuse Block . . . . . . . . . . . 273
Rear Compartment Fuse Block . . . . . . . . . 275
Wheels and Tires
Tires . . . . . . . . . . . . . . . . . . . . . . . . . . . . . . . . . . . 277
All-Season Tires . . . . . . . . . . . . . . . . . . . . . . . . 277
Winter Tires . . . . . . . . . . . . . . . . . . . . . . . . . . . 278
Tire Sidewall Labeling . . . . . . . . . . . . . . . . . 278
Tire Designations . . . . . . . . . . . . . . . . . . . . . . 280
Tire Terminology and Definitions . . . . . 280
Tire Pressure . . . . . . . . . . . . . . . . . . . . . . . . . . 282
Tire Pressure Monitor System . . . . . . . . . 283
Tire Pressure Monitor Operation . . . . . . 284 Tire Inspection . . . . . . . . . . . . . . . . . . . . . . . . 287
Tire Rotation . . . . . . . . . . . . . . . . . . . . . . . . . . 287
When It Is Time for New Tires . . . . . . . . 288
Buying New Tires . . . . . . . . . . . . . . . . . . . . . 289
Different Size Tires and Wheels . . . . . . . 290
Uniform Tire Quality Grading . . . . . . . . . 290
Wheel Alignment and Tire Balance . . . . 292
Wheel Replacement . . . . . . . . . . . . . . . . . . . 292
Tire Chains . . . . . . . . . . . . . . . . . . . . . . . . . . . . 292
If a Tire Goes Flat . . . . . . . . . . . . . . . . . . . . . 293
Tire Changing . . . . . . . . . . . . . . . . . . . . . . . . . 294
Compact Spare Tire . . . . . . . . . . . . . . . . . . . 299
Jump Starting
Jump Starting - North America . . . . . . . . 300
Towing the Vehicle
Transporting a Disabled Vehicle . . . . . . . 302
Recreational Vehicle Towing . . . . . . . . . . . 304
Appearance Care
Exterior Care . . . . . . . . . . . . . . . . . . . . . . . . . . 306
Interior Care . . . . . . . . . . . . . . . . . . . . . . . . . . . 310
Floor Mats . . . . . . . . . . . . . . . . . . . . . . . . . . . . . 313
Page 263 of 360
Chevrolet Equinox Owner Manual (GMNA-Localizing-U.S./Canada-
16540728) - 2023 - crc - 6/16/22
262 Vehicle Care
Replacing Brake System Parts
Always replace brake system parts with
new, approved replacement parts. If this is
not done, the brakes may not work
properly. The braking performance can
change in many ways if the wrong brake
parts are installed or if parts are improperly
installed.
Brake Fluid
The brake master cylinder reservoir is filled
with GM approved DOT 4 brake fluid as
indicated on the reservoir cap. SeeEngine
Compartment Overview 0251 for the
location of the reservoir.
Checking Brake Fluid
With the vehicle in P (Park) on a level
surface, the brake fluid level should be
between the minimum and maximum marks
on the brake fluid reservoir.
There are only two reasons why the brake
fluid level in the reservoir may go down:
.Normal brake lining wear. When new
linings are installed, the fluid level goes
back up.
.A fluid leak in the brake hydraulic system.
Have the brake hydraulic system fixed.
With a leak, the brakes will not
work well.
Always clean the brake fluid reservoir cap
and the area around the cap before
removing it.
Do not top off the brake fluid. Adding fluid
does not correct a leak. If fluid is added
when the linings are worn, there will be too
much fluid when new brake linings are
installed. Add or remove fluid, as necessary,
only when work is done on the brake
hydraulic system.
{Warning
If too much brake fluid is added, it can
spill on the engine and burn, if the
engine is hot enough. You or others could
be burned, and the vehicle could be
damaged. Add brake fluid only when
work is done on the brake hydraulic
system. When the brake fluid falls to a low level,
the brake warning light comes on. See
Brake
System Warning Light 097.
Brake fluid absorbs water over time which
degrades the effectiveness of the brake fluid.
Replace brake fluid at the specified intervals
to prevent increased stopping distance. See
Maintenance Schedule 0316.
What to Add
Use only GM approved DOT 4 brake fluid
from a clean, sealed container. See
Recommended Fluids and Lubricants 0320.
{Warning
The wrong or contaminated brake fluid
could result in damage to the brake
system. This could result in the loss of
braking leading to a possible injury.
Always use the proper GM approved
brake fluid.
Caution
If brake fluid is spilled on the vehicle's
painted surfaces, the paint finish can be
damaged. Immediately wash off any
painted surface.
Page 286 of 360
Chevrolet Equinox Owner Manual (GMNA-Localizing-U.S./Canada-
16540728) - 2023 - crc - 6/16/22
Vehicle Care 285
inflation pressure for the tires when they
are cold. SeeVehicle Load Limits 0187, for
an example of the Tire and Loading
Information label and its location. Also see
Tire Pressure 0282.
The TPMS can warn about a low tire
pressure condition but it does not replace
normal tire maintenance. See Tire Inspection
0 287, Tire Rotation 0287, and Tires0277.
Caution
Tire sealant materials are not all the
same. A non-approved tire sealant could
damage the TPMS sensors. TPMS sensor
damage caused by using an incorrect tire
sealant is not covered by the vehicle
warranty. Always use only the GM
approved tire sealant available through
your dealer or included in the vehicle.
TPMS Malfunction Light and Message
The TPMS will not function properly if one
or more of the TPMS sensors are missing or
inoperable. When the system detects a
malfunction, the low tire pressure warning
light flashes for about one minute and then
stays on for the remainder of the ignition
cycle. A DIC warning message also displays.
The malfunction light and DIC warning message come on at each ignition cycle
until the problem is corrected. Some of the
conditions that can cause these to come
on are:
.One of the road tires has been replaced
with the spare tire. The spare tire does
not have a TPMS sensor. The malfunction
light and DIC message should go off after
the road tire is replaced and the sensor
matching process is performed
successfully. See
“TPMS Sensor Matching
Process” later in this section.
.The TPMS sensor matching process was
not done or not completed successfully
after rotating the tires. The malfunction
light and the DIC message should go off
after successfully completing the sensor
matching process. See "TPMS Sensor
Matching Process" later in this section.
.One or more TPMS sensors are missing or
damaged. The malfunction light and the
DIC message should go off when the
TPMS sensors are installed and the sensor
matching process is performed
successfully. See your dealer for service.
.Replacement tires or wheels do not match
the original equipment tires or wheels.
Tires and wheels other than those recommended could prevent the TPMS
from functioning properly. See
Buying
New Tires 0289.
.Operating electronic devices or being near
facilities using radio wave frequencies
similar to the TPMS could cause the TPMS
sensors to malfunction.
If the TPMS is not functioning properly it
cannot detect or signal a low tire pressure
condition. See your dealer for service if the
TPMS malfunction light and DIC message
come on and stay on.
Tire Fill Alert (If Equipped)
This feature provides visual and audible
alerts outside the vehicle to help when
inflating an underinflated tire to the
recommended cold tire pressure.
When the low tire pressure warning light
comes on: 1. Park the vehicle in a safe, level place.
2. Set the parking brake firmly.
3. Place the vehicle in P (Park).
4. Add air to the tire that is underinflated. The turn signal lamp will flash.
Page 287 of 360
Chevrolet Equinox Owner Manual (GMNA-Localizing-U.S./Canada-
16540728) - 2023 - crc - 6/16/22
286 Vehicle Care
When the recommended pressure is
reached, the horn sounds once and the
turn signal lamp will stop flashing and
briefly turn solid.
Repeat these steps for all underinflated tires
that have illuminated the low tire pressure
warning light.
{Warning
Overinflating a tire could cause the tire
to rupture and you or others could be
injured. Do not exceed the maximum
pressure listed on the tire sidewall. See
Tire Sidewall Labeling 0278 and
Vehicle Load Limits 0187.
If the tire is overinflated by more than
35 kPa (5 psi), the horn will sound multiple
times and the turn signal lamp will continue
to flash for several seconds after filling
stops. To release and correct the pressure,
while the turn signal lamp is still flashing,
briefly press the center of the valve stem.
When the recommended pressure is reached,
the horn sounds once.
If the turn signal lamp does not flash within
15 seconds after starting to inflate the tire,
the tire fill alert has not been activated or is
not working. If the hazard warning flashers are on, the
tire fill alert visual feedback will not work
properly.
The TPMS will not activate the tire fill alert
properly under the following conditions:
.There is interference from an external
device or transmitter.
.The air pressure from the inflation device
is not sufficient to inflate the tire.
.There is a malfunction in the TPMS.
.There is a malfunction in the horn or turn
signal lamps.
.The identification code of the TPMS
sensor is not registered to the system.
.The battery of the TPMS sensor is low.
If the tire fill alert does not operate due to
TPMS interference, move the vehicle about
1 m (3 ft) back or forward and try again.
If the tire fill alert feature is not working,
use a tire pressure gauge.
TPMS Sensor Matching Process
Each TPMS sensor has a unique
identification code. The identification code
needs to be matched to a new tire/wheel
position after rotating the vehicle’s tires or
replacing one or more of the TPMS sensors.
The TPMS sensor matching process should also be performed after replacing a spare
tire with a road tire containing the TPMS
sensor. The malfunction light and the DIC
message should go off at the next ignition
cycle. The sensors are matched to the tire/
wheel positions, using a TPMS relearn tool,
in the following order: driver side front tire,
passenger side front tire, passenger side rear
tire, and driver side rear. See your dealer for
service or to purchase a relearn tool.
A TPMS relearn tool can also be purchased.
See Tire Pressure Monitor Sensor Activation
Tool at www.gmtoolsandequipment.com or
call 1-800-GM TOOLS (1-800-468-6657).
There are two minutes to match the first
tire/wheel position, and five minutes overall
to match all four tire/wheel positions. If it
takes longer, the matching process stops
and must be restarted.
The TPMS sensor matching process is:
1. Set the parking brake.
2. Place the vehicle in Service Mode. See Ignition Positions 0190.
3. Make sure the Tire Pressure info page option is turned on. The info pages on
the DIC can be turned on and off