2022 CHEVROLET EQUINOX remote control
[x] Cancel search: remote controlPage 38 of 360
Chevrolet Equinox Owner Manual (GMNA-Localizing-U.S./Canada-
16540728) - 2023 - crc - 6/16/22
Seats and Restraints 37
Obstructions
If something has blocked the seat while
recalling a memory position, the recall may
stop. Remove the obstruction and try the
recall again. If the memory position still
does not recall, see your dealer.
Heated and Ventilated Front
Seats
{Warning
If temperature change or pain to the skin
cannot be felt, the seat heater may cause
burns. To reduce the risk of burns, use
care when using the seat heater,
especially for long periods of time. Do
not place anything on the seat that
insulates against heat, such as a blanket,
cushion, cover, or similar item. This may
cause the seat heater to overheat. An
overheated seat heater may cause a burn
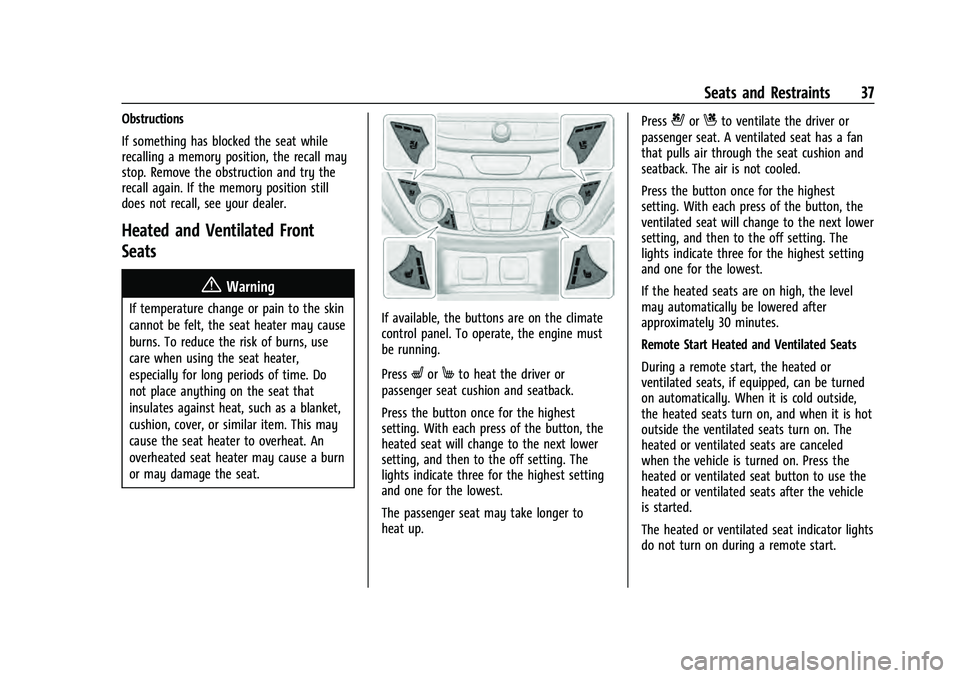
or may damage the seat.If available, the buttons are on the climate
control panel. To operate, the engine must
be running.
Press
LorMto heat the driver or
passenger seat cushion and seatback.
Press the button once for the highest
setting. With each press of the button, the
heated seat will change to the next lower
setting, and then to the off setting. The
lights indicate three for the highest setting
and one for the lowest.
The passenger seat may take longer to
heat up. Press
{orCto ventilate the driver or
passenger seat. A ventilated seat has a fan
that pulls air through the seat cushion and
seatback. The air is not cooled.
Press the button once for the highest
setting. With each press of the button, the
ventilated seat will change to the next lower
setting, and then to the off setting. The
lights indicate three for the highest setting
and one for the lowest.
If the heated seats are on high, the level
may automatically be lowered after
approximately 30 minutes.
Remote Start Heated and Ventilated Seats
During a remote start, the heated or
ventilated seats, if equipped, can be turned
on automatically. When it is cold outside,
the heated seats turn on, and when it is hot
outside the ventilated seats turn on. The
heated or ventilated seats are canceled
when the vehicle is turned on. Press the
heated or ventilated seat button to use the
heated or ventilated seats after the vehicle
is started.
The heated or ventilated seat indicator lights
do not turn on during a remote start.
Page 80 of 360

Chevrolet Equinox Owner Manual (GMNA-Localizing-U.S./Canada-
16540728) - 2023 - crc - 6/16/22
Instruments and Controls 79
Instruments and Controls
Controls
Steering Wheel Adjustment . . . . . . . . . . . . 80
Heated Steering Wheel . . . . . . . . . . . . . . . . . 80
Horn . . . . . . . . . . . . . . . . . . . . . . . . . . . . . . . . . . . 80
Windshield Wiper/Washer . . . . . . . . . . . . . 80
Rear Window Wiper/Washer . . . . . . . . . . . 81
Compass . . . . . . . . . . . . . . . . . . . . . . . . . . . . . . . . 82
Clock . . . . . . . . . . . . . . . . . . . . . . . . . . . . . . . . . . . 82
Power Outlets . . . . . . . . . . . . . . . . . . . . . . . . . . 82
Wireless Charging . . . . . . . . . . . . . . . . . . . . . . 84
Warning Lights, Gauges, and Indicators
Warning Lights, Gauges, andIndicators . . . . . . . . . . . . . . . . . . . . . . . . . . . . . 86
Instrument Cluster (Base and Midlevel) . . . . . . . . . . . . . . . . . . . . . . . . . . . . . 87
Instrument Cluster (Uplevel) . . . . . . . . . . . 90
Speedometer . . . . . . . . . . . . . . . . . . . . . . . . . . . 92
Odometer . . . . . . . . . . . . . . . . . . . . . . . . . . . . . . 92
Trip Odometer . . . . . . . . . . . . . . . . . . . . . . . . . 92
Tachometer . . . . . . . . . . . . . . . . . . . . . . . . . . . . 92
Fuel Gauge . . . . . . . . . . . . . . . . . . . . . . . . . . . . . 92
Engine Coolant Temperature Gauge . . . . 93
Seat Belt Reminders . . . . . . . . . . . . . . . . . . . . 94
Airbag Readiness Light . . . . . . . . . . . . . . . . . 94
Passenger Airbag Status Indicator . . . . . . 95
Charging System Light . . . . . . . . . . . . . . . . . 95 Malfunction Indicator Lamp (Check
Engine Light) . . . . . . . . . . . . . . . . . . . . . . . . . 96
Brake System Warning Light . . . . . . . . . . . 97
Electric Parking Brake Light . . . . . . . . . . . . . 98
Service Electric Parking Brake Light . . . . . 98
Antilock Brake System (ABS) Warning Light . . . . . . . . . . . . . . . . . . . . . . . . . . . . . . . . . 98
Tow/Haul Mode Light . . . . . . . . . . . . . . . . . . 99
Lane Keep Assist (LKA) Light . . . . . . . . . . . 99
Vehicle Ahead Indicator . . . . . . . . . . . . . . . . 99
Pedestrian Ahead Indicator . . . . . . . . . . . . . 99
Traction Off Light . . . . . . . . . . . . . . . . . . . . . . 99
StabiliTrak OFF Light . . . . . . . . . . . . . . . . . . 100
Traction Control System (TCS)/ StabiliTrak Light . . . . . . . . . . . . . . . . . . . . . 100
Tire Pressure Light . . . . . . . . . . . . . . . . . . . . 100
Engine Oil Pressure Light . . . . . . . . . . . . . . 101
Low Fuel Warning Light . . . . . . . . . . . . . . . 101
Security Light . . . . . . . . . . . . . . . . . . . . . . . . . . 102
High-Beam On Light . . . . . . . . . . . . . . . . . . . 102
Front Fog Lamp Light . . . . . . . . . . . . . . . . . . 102
Lamps On Reminder . . . . . . . . . . . . . . . . . . . 102
Cruise Control Light . . . . . . . . . . . . . . . . . . . 103
Information Displays
Driver Information Center (DIC) (Base and Midlevel) . . . . . . . . . . . . . . . . . . . . . . . . 103
Driver Information Center (DIC) (Uplevel) . . . . . . . . . . . . . . . . . . . . . . . . . . . . . 107
Vehicle Messages
Vehicle Messages . . . . . . . . . . . . . . . . . . . . . . 110
Engine Power Messages . . . . . . . . . . . . . . . 110
Vehicle Speed Messages . . . . . . . . . . . . . . . . 111
Universal Remote System
Universal Remote System . . . . . . . . . . . . . . 111
Universal Remote SystemProgramming . . . . . . . . . . . . . . . . . . . . . . . . . 111
Universal Remote System Operation . . . 113
Page 112 of 360
Chevrolet Equinox Owner Manual (GMNA-Localizing-U.S./Canada-
16540728) - 2023 - crc - 6/16/22
Instruments and Controls 111
Vehicle Speed Messages
SPEED LIMITED TO XXX KM/H (MPH)
This message shows that the vehicle speed
has been limited to the speed displayed. The
limited speed is a protection for various
propulsion and vehicle systems, such as
lubrication, thermal, brakes, suspension,
Teen Driver if equipped, or tires.
Universal Remote System
SeeRadio Frequency Statement 0335.
Universal Remote System
Programming
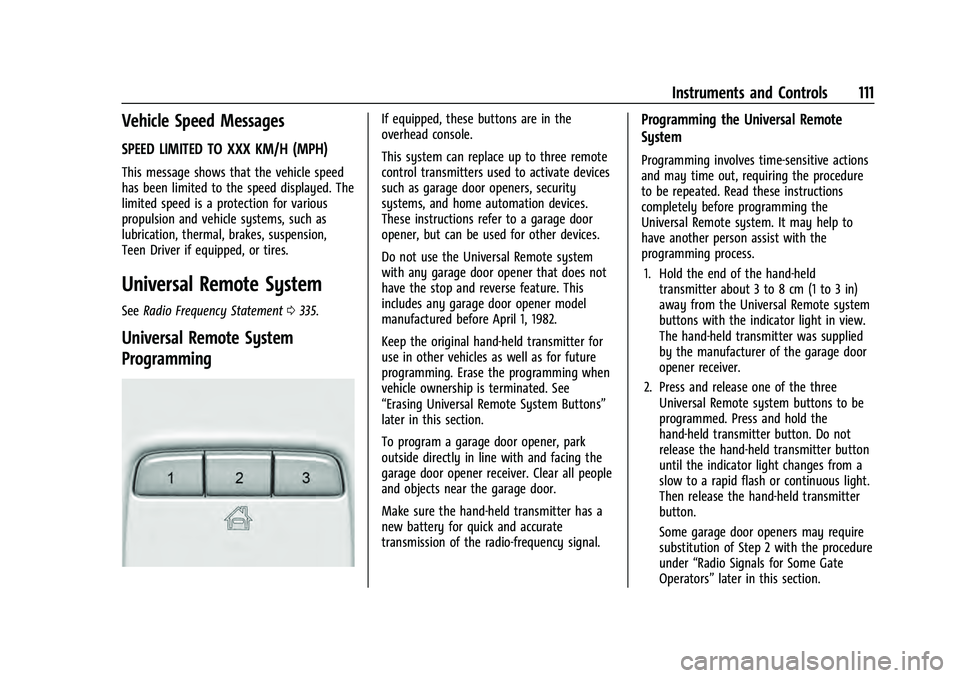
If equipped, these buttons are in the
overhead console.
This system can replace up to three remote
control transmitters used to activate devices
such as garage door openers, security
systems, and home automation devices.
These instructions refer to a garage door
opener, but can be used for other devices.
Do not use the Universal Remote system
with any garage door opener that does not
have the stop and reverse feature. This
includes any garage door opener model
manufactured before April 1, 1982.
Keep the original hand-held transmitter for
use in other vehicles as well as for future
programming. Erase the programming when
vehicle ownership is terminated. See
“Erasing Universal Remote System Buttons”
later in this section.
To program a garage door opener, park
outside directly in line with and facing the
garage door opener receiver. Clear all people
and objects near the garage door.
Make sure the hand-held transmitter has a
new battery for quick and accurate
transmission of the radio-frequency signal.Programming the Universal Remote
System
Programming involves time-sensitive actions
and may time out, requiring the procedure
to be repeated. Read these instructions
completely before programming the
Universal Remote system. It may help to
have another person assist with the
programming process.
1. Hold the end of the hand-held transmitter about 3 to 8 cm (1 to 3 in)
away from the Universal Remote system
buttons with the indicator light in view.
The hand-held transmitter was supplied
by the manufacturer of the garage door
opener receiver.
2. Press and release one of the three Universal Remote system buttons to be
programmed. Press and hold the
hand-held transmitter button. Do not
release the hand-held transmitter button
until the indicator light changes from a
slow to a rapid flash or continuous light.
Then release the hand-held transmitter
button.
Some garage door openers may require
substitution of Step 2 with the procedure
under “Radio Signals for Some Gate
Operators” later in this section.
Page 113 of 360
Chevrolet Equinox Owner Manual (GMNA-Localizing-U.S./Canada-
16540728) - 2023 - crc - 6/16/22
112 Instruments and Controls
3. Press and hold the newly programmedUniversal Remote system button for
five seconds while watching the indicator
light and garage door activation.
.If the indicator light stays on
continuously or the garage door
moves when the button is pressed,
then programming is complete. There
is no need to complete Steps 4–6.
.If the indicator light does not come
on or the garage door does not
move, a second button press may be
required. For a second time, press
and hold the newly programmed
button for five seconds. If the
indicator light stays on continuously
or the garage door moves when the
button is pressed, then programming
is complete. There is no need to
complete Steps 4–6.
.If the garage door does not move,
continue with programming
Steps 4–6.
Learn or Smart Button
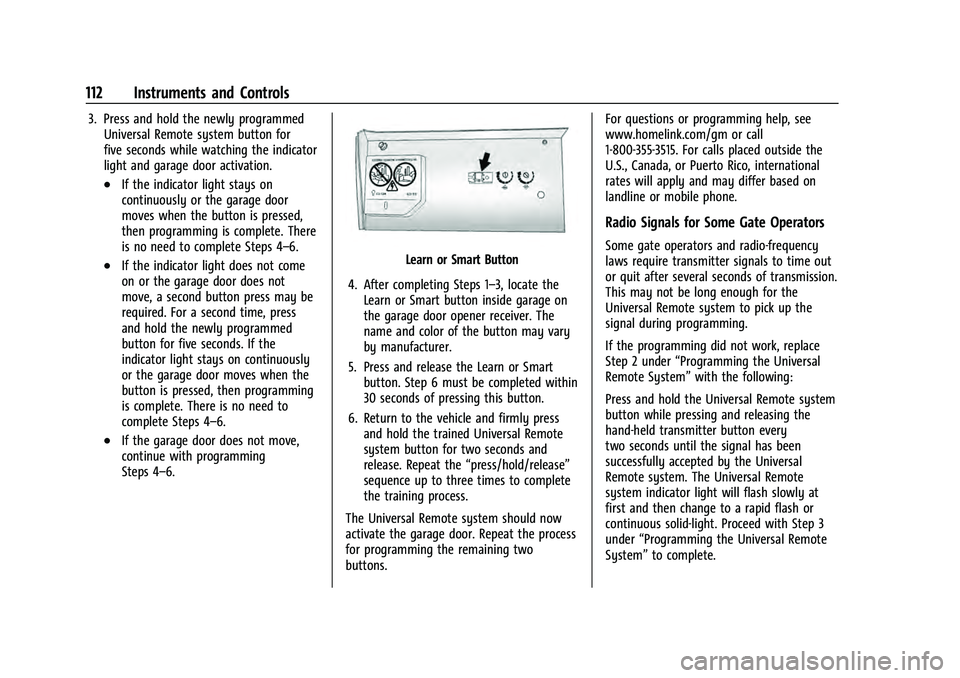
4. After completing Steps 1–3, locate the Learn or Smart button inside garage on
the garage door opener receiver. The
name and color of the button may vary
by manufacturer.
5. Press and release the Learn or Smart button. Step 6 must be completed within
30 seconds of pressing this button.
6. Return to the vehicle and firmly press and hold the trained Universal Remote
system button for two seconds and
release. Repeat the “press/hold/release”
sequence up to three times to complete
the training process.
The Universal Remote system should now
activate the garage door. Repeat the process
for programming the remaining two
buttons. For questions or programming help, see
www.homelink.com/gm or call
1-800-355-3515. For calls placed outside the
U.S., Canada, or Puerto Rico, international
rates will apply and may differ based on
landline or mobile phone.
Radio Signals for Some Gate Operators
Some gate operators and radio-frequency
laws require transmitter signals to time out
or quit after several seconds of transmission.
This may not be long enough for the
Universal Remote system to pick up the
signal during programming.
If the programming did not work, replace
Step 2 under
“Programming the Universal
Remote System” with the following:
Press and hold the Universal Remote system
button while pressing and releasing the
hand-held transmitter button every
two seconds until the signal has been
successfully accepted by the Universal
Remote system. The Universal Remote
system indicator light will flash slowly at
first and then change to a rapid flash or
continuous solid-light. Proceed with Step 3
under “Programming the Universal Remote
System” to complete.
Page 114 of 360
Chevrolet Equinox Owner Manual (GMNA-Localizing-U.S./Canada-
16540728) - 2023 - crc - 6/16/22
Instruments and Controls 113
Universal Remote System
Operation
Using the Universal Remote System
Press and hold the appropriate Universal
Remote system button for at least one-half
second. The indicator light will come on
while the signal is being transmitted.
Erasing Universal Remote System
Buttons
Erase all programmed buttons when vehicle
ownership is terminated.
To erase:1. Press and hold the two outside buttons until the indicator light begins to flash.
This should take about 10 seconds.
2. Release both buttons.
Reprogramming a Single Universal
Remote System Button
To reprogram any of the system buttons: 1. Press and hold any one of the buttons. Do not release the button.
2. The indicator light will begin to flash after 20 seconds. Without releasing the
button, proceed with Step 1 under
“Programming the Universal Remote
System.”
Page 119 of 360
Chevrolet Equinox Owner Manual (GMNA-Localizing-U.S./Canada-
16540728) - 2023 - crc - 6/16/22
118 Lighting
Some localities have laws that require the
high beams to be off when the fog lamps
are on.
Interior Lighting
Instrument Panel Illumination
Control
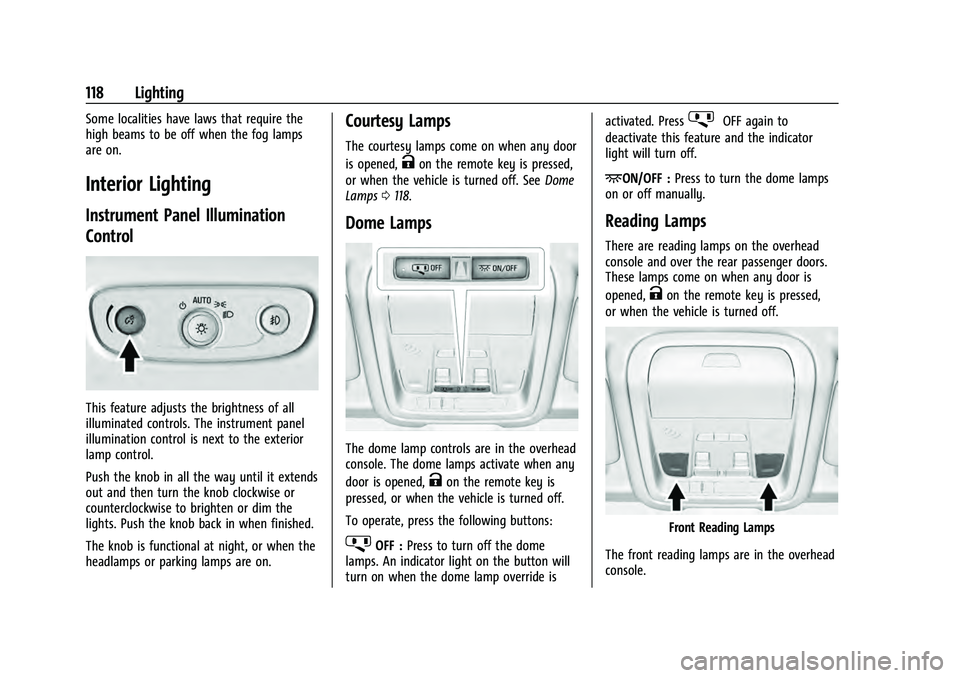
This feature adjusts the brightness of all
illuminated controls. The instrument panel
illumination control is next to the exterior
lamp control.
Push the knob in all the way until it extends
out and then turn the knob clockwise or
counterclockwise to brighten or dim the
lights. Push the knob back in when finished.
The knob is functional at night, or when the
headlamps or parking lamps are on.
Courtesy Lamps
The courtesy lamps come on when any door
is opened,
Kon the remote key is pressed,
or when the vehicle is turned off. See Dome
Lamps 0118.
Dome Lamps
The dome lamp controls are in the overhead
console. The dome lamps activate when any
door is opened,
Kon the remote key is
pressed, or when the vehicle is turned off.
To operate, press the following buttons:
jOFF : Press to turn off the dome
lamps. An indicator light on the button will
turn on when the dome lamp override is activated. Press
jOFF again to
deactivate this feature and the indicator
light will turn off.
+ON/OFF : Press to turn the dome lamps
on or off manually.
Reading Lamps
There are reading lamps on the overhead
console and over the rear passenger doors.
These lamps come on when any door is
opened,
Kon the remote key is pressed,
or when the vehicle is turned off.
Front Reading Lamps
The front reading lamps are in the overhead
console.
Page 120 of 360
Chevrolet Equinox Owner Manual (GMNA-Localizing-U.S./Canada-
16540728) - 2023 - crc - 6/16/22
Lighting 119
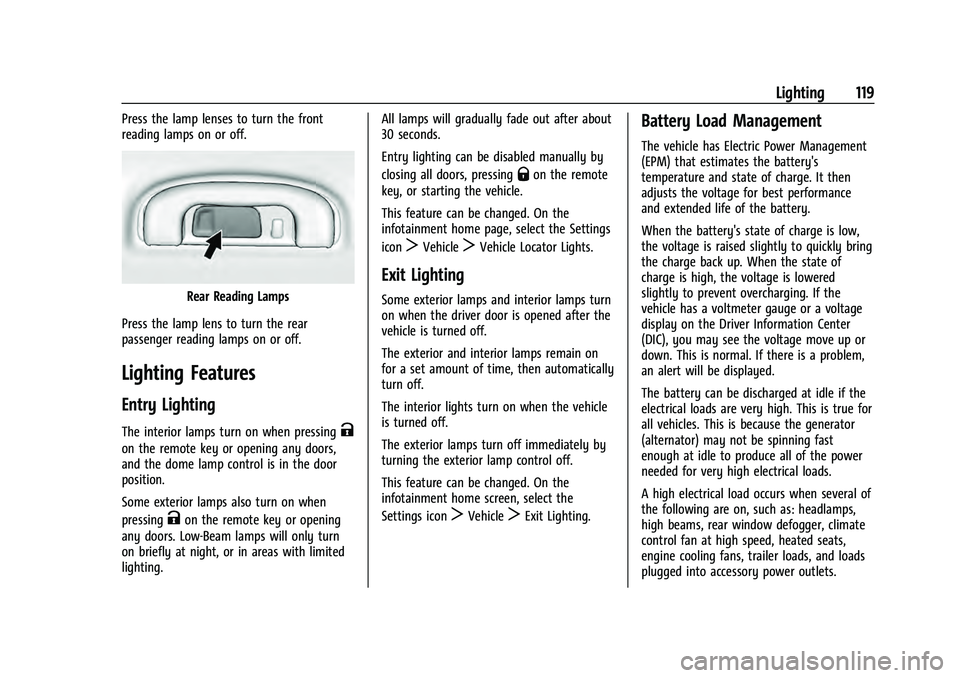
Press the lamp lenses to turn the front
reading lamps on or off.
Rear Reading Lamps
Press the lamp lens to turn the rear
passenger reading lamps on or off.
Lighting Features
Entry Lighting
The interior lamps turn on when pressingK
on the remote key or opening any doors,
and the dome lamp control is in the door
position.
Some exterior lamps also turn on when
pressing
Kon the remote key or opening
any doors. Low-Beam lamps will only turn
on briefly at night, or in areas with limited
lighting. All lamps will gradually fade out after about
30 seconds.
Entry lighting can be disabled manually by
closing all doors, pressing
Qon the remote
key, or starting the vehicle.
This feature can be changed. On the
infotainment home page, select the Settings
icon
TVehicleTVehicle Locator Lights.
Exit Lighting
Some exterior lamps and interior lamps turn
on when the driver door is opened after the
vehicle is turned off.
The exterior and interior lamps remain on
for a set amount of time, then automatically
turn off.
The interior lights turn on when the vehicle
is turned off.
The exterior lamps turn off immediately by
turning the exterior lamp control off.
This feature can be changed. On the
infotainment home screen, select the
Settings icon
TVehicleTExit Lighting.
Battery Load Management
The vehicle has Electric Power Management
(EPM) that estimates the battery's
temperature and state of charge. It then
adjusts the voltage for best performance
and extended life of the battery.
When the battery's state of charge is low,
the voltage is raised slightly to quickly bring
the charge back up. When the state of
charge is high, the voltage is lowered
slightly to prevent overcharging. If the
vehicle has a voltmeter gauge or a voltage
display on the Driver Information Center
(DIC), you may see the voltage move up or
down. This is normal. If there is a problem,
an alert will be displayed.
The battery can be discharged at idle if the
electrical loads are very high. This is true for
all vehicles. This is because the generator
(alternator) may not be spinning fast
enough at idle to produce all of the power
needed for very high electrical loads.
A high electrical load occurs when several of
the following are on, such as: headlamps,
high beams, rear window defogger, climate
control fan at high speed, heated seats,
engine cooling fans, trailer loads, and loads
plugged into accessory power outlets.
Page 159 of 360
Chevrolet Equinox Owner Manual (GMNA-Localizing-U.S./Canada-
16540728) - 2023 - crc - 6/16/22
158 Infotainment System
Phone
Adjusts different phone settings.
Vehicle
The menu may contain the following:
Rear Seat Reminder
Allows for a chime and a message when the
rear door has been opened before or during
operation of the vehicle.
Climate and Air Quality
Adjusts different climate settings.
Collision/Detection Systems
Adjusts different driver assistance system
settings.
Comfort and Convenience
Adjusts different comfort and convenience
settings.
Lighting
Adjusts different lighting settings.
Power Door Locks
Adjusts different door lock settings.
Remote Lock, Unlock, and Start
Adjusts different remote lock settings.Seating Position
Adjusts different seat settings.
Teen Driver
See
Teen Driver 0159.
Valet Mode
This will lock the infotainment system and
steering wheel controls. It may also limit
access to vehicle storage locations,
if equipped.
To enable valet mode: 1. Enter a four-digit code on the keypad.
2. Select Enter to go to the confirmation screen.
3. Re-enter the four-digit code.
Touch Lock or Unlock to lock or unlock the
system. Touch Back to go back to the
previous menu.
Personal
If equipped, this menu allows adjustment of
different user profile settings. See “Users”in
Using the System 0124 for information on
setting up user profiles.
The menu may contain the following: Name
Touch to edit your user name that will be
displayed in the vehicle.
Vehicle Account Information
Touch to view the vehicle account
information and to change the account
password.
An
“unverified user account” pop-up will
display until the account information
verification process has been completed on
the Internet. Check your registered e-mail
account for an activation e-mail to complete
the verification process.
Profile Picture
Touch to choose or change your profile
picture.
Profile Identifiers
Touch to have the vehicle recognize the
identifier you choose.
Touch Vehicle Key 1 and/or Vehicle Key 2.
If the remote key is lost or stolen, see your
dealer.
Security
Touch to have your profile secured with
a PIN.