2022 CHEVROLET COLORADO service
[x] Cancel search: servicePage 216 of 362
Chevrolet Colorado Owner Manual (GMNA-Localizing-U.S./Canada/Mexico-
15274222) - 2022 - CRC - 11/2/21
Driving and Operating 215
Warning (Continued)
.Detect a vehicle ahead if it is partially
blocked by pedestrians or other
objects.
Complete attention is always required
while driving, and you should be ready to
take action and apply the brakes and/or
steer the vehicle to avoid crashes.
AEB may slow the vehicle to a complete
stop to try to avoid a potential crash. If this
happens, AEB may engage the Electric
Parking Brake (EPB) to hold the vehicle at a
stop. Release the EPB or firmly press the
accelerator pedal.
{Warning
AEB may automatically brake the vehicle
suddenly in situations where it is
unexpected and undesired. It could
respond to a turning vehicle ahead,
guardrails, signs, and other non-moving
objects. To override AEB, firmly press the
accelerator pedal, if it is safe to do so.
Intelligent Brake Assist (IBA)
IBA may activate when the brake pedal is
applied quickly by providing a boost to
braking based on the speed of approach and
distance to a vehicle ahead.
Minor brake pedal pulsations or pedal
movement during this time is normal and
the brake pedal should continue to be
applied as needed. IBA will automatically
disengage only when the brake pedal is
released.
{Warning
IBA may increase vehicle braking in
situations when it may not be necessary.
You could block the flow of traffic. If this
occurs, take your foot off the brake pedal
and then apply the brakes as needed.
AEB and IBA can be disabled through vehicle
personalization. See “Collision/Detection
Systems” underVehicle Personalization 099.
{Warning
Using AEB or IBA while towing a trailer
could cause you to lose control of the
vehicle and crash. Turn the system to
Alert or Off when towing a trailer.
A system unavailable message may
display if:
.The front of the vehicle or windshield is
not clean.
.Heavy rain or snow is interfering with
object detection.
.There is a problem with the StabiliTrak/
Electronic Stability Control (ESC) system.
The AEB system does not need service.
Lane Departure Warning (LDW)
If equipped, LDW may help avoid crashes
due to unintentional lane departures. It may
provide an alert if the vehicle is crossing a
lane marking without using a turn signal in
that direction. LDW uses a camera sensor to
detect the lane markings at speeds of
56 km/h (35 mph) or greater. The LDW light
will not alert if the turn signal is active in
the direction of lane departure, or if LDW
detects that you are accelerating, braking or
actively steering.
Page 218 of 362
Chevrolet Colorado Owner Manual (GMNA-Localizing-U.S./Canada/Mexico-
15274222) - 2022 - CRC - 11/2/21
Driving and Operating 217
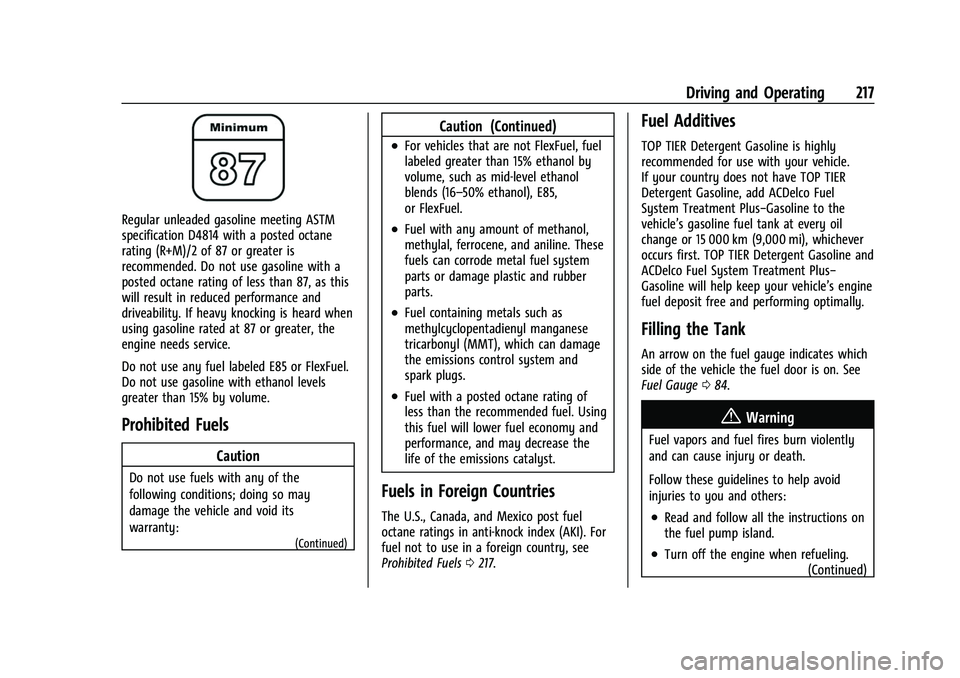
Regular unleaded gasoline meeting ASTM
specification D4814 with a posted octane
rating (R+M)/2 of 87 or greater is
recommended. Do not use gasoline with a
posted octane rating of less than 87, as this
will result in reduced performance and
driveability. If heavy knocking is heard when
using gasoline rated at 87 or greater, the
engine needs service.
Do not use any fuel labeled E85 or FlexFuel.
Do not use gasoline with ethanol levels
greater than 15% by volume.
Prohibited Fuels
Caution
Do not use fuels with any of the
following conditions; doing so may
damage the vehicle and void its
warranty:
(Continued)
Caution (Continued)
.For vehicles that are not FlexFuel, fuel
labeled greater than 15% ethanol by
volume, such as mid-level ethanol
blends (16–50% ethanol), E85,
or FlexFuel.
.Fuel with any amount of methanol,
methylal, ferrocene, and aniline. These
fuels can corrode metal fuel system
parts or damage plastic and rubber
parts.
.Fuel containing metals such as
methylcyclopentadienyl manganese
tricarbonyl (MMT), which can damage
the emissions control system and
spark plugs.
.Fuel with a posted octane rating of
less than the recommended fuel. Using
this fuel will lower fuel economy and
performance, and may decrease the
life of the emissions catalyst.
Fuels in Foreign Countries
The U.S., Canada, and Mexico post fuel
octane ratings in anti-knock index (AKI). For
fuel not to use in a foreign country, see
Prohibited Fuels0217.
Fuel Additives
TOP TIER Detergent Gasoline is highly
recommended for use with your vehicle.
If your country does not have TOP TIER
Detergent Gasoline, add ACDelco Fuel
System Treatment Plus−Gasoline to the
vehicle’s gasoline fuel tank at every oil
change or 15 000 km (9,000 mi), whichever
occurs first. TOP TIER Detergent Gasoline and
ACDelco Fuel System Treatment Plus−
Gasoline will help keep your vehicle’s engine
fuel deposit free and performing optimally.
Filling the Tank
An arrow on the fuel gauge indicates which
side of the vehicle the fuel door is on. See
Fuel Gauge 084.
{Warning
Fuel vapors and fuel fires burn violently
and can cause injury or death.
Follow these guidelines to help avoid
injuries to you and others:
.Read and follow all the instructions on
the fuel pump island.
.Turn off the engine when refueling.
(Continued)
Page 224 of 362
Chevrolet Colorado Owner Manual (GMNA-Localizing-U.S./Canada/Mexico-
15274222) - 2022 - CRC - 11/2/21
Driving and Operating 223
Disconnect the wiring to the trailer before
backing the trailer into the water to prevent
damage to the electrical circuits on the
trailer. Reconnect the wiring to the trailer
after removing the trailer from the water.
If the trailer has electric brakes that can
function when the trailer is submerged, it
might help to leave the electrical trailer
connector attached to maintain trailer brake
functionality while on the boat ramp.
To back the trailer into the water:1. If equipped, place the vehicle in four-wheel-drive high.
2. Slowly back down the boat ramp until the boat is floating, but no further than
necessary.
3. Press and hold the brake pedal, but do not shift into P (Park) yet.
4. Have someone place chocks under the front wheels of the vehicle.
5. Gradually release the brake pedal to allow the chocks to absorb the load of
the trailer.
6. Reapply the brake pedal. Then apply the parking brake and shift into P (Park).
7. Release the brake pedal. Pulling the Trailer from the Water
To pull the trailer of the water:
1. Press and hold the brake pedals.
2. Start the engine and shift into gear.
3. Release the parking brake.
4. Let up on the brake pedal.
5. Drive slowly until the tires are clear of the chocks.
6. Stop and have someone pick up and store the chocks.
7. Slowly pull the trailer from the water.
8. Once the vehicle and trailer have been driven from the sloped part of the boat
ramp, the vehicle can be shifted from
four-wheel-drive high. Shift into the drive
mode that is appropriate for the road
conditions.
Caution
If the vehicle tires begin to spin and the
vehicle begins to slide toward the water,
remove your foot from the accelerator
pedal and apply the brake pedal. Seek
help to have the vehicle towed up
the ramp.
Maintenance when Trailer Towing
The vehicle needs service more often when
used to tow trailers. See Maintenance
Schedule 0314. It is especially important to
check the automatic transmission fluid,
engine oil, axle lubricant, belts, cooling
system, and brake system before and during
each trip.
Check periodically to see that all nuts and
bolts on the trailer hitch are tight.
Engine Cooling When Trailer Towing
The cooling system may temporarily
overheat during severe operating conditions.
See Engine Overheating 0249.
Trailer Towing
If equipped with a diesel engine, see the
Duramax diesel supplement.
Caution
Towing a trailer improperly can damage
the vehicle and result in costly repairs
not covered by the vehicle warranty. To
tow a trailer correctly, follow the
directions in this section and see your
dealer for important information about
towing a trailer with the vehicle.
Page 232 of 362
Chevrolet Colorado Owner Manual (GMNA-Localizing-U.S./Canada/Mexico-
15274222) - 2022 - CRC - 11/2/21
Driving and Operating 231
allows manual application of the trailer
brakes. Use the ITBC control panel and the
DIC trailer brake display page to adjust and
display power output to the trailer brakes.
Trailer Brake DIC Display Page
The ITBC display page indicates:
.Trailer Gain setting
.Output to the trailer brakes
.Trailer connection
.System operational status
To display:
.Scroll through the DIC menu pages
.Press a Trailer Gain (+) or (−) button
.Activate the Manual Trailer Brake Apply
Lever
TRAILER GAIN: Press a Trailer Gain button to
recall the current Trailer Gain setting. Each
press and release of the gain buttons will
then change the Trailer Gain setting. Press
the Trailer Gain (+) or (−) to adjust. Press
and hold to continuously adjust the Trailer
Gain. To turn the output to the trailer off,
adjust the Trailer Gain setting to 0.0. This
setting can be adjusted from 0.0 to 10.0
with a trailer connected or disconnected. TRAILER OUTPUT: This displays anytime a
trailer with electric brakes is connected.
Output to the trailer brakes is based on the
amount of vehicle braking present and
relative to the Trailer Gain setting. Output is
displayed from 0 to 100% for each gain
setting.
The Trailer Output will indicate
“- - - - - -”on
the Trailer Brake Display Page whenever the
following occur:
.No trailer is connected.
.A trailer without electric brakes is
connected, no DIC message displays.
.A trailer with electric brakes has become
disconnected, a CHECK TRAILER WIRING
message displays on the DIC.
.There is a fault present in the wiring to
the trailer brakes, a CHECK TRAILER
WIRING message displays on the DIC.
.The ITBC system is not working due to a
fault, a SERVICE TRAILER BRAKE SYSTEM
message displays in the DIC.
Manual Trailer Brake Apply Lever
Slide this lever right to apply the trailer’s
electric brakes independent of the vehicle’s
brakes. Use this lever to adjust Trailer Gain
to achieve proper power output to the
trailer brakes. The trailer's and the vehicle's brake lamps will come on when either
vehicle brakes or manual trailer brakes are
applied and properly connected.
Trailer Gain Adjustment Procedure
Trailer Gain should be set for a specific
trailering condition and it must be
readjusted anytime vehicle loading, trailer
loading, or road surface conditions change.
{Warning
Trailer brakes that are over-gained or
under-gained may not stop the vehicle
and the trailer as intended and can result
in a crash. Always follow the instructions
to set the Trailer Gain for the proper
trailer stopping performance.
To adjust Trailer Gain for each towing
condition: 1. Drive the vehicle with the trailer attached on a level road surface
representative of the towing condition
and free of traffic at about 32–40 km/h
(20–25 mph) and fully apply the Manual
Trailer Brake Apply Lever.
Adjusting Trailer Gain at speeds lower
than 32–40 km/h (20–25 mph) may
result in an incorrect gain setting.
Page 233 of 362
Chevrolet Colorado Owner Manual (GMNA-Localizing-U.S./Canada/Mexico-
15274222) - 2022 - CRC - 11/2/21
232 Driving and Operating
2. Adjust the Trailer Gain, using the TrailerGain (+) or (-) adjustment buttons, to
just below the point of trailer wheel
lock-up, indicated by trailer wheel squeal
or tire smoke when a trailer wheel locks.
Trailer wheel lock-up may not occur if
towing a heavily loaded trailer. Adjust
the Trailer Gain to the highest allowable
setting for the towing condition.
3. Readjust Trailer Gain anytime vehicle loading, trailer loading, or road surface
conditions change or if trailer wheel
lock-up is noticed at any time while
towing.
Other ITBC-Related DIC Messages
TRAILER CONNECTED: This message will
briefly display when a trailer with electric
brakes is first connected to the vehicle. This
message will automatically turn off in about
10 seconds. This message can be
acknowledged before it automatically
turns off.
CHECK TRAILER WIRING: This message will
display if:
.The ITBC system first determines
connection to a trailer with electric brakes
and then the trailer harness becomes
disconnected from the vehicle. If the disconnect occurs while the vehicle
is stationary, this message will
automatically turn off in about
30 seconds. This message will also turn
off if it is acknowledged or if the trailer
harness is reconnected.
If the disconnect occurs while the vehicle
is moving, this message will continue
until the ignition is turned off. This
message will also turn off if it is
acknowledged or if the trailer harness is
reconnected.
.There is an electrical fault in the wiring to
the trailer brakes. This message will
continue as long as there is an electrical
fault in the trailer wiring. This message
will also turn off if it is acknowledged.
To determine whether the electrical fault is
on the vehicle side or trailer side of the
trailer wiring harness connection: 1. Disconnect the trailer wiring harness from the vehicle.
2. Turn the ignition off.
3. Wait 10 seconds, then turn the ignition back to RUN.
4. If the CHECK TRAILER WIRING message reappears, the electrical fault is on the
vehicle side. If the CHECK TRAILER WIRING message only
reappears when connecting the trailer wiring
harness to the vehicle, the electrical fault is
on the trailer side.
SERVICE TRAILER BRAKE SYSTEM: This
message will display when there is a
problem with the ITBC system. If this
message continues over multiple ignition
cycles, have the vehicle serviced.
If either the CHECK TRAILER WIRING or
SERVICE TRAILER BRAKE SYSTEM message
displays while driving, the ITBC system may
not be fully functional or may not function
at all. When traffic conditions allow,
carefully pull the vehicle over to the side of
the road and turn the ignition off. Check the
wiring connection to the trailer and turn the
ignition back on. If either of these messages
continues, either the vehicle or trailer needs
service.
A GM dealer may be able to diagnose and
repair problems with the trailer. However,
any diagnosis and repair of the trailer is not
covered under the vehicle warranty. Contact
your trailer dealer for assistance with trailer
repairs and trailer warranty information.
Page 235 of 362
Chevrolet Colorado Owner Manual (GMNA-Localizing-U.S./Canada/Mexico-
15274222) - 2022 - CRC - 11/2/21
234 Driving and Operating
Warning (Continued)
.Ask the device or trailer manufacturer
if the device has been thoroughly
tested for compatibility with the
make, model, and year of your vehicle
and any optional equipment installed
on your vehicle.
.Before driving, check the trailer brakes
are working properly, if equipped.
Drive the vehicle with the trailer
attached on a level road surface that
is free of traffic at about 32-40 km/h
(20-25 mph) and fully apply the
manual trailer brake apply lever. Also,
check the trailer brake lamps and
other lamps are functioning correctly.
.If the trailer brakes are not operating
properly at any time, or if a DIC
message indicates problems with the
trailer connections or trailer brakes,
carefully pull the vehicle over to the
side of the road when traffic
conditions allow.
Trailer Tires
Special Trailer (ST) tires differ from vehicle
tires. Trailer tires are designed with stiff
sidewalls to help prevent sway and tosupport heavy loads. These features can
make it difficult to determine if the trailer
tire pressures are low only based on a visual
inspection.
Always check all trailer tire pressures before
each trip when the tires are cool. Low trailer
tire pressure is a leading cause of trailer tire
blowouts.
Trailer tires deteriorate over time. The trailer
tire sidewall will show the week and year
the tire was manufactured. Many trailer tire
manufacturers recommend replacing tires
more than six years old.
Overloading is another leading cause of
trailer tire blowouts. Never load your trailer
with more weight than the tires are
designed to support. The load rating is
located on the trailer tire sidewall.
Always know the maximum speed rating for
the trailer tires before driving. This may be
significantly lower than the vehicle tire
speed rating. The speed rating may be on
the trailer tire sidewall. If the speed rating is
not shown, the default trailer tire speed
rating is 105 km/h (65 mph).
Conversions and Add-Ons
Add-On Electrical Equipment
{Warning
The Data Link Connector (DLC) is used for
vehicle service and Emission Inspection/
Maintenance testing. See
Malfunction
Indicator Lamp (Check Engine Light) 087.
A device connected to the DLC —such as
an aftermarket fleet or driver-behavior
tracking device —may interfere with
vehicle systems. This could affect vehicle
operation and cause a crash. Such devices
may also access information stored in the
vehicle’s systems.
Caution
Some electrical equipment can damage
the vehicle or cause components to not
work and would not be covered by the
vehicle warranty. Always check with your
dealer before adding electrical equipment.
Add-on equipment can drain the vehicle's
12-volt battery, even if the vehicle is not
operating.
Page 237 of 362

Chevrolet Colorado Owner Manual (GMNA-Localizing-U.S./Canada/Mexico-
15274222) - 2022 - CRC - 11/2/21
236 Vehicle Care
Vehicle Care
General Information
General Information . . . . . . . . . . . . . . . . . . . 237
California Perchlorate MaterialsRequirements . . . . . . . . . . . . . . . . . . . . . . . . 237
Accessories and Modifications . . . . . . . . . 237
Vehicle Checks
Doing Your Own Service Work . . . . . . . . . 237
Hood . . . . . . . . . . . . . . . . . . . . . . . . . . . . . . . . . . 238
Engine Compartment Overview . . . . . . . . 239
Engine Oil . . . . . . . . . . . . . . . . . . . . . . . . . . . . . 242
Engine Oil Life System . . . . . . . . . . . . . . . . 244
Automatic Transmission Fluid . . . . . . . . . 245
Engine Air Cleaner/Filter . . . . . . . . . . . . . . . 245
Cooling System . . . . . . . . . . . . . . . . . . . . . . . 246
Engine Overheating . . . . . . . . . . . . . . . . . . . 249
Engine Fan . . . . . . . . . . . . . . . . . . . . . . . . . . . . 250
Washer Fluid . . . . . . . . . . . . . . . . . . . . . . . . . . 251
Brakes . . . . . . . . . . . . . . . . . . . . . . . . . . . . . . . . . 251
Brake Fluid . . . . . . . . . . . . . . . . . . . . . . . . . . . . 252
Battery - North America . . . . . . . . . . . . . . . 253
Four-Wheel Drive . . . . . . . . . . . . . . . . . . . . . . 254
Front Axle . . . . . . . . . . . . . . . . . . . . . . . . . . . . . 254
Rear Axle . . . . . . . . . . . . . . . . . . . . . . . . . . . . . . 254
Starter Switch Check . . . . . . . . . . . . . . . . . . . 255
Automatic Transmission Shift Lock Control Function Check . . . . . . . . . . . . . . 255
Ignition Transmission Lock Check . . . . . . 255 Park Brake and P (Park) Mechanism
Check . . . . . . . . . . . . . . . . . . . . . . . . . . . . . . . . 255
Wiper Blade Replacement . . . . . . . . . . . . . 256
Windshield Replacement . . . . . . . . . . . . . . 256
Gas Strut(s) . . . . . . . . . . . . . . . . . . . . . . . . . . . 256
Headlamp Aiming
Front Headlamp Aiming . . . . . . . . . . . . . . . 257
Bulb Replacement
Bulb Replacement . . . . . . . . . . . . . . . . . . . . . 257
Halogen Bulbs . . . . . . . . . . . . . . . . . . . . . . . . . 258
Headlamps, Front Turn Signal, Sidemarker, and Parking Lamps . . . . . . 258
Taillamps, Turn Signal, Stoplamps, and Back-Up Lamps . . . . . . . . . . . . . . . . . . . . . . 258
Center High-Mounted Stoplamp (CHMSL) and Cargo Lamp . . . . . . . . . . . 260
Electrical System
Electrical System Overload . . . . . . . . . . . . 260
Fuses and Circuit Breakers . . . . . . . . . . . . . 262
Engine Compartment Fuse Block . . . . . . 262
Instrument Panel Fuse Block . . . . . . . . . . 267
Wheels and Tires
Tires . . . . . . . . . . . . . . . . . . . . . . . . . . . . . . . . . . 269
All-Season Tires . . . . . . . . . . . . . . . . . . . . . . . 270
Winter Tires . . . . . . . . . . . . . . . . . . . . . . . . . . . 270
All-Terrain Tires . . . . . . . . . . . . . . . . . . . . . . . . 271
Tire Sidewall Labeling . . . . . . . . . . . . . . . . . . 271
Tire Designations . . . . . . . . . . . . . . . . . . . . . . 273 Tire Terminology and Definitions . . . . . . 273
Tire Pressure . . . . . . . . . . . . . . . . . . . . . . . . . . 275
Tire Pressure Monitor System . . . . . . . . . 276
Tire Pressure Monitor Operation . . . . . . . 277
Tire Inspection . . . . . . . . . . . . . . . . . . . . . . . . 280
Tire Rotation . . . . . . . . . . . . . . . . . . . . . . . . . . 280
When It Is Time for New Tires . . . . . . . . . 281
Buying New Tires . . . . . . . . . . . . . . . . . . . . . 282
Different Size Tires and Wheels . . . . . . . 283
Uniform Tire Quality Grading . . . . . . . . . 283
Wheel Alignment and Tire Balance . . . . 284
Wheel Replacement . . . . . . . . . . . . . . . . . . . 284
Tire Chains . . . . . . . . . . . . . . . . . . . . . . . . . . . . 285
If a Tire Goes Flat . . . . . . . . . . . . . . . . . . . . . 286
Tire Changing . . . . . . . . . . . . . . . . . . . . . . . . . 287
Compact Spare Tire . . . . . . . . . . . . . . . . . . . 296
Full-Size Spare Tire . . . . . . . . . . . . . . . . . . . . 297
Jump Starting
Jump Starting - North America . . . . . . . . 297
Towing the Vehicle
Towing the Vehicle . . . . . . . . . . . . . . . . . . . 300
Recreational Vehicle Towing . . . . . . . . . . . 301
Appearance Care
Exterior Care . . . . . . . . . . . . . . . . . . . . . . . . . . 304
Interior Care . . . . . . . . . . . . . . . . . . . . . . . . . . 308
Floor Mats . . . . . . . . . . . . . . . . . . . . . . . . . . . . . 311
Page 238 of 362
Chevrolet Colorado Owner Manual (GMNA-Localizing-U.S./Canada/Mexico-
15274222) - 2022 - CRC - 11/2/21
Vehicle Care 237
General Information
For service and parts needs, visit your
dealer. You will receive genuine GM parts
and GM-trained and supported service
people.
Genuine GM parts have one of these marks:
California Perchlorate Materials
Requirements
Certain types of automotive applications,
such as airbag initiators, seat belt
pretensioners, and lithium batteries
contained in electronic keys, may contain
perchlorate materials. Perchlorate Material–special handling may apply. See
www.dtsc.ca.gov/hazardouswaste/
perchlorate.
Accessories and Modifications
Adding non-dealer accessories or making
modifications to the vehicle can affect
vehicle performance and safety, including
such things as airbags, braking, stability,
ride and handling, emissions systems,
aerodynamics, durability, and electronic
systems like antilock brakes, traction control,
and stability control. These accessories or
modifications could even cause malfunction
or damage not covered by the vehicle
warranty.
Damage to suspension components caused
by modifying vehicle height outside of
factory settings will not be covered by the
vehicle warranty.
Damage to vehicle components resulting
from modifications or the installation or use
of non-GM certified parts, including control
module or software modifications, is not
covered under the terms of the vehicle
warranty and may affect remaining
warranty coverage for affected parts.
GM Accessories are designed to complement
and function with other systems on the
vehicle. See your dealer to accessorize the
vehicle using genuine GM Accessories
installed by a dealer technician.
Also, see
Adding Equipment to the
Airbag-Equipped Vehicle 043.
Vehicle Checks
Doing Your Own Service Work
{Warning
It can be dangerous to work on your
vehicle if you do not have the proper
knowledge, service manual, tools,
or parts. Always follow owner’s manual
procedures and consult the service
manual for your vehicle before doing any
service work.
If doing some of your own service work, use
the proper service manual. It tells you much
more about how to service the vehicle than
this manual can. To order the proper service
manual, see Publication Ordering
Information 0338.