2022 CHEVROLET COLORADO stop start
[x] Cancel search: stop startPage 185 of 362
Chevrolet Colorado Owner Manual (GMNA-Localizing-U.S./Canada/Mexico-
15274222) - 2022 - CRC - 11/2/21
184 Driving and Operating
Caution (Continued)
.Do not drive at any one constant
speed, fast or slow, for the first
800 km (500 mi). Do not make
full-throttle starts. Avoid downshifting
to brake or slow the vehicle.
.Avoid making hard stops for the first
300 km (200 mi) or so. During this
time the new brake linings are not yet
broken in. Hard stops with new linings
can mean premature wear and earlier
replacement. Follow this breaking-in
guideline every time you get new
brake linings.
.Do not tow a trailer during break-in.
SeeTrailer Towing 0223 for the trailer
towing capabilities of the vehicle and
more information.
Following break-in, engine speed and load
can be gradually increased.
On new vehicles, the various mechanical and
electrical systems experience a “break-in”
period during the first 6,400 km
(4,000 miles) of routine driving. As the
vehicle is driven, the mechanical systems
adjust to provide optimal fuel economy and
transmission shift performance. Electrical systems will adapt and calibrate
during the break-in period. A one-time
occurrence of clicks and similar vehicle
noises is normal during this process.
Normal driving charges the vehicle’s battery
to achieve the best operation of the vehicle,
including fuel economy.
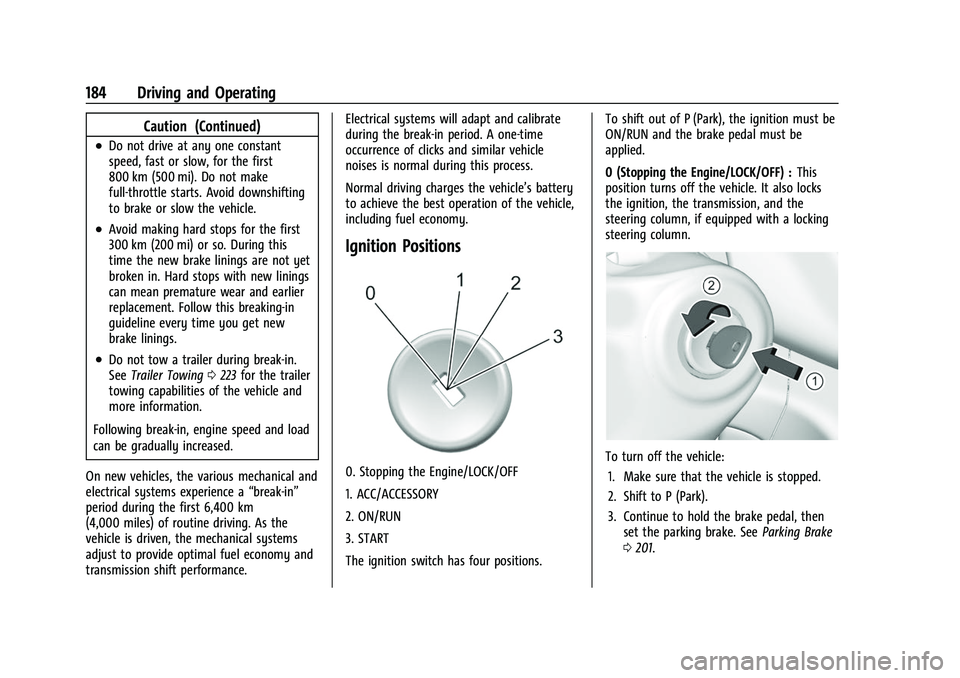
Ignition Positions
0. Stopping the Engine/LOCK/OFF
1. ACC/ACCESSORY
2. ON/RUN
3. START
The ignition switch has four positions.
To shift out of P (Park), the ignition must be
ON/RUN and the brake pedal must be
applied.
0 (Stopping the Engine/LOCK/OFF) :
This
position turns off the vehicle. It also locks
the ignition, the transmission, and the
steering column, if equipped with a locking
steering column.To turn off the vehicle:
1. Make sure that the vehicle is stopped.
2. Shift to P (Park).
3. Continue to hold the brake pedal, then set the parking brake. See Parking Brake
0 201.
Page 186 of 362
Chevrolet Colorado Owner Manual (GMNA-Localizing-U.S./Canada/Mexico-
15274222) - 2022 - CRC - 11/2/21
Driving and Operating 185
4. Push the key all the way in toward thesteering column, then turn the key to
LOCK/OFF.
5. Remove the key.
6. Release the brake pedal.
See your dealer if the key can be removed
in any other position.
Retained Accessory Power (RAP) will remain
active. See Retained Accessory Power (RAP)
0 188.
A warning chime will sound when the driver
door is opened and the key is in the
ignition.
If equipped with a locking steering column,
the steering can bind with the front wheels
turned off center, which may prevent key
rotation out of LOCK/OFF. If this happens,
move the steering wheel from right to left
while turning the key to ACC/ACCESSORY.
If this does not work, then the vehicle needs
service.{Warning
Turning off the vehicle while moving may
cause loss of power assist in the brake
and steering systems and disable the
airbags. While driving, turn off the
vehicle only in an emergency.
In an emergency, if the vehicle cannot be
pulled over and must be turned off while
driving: 1. Push the key all the way in toward the steering column, then turn the key to
ACC/ACCESSORY.
2. Brake using firm and steady pressure. Do not pump the brakes repeatedly. This
may deplete power assist, requiring
increased brake pedal force.
3. Shift the vehicle to N (Neutral). This can be done while the vehicle is moving.
Continue braking and steer the vehicle to
a safe location.
4. Come to a complete stop.
5. Shift to P (Park).
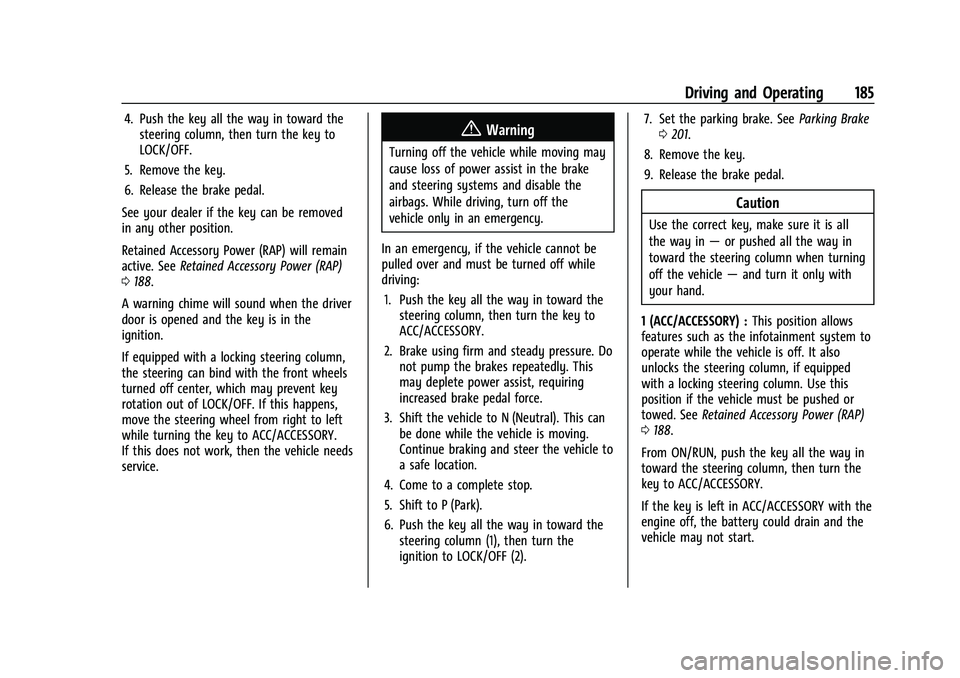
6. Push the key all the way in toward the steering column (1), then turn the
ignition to LOCK/OFF (2). 7. Set the parking brake. See
Parking Brake
0 201.
8. Remove the key.
9. Release the brake pedal.
Caution
Use the correct key, make sure it is all
the way in —or pushed all the way in
toward the steering column when turning
off the vehicle —and turn it only with
your hand.
1 (ACC/ACCESSORY) : This position allows
features such as the infotainment system to
operate while the vehicle is off. It also
unlocks the steering column, if equipped
with a locking steering column. Use this
position if the vehicle must be pushed or
towed. See Retained Accessory Power (RAP)
0 188.
From ON/RUN, push the key all the way in
toward the steering column, then turn the
key to ACC/ACCESSORY.
If the key is left in ACC/ACCESSORY with the
engine off, the battery could drain and the
vehicle may not start.
Page 187 of 362

Chevrolet Colorado Owner Manual (GMNA-Localizing-U.S./Canada/Mexico-
15274222) - 2022 - CRC - 11/2/21
186 Driving and Operating
A warning chime will sound when the driver
door is opened and the key is in the
ignition.
2 (ON/RUN) :This position can be used to
operate the electrical accessories and to
display some instrument cluster warning
and indicator lights. This position can also
be used for service and diagnostics, and to
verify the proper operation of the
malfunction indicator lamp as may be
required for emission inspection purposes.
The switch stays in this position when the
engine is running. The transmission is also
unlocked in this position.
If the key is left in ON/RUN with the engine
off, the battery could drain and the vehicle
may not start.
3 (START) : This is the position that starts
the engine. When the engine starts, release
the key. The ignition returns to ON/RUN for
driving.
Starting the Engine
If the vehicle has a diesel engine, see the
Duramax diesel supplement.
Caution
If you add electrical parts or accessories,
you could change the way the engine
operates. Any resulting damage would
not be covered by the vehicle warranty.
See Add-On Electrical Equipment 0234.
Place the transmission in the proper gear.
Move the shift lever to P (Park) or
N (Neutral). The engine will not start in any
other position. To restart the engine when
the vehicle is already moving, use
N (Neutral) only.
Caution
Do not try to shift to P (Park) if the
vehicle is moving. If you do, you could
damage the transmission. Shift to P (Park)
only when the vehicle is stopped.
Starting Procedure
1. With your foot off the accelerator pedal, turn the ignition key to START. When
the engine starts, let go of the key. The
idle speed will go down as the engine
gets warm. Do not race the engine
immediately after starting it. Operate the engine and transmission gently to
allow the oil to warm up and lubricate
all moving parts.
Caution
Cranking the engine for long periods of
time, by returning the ignition to the
START position immediately after
cranking has ended, can overheat and
damage the cranking motor, and drain
the battery. Wait at least 15 seconds
between each try, to let the cranking
motor cool down.
2. If the engine does not start after five to 10 seconds, especially in very cold
weather (below −18 °C or 0 °F), it could
be flooded with too much gasoline. Try
pushing the accelerator pedal all the way
to the floor and holding it there while
holding the key in START for up to
15 seconds. Wait at least 15 seconds
between each try, to allow the cranking
motor to cool down. When the engine
starts, let go of the key and accelerator
pedal. If the vehicle starts briefly but
then stops again, do the same thing.
This clears the extra gasoline from the
engine. Do not race the engine
immediately after starting it. Operate
Page 192 of 362
Chevrolet Colorado Owner Manual (GMNA-Localizing-U.S./Canada/Mexico-
15274222) - 2022 - CRC - 11/2/21
Driving and Operating 191
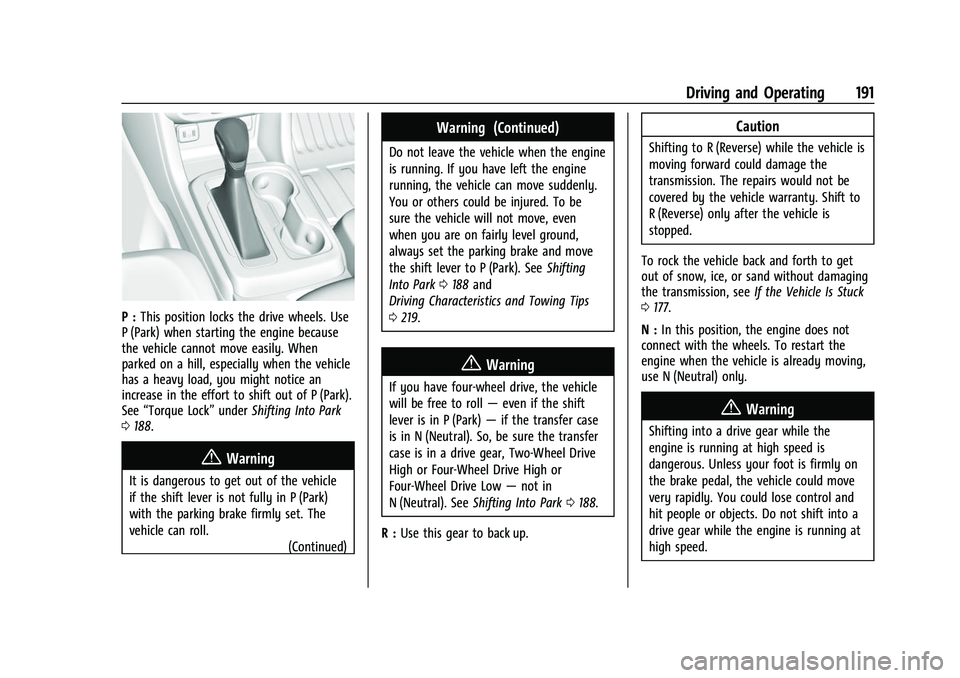
P :This position locks the drive wheels. Use
P (Park) when starting the engine because
the vehicle cannot move easily. When
parked on a hill, especially when the vehicle
has a heavy load, you might notice an
increase in the effort to shift out of P (Park).
See “Torque Lock” underShifting Into Park
0 188.
{Warning
It is dangerous to get out of the vehicle
if the shift lever is not fully in P (Park)
with the parking brake firmly set. The
vehicle can roll.
(Continued)
Warning (Continued)
Do not leave the vehicle when the engine
is running. If you have left the engine
running, the vehicle can move suddenly.
You or others could be injured. To be
sure the vehicle will not move, even
when you are on fairly level ground,
always set the parking brake and move
the shift lever to P (Park). SeeShifting
Into Park 0188 and
Driving Characteristics and Towing Tips
0 219.
{Warning
If you have four-wheel drive, the vehicle
will be free to roll —even if the shift
lever is in P (Park) —if the transfer case
is in N (Neutral). So, be sure the transfer
case is in a drive gear, Two-Wheel Drive
High or Four-Wheel Drive High or
Four-Wheel Drive Low —not in
N (Neutral). See Shifting Into Park 0188.
R : Use this gear to back up.
Caution
Shifting to R (Reverse) while the vehicle is
moving forward could damage the
transmission. The repairs would not be
covered by the vehicle warranty. Shift to
R (Reverse) only after the vehicle is
stopped.
To rock the vehicle back and forth to get
out of snow, ice, or sand without damaging
the transmission, see If the Vehicle Is Stuck
0 177.
N : In this position, the engine does not
connect with the wheels. To restart the
engine when the vehicle is already moving,
use N (Neutral) only.
{Warning
Shifting into a drive gear while the
engine is running at high speed is
dangerous. Unless your foot is firmly on
the brake pedal, the vehicle could move
very rapidly. You could lose control and
hit people or objects. Do not shift into a
drive gear while the engine is running at
high speed.
Page 194 of 362
Chevrolet Colorado Owner Manual (GMNA-Localizing-U.S./Canada/Mexico-
15274222) - 2022 - CRC - 11/2/21
Driving and Operating 193
Caution
Spinning the tires or holding the vehicle
in one place on a hill using only the
accelerator pedal may damage the
transmission. The repair will not be
covered by the vehicle warranty. If the
vehicle is stuck, do not spin the tires.
When stopping on a hill, use the brakes
to hold the vehicle in place.
Normal Mode Grade Braking
Normal Mode Grade Braking is enabled
when the vehicle is started, but is not
enabled in Range Selection Mode. It assists
in maintaining desired vehicle speeds when
driving on downhill grades by using the
engine and transmission to slow the vehicle.
Manual Mode
Range Selection Mode
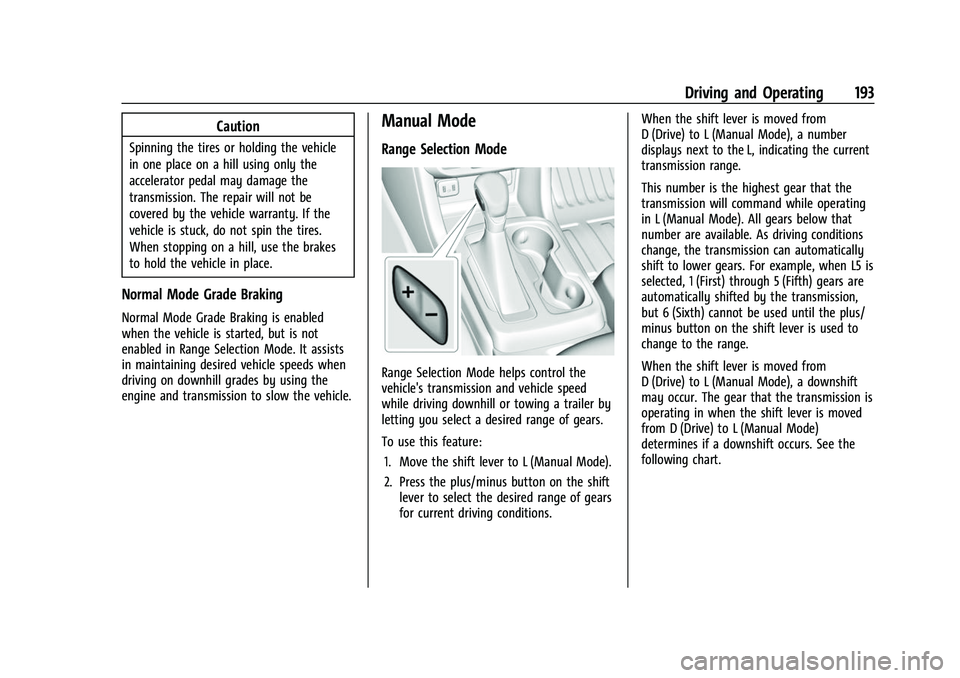
Range Selection Mode helps control the
vehicle's transmission and vehicle speed
while driving downhill or towing a trailer by
letting you select a desired range of gears.
To use this feature:1. Move the shift lever to L (Manual Mode).
2. Press the plus/minus button on the shift lever to select the desired range of gears
for current driving conditions. When the shift lever is moved from
D (Drive) to L (Manual Mode), a number
displays next to the L, indicating the current
transmission range.
This number is the highest gear that the
transmission will command while operating
in L (Manual Mode). All gears below that
number are available. As driving conditions
change, the transmission can automatically
shift to lower gears. For example, when L5 is
selected, 1 (First) through 5 (Fifth) gears are
automatically shifted by the transmission,
but 6 (Sixth) cannot be used until the plus/
minus button on the shift lever is used to
change to the range.
When the shift lever is moved from
D (Drive) to L (Manual Mode), a downshift
may occur. The gear that the transmission is
operating in when the shift lever is moved
from D (Drive) to L (Manual Mode)
determines if a downshift occurs. See the
following chart.
Page 198 of 362
Chevrolet Colorado Owner Manual (GMNA-Localizing-U.S./Canada/Mexico-
15274222) - 2022 - CRC - 11/2/21
Driving and Operating 197
Shifting Into 2m
Turn the knob to 2mat any speed, except
when shifting from 4
n.
Shifting Into 4
n
When 4nis engaged, vehicle speed should
be kept below 72 km/h (45 mph).
1. The ignition must be on and the vehicle must be stopped or moving less than
5 km/h (3 mph) with the transmission in
N (Neutral). It is best for the vehicle to
be moving 1.6 to 3.2 km/h (1 to 2 mph).
2. Turn the knob to 4
n. Wait for the 4n
indicator light to stop flashing before
shifting the transmission into gear.
If the transmission is in gear and/or moving
more than 5 km/h (3 mph), the 4
nindicator
light will flash for 30 seconds, but will not
complete the shift. After 30 seconds the
transfer case will shift to 4
m. Turn the knob
to 4
mto see the indicator. With the vehicle
moving less than 5 km/h (3 mph), and the
transmission in N (Neutral), attempt the shift
again. Shifting Out of 4
n
1. To shift out of 4nthe vehicle must be
stopped or moving less than 5 km/h
(3 mph) with the transmission in
N (Neutral) and the ignition on. It is best
for the vehicle to be moving
1.6 to 3.2 km/h (1 to 2 mph).
2. Turn the knob to 4
mor 2m. Wait for the
4
mor 2mindicator light to stop flashing
before shifting the transmission
into gear.
If the transmission is in gear and/or moving
more than 5 km/h (3 mph), the 4
mor 2m
indicator light will flash for 30 seconds, but
will not complete the shift. With the vehicle
moving less than 5 km/h (3 mph), and the
transmission in N (Neutral), attempt the shift
again.
Shifting Into N (Neutral)
To shift: 1. Park the vehicle on a level surface.
2. Set the parking brake and press and hold the brake pedal. See Parking Brake
0 201.
3. Start the vehicle or turn the ignition on.
4. Shift the transmission to N (Neutral). 5. Shift the transfer case to 2
m.
6. Turn the transfer case knob clockwise past the 4
ndetent to N (Neutral) until it
stops and hold it there until the
N (Neutral) light starts flashing. This will
take at least 10 seconds. Then slowly
release the knob to the 4
nposition. The
N (Neutral) light will come on when the
transfer case shift to N (Neutral) is
complete.
7. With the engine running, verify that the transfer case is in N (Neutral) by shifting
the transmission to R (Reverse), then to
D (Drive). There should be no movement
of the vehicle while shifting the
transmission.
8. Turn the engine off, and the ignition to ACC/ACCESSORY.
9. Place the transmission shift lever in P (Park). See Recreational Vehicle Towing
0 301.
Shifting Out of N (Neutral)
To shift: 1. Set the parking brake.
2. Turn the ignition on with the engine off.
3. Shift the transmission to N (Neutral).
Page 201 of 362
Chevrolet Colorado Owner Manual (GMNA-Localizing-U.S./Canada/Mexico-
15274222) - 2022 - CRC - 11/2/21
200 Driving and Operating
Caution
Shifting the transmission into gear before
the requested mode indicator light has
stopped flashing could damage the
transfer case.
If the transmission is in gear and/or moving
more than 5 km/h (3 mph), the 4
m, AUTO,
or 2
mindicator light will flash for
30 seconds but will not complete the shift.
With the vehicle moving less than 5 km/h
(3 mph), and the transmission in N (Neutral),
attempt the shift again.
Shifting Into N (Neutral)
To shift:
1. Park the vehicle on a level surface.
2. Set the parking brake and press and hold the brake pedal. See Parking Brake
0 201.
3. Start the vehicle or turn the ignition on.
4. Shift the transmission to N (Neutral).
5. Shift the transfer case to 2
m.
6. Turn the transfer case shift knob clockwise past the 4
ndetent to
N (Neutral) until it stops and hold it
there until the N (Neutral) light starts flashing. This will take at least
10 seconds. Then slowly release the knob
to the 4
nposition. The N (Neutral) light
will come on when the transfer case
shift to N (Neutral) is complete.
7. With the engine running, verify that the transfer case is in N (Neutral) by shifting
the transmission to R (Reverse), then
shift the transmission to D (Drive). There
should be no movement of the vehicle
while shifting the transmission.
8. Turn the engine off, and the ignition to ACC/ACCESSORY.
9. Place the transmission shift lever in P (Park).
Shifting Out of N (Neutral)
To shift: 1. Set the parking brake.
2. Turn the ignition on with the engine off.
3. Shift the transmission to N (Neutral).
4. Turn the transfer case shift knob to 2
m.
After the transfer case has shifted out of
N (Neutral), the N (Neutral) light will
go out and the new 2
mstate will be
displayed. 5. Place the transmission shift lever in
P (Park).
6. Release the parking brake.
Brakes
Antilock Brake System (ABS)
The Antilock Brake System (ABS) helps
prevent a braking skid and maintain steering
while braking hard.
ABS performs a system check when the
vehicle is first driven. A momentary motor
or clicking noise may be heard while this
test is going on, and the brake pedal may
move slightly. This is normal.
If there is a problem with ABS, this warning
light stays on. See Antilock Brake System
(ABS) Warning Light 089.
ABS does not change the time needed to
get a foot on the brake pedal and does not
always decrease stopping distance. If you
Page 202 of 362
Chevrolet Colorado Owner Manual (GMNA-Localizing-U.S./Canada/Mexico-
15274222) - 2022 - CRC - 11/2/21
Driving and Operating 201
get too close to the vehicle ahead, there will
not be enough time to apply the brakes if
that vehicle suddenly slows or stops. Always
leave enough room ahead to stop, even
with ABS.
Using ABS
Do not pump the brakes. Just hold the brake
pedal down firmly. Hearing or feeling ABS
operate is normal.
Braking in Emergencies
ABS allows steering and braking at the same
time. In many emergencies, steering can
help even more than braking.
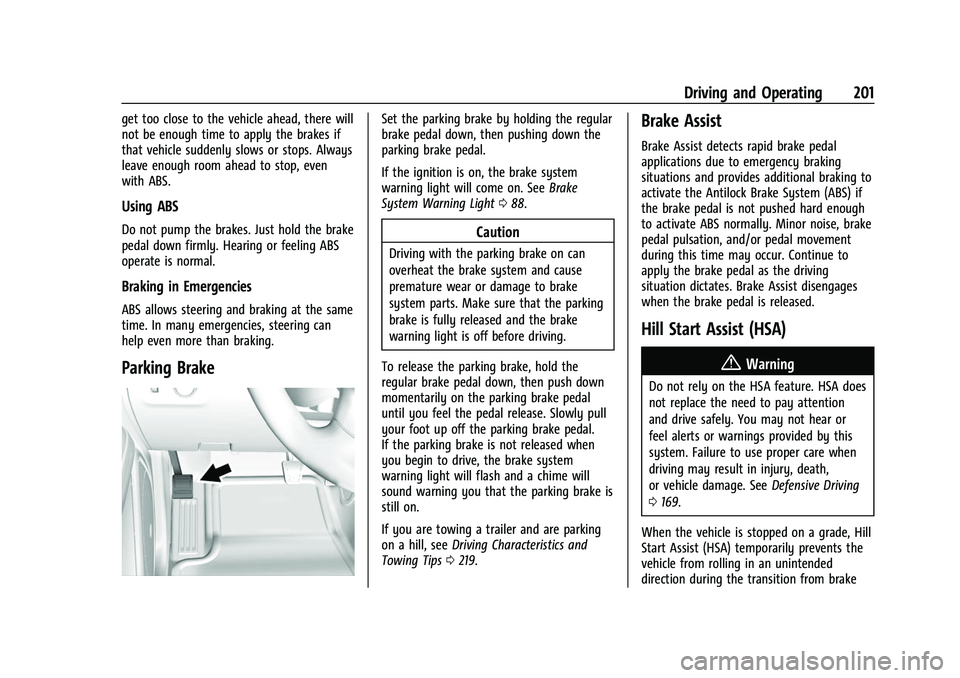
Parking Brake
Set the parking brake by holding the regular
brake pedal down, then pushing down the
parking brake pedal.
If the ignition is on, the brake system
warning light will come on. SeeBrake
System Warning Light 088.
Caution
Driving with the parking brake on can
overheat the brake system and cause
premature wear or damage to brake
system parts. Make sure that the parking
brake is fully released and the brake
warning light is off before driving.
To release the parking brake, hold the
regular brake pedal down, then push down
momentarily on the parking brake pedal
until you feel the pedal release. Slowly pull
your foot up off the parking brake pedal.
If the parking brake is not released when
you begin to drive, the brake system
warning light will flash and a chime will
sound warning you that the parking brake is
still on.
If you are towing a trailer and are parking
on a hill, see Driving Characteristics and
Towing Tips 0219.
Brake Assist
Brake Assist detects rapid brake pedal
applications due to emergency braking
situations and provides additional braking to
activate the Antilock Brake System (ABS) if
the brake pedal is not pushed hard enough
to activate ABS normally. Minor noise, brake
pedal pulsation, and/or pedal movement
during this time may occur. Continue to
apply the brake pedal as the driving
situation dictates. Brake Assist disengages
when the brake pedal is released.
Hill Start Assist (HSA)
{Warning
Do not rely on the HSA feature. HSA does
not replace the need to pay attention
and drive safely. You may not hear or
feel alerts or warnings provided by this
system. Failure to use proper care when
driving may result in injury, death,
or vehicle damage. See Defensive Driving
0 169.
When the vehicle is stopped on a grade, Hill
Start Assist (HSA) temporarily prevents the
vehicle from rolling in an unintended
direction during the transition from brake