2022 CHEVROLET COLORADO check engine light
[x] Cancel search: check engine lightPage 93 of 362
Chevrolet Colorado Owner Manual (GMNA-Localizing-U.S./Canada/Mexico-
15274222) - 2022 - CRC - 11/2/21
92 Instruments and Controls
the light will come on at every ignition
cycle. SeeTire Pressure Monitor Operation
0 277.
Engine Oil Pressure Light
Caution
Lack of proper engine oil maintenance
can damage the engine. Driving with the
engine oil low can also damage the
engine. The repairs would not be covered
by the vehicle warranty. Check the oil
level as soon as possible. Add oil if
required, but if the oil level is within the
operating range and the oil pressure is
still low, have the vehicle serviced.
Always follow the maintenance schedule
for changing engine oil.
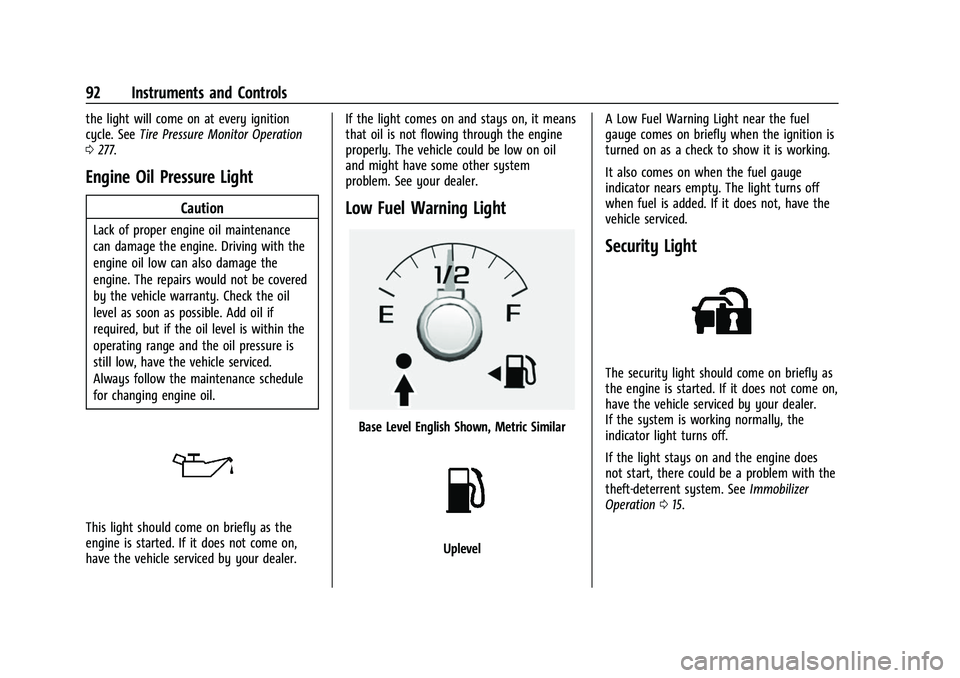
This light should come on briefly as the
engine is started. If it does not come on,
have the vehicle serviced by your dealer. If the light comes on and stays on, it means
that oil is not flowing through the engine
properly. The vehicle could be low on oil
and might have some other system
problem. See your dealer.
Low Fuel Warning Light
Base Level English Shown, Metric Similar
Uplevel
A Low Fuel Warning Light near the fuel
gauge comes on briefly when the ignition is
turned on as a check to show it is working.
It also comes on when the fuel gauge
indicator nears empty. The light turns off
when fuel is added. If it does not, have the
vehicle serviced.
Security Light
The security light should come on briefly as
the engine is started. If it does not come on,
have the vehicle serviced by your dealer.
If the system is working normally, the
indicator light turns off.
If the light stays on and the engine does
not start, there could be a problem with the
theft-deterrent system. See
Immobilizer
Operation 015.
Page 97 of 362

Chevrolet Colorado Owner Manual (GMNA-Localizing-U.S./Canada/Mexico-
15274222) - 2022 - CRC - 11/2/21
96 Instruments and Controls
The display provides feedback on how
current driving behavior in the bar graph
affects the running average in the top
display and how well recent driving
compares to the best that has been
achieved.
Driver Information Center (DIC)
(Uplevel)
The DIC displays are shown in the center of
the instrument cluster in the Info app. See
Instrument Cluster081. The displays show
the status of many vehicle systems.
worx: Press to move up or down in
a list.
oorp: Press to move between the
interactive display zones in the cluster.
V: Press to open a menu or select a menu
item. Press and hold to reset values on
certain screens.
If the vehicle has a diesel engine, see the
Duramax diesel supplement for additional
DIC pages.
DIC Info Page Options
The info pages on the DIC can be turned on
or off through the Options menu.
1. Press
oorpto scroll to the Options
application.
2. Scroll to Info Page Options and press
V.
3. Press
worxto move through the list
of possible information displays.
4. Press
Vwhile an item is highlighted to
select or deselect that item. When an
item is selected, a checkmark will appear
next to it.
DIC Info Pages
The following is the list of all possible DIC
info page displays. Some may not be
available for your particular vehicle. Some
items may not be turned on by default but can be turned on through the Options app.
See
“DIC Info Page Options” earlier in this
section.
Speed : Shows the vehicle speed in either
kilometers per hour (km/h) or miles per
hour (mph). If equipped, press
Vto open
the menu and select to display speed limit
signs. The sign will show “− −”when there
is no detected speed limit or the system is
unavailable.
Trip 1 or Trip 2 : Shows the current distance
traveled, in either kilometers (km) or
miles (mi), since the trip odometer was last
reset.
This also shows the approximate average
liters per 100 kilometers (L/100 km) or miles
per gallon (mpg). This number is calculated
based on the number of L/100 km (mpg)
recorded since the last time this menu item
was reset. This number reflects only the
approximate average fuel economy that the
vehicle has right now, and will change as
driving conditions change.
Press and hold
Vwhile this display is active
to reset the trip odometer and the average
fuel economy. Trip 1 and Trip 2 can also be
reset by pressing
Vand choosing reset.
Page 176 of 362
Chevrolet Colorado Owner Manual (GMNA-Localizing-U.S./Canada/Mexico-
15274222) - 2022 - CRC - 11/2/21
Driving and Operating 175
This affects steering, accelerating, and
braking. Drive at a reduced speed and avoid
sharp turns or abrupt maneuvers.
Traction is reduced on hard packed snow
and ice and it is easy to lose control. Reduce
vehicle speed when driving on hard packed
snow and ice.
{Warning
Driving on frozen lakes, ponds, or rivers
can be dangerous. Ice conditions vary
greatly and the vehicle could fall through
the ice; you and your passengers could
drown. Drive your vehicle on safe
surfaces only.
Driving in Water
{Warning
Driving through rushing water can be
dangerous. Deep water can sweep your
vehicle downstream and you and your
passengers could drown. If it is only
shallow water, it can still wash away the
ground from under your tires. Traction
could be lost, and the vehicle could roll
over. Do not drive through rushing water.
Caution
Do not drive through standing water if it
is deep enough to cover the wheel hubs,
axles, or exhaust pipe. Deep water can
damage the axle and other vehicle parts.
If the standing water is not too deep, drive
through it slowly. At faster speeds, water
can get into the engine and cause it to stall.
Stalling can occur if the exhaust pipe is
under water. Do not turn off the ignition
when driving through water. If the exhaust
pipe is under water, the engine will not
start. When going through water, the brakes
get wet and it may take longer to stop. See
“Driving on Wet Roads” later in this section.
After Off-Road Driving
Remove any brush or debris that has
collected on the underbody or chassis,
or under the hood. These accumulations can
be a fire hazard.
After operation in mud or sand, have the
brake linings cleaned and checked. These
substances can cause glazing and uneven
braking. Check the body structure, driveline,
steering, suspension, wheels, tires, and exhaust system for damage and check the
fuel lines and cooling system for any
leakage.
More frequent maintenance service is
required. See the
Maintenance Schedule
0 314.
Driving on Wet Roads
Rain and wet roads can reduce vehicle
traction and affect your ability to stop and
accelerate. Always drive slower in these
types of driving conditions and avoid driving
through large puddles and deep-standing or
flowing water.
{Warning
Wet brakes can cause crashes. They
might not work as well in a quick stop
and could cause pulling to one side. You
could lose control of the vehicle.
After driving through a large puddle of
water or a car/vehicle wash, lightly apply
the brake pedal until the brakes work
normally.
(Continued)
Page 201 of 362
Chevrolet Colorado Owner Manual (GMNA-Localizing-U.S./Canada/Mexico-
15274222) - 2022 - CRC - 11/2/21
200 Driving and Operating
Caution
Shifting the transmission into gear before
the requested mode indicator light has
stopped flashing could damage the
transfer case.
If the transmission is in gear and/or moving
more than 5 km/h (3 mph), the 4
m, AUTO,
or 2
mindicator light will flash for
30 seconds but will not complete the shift.
With the vehicle moving less than 5 km/h
(3 mph), and the transmission in N (Neutral),
attempt the shift again.
Shifting Into N (Neutral)
To shift:
1. Park the vehicle on a level surface.
2. Set the parking brake and press and hold the brake pedal. See Parking Brake
0 201.
3. Start the vehicle or turn the ignition on.
4. Shift the transmission to N (Neutral).
5. Shift the transfer case to 2
m.
6. Turn the transfer case shift knob clockwise past the 4
ndetent to
N (Neutral) until it stops and hold it
there until the N (Neutral) light starts flashing. This will take at least
10 seconds. Then slowly release the knob
to the 4
nposition. The N (Neutral) light
will come on when the transfer case
shift to N (Neutral) is complete.
7. With the engine running, verify that the transfer case is in N (Neutral) by shifting
the transmission to R (Reverse), then
shift the transmission to D (Drive). There
should be no movement of the vehicle
while shifting the transmission.
8. Turn the engine off, and the ignition to ACC/ACCESSORY.
9. Place the transmission shift lever in P (Park).
Shifting Out of N (Neutral)
To shift: 1. Set the parking brake.
2. Turn the ignition on with the engine off.
3. Shift the transmission to N (Neutral).
4. Turn the transfer case shift knob to 2
m.
After the transfer case has shifted out of
N (Neutral), the N (Neutral) light will
go out and the new 2
mstate will be
displayed. 5. Place the transmission shift lever in
P (Park).
6. Release the parking brake.
Brakes
Antilock Brake System (ABS)
The Antilock Brake System (ABS) helps
prevent a braking skid and maintain steering
while braking hard.
ABS performs a system check when the
vehicle is first driven. A momentary motor
or clicking noise may be heard while this
test is going on, and the brake pedal may
move slightly. This is normal.
If there is a problem with ABS, this warning
light stays on. See Antilock Brake System
(ABS) Warning Light 089.
ABS does not change the time needed to
get a foot on the brake pedal and does not
always decrease stopping distance. If you
Page 203 of 362
Chevrolet Colorado Owner Manual (GMNA-Localizing-U.S./Canada/Mexico-
15274222) - 2022 - CRC - 11/2/21
202 Driving and Operating
pedal release to accelerator pedal apply. The
brakes release when the accelerator pedal is
applied or automatically release after a few
seconds. The brakes may also release under
other conditions. Do not rely on HSA to hold
the vehicle.
HSA is available when the vehicle is facing
uphill in a forward gear, or when facing
downhill in R (Reverse). The vehicle must
come to a complete stop on a grade for HSA
to activate.
Ride Control Systems
Traction Control/Electronic
Stability Control
System Operation
The vehicle has a Traction Control System
(TCS) and StabiliTrak/Electronic Stability
Control (ESC), an electronic stability control
system. These systems help limit wheel spin
and assist the driver in maintaining control,
especially on slippery road conditions.
TCS activates if it senses that any of the
drive wheels are spinning or beginning to
lose traction. When this happens, TCSapplies the brakes to the spinning wheels
and reduces engine power to limit
wheel spin.
StabiliTrak/ESC activates when the vehicle
senses a difference between the intended
path and the direction the vehicle is actually
traveling. StabiliTrak/ESC selectively applies
braking pressure to any one of the vehicle
wheel brakes to assist the driver in keeping
the vehicle on the intended path.
If cruise control is being used and TCS or
StabiliTrak/ESC begins to limit wheel spin,
cruise control will disengage. Cruise control
may be turned back on when road
conditions allow.
Both systems come on automatically when
the vehicle is started and begins to move.
The systems may be heard or felt while
they are operating or while performing
diagnostic checks. This is normal and does
not mean there is a problem with the
vehicle.
It is recommended to leave both systems on
for normal driving conditions, but it may be
necessary to turn TCS off if the vehicle gets
stuck in sand, mud, ice, or snow. See
If the
Vehicle Is Stuck 0177 and “Turning the
Systems Off and On” later in this section. When the transfer case (if equipped) is in 4
n, the stability system is automatically
disabled, and
gcomes on in the instrument
cluster. Both TCS and StabiliTrak/ESC are
automatically disabled.
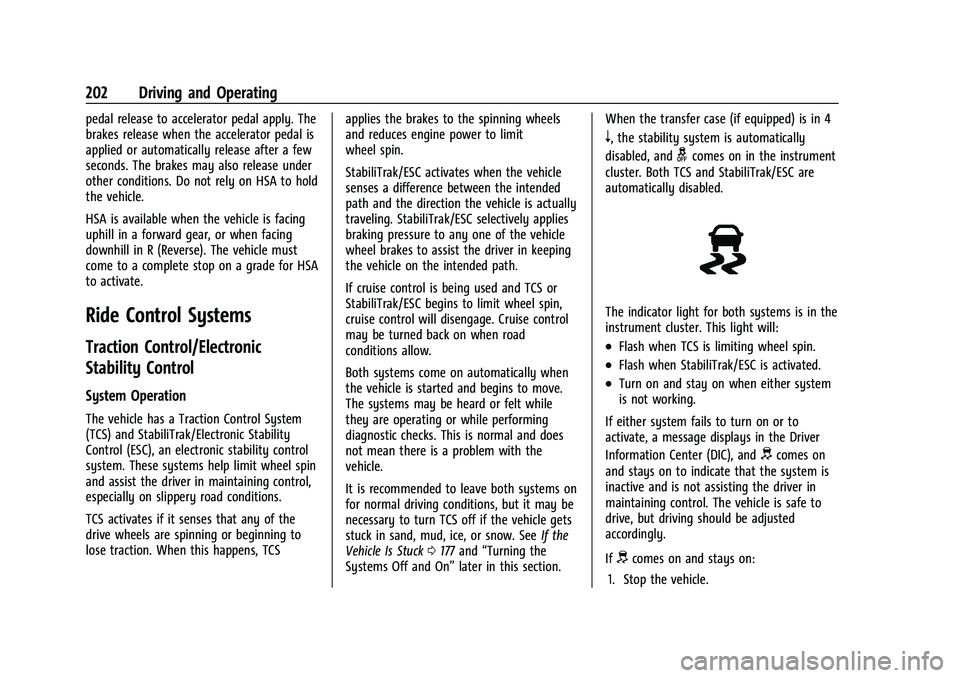
The indicator light for both systems is in the
instrument cluster. This light will:
.Flash when TCS is limiting wheel spin.
.Flash when StabiliTrak/ESC is activated.
.Turn on and stay on when either system
is not working.
If either system fails to turn on or to
activate, a message displays in the Driver
Information Center (DIC), and
dcomes on
and stays on to indicate that the system is
inactive and is not assisting the driver in
maintaining control. The vehicle is safe to
drive, but driving should be adjusted
accordingly.
If
dcomes on and stays on:
1. Stop the vehicle.
Page 234 of 362
Chevrolet Colorado Owner Manual (GMNA-Localizing-U.S./Canada/Mexico-
15274222) - 2022 - CRC - 11/2/21
Driving and Operating 233
Trailer Sway Control (TSC)
Vehicles with StabiliTrak/Electronic Stability
Control (ESC) have a Trailer Sway Control
(TSC) feature. Trailer sway is unintended
side-to-side motion of a trailer while towing.
If the vehicle is towing a trailer and the TSC
detects that sway is increasing, the vehicle
brakes are selectively applied at each wheel,
to help reduce excessive trailer sway.
If equipped with the Integrated Trailer Brake
Control (ITBC) system, and the trailer has an
electric brake system, StabiliTrak/ESC may
also apply the trailer brakes.
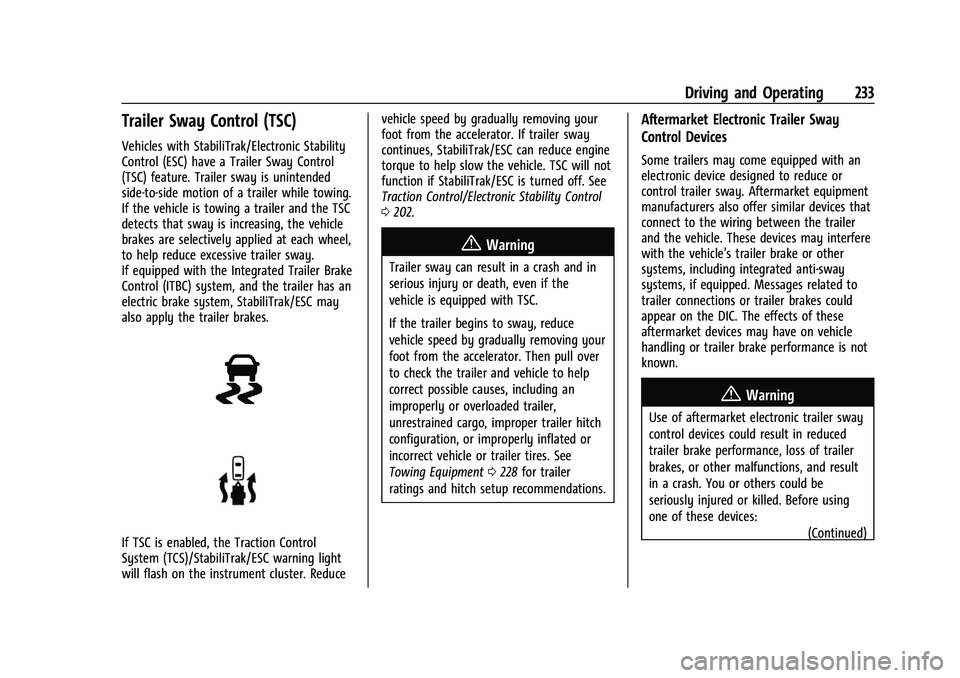
If TSC is enabled, the Traction Control
System (TCS)/StabiliTrak/ESC warning light
will flash on the instrument cluster. Reducevehicle speed by gradually removing your
foot from the accelerator. If trailer sway
continues, StabiliTrak/ESC can reduce engine
torque to help slow the vehicle. TSC will not
function if StabiliTrak/ESC is turned off. See
Traction Control/Electronic Stability Control
0
202.
{Warning
Trailer sway can result in a crash and in
serious injury or death, even if the
vehicle is equipped with TSC.
If the trailer begins to sway, reduce
vehicle speed by gradually removing your
foot from the accelerator. Then pull over
to check the trailer and vehicle to help
correct possible causes, including an
improperly or overloaded trailer,
unrestrained cargo, improper trailer hitch
configuration, or improperly inflated or
incorrect vehicle or trailer tires. See
Towing Equipment 0228 for trailer
ratings and hitch setup recommendations.
Aftermarket Electronic Trailer Sway
Control Devices
Some trailers may come equipped with an
electronic device designed to reduce or
control trailer sway. Aftermarket equipment
manufacturers also offer similar devices that
connect to the wiring between the trailer
and the vehicle. These devices may interfere
with the vehicle’s trailer brake or other
systems, including integrated anti-sway
systems, if equipped. Messages related to
trailer connections or trailer brakes could
appear on the DIC. The effects of these
aftermarket devices may have on vehicle
handling or trailer brake performance is not
known.
{Warning
Use of aftermarket electronic trailer sway
control devices could result in reduced
trailer brake performance, loss of trailer
brakes, or other malfunctions, and result
in a crash. You or others could be
seriously injured or killed. Before using
one of these devices: (Continued)
Page 235 of 362
Chevrolet Colorado Owner Manual (GMNA-Localizing-U.S./Canada/Mexico-
15274222) - 2022 - CRC - 11/2/21
234 Driving and Operating
Warning (Continued)
.Ask the device or trailer manufacturer
if the device has been thoroughly
tested for compatibility with the
make, model, and year of your vehicle
and any optional equipment installed
on your vehicle.
.Before driving, check the trailer brakes
are working properly, if equipped.
Drive the vehicle with the trailer
attached on a level road surface that
is free of traffic at about 32-40 km/h
(20-25 mph) and fully apply the
manual trailer brake apply lever. Also,
check the trailer brake lamps and
other lamps are functioning correctly.
.If the trailer brakes are not operating
properly at any time, or if a DIC
message indicates problems with the
trailer connections or trailer brakes,
carefully pull the vehicle over to the
side of the road when traffic
conditions allow.
Trailer Tires
Special Trailer (ST) tires differ from vehicle
tires. Trailer tires are designed with stiff
sidewalls to help prevent sway and tosupport heavy loads. These features can
make it difficult to determine if the trailer
tire pressures are low only based on a visual
inspection.
Always check all trailer tire pressures before
each trip when the tires are cool. Low trailer
tire pressure is a leading cause of trailer tire
blowouts.
Trailer tires deteriorate over time. The trailer
tire sidewall will show the week and year
the tire was manufactured. Many trailer tire
manufacturers recommend replacing tires
more than six years old.
Overloading is another leading cause of
trailer tire blowouts. Never load your trailer
with more weight than the tires are
designed to support. The load rating is
located on the trailer tire sidewall.
Always know the maximum speed rating for
the trailer tires before driving. This may be
significantly lower than the vehicle tire
speed rating. The speed rating may be on
the trailer tire sidewall. If the speed rating is
not shown, the default trailer tire speed
rating is 105 km/h (65 mph).
Conversions and Add-Ons
Add-On Electrical Equipment
{Warning
The Data Link Connector (DLC) is used for
vehicle service and Emission Inspection/
Maintenance testing. See
Malfunction
Indicator Lamp (Check Engine Light) 087.
A device connected to the DLC —such as
an aftermarket fleet or driver-behavior
tracking device —may interfere with
vehicle systems. This could affect vehicle
operation and cause a crash. Such devices
may also access information stored in the
vehicle’s systems.
Caution
Some electrical equipment can damage
the vehicle or cause components to not
work and would not be covered by the
vehicle warranty. Always check with your
dealer before adding electrical equipment.
Add-on equipment can drain the vehicle's
12-volt battery, even if the vehicle is not
operating.
Page 246 of 362
Chevrolet Colorado Owner Manual (GMNA-Localizing-U.S./Canada/Mexico-
15274222) - 2022 - CRC - 11/2/21
Vehicle Care 245
Automatic Transmission Fluid
How to Check Automatic Transmission
Fluid
It is not necessary to check the transmission
fluid level. A transmission fluid leak is the
only reason for fluid loss. If a leak occurs,
take the vehicle to your dealer and have it
repaired as soon as possible.
There is a special procedure for checking and
changing the transmission fluid. Because this
procedure is difficult, this should be done at
your dealer. Contact your dealer for
additional information.
Caution
Use of the incorrect automatic
transmission fluid may damage the
vehicle, and the damage may not be
covered by the vehicle warranty. Always
use the correct automatic transmission
fluid. SeeRecommended Fluids and
Lubricants 0323.
Change the fluid and filter at the intervals
listed in Maintenance Schedule 0314, and
be sure to use the fluid listed in
Recommended Fluids and Lubricants 0323.
Engine Air Cleaner/Filter
The engine air cleaner/filter is in the engine
compartment on the passenger side of the
vehicle. See Engine Compartment Overview
0 239.
When to Inspect/Replace the Engine Air
Cleaner/Filter
For intervals on changing and inspecting the
engine air cleaner/filter, see Maintenance
Schedule 0314.
How to Inspect/Replace the Engine Air
Cleaner/Filter
Do not start the engine or have the engine
running with the engine air cleaner/filter
housing open. Before removing the engine
air cleaner/filter, make sure that the engine
air cleaner/filter housing and nearby
components are free of dirt and debris.
Remove the engine air cleaner/filter. Lightly
tap and shake the engine air cleaner/filter
(away from the vehicle), to release loose
dust and dirt. Inspect the engine air cleaner/
filter for damage, and replace if damaged.
Do not clean the engine air cleaner/filter or
components with water or compressed air. To inspect or replace the air cleaner/filter:
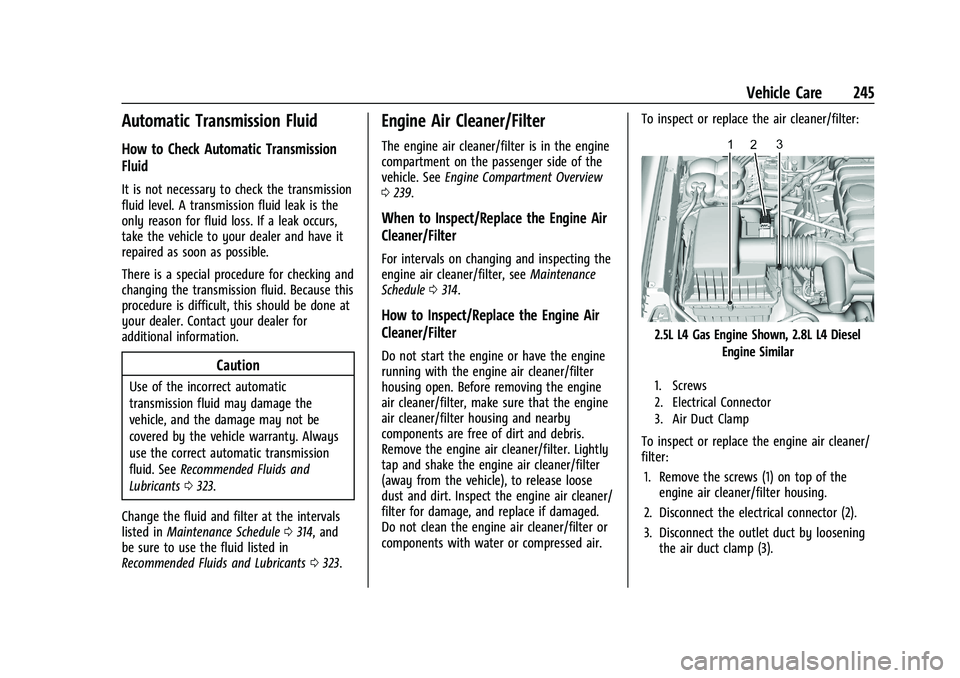
2.5L L4 Gas Engine Shown, 2.8L L4 Diesel
Engine Similar
1. Screws
2. Electrical Connector
3. Air Duct Clamp
To inspect or replace the engine air cleaner/
filter:
1. Remove the screws (1) on top of the engine air cleaner/filter housing.
2. Disconnect the electrical connector (2).
3. Disconnect the outlet duct by loosening the air duct clamp (3).