2022 CHEVROLET BOLT EV battery location
[x] Cancel search: battery locationPage 8 of 316

Chevrolet BOLT EV Owner Manual (GMNA-Localizing-U.S./Canada-
15082216) - 2022 - CRC - 6/25/21
Keys, Doors, and Windows 7
The key that is part of the Remote Keyless
Entry (RKE) transmitter can be used for all
locks.
To remove the key, press the button near
the bottom of the transmitter, and pull the
key out. Never pull the key out without
pressing the button.
If it becomes difficult to turn the key,
inspect the key blade for debris. Periodically,
clean the key with a brush or a pick.
See your dealer if a new key is needed.
If locked out of the vehicle, seeRoadside
Assistance Program 0289.
With an active OnStar or connected service
plan, an OnStar Advisor may remotely
unlock the vehicle. See OnStar Overview
0 297.
Remote Keyless Entry (RKE)
System
See Radio Frequency Statement 0294.
If there is a decrease in the Remote Keyless
Entry (RKE) operating range:
.Check the distance. The transmitter may
be too far from the vehicle.
.Check the location. Other vehicles or
objects may be blocking the signal.
.Check the transmitter's battery. See
“Battery Replacement” later in this
section.
.If the transmitter is still not working
correctly, see your dealer or a qualified
technician for service.
Remote Keyless Entry (RKE)
System Operation
The Keyless Access system allows for vehicle
entry when the Remote Keyless Entry (RKE)
transmitter is within 1 m (3 ft). See “Keyless
Access Operation” following.
The transmitter functions may work up to
60 m (197 ft) away from the vehicle.
Other conditions can impact the
performance of the transmitter. See Remote
Keyless Entry (RKE) System 07.
Page 11 of 316

Chevrolet BOLT EV Owner Manual (GMNA-Localizing-U.S./Canada-
15082216) - 2022 - CRC - 6/25/21
10 Keys, Doors, and Windows
Remote No Longer In Vehicle Alert
If the vehicle is on with a door open, and
then all doors are closed, the vehicle will
check for RKE transmitters inside. If an RKE
transmitter is not detected, the Driver
Information Center (DIC) will display NO
REMOTE DETECTED and the horn will chirp
three times.
This occurs only once each time the vehicle
is driven.
SeeVehicle Personalization 0102.
Keyless Liftgate Opening
Press the touch pad on the underside of the
liftgate glass and lift up to open if the RKE
transmitter is within 1 m (3 ft) and the doors
are locked. If the doors are unlocked, the
transmitter is not required to open the
liftgate. See Liftgate018.
Key Access
To access a vehicle with a weak transmitter
battery, see Door Locks015.
Programming Transmitters to the Vehicle
Only RKE transmitters programmed to the
vehicle will work. If a transmitter is lost or
stolen, a replacement can be purchased and
programmed through your dealer. The vehicle can be reprogrammed so that lost or
stolen transmitters no longer work. Any
remaining transmitters will need to be
reprogrammed. Each vehicle can have up to
eight transmitters matched to it.
Programming with Two Recognized
Transmitters
A new transmitter can be programmed to
the vehicle when there are two recognized
transmitters. To program, the vehicle must
be off and all of the transmitters, both
currently recognized and new, must be
with you.
1. Open the center console and take out
the small tray, if equipped. Place the two
recognized transmitters in the backup
location with the buttons facing down.
2. Remove the key lock cylinder cover on the driver door handle. See Door Locks
0 15. Insert the vehicle key of the new
transmitter into the key lock cylinder on
the driver door handle and turn the key
to the unlock position five times within
10 seconds.
The DIC displays READY FOR REMOTE # 3,
4, 5, 6, 7, or 8.
3. Place the transmitter to be programmed in the backup location with the buttons
facing down.
4. Press POWER
Oto start the vehicle.
When the transmitter is learned, the DIC
will show that it is ready to program the
next transmitter.
5. Remove the transmitter from the backup location and press
KorQ.
To program additional transmitters,
repeat Steps 3–5.
When all additional transmitters are
programmed, press and hold POWER
O
for 12 seconds to exit
programming mode.
Page 12 of 316

Chevrolet BOLT EV Owner Manual (GMNA-Localizing-U.S./Canada-
15082216) - 2022 - CRC - 6/25/21
Keys, Doors, and Windows 11
6. Put the key back into the RKEtransmitter.
7. Replace the key lock cylinder cap. See Door Locks 015.
Programming without Two Recognized
Transmitters
If two currently recognized transmitters are
not available, follow this procedure to
program up to eight transmitters. This
feature is not available in Canada. This
procedure will take approximately
30 minutes to complete. The vehicle must
be off and all of the transmitters to be
programmed must be with you. 1. Remove the key lock cylinder cover on the driver door handle. See Door Locks
0 15. Insert the vehicle key of the
transmitter into the key lock cylinder on
the driver door handle and turn the key
to the unlock position five times within
10 seconds.
The DIC displays REMOTE LEARN
PENDING, PLEASE WAIT.
2. Wait for 10 minutes until the DIC displays PRESS ENGINE START BUTTON TO
LEARN and then press POWER
O.
The DIC will again show REMOTE LEARN
PENDING, PLEASE WAIT. 3. Repeat Step 2 two additional times. After
the third time, all previously known
transmitters will no longer work with the
vehicle. Remaining transmitters can be
relearned during the next steps.
The DIC should now show READY FOR
REMOTE # 1.
4. Open the center console and take outthe small tray, if equipped. Place the
transmitter in the backup location with
the buttons facing down.
5. Press POWER
Oto start the vehicle.
When the transmitter is learned, the DIC
will show that it is ready to program the
next transmitter. 6. Remove the transmitter from the backup
location and press
KorQ.
To program additional transmitters,
repeat Steps 4–6.
When all additional transmitters are
programmed, press and hold POWER
O
for 12 seconds to exit
programming mode.
7. Put the key back into the RKE transmitter.
8. Replace the key lock cylinder cap. See Door Locks 015.
Starting the Vehicle with a Low
Transmitter Battery
While trying to start the vehicle, if the
transmitter battery is weak or if there is
interference with the signal, the DIC may
display NO REMOTE DETECTED or USE
TRANSMITTER POCKET TO START. The DIC
may also display REPLACE BATTERY IN
REMOTE KEY.
For improved vehicle security, the
transmitter is equipped with a motion
sensor. When starting the vehicle, if the
transmitter has been idle for a while, move
the transmitter slightly and then try to start
the vehicle.
Page 13 of 316

Chevrolet BOLT EV Owner Manual (GMNA-Localizing-U.S./Canada-
15082216) - 2022 - CRC - 6/25/21
12 Keys, Doors, and Windows
To start the vehicle:
1. Open the center console and take outthe small tray, if equipped. Place the
transmitter in the backup location with
the buttons facing down.
2. With the vehicle in P (Park) or N (Neutral), press the brake pedal and
press POWER
O. Replace the transmitter
battery as soon as possible.
Battery Replacement
{Warning
Never allow children to play with the RKE
transmitter. The transmitter contains a
small battery, which can be a choking (Continued)
Warning (Continued)
hazard. If swallowed, internal burns can
occur, resulting in severe injury or death.
Seek medical attention immediately if a
battery is swallowed.
{Warning
To avoid personal injury, do not touch
metal surfaces on the RKE transmitter
when it has been exposed to extreme
heat. These surfaces can be hot to the
touch at temperatures above 59 °C
(138 °F).
Caution
When replacing the battery, do not touch
any of the circuitry on the transmitter.
Static from your body could damage the
transmitter.
Caution
Always replace the battery with the
correct type. Replacing the battery with
an incorrect type could potentially create
a risk of battery explosion. Dispose of
used batteries according to instructions
and local laws. Do not attempt to burn,
crush, or cut the used battery, and avoid
exposing the battery to environments
with extremely low air pressures or high
temperatures.
Caution
If the RKE transmitter is not reassembled
properly, liquids could enter the housing
and damage the circuitry, resulting in an
RKE transmitter malfunction and/or
failure. To prevent damage, always follow
the steps for RKE transmitter reassembly
in this manual to ensure the transmitter
is sealed properly whenever the RKE
transmitter is opened.
Replace the battery if the DIC displays
REPLACE BATTERY IN REMOTE KEY.
Page 93 of 316

Chevrolet BOLT EV Owner Manual (GMNA-Localizing-U.S./Canada-
15082216) - 2022 - CRC - 6/25/21
92 Instruments and Controls
12 amp setting at a specified Home location.
See“Location Based Charging” later in this
section.
The Level 1-120V Cord Limit setting can be
changed at any time while the infotainment
display is operable.
{Warning
Using a charge level that exceeds the
electrical circuit or electrical outlet
capacity may start a fire or damage the
electrical circuit. Use the lowest charge
level until a qualified electrician inspects
the electrical circuit capacity. Use the
lowest charge level if the electrical circuit
or electrical outlet capacity is not known.
Target Charge Level
This mode allows the charging range for the
vehicle to be set based on what is needed.
When at a public pay station and a full
charge is not needed, the target charge level
can be set to only get as much range as
needed. If driving on a hill, the target charge level
can be set to stop the charge before the
battery is full to allow space for energy
from regenerative braking when going down
a hill.
There is a minimum target charge level.
Once this level is reached, the
–will not
allow the target charge level bar move
down further.
Target Charge Level can also be set
separately for Location-Based Home and
Away locations. If available, the Home and
Away buttons will appear on the screen.
When Location Based Charging is active, the
Target Charge Level on the Charging Status
screen will automatically update to the
Home or Away setting based on the current
location.
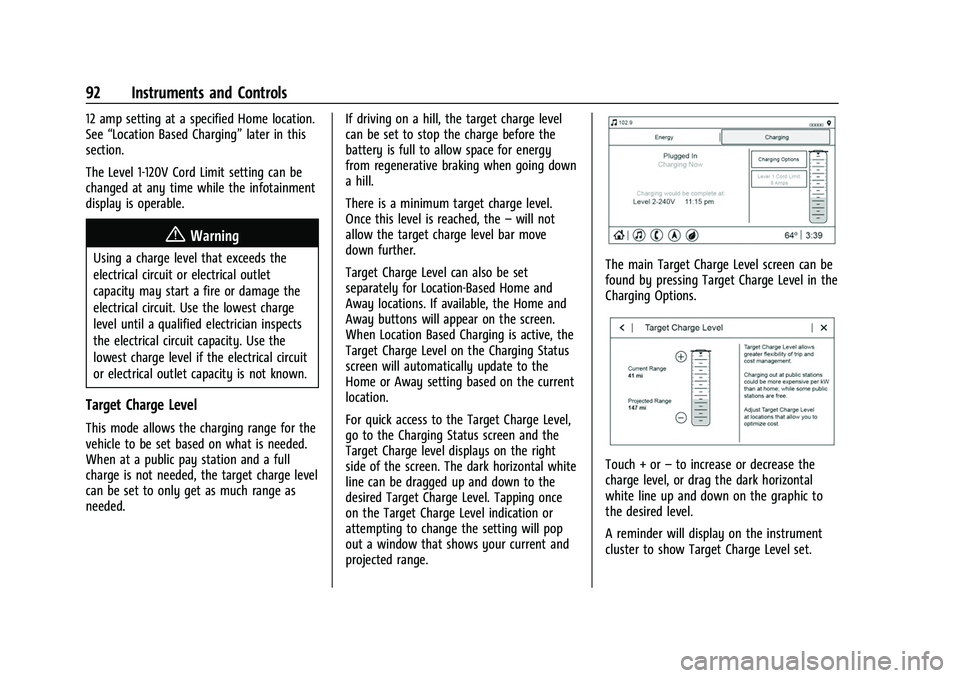
For quick access to the Target Charge Level,
go to the Charging Status screen and the
Target Charge level displays on the right
side of the screen. The dark horizontal white
line can be dragged up and down to the
desired Target Charge Level. Tapping once
on the Target Charge Level indication or
attempting to change the setting will pop
out a window that shows your current and
projected range.
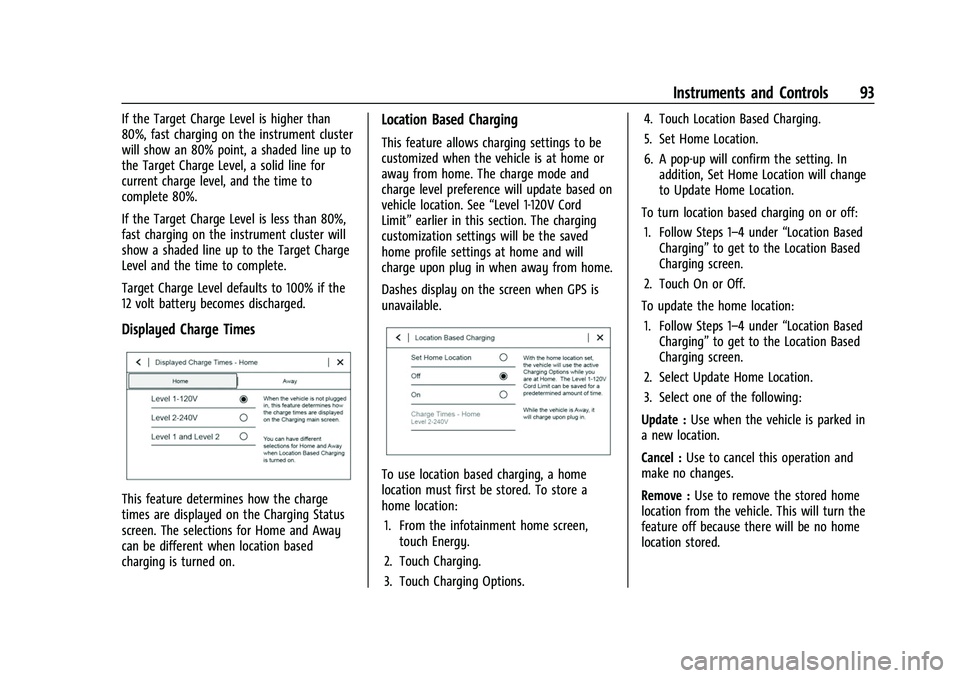
The main Target Charge Level screen can be
found by pressing Target Charge Level in the
Charging Options.
Touch + or –to increase or decrease the
charge level, or drag the dark horizontal
white line up and down on the graphic to
the desired level.
A reminder will display on the instrument
cluster to show Target Charge Level set.
Page 94 of 316

Chevrolet BOLT EV Owner Manual (GMNA-Localizing-U.S./Canada-
15082216) - 2022 - CRC - 6/25/21
Instruments and Controls 93
If the Target Charge Level is higher than
80%, fast charging on the instrument cluster
will show an 80% point, a shaded line up to
the Target Charge Level, a solid line for
current charge level, and the time to
complete 80%.
If the Target Charge Level is less than 80%,
fast charging on the instrument cluster will
show a shaded line up to the Target Charge
Level and the time to complete.
Target Charge Level defaults to 100% if the
12 volt battery becomes discharged.
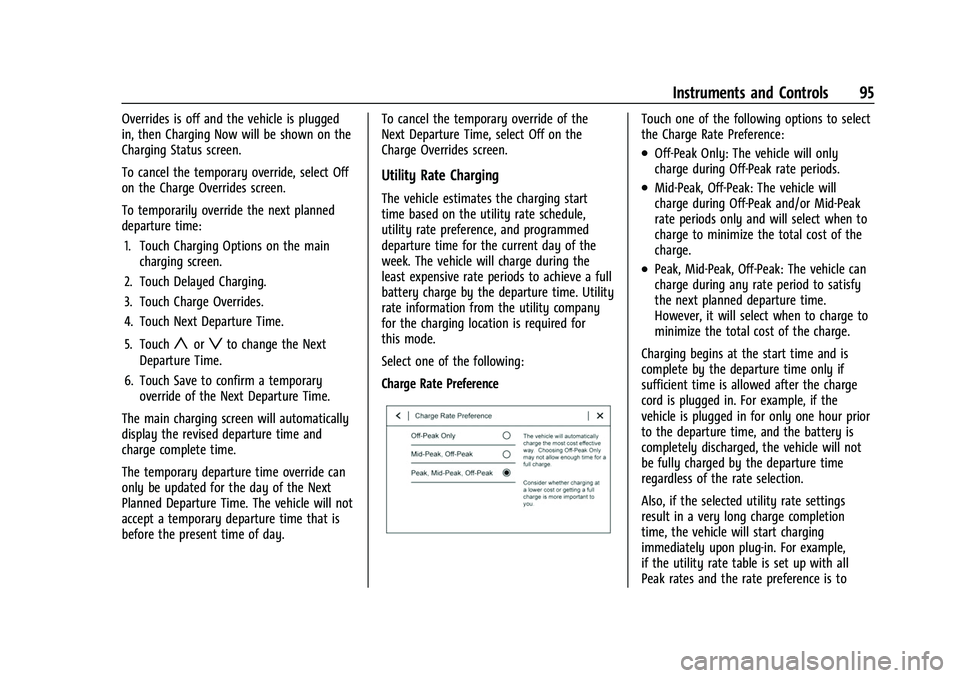
Displayed Charge Times
This feature determines how the charge
times are displayed on the Charging Status
screen. The selections for Home and Away
can be different when location based
charging is turned on.
Location Based Charging
This feature allows charging settings to be
customized when the vehicle is at home or
away from home. The charge mode and
charge level preference will update based on
vehicle location. See“Level 1-120V Cord
Limit” earlier in this section. The charging
customization settings will be the saved
home profile settings at home and will
charge upon plug in when away from home.
Dashes display on the screen when GPS is
unavailable.
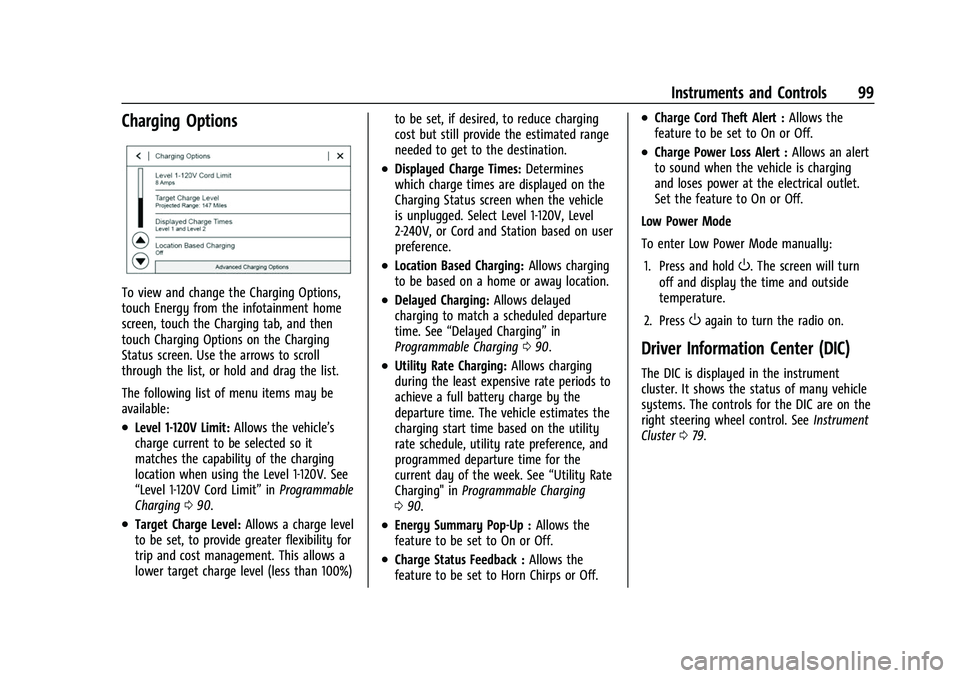
To use location based charging, a home
location must first be stored. To store a
home location:
1. From the infotainment home screen, touch Energy.
2. Touch Charging.
3. Touch Charging Options. 4. Touch Location Based Charging.
5. Set Home Location.
6. A pop-up will confirm the setting. In
addition, Set Home Location will change
to Update Home Location.
To turn location based charging on or off: 1. Follow Steps 1–4 under “Location Based
Charging” to get to the Location Based
Charging screen.
2. Touch On or Off.
To update the home location: 1. Follow Steps 1–4 under “Location Based
Charging” to get to the Location Based
Charging screen.
2. Select Update Home Location.
3. Select one of the following:
Update : Use when the vehicle is parked in
a new location.
Cancel : Use to cancel this operation and
make no changes.
Remove : Use to remove the stored home
location from the vehicle. This will turn the
feature off because there will be no home
location stored.
Page 96 of 316

Chevrolet BOLT EV Owner Manual (GMNA-Localizing-U.S./Canada-
15082216) - 2022 - CRC - 6/25/21
Instruments and Controls 95
Overrides is off and the vehicle is plugged
in, then Charging Now will be shown on the
Charging Status screen.
To cancel the temporary override, select Off
on the Charge Overrides screen.
To temporarily override the next planned
departure time:1. Touch Charging Options on the main charging screen.
2. Touch Delayed Charging.
3. Touch Charge Overrides.
4. Touch Next Departure Time.
5. Touch
yorzto change the Next
Departure Time.
6. Touch Save to confirm a temporary override of the Next Departure Time.
The main charging screen will automatically
display the revised departure time and
charge complete time.
The temporary departure time override can
only be updated for the day of the Next
Planned Departure Time. The vehicle will not
accept a temporary departure time that is
before the present time of day. To cancel the temporary override of the
Next Departure Time, select Off on the
Charge Overrides screen.
Utility Rate Charging
The vehicle estimates the charging start
time based on the utility rate schedule,
utility rate preference, and programmed
departure time for the current day of the
week. The vehicle will charge during the
least expensive rate periods to achieve a full
battery charge by the departure time. Utility
rate information from the utility company
for the charging location is required for
this mode.
Select one of the following:
Charge Rate Preference
Touch one of the following options to select
the Charge Rate Preference:
.Off-Peak Only: The vehicle will only
charge during Off-Peak rate periods.
.Mid-Peak, Off-Peak: The vehicle will
charge during Off-Peak and/or Mid-Peak
rate periods only and will select when to
charge to minimize the total cost of the
charge.
.Peak, Mid-Peak, Off-Peak: The vehicle can
charge during any rate period to satisfy
the next planned departure time.
However, it will select when to charge to
minimize the total cost of the charge.
Charging begins at the start time and is
complete by the departure time only if
sufficient time is allowed after the charge
cord is plugged in. For example, if the
vehicle is plugged in for only one hour prior
to the departure time, and the battery is
completely discharged, the vehicle will not
be fully charged by the departure time
regardless of the rate selection.
Also, if the selected utility rate settings
result in a very long charge completion
time, the vehicle will start charging
immediately upon plug-in. For example,
if the utility rate table is set up with all
Peak rates and the rate preference is to
Page 100 of 316

Chevrolet BOLT EV Owner Manual (GMNA-Localizing-U.S./Canada-
15082216) - 2022 - CRC - 6/25/21
Instruments and Controls 99
Charging Options
To view and change the Charging Options,
touch Energy from the infotainment home
screen, touch the Charging tab, and then
touch Charging Options on the Charging
Status screen. Use the arrows to scroll
through the list, or hold and drag the list.
The following list of menu items may be
available:
.Level 1-120V Limit:Allows the vehicle’s
charge current to be selected so it
matches the capability of the charging
location when using the Level 1-120V. See
“Level 1-120V Cord Limit” inProgrammable
Charging 090.
.Target Charge Level: Allows a charge level
to be set, to provide greater flexibility for
trip and cost management. This allows a
lower target charge level (less than 100%) to be set, if desired, to reduce charging
cost but still provide the estimated range
needed to get to the destination.
.Displayed Charge Times:
Determines
which charge times are displayed on the
Charging Status screen when the vehicle
is unplugged. Select Level 1-120V, Level
2-240V, or Cord and Station based on user
preference.
.Location Based Charging: Allows charging
to be based on a home or away location.
.Delayed Charging: Allows delayed
charging to match a scheduled departure
time. See “Delayed Charging” in
Programmable Charging 090.
.Utility Rate Charging: Allows charging
during the least expensive rate periods to
achieve a full battery charge by the
departure time. The vehicle estimates the
charging start time based on the utility
rate schedule, utility rate preference, and
programmed departure time for the
current day of the week. See “Utility Rate
Charging" in Programmable Charging
0 90.
.Energy Summary Pop-Up : Allows the
feature to be set to On or Off.
.Charge Status Feedback : Allows the
feature to be set to Horn Chirps or Off.
.Charge Cord Theft Alert : Allows the
feature to be set to On or Off.
.Charge Power Loss Alert : Allows an alert
to sound when the vehicle is charging
and loses power at the electrical outlet.
Set the feature to On or Off.
Low Power Mode
To enter Low Power Mode manually:
1. Press and hold
O. The screen will turn
off and display the time and outside
temperature.
2. Press
Oagain to turn the radio on.
Driver Information Center (DIC)
The DIC is displayed in the instrument
cluster. It shows the status of many vehicle
systems. The controls for the DIC are on the
right steering wheel control. See Instrument
Cluster 079.