2021 YAMAHA YZF-R125 Rear brake
[x] Cancel search: Rear brakePage 48 of 94

Periodic maintenance an d a djustment
6-4
6
EAU71342
General maintenance an d lu brication chartNO. ITEM CHECK OR MAINTENANCE JOB ODOMETER READING
ANNUAL
CHECK
1000 km
(600 mi) 6000 km
(3500 mi) 12000 km
(7000 mi) 18000 km
(10500 mi) 24000 km
(14000 mi)
1 *Dia
gnostic system
check • Perform dynamic inspection us-
ing Yamaha diagnostic tool.
• Check the error codes. √√√√√√
2 *Air filter element • Replace. √√
3 Air filter case check
hose • Clean.
√√√√√
4Clutch • Check operation.
•Adjust.
√√√√√
5 *Front brake • Check operation, fluid level, and
for fluid leakage.
• Replace brake pads if necessary. √√√√√√
6 *Rear brake • Check operation, fluid level, and
for fluid leakage.
• Replace brake pads if necessary. √√√√√√
7 *Brake hoses • Check for cracks or damage.
√√√√√
• Replace. Every 4 years
8 *Brake flui d • Change. Every 2 years
9 *Wheels • Check runout and for damage.
• Replace if necessary. √√√√
10 *Tires • Check tread depth and for dam-
age.
• Replace if necessary.
• Check air pressure.
• Correct if necessary. √√√√√
UB5GE2E0.book Page 4 Thursday, July 30, 2020 3:08 PM
Page 66 of 94

Periodic maintenance an d a djustment
6-22
6 the motorcycle until the
brake sys-
tem has b een checked or repaired
b y a Yamaha dealer.
EAU36505
Brake li ght switchesThe brake light should come on just
before braking takes effect. The brake
light is activated by switches connect-
ed to the brake lever and brake pedal.
Since the brake light switches are
components of the anti-lock brake sys-
tem, they should only be serviced by a
Yamaha dealer.
EAU22393
Checkin g the front an d rear
b rake pa dsThe front and rear brake pads must be
checked for wear at the intervals spec-
ified in the periodic maintenance and
lubrication chart.
EAU22421
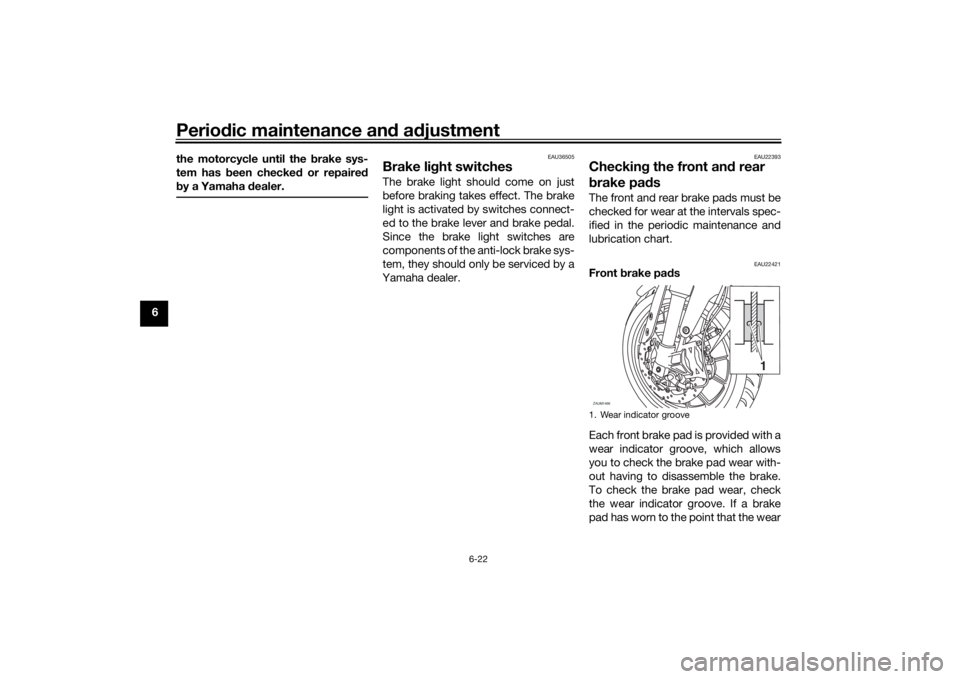
Front brake pa ds
Each front brake pad is provided with a
wear indicator groove, which allows
you to check the brake pad wear with-
out having to disassemble the brake.
To check the brake pad wear, check
the wear indicator groove. If a brake
pad has worn to the point that the wear1. Wear indicator grooveZAUM1466
1
UB5GE2E0.book Page 22 Thursday, July 30, 2020 3:08 PM
Page 67 of 94

Periodic maintenance an d a djustment
6-23
6
indicator groove has almost disap-
peared, have a Yamaha dealer replace
the brake pads as a set.
EAU36721
Rear
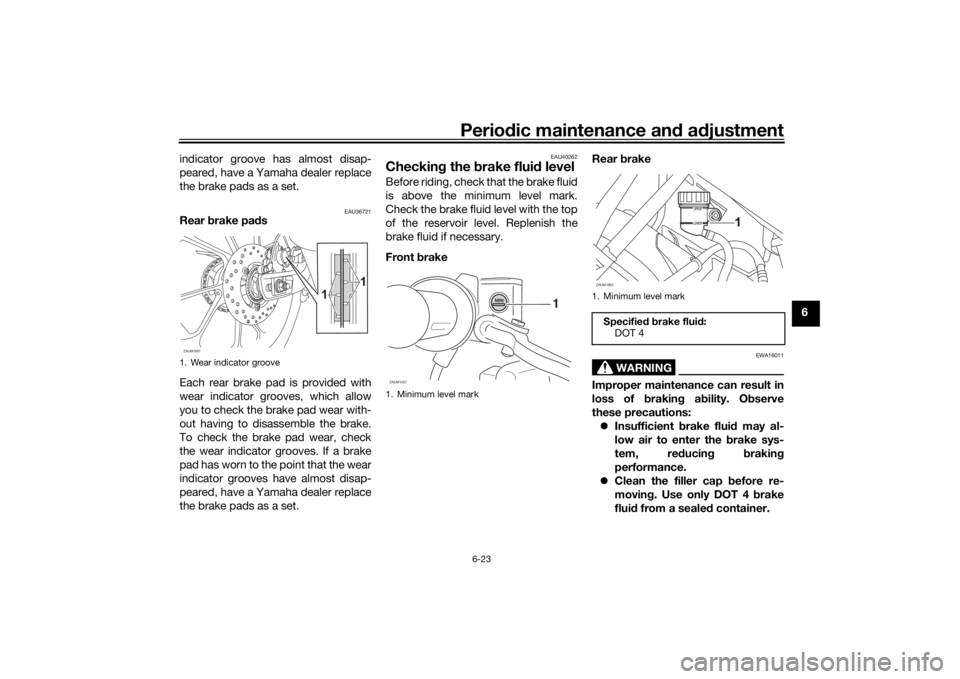
brake pa ds
Each rear brake pad is provided with
wear indicator grooves, which allow
you to check the brake pad wear with-
out having to disassemble the brake.
To check the brake pad wear, check
the wear indicator grooves. If a brake
pad has worn to the point that the wear
indicator grooves have almost disap-
peared, have a Yamaha dealer replace
the brake pads as a set.
EAU40262
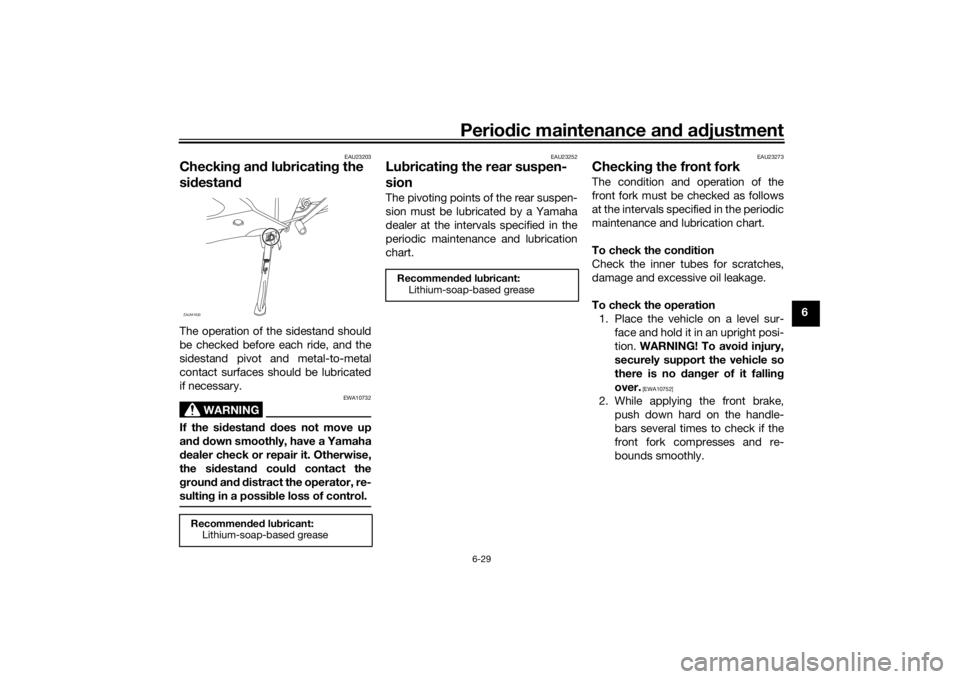
Checkin g the brake flui d levelBefore riding, check that the brake fluid
is above the minimum level mark.
Check the brake fluid level with the top
of the reservoir level. Replenish the
brake fluid if necessary.
Front brake Rear
brake
WARNING
EWA16011
Improper maintenance can result in
loss of b raking a bility. O bserve
these precautions: Insufficient brake flui d may al-
low air to enter the b rake sys-
tem, re ducing brakin g
performance.
Clean the filler cap before re-
moving . Use only DOT 4 b rake
flui d from a seale d container.
1. Wear indicator grooveZAUM1601
1
1
1. Minimum level mark
1
ZAUM1057
1. Minimum level mark
Specified b rake flui d:
DOT 4ZAUM1603
UB5GE2E0.book Page 23 Thursday, July 30, 2020 3:08 PM
Page 73 of 94

Periodic maintenance an d a djustment
6-29
6
EAU23203
Checkin g an d lu bricatin g the
si destan dThe operation of the sidestand should
be checked before each ride, and the
sidestand pivot and metal-to-metal
contact surfaces should be lubricated
if necessary.
WARNING
EWA10732
If the sid estand d oes not move up
an d d own smoothly, have a Yamaha
d ealer check or repair it. Otherwise,
the si destan d coul d contact the
g roun d an d d istract the operator, re-
sultin g in a possi ble loss of control.
EAU23252
Lu bricatin g the rear suspen-
sionThe pivoting points of the rear suspen-
sion must be lubricated by a Yamaha
dealer at the intervals specified in the
periodic maintenance and lubrication
chart.
EAU23273
Checkin g the front forkThe condition and operation of the
front fork must be checked as follows
at the intervals specified in the periodic
maintenance and lubrication chart.
To check the con dition
Check the inner tubes for scratches,
damage and excessive oil leakage.
To check the operation 1. Place the vehicle on a level sur- face and hold it in an upright posi-
tion. WARNING! To avoi d injury,
securely support the vehicle so
there is no dan ger of it fallin g
over.
[EWA10752]
2. While applying the front brake, push down hard on the handle-
bars several times to check if the
front fork compresses and re-
bounds smoothly.
Recommen ded lu bricant:
Lithium-soap-based greaseZAUM1620
Recommen ded lu bricant:
Lithium-soap-based grease
UB5GE2E0.book Page 29 Thursday, July 30, 2020 3:08 PM
Page 87 of 94

Specifications
8-2
8
Loadin g:Maximum load:
175 kg (387 lb)
(Total weight of rider, passenger, cargo and
accessories)Front brake:Type:
Hydraulic single disc brakeRear brake:Type:
Hydraulic single disc brakeFront suspension:Type:
Telescopic forkRear suspension:Type:Swingarm (link suspension)Electrical system:System voltage:12 VBattery:Model:
GTZ4V
Voltage, capacity: 12 V, 3.0 Ah (10 HR)Bul b watta ge:Headlight:
LED
Brake/tail light: LED
Front turn signal light: 10.0 W
Rear turn signal light:
10.0 W Auxiliary light:
LED
License plate light: 5.0 W
UB5GE2E0.book Page 2 Thursday, July 30, 2020 3:08 PM
Page 91 of 94

10-1
10
Index
AABS....................................................... 3-15
ABS warning light ................................... 3-3
Air filter element and check hose,
replacing and cleaning ....................... 6-15BBattery .................................................. 6-31
Brake and clutch levers, checking and lubricating........................................... 6-28
Brake and shift pedals, checking and lubricating........................................... 6-27
Brake fluid, changing............................ 6-24
Brake fluid level, checking.................... 6-23
Brake lever............................................ 3-14
Brake light switches ............................. 6-22
Brake pedal .......................................... 3-14
Brake pedal free play, adjusting ........... 6-21CCables, checking and lubricating ......... 6-27
Canister ................................................ 6-10
Care ........................................................ 7-1
Catalytic converter ............................... 3-19
Clutch lever........................................... 3-13
Clutch lever free play, adjusting ........... 6-20
Coolant ................................................. 6-14
Coolant temperature warning light ......... 3-2
Cowlings, removing and installing.......... 6-8DData recording, vehicle........................... 9-2
Diagnostic connector ............................. 9-2
Dimmer/Pass switch............................. 3-13
Drive chain, cleaning and lubricating ... 6-26
Drive chain slack .................................. 6-25
EEngine break-in ...................................... 5-1
Engine idling speed.............................. 6-16
Engine oil and oil filter element ............ 6-11
Engine overheating .............................. 6-37
Engine serial number ............................. 9-1
Engine stop switch............................... 3-13FFront and rear brake pads, checking ... 6-22
Front brake lever free play, checking ... 6-21
Front fork, checking ............................. 6-29
Fuel ...................................................... 3-16
Fuel consumption, tips for reducing ...... 5-4
Fuel tank breather hose and overflow hose ................................................... 3-18
Fuel tank cap........................................ 3-16
Fuses, replacing ................................... 6-32HHandlebar switches ............................. 3-12
High beam indicator light ....................... 3-2
Horn switch .......................................... 3-13IIdentification numbers ........................... 9-1
Ignition circuit cut-off system .............. 3-21
Indicator lights and warning lights ......... 3-2LLicense plate light bulb, replacing ....... 6-34MMain switch/steering lock ...................... 3-1
Maintenance and lubrication, periodic... 6-4
Maintenance, emission control system ................................................. 6-3
Malfunction indicator light (MIL)............. 3-3
Matte color, caution ............................... 7-1 Model label ............................................. 9-1
Multi-function meter unit ........................ 3-4
NNeutral indicator light ............................. 3-2PParking.................................................... 5-4
Part locations.......................................... 2-1RRear suspension, lubricating ................ 6-29SSafety information................................... 1-1
Seats ..................................................... 3-19
Shifting.................................................... 5-3
Shift light ................................................. 3-3
Shift pedal............................................. 3-14
Sidestand.............................................. 3-20
Sidestand, checking and lubricating .... 6-29
Spark plug, checking .............................. 6-9
Specifications ......................................... 8-1
Starting the engine ................................. 5-2
Start switch ........................................... 3-13
Steering, checking ................................ 6-30
Storage ................................................... 7-3
Supporting the motorcycle ................... 6-34TTail/brake light ...................................... 6-33
Throttle grip and cable, checking and
lubricating ........................................... 6-27
Throttle grip free play, adjusting ........... 6-16
Tires ...................................................... 6-17
Tool kit .................................................... 6-2
Troubleshooting .................................... 6-35
Troubleshooting chart........................... 6-36
Turn signal indicator light ....................... 3-2
UB5GE2E0.book Page 1 Thursday, July 30, 2020 3:08 PM