2021 YAMAHA YFM90R maintenance
[x] Cancel search: maintenancePage 94 of 126

9-15
95. Install the transmission oil drain bolt and its
new gasket, and then tighten the bolt to the
specified torque.
6. Refill with the specified amount of the recom- mended oil. NOTICE: Make sure that no
foreign material enters the transmission
case.
[ECB03380]
7. Check the oil filler cap O-ring for damage, and replace it if necessary.
8. Install and tighten the oil filler cap.
9. Check the transmission case for oil leakage. If oil is leaking, check for the cause.EBU34111Cleaning the air filter elementThe air filter element should be serviced at the in-
tervals specified in the periodic maintenance
chart. Clean or, if necessary, replace the air filter
element more frequently if you are riding in unusu-
ally wet or dusty areas.TIPThere is a check hose at the bottom of the air filter
case. If dust or water collects in this hose, empty
the hose and clean the air filter element and air fil-
ter case.
1. Transmission oil drain bolt
2. GasketTightening torque:Transmission oil drain bolt:22 N
Page 98 of 126

9-19
93. Tap the spark arrester lightly, and then use a
wire brush to remove any carbon deposits.
4. Insert the spark arrester into the muffler and align the bolt hole.
5. Install the tailpipe bolt and nut, and then tight- en the nut to the specified torque.
WARNING
EWB02342Always let the exhaust system cool prior to
touching exhaust components.
Do not start the engine with the spark arrester
removed. Sparks or exhaust particulate can
cause eye injury, burns, or start a fire. EBU23942Adjusting the carburetorThe carburetor should be checked and, if neces-
sary, adjusted at the intervals specified in the pe-
riodic maintenance chart. The carburetor is an
important part of the engine and requires very so-
phisticated adjustment. Therefore, most carbure-
tor adjustments should be left to a Yamaha dealer, who has the necessary professional knowledge
and experience. The adjustment described in the
following section, however, may be performed by
the owner as part of routine maintenance.
NOTICEECB00481The carburetor has been set and extensively
tested at the Yamaha factory. Changing these
settings without sufficient technical knowl-
edge may result in poor performance of or
damage to the engine. EBU24002Adjusting the engine idling speedThe engine idling speed must be checked and, if
necessary, adjusted as follows at the intervals
specified in the periodic maintenance chart.TIPA diagnostic tachometer is needed to make this
adjustment. 1. Start the engine and warm it up.TIPThe engine is warm when it quickly responds to
the throttle.
Tightening torque:
Tailpipe nut:10 N
Page 100 of 126

9-21
9Periodically check the throttle lever free play and
adjust if necessary.
TIPThe engine idling speed must be checked and ad-
justed before adjusting the throttle lever free play. 1. Slide the rubber cover away from the locknut.
2. Loosen the locknut.
3. To increase the throttle lever free play, turn
the throttle lever free play adjusting nut in di-
rection (a). To decrease the throttle lever free
play, turn the adjusting nut in direction (b).
4. Tighten the locknut.
5. Slide the rubber cover to its original position.EBU24062Valve clearanceThe valve clearance changes with use, resulting in
improper air-fuel mixture and/or engine noise. To
prevent this from occurring, the valve clearance
must be adjusted by a Yamaha dealer at the inter-
vals specified in the periodic maintenance chart.
EBU29602BrakesReplacement of brake components requires pro-
fessional knowledge. Brake service should be
performed by a Yamaha dealer.
WARNING
EWB02572Operating with improperly serviced or adjust-
ed brakes could lead to a loss in braking ability
and an accident. EBU34512Checking the front and rear brake
shoesThe front and rear brake shoes must be checked
for wear at the intervals specified in the periodic
maintenance chart. Without disassembling the
brake, this can be performed by checking the po-
sition of the brake lever free play adjusting bolts or
nut.
Front brakes
To check front brake shoe wear, check the posi-
tion of the adjusting bolts. If a bolt extends more
than 12 mm (0.47 in) from its locknut, the brake
shoes need to be replaced.
UBD365E0.book Page 21 Monday, January 27, 2020 9:05 AM
Page 106 of 126

9-27
94. To tighten the drive chain, turn the drive chain
slack adjusting nut in direction (a). To loosen
the drive chain, turn the adjusting nut in direc-
tion (b) and push the rear wheels forward.
NOTICE: Improper drive chain slack will
overload the engine as well as other vital
parts of the ATV and can lead to drive
chain slippage or breakage. To prevent
this from occurring, keep the drive chain
slack within the specified limits.
[ECB00543]
5. Tighten the locknut, and then the bolts and nuts to their specified torques.
6. Adjust the rear brake lever free play. (See page 9-24.)
EBU24885Lubricating the drive chainThe drive chain must be cleaned and lubricated at
the intervals specified in the periodic maintenance
chart, otherwise it will quickly wear out, especially
when riding in dusty or wet areas. Service the
drive chain as follows.NOTICEECB00562The drive chain must be lubricated after wash-
ing the ATV or riding in the rain or wet areas.
Tightening torques:Locknut:22 N·m (2.2 kgf·m, 16 lb·ft)
Bolt: 45 N·m (4.5 kgf·m, 33 lb·ft)
Nut: 54 N·m (5.4 kgf·m, 40 lb·ft)
1. O-ring
1
1
UBD365E0.book Page 27 Monday, January 27, 2020 9:05 AM
Page 108 of 126

9-29
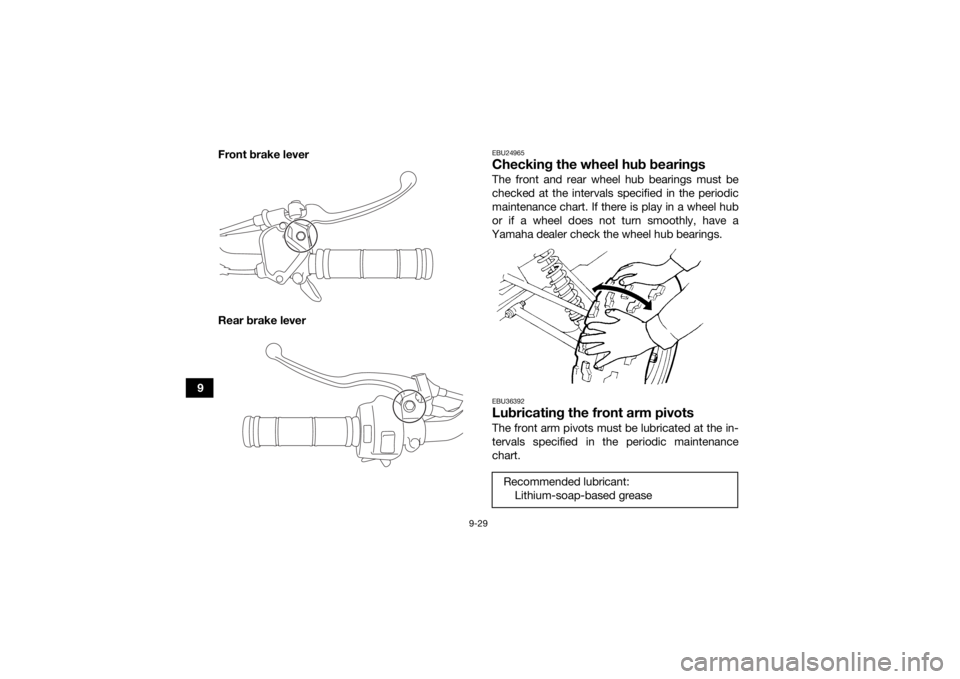
9Front brake lever
Rear brake lever
EBU24965Checking the wheel hub bearingsThe front and rear wheel hub bearings must be
checked at the intervals specified in the periodic
maintenance chart. If there is play in a wheel hub
or if a wheel does not turn smoothly, have a
Yamaha dealer check the wheel hub bearings.EBU36392Lubricating the front arm pivotsThe front arm pivots must be lubricated at the in-
tervals specified in the periodic maintenance
chart.Recommended lubricant: Lithium-soap-based grease
UBD365E0.book Page 29 Monday, January 27, 2020 9:05 AM
Page 109 of 126

9-30
9
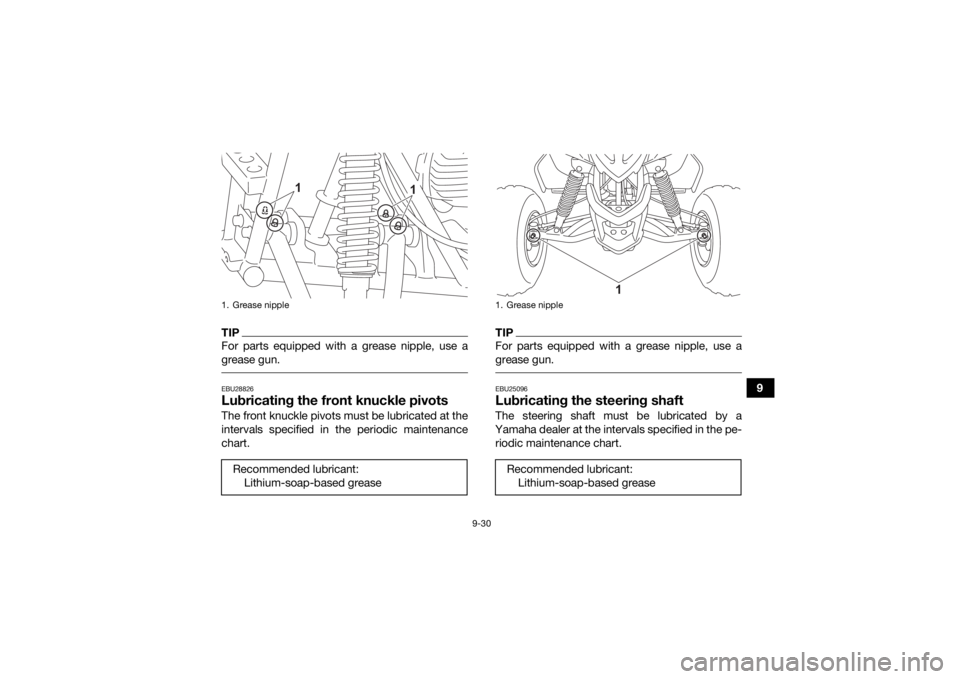
TIPFor parts equipped with a grease nipple, use a
grease gun. EBU28826Lubricating the front knuckle pivotsThe front knuckle pivots must be lubricated at the
intervals specified in the periodic maintenance
chart.
TIPFor parts equipped with a grease nipple, use a
grease gun. EBU25096Lubricating the steering shaftThe steering shaft must be lubricated by a
Yamaha dealer at the intervals specified in the pe- riodic maintenance chart.
1. Grease nippleRecommended lubricant: Lithium-soap-based grease
1
1
1. Grease nippleRecommended lubricant:Lithium-soap-based grease
1
UBD365E0.book Page 30 Monday, January 27, 2020 9:05 AM
Page 118 of 126

10-2
10abrasives which may mar the paint or protec-
tive finish. When finished cleaning, start the
engine and let it idle for several minutes.
EBU30362StorageShort-term
Always store your ATV in a cool, dry place and, if
necessary, protect it against dust with a porous
cover.
NOTICE: Storing the ATV in a poorly ven-
tilated room or covering it with a tarp while it is
still wet, will allow water and humidity to seep
in and cause rust. To prevent corrosion, avoid
damp cellars, stables (because of the presence
of ammonia) and areas where strong chemi-
cals are stored.
[ECB00722]
Long-term
Before storing your ATV for several months: 1. Make any necessary repairs and perform all outstanding maintenance.
2. Follow all the instructions in the Cleaning sec- tion of this chapter. 3. Fill up the fuel tank and add fuel stabilizer (Fu-
el Med Rx if available), and then run the en-
gine for 5 minutes to distribute the treated
fuel.
4. Turn the fuel cock lever off, and then drain the carburetor float chamber by loosening the
drain bolt. Pour the drained fuel into the fuel
tank.
5. Perform the following steps to protect the en- gine from internal corrosion.a. Remove the spark plug cap and spark plug.
b. Pour a teaspoonful of engine oil into the spark plug bore.
c. Install the spark plug cap onto the spark plug, and then place the spark plug on the
cylinder head so that the electrodes are
grounded. (This will limit sparking during
the next step.)
d. Turn the engine over several times with the starter. (This will coat the cylinder wall
with oil.)
Specified amount:
7.5 ml per liter of fuel (1 oz per gallon)UBD365E0.book Page 2 Monday, January 27, 2020 9:05 AM
Page 124 of 126

12-1
12
INDEX
AAccessories and loading ................................................ 7-6
Air filter element, cleaning ............................................ 9-15BBattery .......................................................................... 9-31
Brake lever free play, adjusting the front ..................... 9-23
Brake lever free play (rear), adjusting ........................... 9-24
Brake lever, front ............................................................ 5-5
Brake lever, rear ............................................................. 5-5
Brake levers, checking and lubricating ........................ 9-28
Brakes .......................................................................... 9-21
Brakes, front and rear .................................................... 6-3CCables, checking and lubricating ................................. 9-28
Carburetor, adjusting ...................................................9-19
Chassis fasteners ........................................................... 6-6
Cleaning ....................................................................... 10-1DDrive chain ..................................................................... 6-3
Drive chain, lubricating ................................................ 9-27
Drive chain slack .......................................................... 9-25
Drive select lever ............................................................ 5-6
Drive select lever and driving in reverse ........................ 7-3EEngine break-in .............................................................. 7-4
Engine, cold start ........................................................... 7-1
Engine idling speed ...................................................... 9-19
Engine oil .............................................................. 6-3, 9-10
Engine, starting a warm ................................................. 7-3Engine stop switch ......................................................... 5-2
FFront and rear brake shoes, checking ......................... 9-21
Front arm pivots, lubricating ........................................ 9-29
Front knuckle pivots, lubricating .................................. 9-30
Fuel ........................................................................ 5-9, 6-3
Fuel cock ...................................................................... 5-10
Fuel tank cap ................................................................. 5-8
Fuse, replacing ............................................................. 9-34HHandlebar switches ....................................................... 5-2IIdentification numbers ................................................... 1-1
Indicator lights ............................................................... 5-1
Instruments and switches .............................................. 6-6KKickstarter ...................................................................... 5-7LLabel locations ............................................................... 2-1MMain switch .................................................................... 5-1
Maintenance and lubrication chart ................................ 9-5
Maintenance chart, emission control system ................ 9-3
Model label .................................................................... 1-1NNeutral indicator light ..................................................... 5-1OOwner’s Manual and tool kit .......................................... 9-2
UBD365E0.book Page 1 Monday, January 27, 2020 9:05 AM