2021 VOLVO V90 CROSS COUNTRY lights
[x] Cancel search: lightsPage 406 of 683
||
STARTING AND DRIVING
404
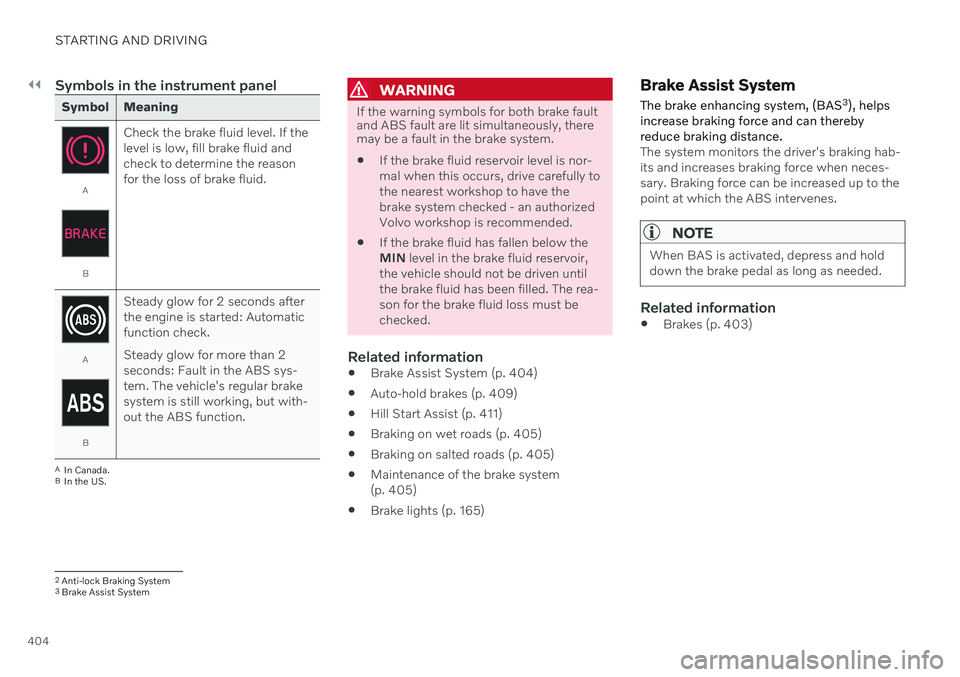
Symbols in the instrument panel
Symbol Meaning
A
BCheck the brake fluid level. If the level is low, fill brake fluid andcheck to determine the reasonfor the loss of brake fluid.
A
BSteady glow for 2 seconds after the engine is started: Automaticfunction check. Steady glow for more than 2 seconds: Fault in the ABS sys-tem. The vehicle's regular brakesystem is still working, but with-out the ABS function.
A
In Canada.
B In the US.
WARNING
If the warning symbols for both brake fault and ABS fault are lit simultaneously, theremay be a fault in the brake system.
If the brake fluid reservoir level is nor- mal when this occurs, drive carefully tothe nearest workshop to have thebrake system checked - an authorizedVolvo workshop is recommended.
If the brake fluid has fallen below theMIN
level in the brake fluid reservoir,
the vehicle should not be driven untilthe brake fluid has been filled. The rea-son for the brake fluid loss must bechecked.
Related information
Brake Assist System (p. 404)
Auto-hold brakes (p. 409)
Hill Start Assist (p. 411)
Braking on wet roads (p. 405)
Braking on salted roads (p. 405)
Maintenance of the brake system(p. 405)
Brake lights (p. 165)
Brake Assist System The brake enhancing system, (BAS 3
), helps
increase braking force and can thereby reduce braking distance.
The system monitors the driver's braking hab- its and increases braking force when neces-sary. Braking force can be increased up to thepoint at which the ABS intervenes.
NOTE
When BAS is activated, depress and hold down the brake pedal as long as needed.
Related information
Brakes (p. 403)
2
Anti-lock Braking System
3 Brake Assist System
Page 436 of 683
||
STARTING AND DRIVING
* Option/accessory.
434 pedal. When the accelerator pedal is released, the vehicle will return to very low speedregardless of how steep the hill is and withoutthe brakes needing to be applied. The brakelights will illuminate when the function is acti-vated. The driver can brake to stop or slow the vehi- cle at any time by depressing the brake pedal. HDC is activated along with Low Speed Con- trol (LSC
18
), which facilitates and improves
traction and control on rough and slippery sur- faces. The system is intended to be used atlow speeds, up to approximately 40 km/h (25mph).
To keep in mind when using HDC
If the function is switched off while drivingon a steep downhill gradient, brakingeffect will be gradually reduced.
HDC can be used in gear positions
D and
R , and in manual gears 1 or 2.
It is not possible to manually shift to thirdgear or higher when HDC is active.
NOTE
When LSC with HDC is activated, the feel of the accelerator pedal and engineresponse will change.
NOTE
This drive mode is not designed to be used for normal street driving.
NOTE
The function is deactivated when driving at high speeds and must be reactivated atlower speeds if so desired.
Related information
Activating and deactivating Hill Descent Control using the function button (p. 434)
Changing drive mode
* (p. 421)
Low Speed Control (p. 432)
All Wheel Drive (AWD) (p. 419)
Activating and deactivating Hill Descent Control using the functionbutton There is a function button for assistance on steep gradients with
Hill Descent Control in
the center display's Function view if the vehi- cle is not equipped with a drive mode controlin the tunnel console.
Selecting Hill Descent Control in the center display's Function view
HDC only works at low speeds.
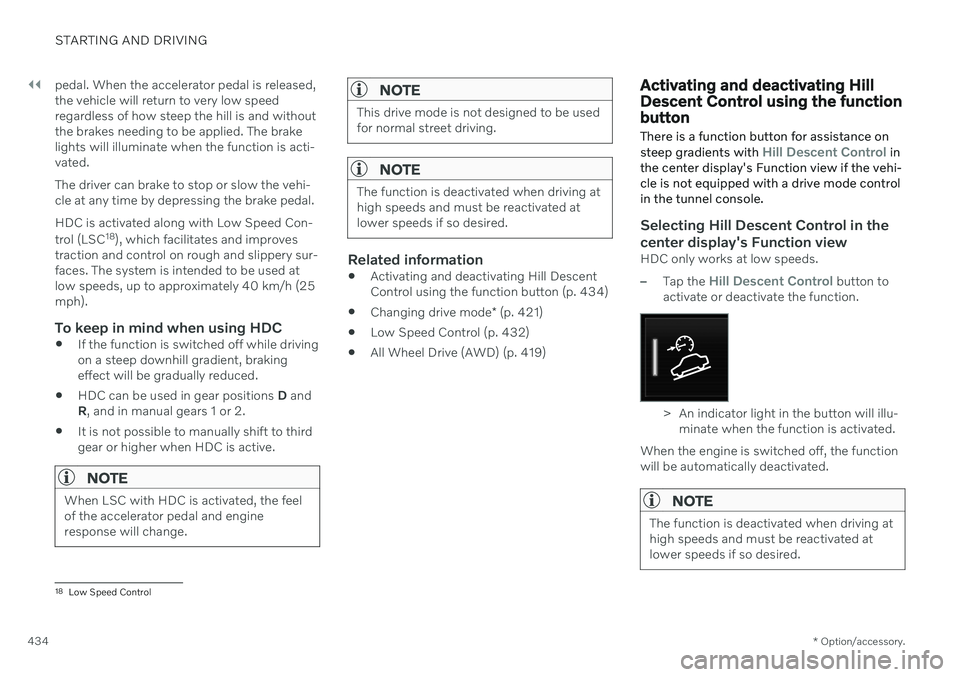
–Tap the Hill Descent Control button to
activate or deactivate the function.
> An indicator light in the button will illu- minate when the function is activated.
When the engine is switched off, the function will be automatically deactivated.
NOTE
The function is deactivated when driving at high speeds and must be reactivated atlower speeds if so desired.
18 Low Speed Control
Page 444 of 683

STARTING AND DRIVING
442
Emission controls
Three-way catalytic converter
Keep your engine properly tuned. Certain engine malfunctions, particularly involvingthe electrical, fuel or distributor ignitionsystems, may cause unusually high three-way catalytic converter temperatures. Donot continue to operate your vehicle if youdetect engine misfire, noticeable loss ofpower or other unusual operating condi-tions, such as engine overheating or back-firing. A properly tuned engine will helpavoid malfunctions that could damage thethree-way catalytic converter.
Do not park your vehicle over combustiblematerials, such as grass or leaves, whichcan come into contact with the hotexhaust system and cause such materialsto ignite under certain wind and weatherconditions.
Excessive starter cranking (in excess ofone minute), or an intermittently firing orflooded engine can cause three-way cata-lytic converter or exhaust system over-heating.
Remember that tampering or unauthor-ized modifications to the engine, theEngine Control Module, or the vehicle maybe illegal and can cause three-way cata-lytic converter or exhaust system over-heating. This includes: altering fuel injec- tion settings or components, alteringemission system components or locationor removing components, and/or repeateduse of leaded fuel.
NOTE
Unleaded fuel is required for vehicles with three-way catalytic converters.
Heated oxygen sensorsThe heated oxygen sensors monitor the oxy- gen content of the exhaust gases. Readings are fed into a control module that continuouslymonitors engine functions and controls fuelinjection. The ratio of fuel to air into the engineis continuously adjusted for efficient combus-tion to help reduce harmful emissions.
Related information
Octane rating (p. 440)
Fuel (p. 439)
Overheating of engine and transmission
In certain driving conditions, such as driving in mountainous areas or hot weather, there isa risk of the engine or transmission overheat-ing, especially when carrying heavy loads.
Engine power may be temporarily limited.
Remove any auxiliary lights mounted in front of the grille when driving in hotweather.
If the temperature in the engine's coolingsystem becomes too high, a warning sym-bol will appear in the instrument panel along with the message
Engine
temperature High temperature Stop
safely. Pull over to a safe location and let
the engine idle for a few minutes to cool down.
If the message
Engine temperature
High temperature Turn off engine orEngine coolant Level low, turn off
engine is displayed, stop the vehicle and
turn off the engine.
If the transmission begins to overheat, an alternative gear shifting program will beselected. An integrated protective functionwill also be activated, the warning symbolwill illuminate and the message
Transmission warm Reduce speed to
lower temperature or Transmission hot
Stop safely, wait for cooling will be dis-
Page 445 of 683
STARTING AND DRIVING
443
played in the instrument panel. Follow the recommendations given by reducingspeed or stopping the vehicle safely andletting the engine idle for a few minutes tolet the transmission cool.
If the vehicle begins to overheat, the airconditioning may be temporarily switchedoff.
After a prolonged period of driving indemanding conditions, do not turn off theengine immediately after stopping.
NOTE
It is normal for the engine's cooling fan to operate for a short time after the engine isswitched off.
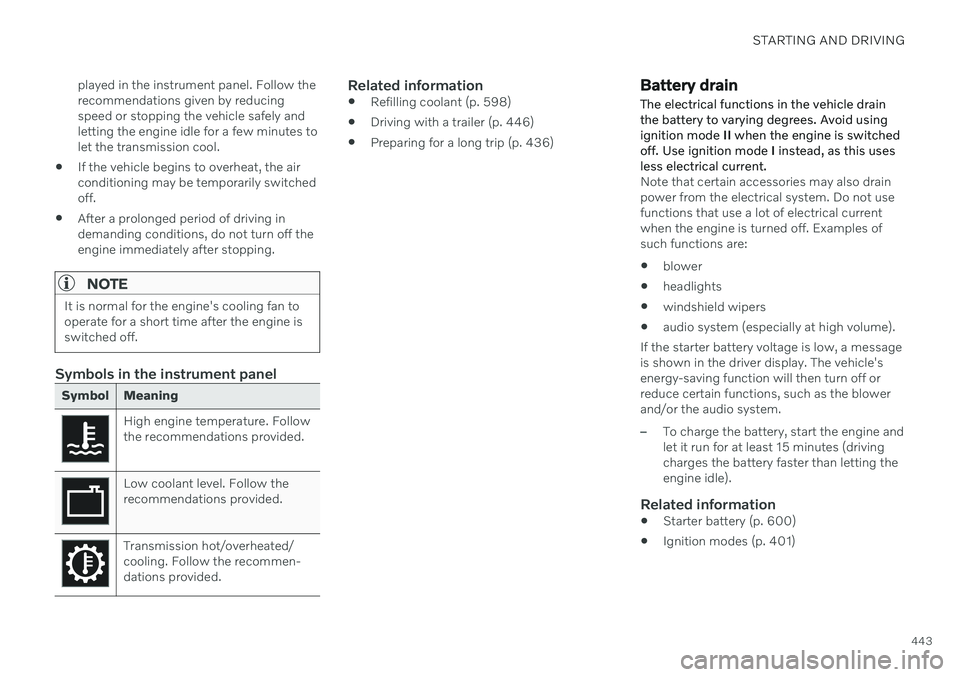
Symbols in the instrument panel
Symbol Meaning
High engine temperature. Follow the recommendations provided.
Low coolant level. Follow the recommendations provided.
Transmission hot/overheated/ cooling. Follow the recommen-dations provided.
Related information
Refilling coolant (p. 598)
Driving with a trailer (p. 446)
Preparing for a long trip (p. 436)
Battery drain
The electrical functions in the vehicle drain the battery to varying degrees. Avoid usingignition mode II when the engine is switched
off. Use ignition mode I instead, as this uses
less electrical current.
Note that certain accessories may also drain power from the electrical system. Do not usefunctions that use a lot of electrical currentwhen the engine is turned off. Examples ofsuch functions are: blower
headlights
windshield wipers
audio system (especially at high volume).
If the starter battery voltage is low, a message is shown in the driver display. The vehicle'senergy-saving function will then turn off orreduce certain functions, such as the blowerand/or the audio system.
–To charge the battery, start the engine and let it run for at least 15 minutes (drivingcharges the battery faster than letting theengine idle).
Related information
Starter battery (p. 600)
Ignition modes (p. 401)
Page 450 of 683
||
STARTING AND DRIVING
* Option/accessory.
448
Related information
Trailer Stability Assist
* (p. 448)
Checking trailer lights (p. 449)
Towing capacity and tongue weight (p. 656)
Overheating of engine and transmission(p. 442)
Trailer Stability Assist
*
Trailer Stability Assist (TSA 23
) is part of the
ESC 24
stability system and is a function
designed to help stabilize a vehicle that is towing a trailer when the vehicle and trailerhave begun to sway. The function is addedwhen installing a towbar. Contact a Volvoretailer for more information.
Reasons for swayingA vehicle towing a trailer may begin to sway for various reasons. Normally this only occursat high speeds. However, if the trailer is over-loaded or unevenly distributed, e.g. too farback, there is a risk of swaying even at lowspeeds. Swaying may be caused by factors such as:
The vehicle and trailer are hit by a sudden, strong crosswind.
The vehicle and trailer are traveling on anuneven road or over a bump.
Sudden movements of the steering wheel.
Once swaying has begun, it can be difficult orimpossible to stop it. This makes the vehicleand trailer difficult to control and there is a riskof swerving into oncoming traffic or driving offthe road.
Trailer Stability Assist functionTrailer Stability Assist continuously monitorsthe vehicle's movements, particularly lateralmovements. If swaying is detected, the brakesare applied individually on the front wheels,which has a stabilizing effect on the vehicleand trailer. This is often enough to enable thedriver to regain control of the vehicle. If the Trailer Stability Assist function's first attempt is not adequate to stop the swayingmotion, the brakes are applied on all wheelsand engine power is temporarily reduced. Asthe swaying motion begins to decrease andthe vehicle and trailer have once againbecome stable, TSA stops regulating thebrakes/engine power and the driver regainscontrol of the vehicle.
NOTE
Trailer Stability Assist is deactivated if the driver activates ESC Sport Mode in the
center display's menu system.
Trailer Stability Assist may not intervene if the driver tries to compensate for the swayingmotion by moving the steering wheel rapidly,because the system will then not be able todetermine if it is the trailer or the driver caus-ing the swaying.
23 Trailer Stability Assist
24 Electronic Stability Control
Page 451 of 683
STARTING AND DRIVING
}}
449
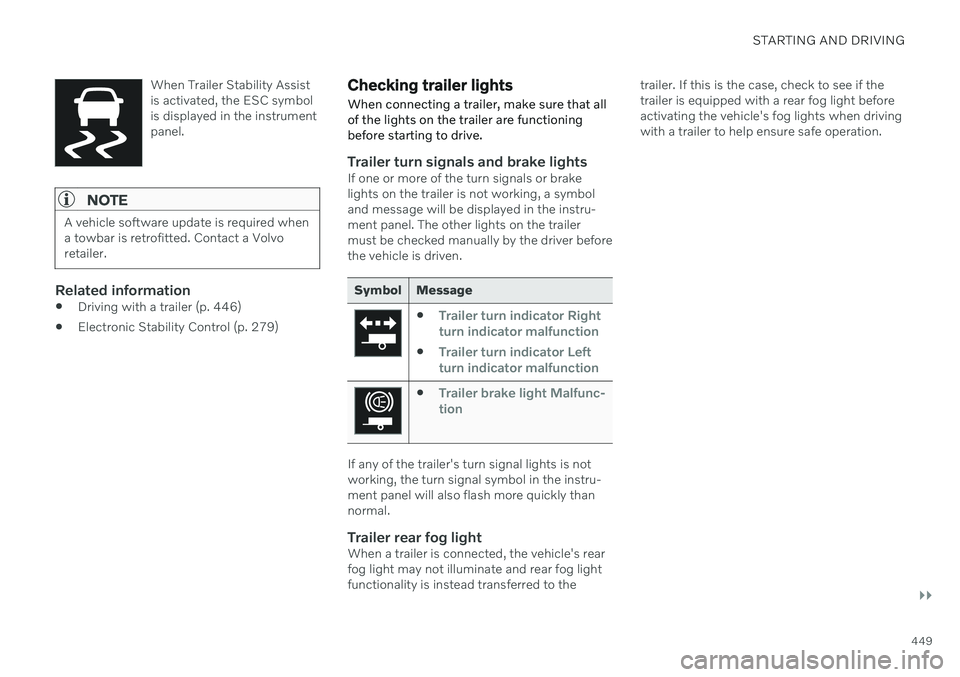
When Trailer Stability Assist is activated, the ESC symbolis displayed in the instrumentpanel.
NOTE
A vehicle software update is required when a towbar is retrofitted. Contact a Volvoretailer.
Related information
Driving with a trailer (p. 446)
Electronic Stability Control (p. 279)
Checking trailer lights
When connecting a trailer, make sure that all of the lights on the trailer are functioningbefore starting to drive.
Trailer turn signals and brake lightsIf one or more of the turn signals or brake lights on the trailer is not working, a symboland message will be displayed in the instru-ment panel. The other lights on the trailermust be checked manually by the driver beforethe vehicle is driven.
Symbol Message
Trailer turn indicator Right
turn indicator malfunction
Trailer turn indicator Left
turn indicator malfunction
Trailer brake light Malfunc-
tion
If any of the trailer's turn signal lights is not working, the turn signal symbol in the instru-ment panel will also flash more quickly thannormal.
Trailer rear fog lightWhen a trailer is connected, the vehicle's rearfog light may not illuminate and rear fog lightfunctionality is instead transferred to the trailer. If this is the case, check to see if thetrailer is equipped with a rear fog light beforeactivating the vehicle's fog lights when drivingwith a trailer to help ensure safe operation.
Page 452 of 683
||
STARTING AND DRIVING
* Option/accessory.
450
Checking trailer lights *
Automatic check
When the trailer has been connected to the vehicle's electrical system, its lights can bechecked by automatically activating them.This function helps the driver check that thetrailer's lights are functioning correctly beforestarting to drive. In order to perform this check, the vehicle must be switched off.
1. When a trailer is connected to the towbar,
the message
Automatic Trailer Lamp
Check will appear in the instrument panel.
2. Acknowledge the message by pressing the O button on the right-side steering
wheel keypad.
> The light check will begin.
3. Get out of the vehicle to perform the check.
> All of the lights on the trailer will beginflashing, and then illuminate separately one at a time.
4. Visually check that all of the trailer's lights are functioning correctly.
5. After a short time, all of the trailer's lights will start flashing again.
> The light check is completed.
Disabling the automatic check
The automatic light check can be disabled in the center display. 1.Tap
Settings in the Top view.
2. Tap
My CarLights and Lighting.
3. Deselect
Automatic Trailer Lamp
Check.
Manual check
If the automatic check has been disabled, the check can be started manually. 1. Tap
Settings in the Top view.
2. Tap
My CarLights and Lighting.
3. Select
Manual Trailer Lamp Check.
> The light check will begin. Get out of the vehicle to perform the check.
Related information
Driving with a trailer (p. 446)
Towing using a towline
This section refers to one vehicle being towed behind another using a towline.
Before towing another vehicle, check applica- ble speed limit regulations.
Preparations and towing
CAUTION
For some transmission variants, it is not possible to shift from P position if theengine is switched off. Contact an author-ized Volvo workshop for assistance towingor call a professional towing service.
CAUTION
Note that the vehicle must always be towed with the wheels rolling forward.
Do not tow a vehicle with automatictransmission at a speed greater than80 km/h (50 mph) or for a distancegreater than 80 km (50 miles).
Page 585 of 683
MAINTENANCE AND SERVICE
}}
583
Periodic maintenance helps minimize emissions
NOTE
Refer to your Service and Warranty Booklet for a comprehensive serviceand maintenance schedule up to240,000 km (150,000 miles). Thisprogram contains inspections and ser-vices necessary for the proper functionof your vehicle and includes compo-nents that affect vehicle emissions.
The Warranty and Service RecordsInformation booklet also containsdetailed information concerning thewarranties that apply to your vehicle.
On-board Diagnostic SystemOBD II is part of your vehicle's computerized engine management system. It stores diag-nostic information about your vehicle's emis-sion controls. It can light the Check Enginelight (MIL) if it detects an emission control"fault." A "fault" is a component or systemthat is not performing within an expectedrange. A fault may be permanent or temporary.OBD II will store a message about any fault.
Emission inspection readiness
How do states use
OBD II for emission
inspections?
Many states connect a computer directly to a vehicle's OBD II system. The inspector canthen read "faults." In some states, this type ofinspection has replaced the tailpipe emissiontest.
How can my vehicle fail OBD II emission
inspection?
Your vehicle can fail OBD II emission inspec- tion for any of the following reasons: If your Check Engine (MIL) light is lit, your vehicle may fail inspection.
If your vehicle's Check Engine light was lit,but went out without any action on yourpart, OBD II will still have a recorded fault.Your vehicle may pass or fail, dependingon the inspection practices in your area.
If you had recent service that required dis-connecting the battery, OBD II diagnosticinformation may be incomplete and "notready" for inspection. A vehicle that is notready may fail inspection.
How can I prepare for my next
OBD II
emission inspection?
If your Check Engine (MIL) light is lit or was lit but went out without service, have your vehicle diagnosed and, if necessary,serviced by a qualified Volvo technician.
If you recently had service for a lit CheckEngine light, or if you had service thatrequired disconnecting the battery, aperiod of driving is necessary to bring theOBD II system to "ready" for inspection.Two half-hour trips of mixed stop-and-go/highway driving are typically needed toallow OBD II to reach readiness. YourVolvo retailer can provide you with moreinformation on planning a trip.
Maintain your vehicle in accordance withyour vehicle's maintenance schedule.
Owner maintenancePeriodic maintenance requirements and inter-vals are described in your vehicle's Warrantyand Service Records Information booklet. The following points can be carried out between the normally scheduled maintenanceservices.
Each time the vehicle is refueled:
Check the engine oil level.
Clean the windshield, windshield wipers, headlights, and taillights.