2021 VOLVO V90 CROSS COUNTRY stop start
[x] Cancel search: stop startPage 408 of 683
STARTING AND DRIVING
406
Parking brake
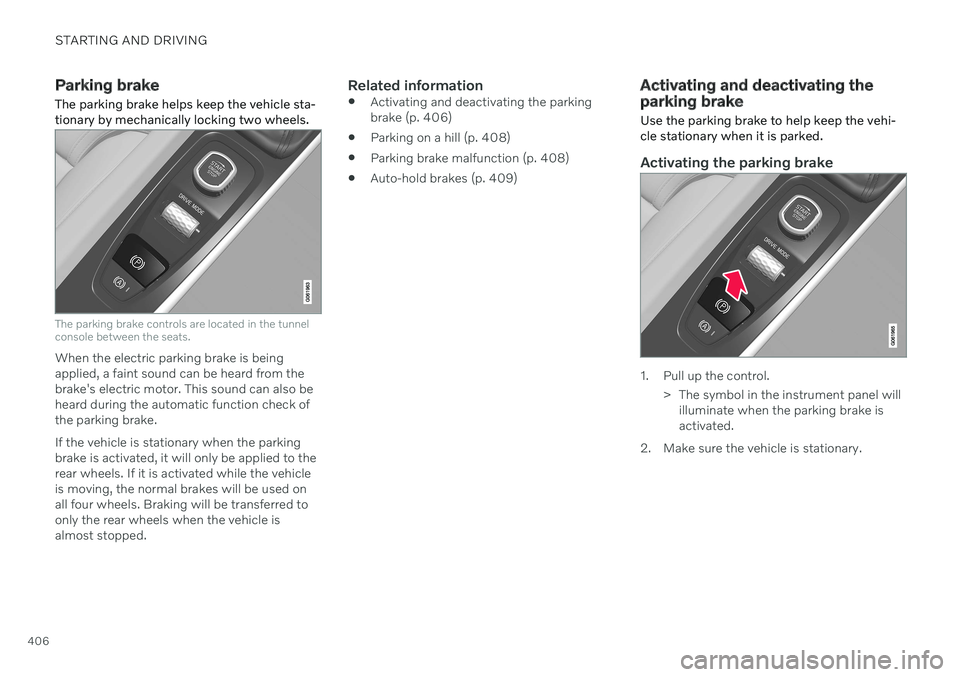
The parking brake helps keep the vehicle sta- tionary by mechanically locking two wheels.
The parking brake controls are located in the tunnel console between the seats.
When the electric parking brake is being applied, a faint sound can be heard from thebrake's electric motor. This sound can also beheard during the automatic function check ofthe parking brake. If the vehicle is stationary when the parking brake is activated, it will only be applied to therear wheels. If it is activated while the vehicleis moving, the normal brakes will be used onall four wheels. Braking will be transferred toonly the rear wheels when the vehicle isalmost stopped.
Related information
Activating and deactivating the parkingbrake (p. 406)
Parking on a hill (p. 408)
Parking brake malfunction (p. 408)
Auto-hold brakes (p. 409)
Activating and deactivating the parking brake
Use the parking brake to help keep the vehi- cle stationary when it is parked.
Activating the parking brake
1. Pull up the control.
> The symbol in the instrument panel willilluminate when the parking brake is activated.
2. Make sure the vehicle is stationary.
Page 411 of 683
STARTING AND DRIVING
}}
409
Symbols in the instrument panel
Symbol Meaning
A
BA flashing symbol indicates that a fault has been detected. Seethe message in the instrumentpanel.
A
BFault in the brake system. See the message in the instrumentpanel.
Information message in the instrument panel.
A
Canadian models.
B US models.
Related information
Activating and deactivating the parking brake (p. 406)
Parking on a hill (p. 408)
Starter battery (p. 600)
Volvo's service program (p. 582)
Auto-hold brakes
With the Auto-hold brake function, the driver can release the brake pedal and the brakeswill remain applied, for example, when thevehicle has stopped at a traffic light or inter-section.
When the vehicle stops, the brakes are acti- vated automatically. The function can useeither the normal brakes or the parking brakesto keep the vehicle stationary and works onflat surfaces or hills. If the driver has their seatbelt fastened and/or if the driver's door isclosed, the brakes will disengage automati-cally when the vehicle starts driving.
NOTE
When braking to a stop on an uphill or downhill gradient, depress the brake pedalwith slightly more force than usual beforereleasing to ensure that the vehicle cannotmove at all.
The parking brake is activated if
the vehicle is switched off.
the driver's door is opened
the driver's seat belt is removed
the vehicle has been stationary for a pro- longed period of time (5-10 minutes)
Page 413 of 683
STARTING AND DRIVING
* Option/accessory.411
Hill Start Assist
The function for assisting when starting the vehicle on inclines (HSA 4
) helps prevent the
vehicle from rolling backward when starting on an uphill gradient. When backing up a hill,HSA helps prevent the vehicle from rollingforward.
The function retains pressure from the brake pedal in the brake system for several secondsafter the brake pedal has been released. This temporary braking effect is released after a few seconds or when the driver begins driv-ing. Hill Start Assist is activated when the vehicle is stopped on steep inclines. The function isavailable even when the Auto-hold brake func-tion is switched off.
Related information
Auto-hold brakes (p. 409)
Brakes (p. 403)
Braking assist after a collision
In a collision in which the activation level is reached for the pyrotechnic seat belt tension-ers or airbags, or if a collision with a large ani-mal is detected, the vehicle's brakes will beautomatically activated. This function isintended to help prevent or reduce the effectsof any subsequent collision.
After a serious collision, it may no longer be possible to control and steer the vehicle. Inorder to avoid or mitigate a possible furthercollision with a vehicle or an object in the vehi-cle's path, the brake assist system is activatedautomatically to help stop the vehicle safely. If braking is not appropriate, e.g. if there is a risk of being hit by passing traffic, the drivercan override the system by depressing theaccelerator pedal. This function assumes that the brake system is intact after a collision.
Related information
Rear Collision Warning
* (p. 351)
BLIS
* (p. 352)
Brake functions (p. 403)
Regenerative braking
*
The vehicle recovers kinetic energy during braking in order to reduce fuel consumptionand emissions.
The battery symbol is shown in the instrument panel when the vehicle is generating power for the battery 5
.
The function is available in all drive modes together with gear selector position D or M.
Activating brake regeneration
Brake regeneration is activated by gentle pres- sure on the brake pedal or during engine brak-ing. Regeneration increases during engine braking if manual gear selector position M is selected.
Related information
Drive modes
* (p. 419)
Shifting gears with automatic transmis-sion (p. 413)
4
Hill Start Assist
5 The symbol is used in vehicles with 48 V batteries.
Page 418 of 683
||
STARTING AND DRIVING
416
Activating the steering wheel paddles in the D position
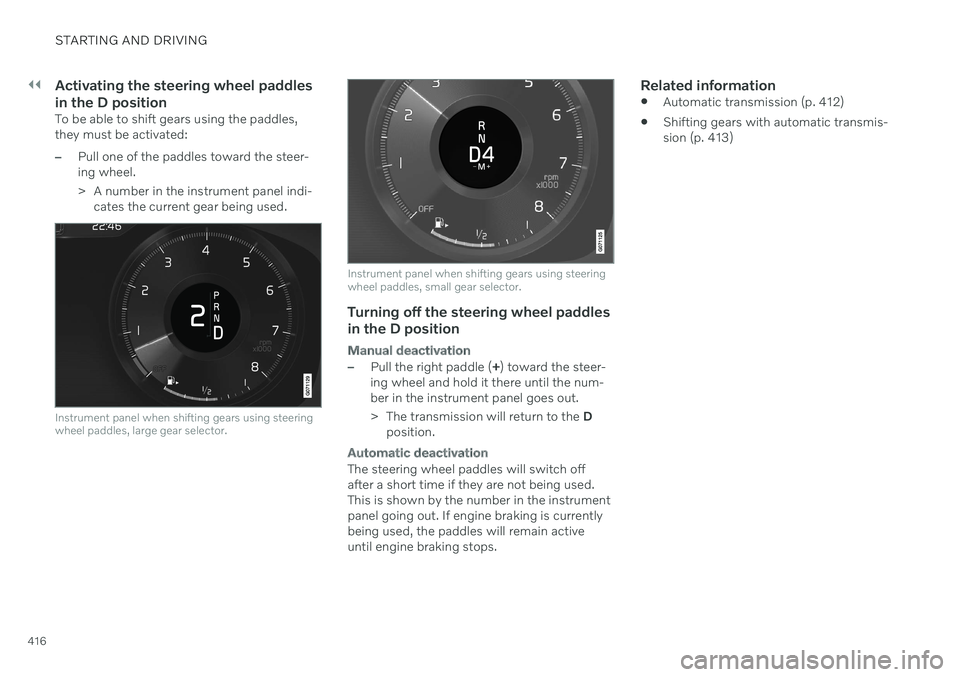
To be able to shift gears using the paddles, they must be activated:
–Pull one of the paddles toward the steer- ing wheel.
> A number in the instrument panel indi-cates the current gear being used.
Instrument panel when shifting gears using steering wheel paddles, large gear selector.
Instrument panel when shifting gears using steering wheel paddles, small gear selector.
Turning off the steering wheel paddles
in the D position
Manual deactivation
–Pull the right paddle ( +) toward the steer-
ing wheel and hold it there until the num- ber in the instrument panel goes out.
> The transmission will return to the D
position.
Automatic deactivation
The steering wheel paddles will switch off after a short time if they are not being used.This is shown by the number in the instrumentpanel going out. If engine braking is currentlybeing used, the paddles will remain activeuntil engine braking stops.
Related information
Automatic transmission (p. 412)
Shifting gears with automatic transmis-sion (p. 413)
Page 421 of 683
STARTING AND DRIVING
}}
* Option/accessory.419
Automatic transmission symbols and messages If a problem occurs with the transmission, a symbol and a message are displayed in theinstrument panel.
CAUTION
Check the operating temperature of the transmission to help avoid damage to anyof the drive system components. If there isa risk of overheating, a warning symbol willappear in the instrument panel and a textmessage will be displayed. Follow the rec-ommendations given.
Symbol Meaning
A fault has occurred in the trans- mission. Read the message in the instru- ment panel.
Hot or overheated transmission. Read the message in the instru- ment panel.
Temporary fault in driveline. Read the message in the instru- ment panel.
Related information
Automatic transmission (p. 412)
All Wheel Drive (AWD)
All-wheel drive (AWD 9
), also called four-
wheel drive, means that power is distributed to all four wheels, which improves traction.
To achieve the best traction, power is auto- matically directed to the wheels that have thebest grip. The system continuously calculatesthe need for torque to the rear wheels, andcan immediately redistribute up to half of theengine's torque to the rear wheels. All-wheel drive also has a stabilizing effect at higher speeds. In normal driving conditions,most of the engine's power is directed to thefront wheels. When the vehicle is stationary,all-wheel drive is always activated in prepara-tion for maximum traction during acceleration. All-wheel drive reacts differently depending on which drive mode is selected.
Related information
Drive modes
* (p. 419)
Low Speed Control (p. 432)
Transmission (p. 412)
Drive modes
*
Drive modes affect the vehicle's driving cha- racteristics in different ways to enhance andsimplify the driving experience in certaintypes of situations.
Drive modes enable easy access to the vehi- cle's many functions and settings in differentdriving situations. The following systems areadapted to help optimize driving characteris-tics in each drive mode: Steering
Engine/transmission/all-wheel drive
Brakes
Shock absorbers
Instrument panel
Start/Stop function
Climate control settings
Select the drive mode that is adapted to the current driving conditions. Keep in mind thatnot all drive modes are available in all situa-tions.
Available drive modesWhen the engine is started, the vehicle will be in Comfort mode and the start/stop function
will be activated. Drive mode can be changed once the vehicle is started, e.g. to
Individualmode. Once Individual mode is selected, you
can adjust settings to personal preferences, e.g. to show the tachometer.
Page 422 of 683
||
STARTING AND DRIVING
* Option/accessory.
420
Comfort
Comfort is the vehicle's default mode. This
setting offers driving comfort, light steering and soft suspension. In
Comfort mode, no tachometer will be dis-
played in the instrument panel 10
.
Eco
Adapt the vehicle for more fuel-efficient and eco-friendly driving with Eco mode.
In this mode, the Start/Stop function is acti- vated and certain climate settings arereduced. When driving in
Eco mode, an ECO gauge
indicating how economical the driving is will be displayed in the instrument panel.
Off Road
Helps maximize the vehicle's ability to tra- verse difficult terrain or poor roads.
Steering is light and all-wheel drive and thelow-speed function with assistance for driving downhill (HDC 11
) are activated. The Start/Stop
function is deactivated. This mode can only be activated at low speeds. The permitted speed range will beshown in the speedometer. If this speed is exceeded,
Off Road mode will be deactivated
and another drive mode activated. In
Off Road mode, a compass will be dis-
played between the speedometer and the tachometer in the instrument panel.
NOTE
This drive mode is not designed to be used for normal street driving.
Dynamic
Dynamic mode is designed to help pro-
vide sportier driving characteristics and a faster acceleration response.
Gear shifting will be faster and more distinctand the transmission will prioritize gears witha higher traction force. Steering response is faster and suspension is stiffer 12
to help reduce body roll when corner-
ing. The Start/Stop function is deactivated.
Dynamic mode is also available in a Polestar
Engineered* version.
Individual
Customizes drive mode to personal prefer- ences. Select one of the drive modes as a basis andadjust the settings to achieve your preferreddriving characteristics. These settings will bestored in the active driver profile and will beavailable every time the vehicle is unlockedwith that remote key. Individual drive mode is only available if it has been activated in the center display.
9
All Wheel Drive
10 Only applies to vehicles with 8-inch instrument panels.
11 Hill Descent Control
12 Vehicles with Four-C.
Page 423 of 683
STARTING AND DRIVING
}}
* Option/accessory.421
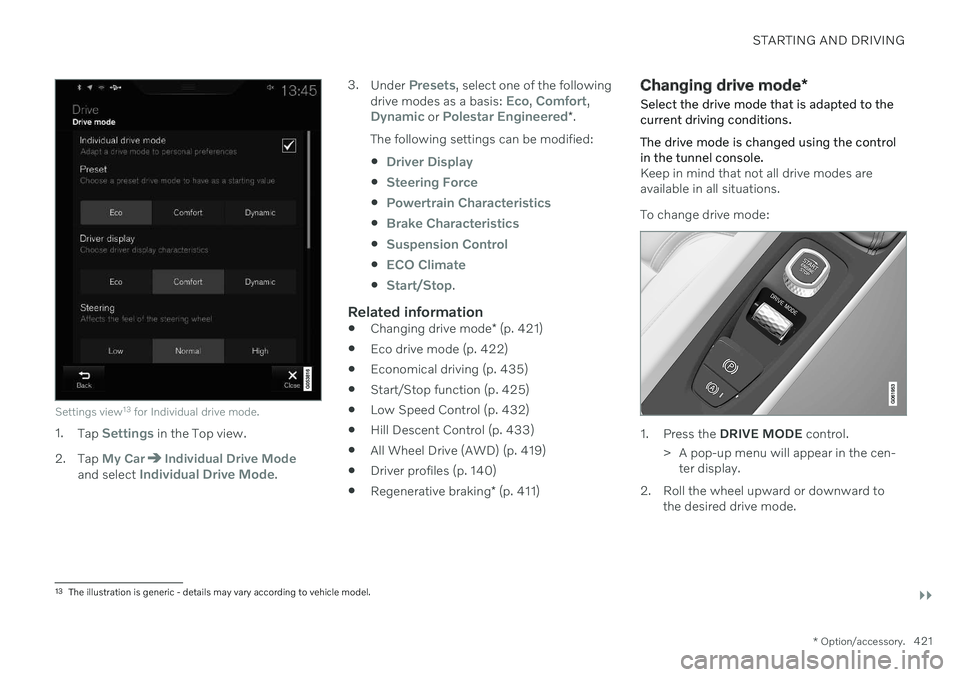
Settings view13
for Individual drive mode.
1. Tap Settings in the Top view.
2. Tap
My CarIndividual Drive Modeand select Individual Drive Mode. 3.
Under
Presets, select one of the following
drive modes as a basis: Eco, Comfort,Dynamic or Polestar Engineered* .
The following settings can be modified:
Driver Display
Steering Force
Powertrain Characteristics
Brake Characteristics
Suspension Control
ECO Climate
Start/Stop.
Related information
Changing drive mode
* (p. 421)
Eco drive mode (p. 422)
Economical driving (p. 435)
Start/Stop function (p. 425)
Low Speed Control (p. 432)
Hill Descent Control (p. 433)
All Wheel Drive (AWD) (p. 419)
Driver profiles (p. 140)
Regenerative braking
* (p. 411)
Changing drive mode *
Select the drive mode that is adapted to the current driving conditions. The drive mode is changed using the control in the tunnel console.
Keep in mind that not all drive modes are available in all situations. To change drive mode:
1. Press the DRIVE MODE control.
> A pop-up menu will appear in the cen- ter display.
2. Roll the wheel upward or downward to the desired drive mode.
13The illustration is generic - details may vary according to vehicle model.
Page 426 of 683
||
STARTING AND DRIVING
* Option/accessory.
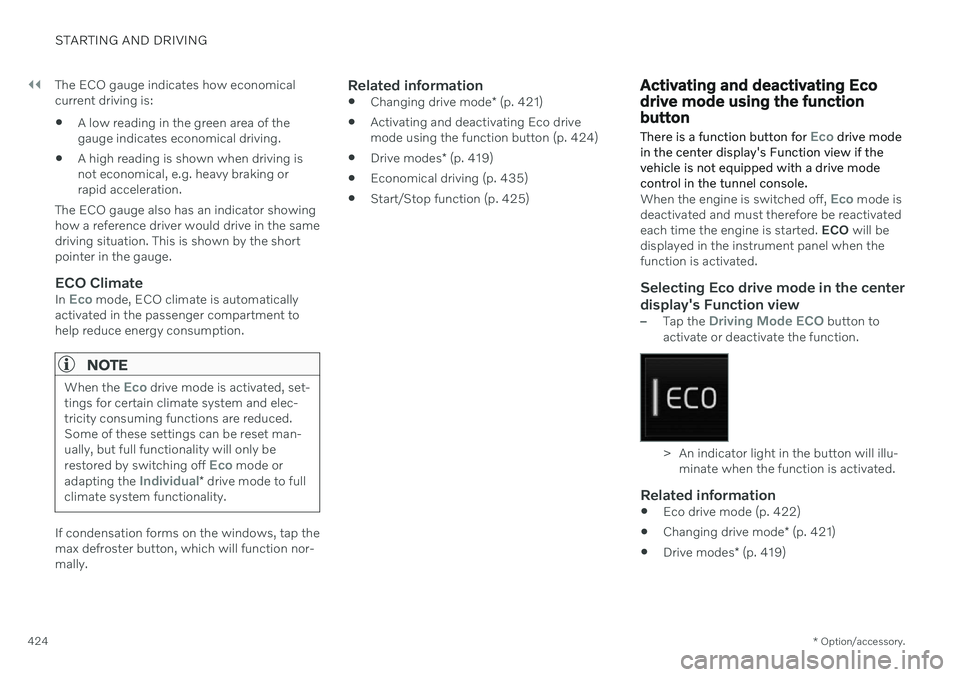
424 The ECO gauge indicates how economical current driving is:
A low reading in the green area of thegauge indicates economical driving.
A high reading is shown when driving isnot economical, e.g. heavy braking orrapid acceleration.
The ECO gauge also has an indicator showinghow a reference driver would drive in the samedriving situation. This is shown by the shortpointer in the gauge.
ECO ClimateIn Eco mode, ECO climate is automatically
activated in the passenger compartment to help reduce energy consumption.
NOTE
When the Eco drive mode is activated, set-
tings for certain climate system and elec- tricity consuming functions are reduced.Some of these settings can be reset man-ually, but full functionality will only be restored by switching off
Eco mode or
adapting the Individual* drive mode to full
climate system functionality.
If condensation forms on the windows, tap the max defroster button, which will function nor-mally.
Related information
Changing drive mode
* (p. 421)
Activating and deactivating Eco drivemode using the function button (p. 424)
Drive modes
* (p. 419)
Economical driving (p. 435)
Start/Stop function (p. 425)
Activating and deactivating Eco drive mode using the functionbutton There is a function button for
Eco drive mode
in the center display's Function view if the vehicle is not equipped with a drive modecontrol in the tunnel console.
When the engine is switched off, Eco mode is
deactivated and must therefore be reactivated each time the engine is started. ECO will be
displayed in the instrument panel when thefunction is activated.
Selecting Eco drive mode in the center display's Function view
–Tap the Driving Mode ECO button to
activate or deactivate the function.
> An indicator light in the button will illu- minate when the function is activated.
Related information
Eco drive mode (p. 422)
Changing drive mode
* (p. 421)
Drive modes
* (p. 419)