2021 VOLVO V90 CROSS COUNTRY center console
[x] Cancel search: center consolePage 435 of 683
STARTING AND DRIVING
}}
* Option/accessory.433
Activating and deactivating Low Speed Control using the functionbutton There is a function button for driving at low speeds with
Hill Descent Control in the cen-
ter display's Function view if the vehicle is not equipped with a drive mode control in thetunnel console.
Selecting Low Speed Control in the center display's Function view
–Tap the Hill Descent Control button to
activate or deactivate the function.
> An indicator light in the button will illu- minate when the function is activated.
When the engine is switched off, the function will be automatically deactivated.
NOTE
The function is deactivated when driving at high speeds and must be reactivated atlower speeds if so desired.
Related information
Low Speed Control (p. 432)
Changing drive mode
* (p. 421)
Hill Descent Control
The function for assisting when driving down- hill (HDC 17
) is a low-speed function with
increased engine braking. The function makes it possible to increase or decrease thevehicle's speed on steep downhill gradientsby only using the accelerator pedal, withoutapplying the brakes. In vehicles equipped with drive mode con- trol *, the function is included in the
Off Roaddrive mode.HDC is designed for driving on rough roads at low speeds and downhill gradients with slip-pery or otherwise difficult road surfaces. Thedriver does not need to use the brake pedalbut can instead focus on steering.
WARNING
HDC is only intended to be a supplemen- tary braking aid and it does not function inall situations. The driver is always ultimately responsible for operating the vehicle in a safe manner.
FunctionHill Descent Control allows the vehicle to move forward or backward at very low speedsassisted by the brake system. The driver canincrease the speed by pressing the accelerator
17
Hill Descent Control
Page 436 of 683
||
STARTING AND DRIVING
* Option/accessory.
434 pedal. When the accelerator pedal is released, the vehicle will return to very low speedregardless of how steep the hill is and withoutthe brakes needing to be applied. The brakelights will illuminate when the function is acti-vated. The driver can brake to stop or slow the vehi- cle at any time by depressing the brake pedal. HDC is activated along with Low Speed Con- trol (LSC
18
), which facilitates and improves
traction and control on rough and slippery sur- faces. The system is intended to be used atlow speeds, up to approximately 40 km/h (25mph).
To keep in mind when using HDC
If the function is switched off while drivingon a steep downhill gradient, brakingeffect will be gradually reduced.
HDC can be used in gear positions
D and
R , and in manual gears 1 or 2.
It is not possible to manually shift to thirdgear or higher when HDC is active.
NOTE
When LSC with HDC is activated, the feel of the accelerator pedal and engineresponse will change.
NOTE
This drive mode is not designed to be used for normal street driving.
NOTE
The function is deactivated when driving at high speeds and must be reactivated atlower speeds if so desired.
Related information
Activating and deactivating Hill Descent Control using the function button (p. 434)
Changing drive mode
* (p. 421)
Low Speed Control (p. 432)
All Wheel Drive (AWD) (p. 419)
Activating and deactivating Hill Descent Control using the functionbutton There is a function button for assistance on steep gradients with
Hill Descent Control in
the center display's Function view if the vehi- cle is not equipped with a drive mode controlin the tunnel console.
Selecting Hill Descent Control in the center display's Function view
HDC only works at low speeds.
–Tap the Hill Descent Control button to
activate or deactivate the function.
> An indicator light in the button will illu- minate when the function is activated.
When the engine is switched off, the function will be automatically deactivated.
NOTE
The function is deactivated when driving at high speeds and must be reactivated atlower speeds if so desired.
18 Low Speed Control
Page 478 of 683
||
AUDIO, MEDIA AND INTERNET
* Option/accessory.
476
Categories/Genres
Tap to display the categories available. Tap a category or genre name to display the chan-nels that it contains and then tap a channel tolisten. If you have activated alerts (see the “Alerts” section below) and an alert is activated for anartist, song or team, temporary virtual catego-ries will also be created and displayed. Thechannels currently broadcasting the song,artist or broadcasting a program with theselected team will be listed in a virtual cate-gory.
EPG (Electronic Program Guide)On the center display's Home view, tap EPGfor information about e.g., when a program is being broadcast and its name, description,artist, etc. If no information is currently availa- ble,
No information will be displayed.
AlertsIf this feature has been selected underSiriusXM Settings, the Alerts button will be
displayed on the Home view. To add e.g. an artist's name, song title or a sports team to the list of alerts:
1. Tune to a channel that is broadcasting a song, game, etc., of your choice.
2. Tap the
Alerts button. 3. A pop-up window will be displayed show-
ing a list of alerts (nothing will be dis- played if the selected channel does notsupport the alert function).
4. Select one of the alternatives in list (only one can be selected at a time).
5. The song/artist/team will now be added to the list of alerts. Favorite sports teams canalso be added to the list using “GameAlert” in the SiriusXM satellite radio set-tings.
> When your choice is being broadcaston a channel, you will be informed by a pop-up.
iTunes taggingFrom the center display's Top view, tapSiriusXM Settings. Tap the iTunes Taggingmenu. Tap the iTunes Tagging box to acti-
vate/deactivate this function and tap Close to
return to Home view. Tap Tags List to display
a list of all tagged songs. If the function is activated, the
iTunes tagbutton will be displayed in Home view. If a song is played that you would like to buy inthe iTunes store, tap this button while the song is playing to tag it. If a song with
iTunes
Tagging information is available, the button
will be selectable. Tap the button to tag the song. If you would like to buy a tagged song via iTunes, Tap the iTunes tag button. To buy a song in iTunes, begin by connecting an iPhone/iPod/iPad to the USB port in thetunnel console. The iTunes tagging list willautomatically be transferred to the device andremoved from the list in the vehicle. If thedevice is connected when a song is tagged,the data will automatically be saved in thedevice. To purchase the song, consult theiTunes support page.
Related information
SiriusXM ®
Satellite radio * (p. 474)
Entering characters, letters and words by
hand in the center display (p. 133)
Settings for SiriusXM ®
Satellite radio *
(p. 477)
Settings for SiriusXM ®
Satellite radio *
(p. 477)
Connecting a device via the USB port(p. 490)
Page 510 of 683
AUDIO, MEDIA AND INTERNET
* Option/accessory.
508
Wireless phone charger *
A charging pad for wireless phone charging is located in the tunnel console.
To be able to charge, the phone must have wireless charging (Qi)capability. Phones not equipped witha wireless charging receiver can
often be supplemented with a shell that ena-bles wireless charging.
WARNING
Wireless charging can affect the operation of an implanted pacemaker or other medi-cal devices. If you have one, it is recom-mended to consult with your doctor beforeusing the wireless charging system.
Related information
Phone (p. 499)
Using the wireless phone charger
*
(p. 508)
Certificate for wireless charger (p. 510)
Using the wireless phone charger
*
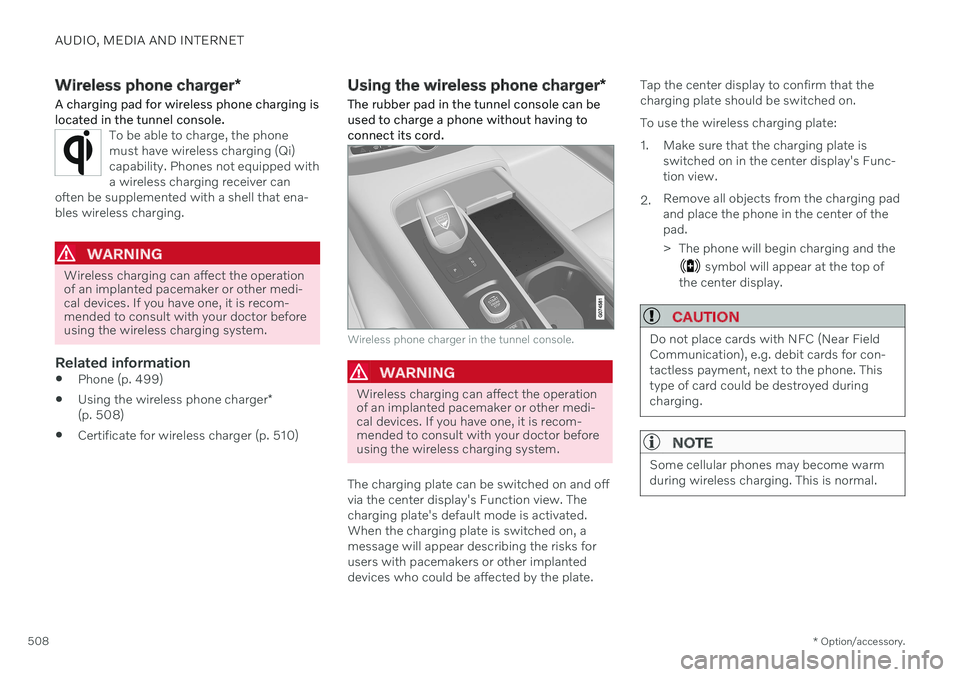
The rubber pad in the tunnel console can be used to charge a phone without having toconnect its cord.
Wireless phone charger in the tunnel console.
WARNING
Wireless charging can affect the operation of an implanted pacemaker or other medi-cal devices. If you have one, it is recom-mended to consult with your doctor beforeusing the wireless charging system.
The charging plate can be switched on and off via the center display's Function view. Thecharging plate's default mode is activated.When the charging plate is switched on, amessage will appear describing the risks forusers with pacemakers or other implanteddevices who could be affected by the plate. Tap the center display to confirm that thecharging plate should be switched on. To use the wireless charging plate:
1. Make sure that the charging plate is
switched on in the center display's Func- tion view.
2. Remove all objects from the charging padand place the phone in the center of thepad.
> The phone will begin charging and the
symbol will appear at the top of
the center display.
CAUTION
Do not place cards with NFC (Near Field Communication), e.g. debit cards for con-tactless payment, next to the phone. Thistype of card could be destroyed duringcharging.
NOTE
Some cellular phones may become warm during wireless charging. This is normal.
Page 566 of 683
LOADING, STORAGE AND PASSENGER COMPARTMENT
* Option/accessory.
564
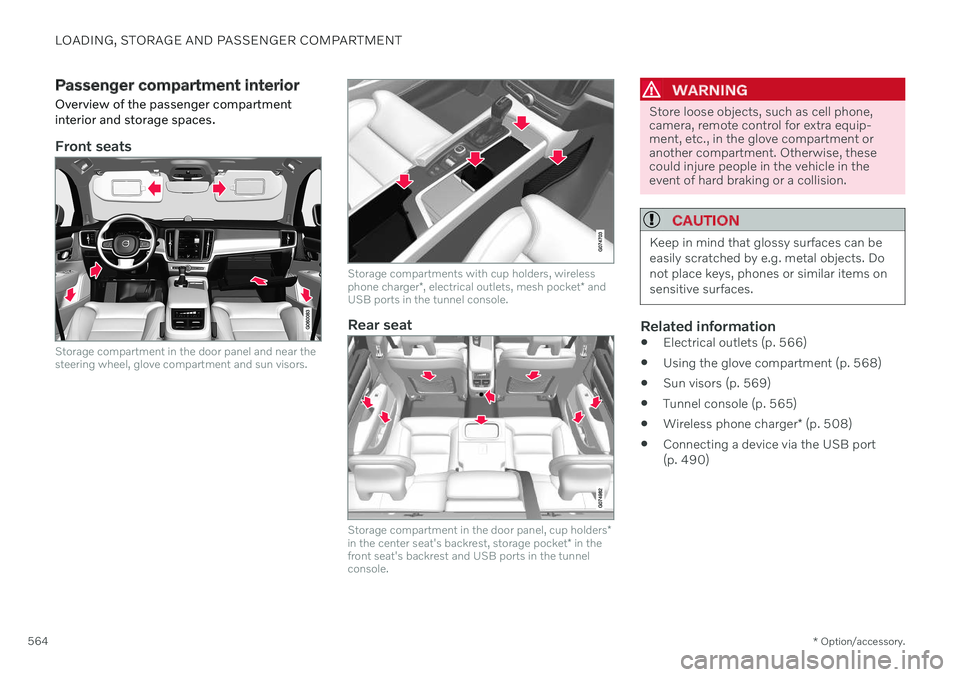
Passenger compartment interior
Overview of the passenger compartment interior and storage spaces.
Front seats
Storage compartment in the door panel and near the steering wheel, glove compartment and sun visors.
Storage compartments with cup holders, wireless phone charger *, electrical outlets, mesh pocket * and
USB ports in the tunnel console.
Rear seat
Storage compartment in the door panel, cup holders *
in the center seat's backrest, storage pocket * in the
front seat's backrest and USB ports in the tunnel console.
WARNING
Store loose objects, such as cell phone, camera, remote control for extra equip-ment, etc., in the glove compartment oranother compartment. Otherwise, thesecould injure people in the vehicle in theevent of hard braking or a collision.
CAUTION
Keep in mind that glossy surfaces can be easily scratched by e.g. metal objects. Donot place keys, phones or similar items onsensitive surfaces.
Related information
Electrical outlets (p. 566)
Using the glove compartment (p. 568)
Sun visors (p. 569)
Tunnel console (p. 565)
Wireless phone charger
* (p. 508)
Connecting a device via the USB port (p. 490)
Page 567 of 683

LOADING, STORAGE AND PASSENGER COMPARTMENT
* Option/accessory.565
Tunnel console
The tunnel console is located between the front seats.
Storage compartment with cover * and 12
V outlet 1
. Press the handle to open/close
the cover.
Storage compartment with cup holder and wireless phone charger *.
Storage compartment and USB port under the armrest.
Climate control panel for the rear seats * or
storage compartment. There is also a USB port underneath.
WARNING
Store loose objects, such as cell phone, camera, remote control for extra equip-ment, etc., in the glove compartment oranother compartment. Otherwise, thesecould injure people in the vehicle in theevent of hard braking or a collision.
CAUTION
Keep in mind that glossy surfaces can be easily scratched by e.g. metal objects. Donot place keys, phones or similar items onsensitive surfaces.
NOTE
One of the sensors for the alarm * is located
under the cup holder in the center console. Avoid placing coins, keys and other metalobjects in the cup holder as this could trig-ger the alarm.
NOTE
The USB port can be used to e.g. charge a cellular phone or tablet. Only the front USBport can be used to play media through thevehicle's speakers.
Related information
Passenger compartment interior (p. 564)
Electrical outlets (p. 566)
Climate system controls (p. 218)
1
If the vehicle does not have a wireless phone charger, the 12 V outlet is located in the center storage compartment.
Page 616 of 683

||
MAINTENANCE AND SERVICE
* Option/accessory.
614
Function Ampere Type
Medium voltage moduleA
10 Micro
– –
MCaseB
–
– Micro
Movement sensor* 5 Micro
–
– Micro
Instrument panel 5 Micro
Center console buttons5 Micro
Sun sensor5 Micro
–– Micro
–– Micro
Steering wheel module 5 Micro
Module for start knob and parking brake controls5 Micro
Heated steering wheel* module 15 Micro
–
– Micro
–– Micro
–– Micro
Rear lamp housing control modules15 Micro
Page 617 of 683

MAINTENANCE AND SERVICE
}}
* Option/accessory.615
Function Ampere Type
Climate system control module 10 Micro
– – Micro
Data link connector OBD-II10 Micro
Center display 5 Micro
Climate system blower module (front)40
MCaseB
USB HUB
5 Micro
Instrument lighting; Interior lighting; Rearview mirror auto-dim function*; Rain and light sensors *; Rear tunnel console
keypad, rear seat *; Power front seats *; Rear door control panels; Climate system blower module left/right 7.5 Micro
Control module for driver support functions
5 Micro
Panoramic roof with sun curtain* 20 Micro
Head-up display
* 5 Micro
Passenger compartment lighting
5 Micro
Wireless charging pad5 Micro
Ceiling console display (seat belt reminder/front passenger side airbag indicator)5 Micro
–– Micro
–– Micro
–– Micro