2021 VOLKSWAGEN TRANSPORTER child restraint
[x] Cancel search: child restraintPage 101 of 486

Installing child seats with ISOFIX ISOFIX/i-
Size
The location of the ISO FIX anchor points is shown either by a symbol or by a label marked "ISOFIX" 79.
• Observe the warnings 97, Basic infor-mation on fitting and using child seats.
• Push the attachment arms on the child seat into the ISOFIX anchor points 79 as shown by the arrows. The child seat must click and audibly securely into place.
• Pull on both sides of the child seat to check whether the seat has clicked properly into place.
• If the child seat is fitted with a support foot, the foot must sit firmly on the floor of the vehicle.
Using insert guides
If the child seat anchor points are not directly ac-cessible, insert guides make fitting and removing the child seat easier. First attach the insert guides to the anchor points. Then secure the child seat as per the installation guide.
CD
Avoid damage to the upholstery and seat cush-ions caused by the Insert guides.
• Always pull the insert guides off the anchor points before folding the rear seat forward, or when removing the child seat.
Fig. 80 Attached upper strap (top tether) on rear of backrest of 3-seat or 2-seat bench [ID.
87E-0783
Fig. 81 Attached upper strap (top tether) on rear of backrest of single seat.
r-1'11 First read and observe the Introductory L-lcJ.I Information and safety warnings & on page 96.
Child seats with "universal" approval must be se-cured with an upper strap (top tether) in addition to the ISOFIX anchor points.
Only secure the strap to the top tether anchor rings.
• Observe the warnings 97, Basic infor-mation on fitting and using child seats.
• Fold down the head restraint located behind the child seat, and stow it securely in the vehicle 61.
• Guide the upper strap (top tether) of the child seat back behind the backrest. )I>
Sitting correctly and safely 1101
Page 102 of 486
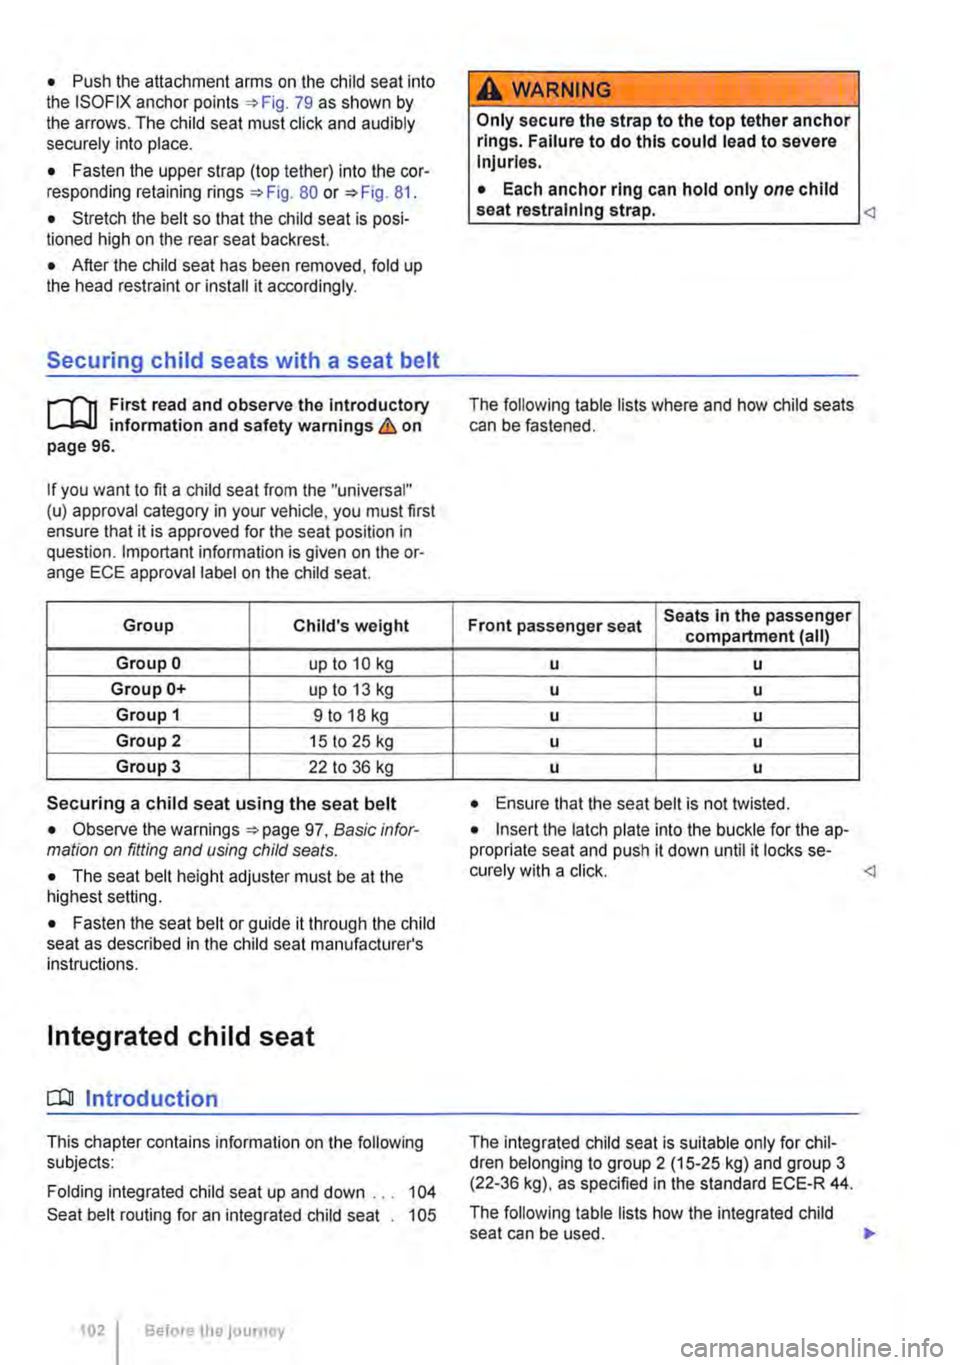
• Push the attachment arms on the child seat into the ISOFIX anchor points 79 as shown by the arrows. The child seat must click and audibly securely into place.
• Fasten the upper strap (top tether) into the cor-responding retaining rings 80 or 81.
• Stretch the belt so that the child seat is posi-tioned high on the rear seat backrest.
• After the child seat has been removed, fold up the head restraint or install it accordingly.
Securing child seats with a seat belt
r-111 First read and observe the Introductory L--lo:oU information and safety warnings & on page 96.
If you want to fit a child seat from the "universal" (u) approval category in your vehicle. you must first ensure that it is approved for the seat position in question. Important information is given on the or-ange ECE approval label on the child seat.
Group Child's weight
Group 0 up to 10 kg
Group 0+ up to 13 kg
Group 1 9 to 18 kg
Group 2 15 to 25 kg
Group 3 22 to 36 kg
Securing a child seat using the seat belt
• Observe the warnings 97, Basic infor-mation on fitting and using child seals.
• The seat belt height adjuster must be at the highest setting.
• Fasten the seat belt or guide it through the child seat as described in the child seat manufacturer's instructions.
Integrated child seat
o::n Introduction
This chapter contains information on the following subjects:
Folding integrated child seat up and down ... 104
Seat belt routing for an integrated child seat . 105
102 Before the journey
A WARNING
Only secure the strap to the top tether anchor rings. Failure to do this could lead to severe Injuries.
• Each anchor ring can hold only one child seat restraining strap.
Front passenger seat Seats In the passenger compartment (all)
u u
u u
u u
u u
u u
• Ensure that the seat belt is not twisted.
• Insert the latch plate into the buckle for the ap-propriate seat and push it down until it locks se-curely with a click.
The following table lists how the integrated child seat can be used. .,..
Page 103 of 486
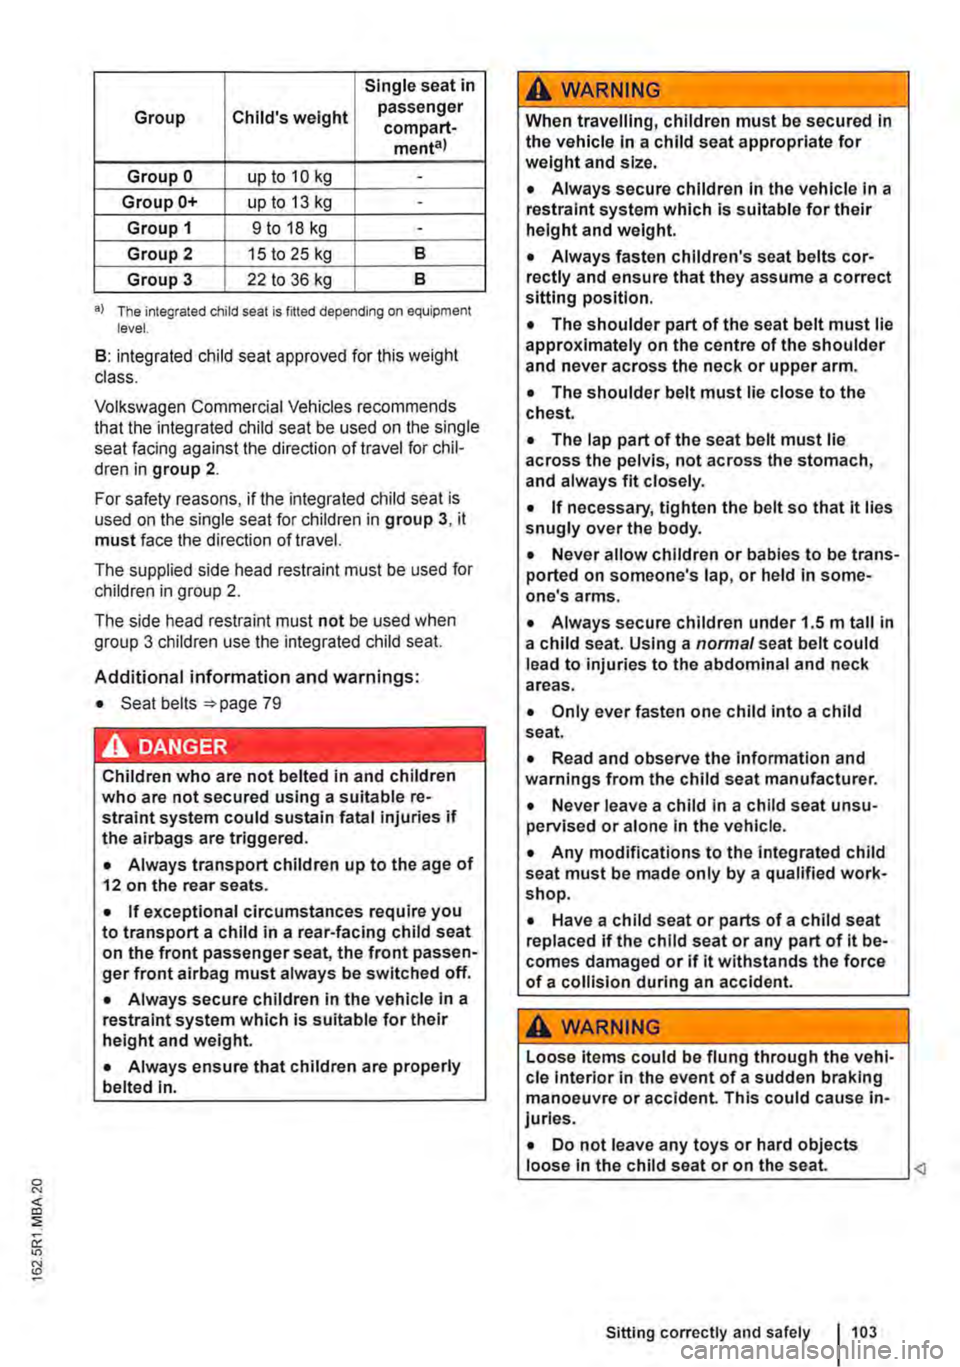
Single seat in
Group Child's weight passenger compart-menta)
Group 0 up to 10 kg -
Group 0+ up to 13 kg -
Group 1 9 to 18 kg -
Group 2 15 to 25 kg 8
Group 3 22 to 36 kg 8
a) The integrated child seat is fijted depending on equipment level.
8: integrated child seat approved for this weight class.
Volkswagen Commercial Vehicles recommends that the integrated child seat be used on the single seat facing against the direction of travel for chil-dren in group 2.
For safety reasons, if the integrated child seat is used on the single seat for children in group 3, it must face the direction of travel.
The supplied side head restraint must be used for children in group 2.
The side head restraint must not be used when group 3 children use the integrated child seat.
Additional information and warnings:
• Seat belts =:. page 79
Children who are not belted in and children who are not secured using a suitable re-straint system could sustain fatal injuries if the airbags are triggered.
• Always transport children up to the age of 12 on the rear seats.
• If exceptional circumstances require you to transport a child in a rear-facing child seat on the front passenger seat, the front passen-ger front airbag must always be switched off.
• Always secure children in the vehicle in a restraint system which is suitable for their height and weight.
• Always ensure that children are properly belted In.
A WARNING
When travelling, children must be secured In the vehicle In a child seat appropriate for weight and size.
• Always secure children In the vehicle in a restraint system which is suitable for their height and weight.
• Always fasten children's seat belts cor-rectly and ensure that they assume a correct sitting position.
• The shoulder part of the seat belt must lie approximately on the centre of the shoulder and never across the neck or upper arm.
• The shoulder belt must lie close to the chest.
• The lap part of the seat belt must lie across the pelvis, not across the stomach, and always fit closely.
• If necessary, tighten the belt so that it lies snugly over the body.
• Never allow children or babies to be trans-ported on someone's lap, or held In some-one's arms.
• Always secure children under 1.5 m tall in a child seat. Using a normal seat belt could lead to injuries to the abdominal and neck areas.
• Only ever fasten one child into a child seat.
• Read and observe the information and warnings from the child seat manufacturer.
• Never leave a child in a child seat unsu-pervised or alone In the vehicle.
• Any modifications to the integrated child seat must be made only by a qualified work-shop.
• Have a child seat or parts of a child seat replaced if the child seat or any part of it be-comes damaged or if it withstands the force of a collision during an accident.
A WARNING
Loose items could be flung through the vehi-cle interior in the event of a sudden braking manoeuvre or accident. This could cause in-juries.
• Do not leave any toys or hard objects loose in the child seat or on the seat. <1
Sitting correctly and safely 103
Page 104 of 486

Folding integrated child seat up and down
Fig. 82 Fold out the seat padding of the integrated child seat.
Fig. 83 Fit the lateral head restraint for the integrated child seat for goup 2 children.
r"'1'1t First read and observe the Introductory information and safety warnings & on page 102.
Folding out the seat cushion
• Use the release lever 82 Q) to pull the seat cushion forwards.
• Push the seat cushion to the rear in the direc-tion of the arrow@ until it engages in place.
Fitting the side head restraints
The supplied side head restraint must be used for children in group 2.
The side head restraint must not be used when group 3 children use the integrated child seat.
• Push the head restraint up.
• Hold the side head restraint in such a way that the angled part of the restraint is pointing down.
• Push the lever 83 ®in position@.
104 Before the journey
• Push the slots on the side head restraint Q) on-to the rods of the head restraint in the direction of arrow@.
• The side head restraints must click into place. The red marking should no longer be visible@ and the lever@ must be in position @.
• Push the head restraint as far down as possible 61.
Folding the seat cushion back
• Use the release lever 82 Q) to pull the seat cushion against the direction of arrow @.
• Place your hand on the middle of the seat cushion and push it down until it engages securely
Removing the side head restraints
• Push the head restraint up.
• Push the lever 83 ® to position ® to re-move the side head restraint.
• Lower the head restraint. ...
Page 181 of 486
anchor points should be fitted to the vehicle floor by a specialist workshop in accordance with Volks-
wagen AG guidelines.
These additional seats must also have seat belt anchor points and suitable seat belts.
The Volkswagen Commercial Vehicles dealership can provide you with more Information on retrofit-ting seats.
Additional Information and warnings:
• Sitting correctly and safely =>page 61
• Child seats (accessories) =>page 96
A WARNING
Assuming an Incorrect sitting position In the vehicle can Increase the risk of severe or fa-tal injuries during a sudden driving or brak-Ing manoeuvre, In the event of a collision or accident, or If the alrbags are triggered.
• The number of vehicle occupants must never exceed the number of seats with seat belts In the vehicle.
• All vehicle occupants must assume a cor-rect sitting position before setting off and maintain this position throughout the trip. This also applies to the fastening of seat belts.
• Always secure children In the vehicle in an authorised restraint system which is suita-ble for their height and weight=> page 61.
• Always keep your feet In the footwell while the vehicle is In motion. Never place your feet on the seat or dash panel, for example, and never ride with your feet out the window. When you are sat like this, the alrbag and seat belt cannot provide optimal protection and could actually Increase the risk of injury during an accident.
A WARNING
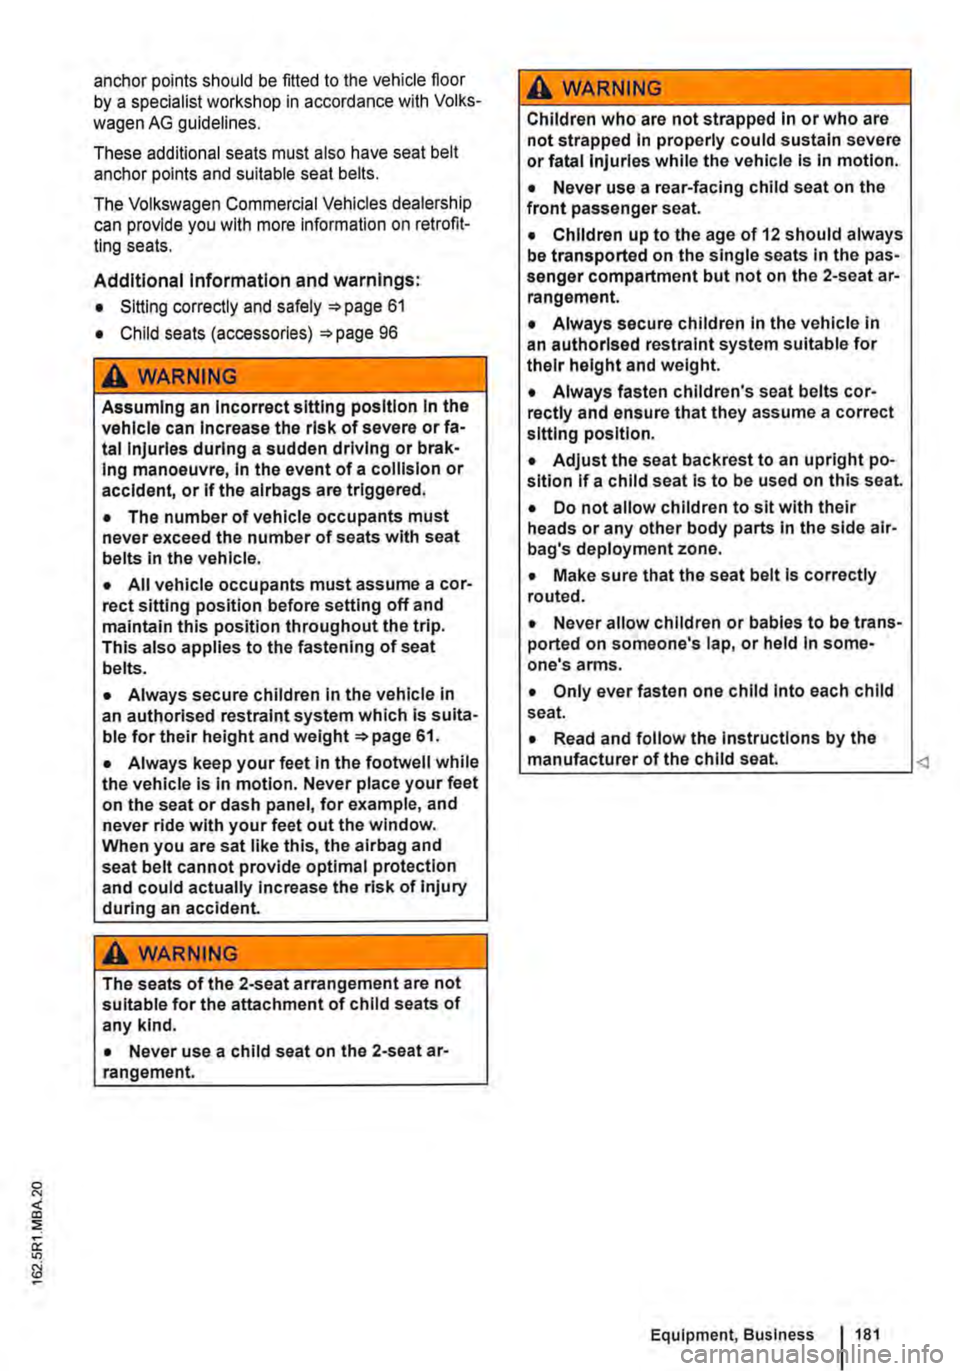
The seats of the 2-seat arrangement are not suitable for the attachment of child seats of any kind.
• Never use a child seat on the 2-seat ar-rangement.
A WARNING
Children who are not strapped In or who are not strapped In properly could sustain severe or fatal injuries while the vehicle Is In motion.
• Never use a rear-facing child seat on the front passenger seat.
• Children up to the age of 12 should always be transported on the single seats In the pas-senger compartment but not on the 2-seat ar-rangement.
• Always secure children In the vehicle In an authorised restraint system suitable for their height and weight.
• Always fasten children's seat belts cor-rectly and ensure that they assume a correct sitting position.
• Adjust the seat backrest to an upright po-sition If a child seat Is to be used on this seat.
• Do not allow children to sit with their heads or any other body parts In the side air-bag's deployment zone.
• Make sure that the seat belt Is correctly routed.
• Never allow children or babies to be trans-ported on someone's lap, or held In some-one's arms.
• Only ever fasten one child Into each child seat.
• Read and follow the Instructions by the manufacturer of the child seat.
Page 182 of 486
Seat functions, rear, Business
ct:lJ Introduction
This chapter contains information on the following subjects:
Controls of the 2-seat arrangement. . . . . . . . . 183
Seat heater in the 2-seat arrangement . . . . . . 183
Armrests . . . . . . . . . . . . .. . . . .. .. .. . .. .. .. 184
Moving the 2-seat arrangement . . . . . . . . . . . 185
Centre console of the 2-seat arrangement . . 185
Refrigerator box . . . . . . . . . . . . . . . . . . . . . . . 186
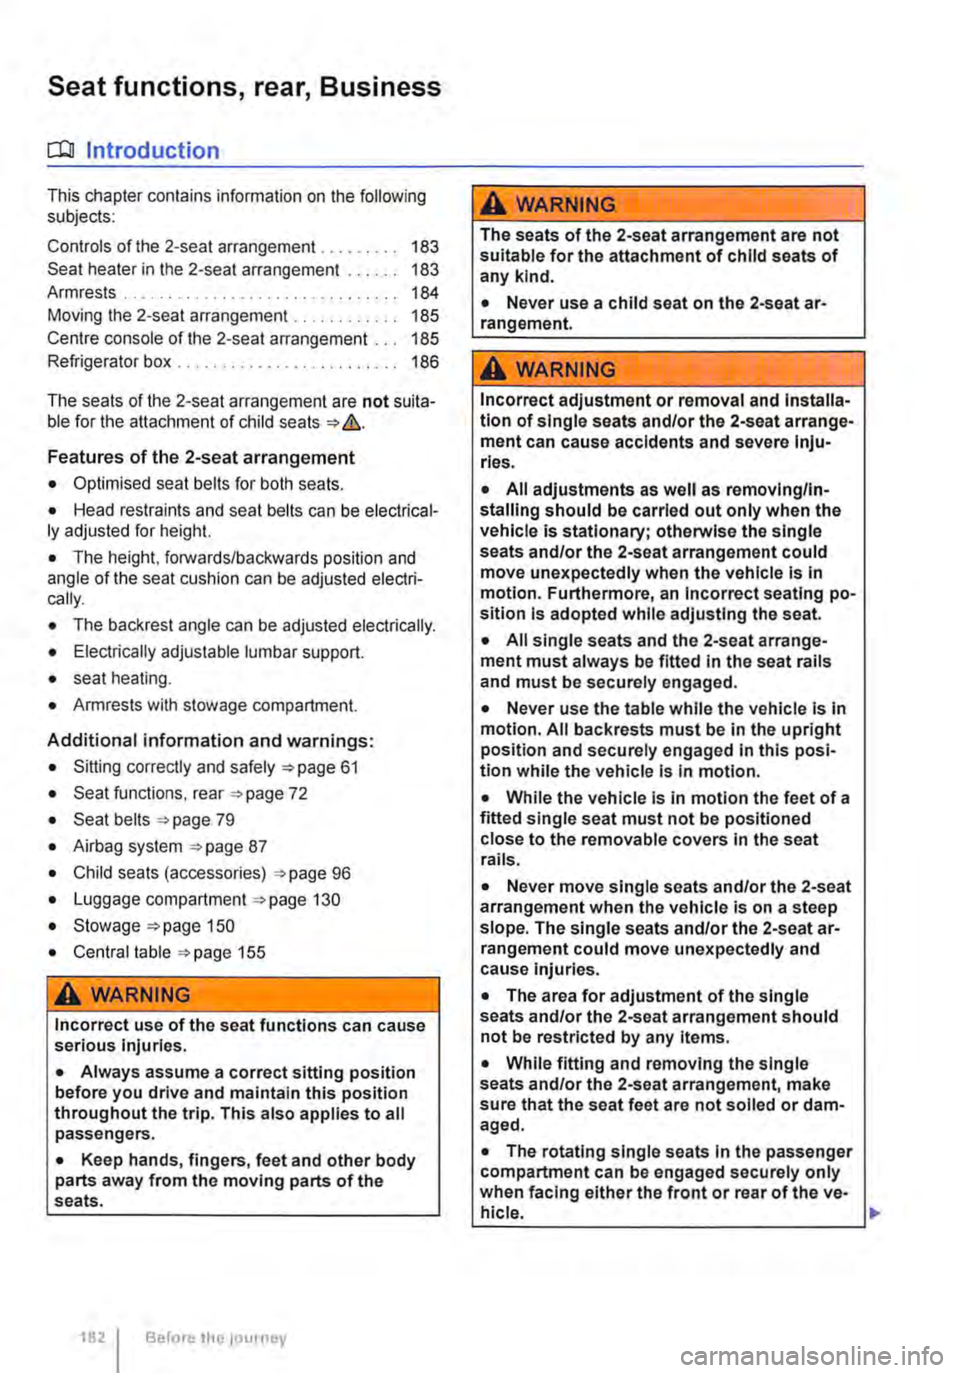
The seats of the 2-seat arrangement are not suita-ble for the attachment of child seats => &.
Features of the 2-seat arrangement
• Optimised seat belts for both seats.
• Head restraints and seat belts can be electrical-ly adjusted for height.
• The height, forwards/backwards position and angle of the seat cushion can be adjusted electri-cally.
• The backrest angle can be adjusted electrically.
• Electrically adjustable lumbar support.
• seat heating.
• Armrests with stowage compartment.
Additional information and warnings:
• Sitting correctly and safely =>page 61
• Seat functions. rear =>page 72
• Seat belts => page 79
• Airbag system =>page 87
• Child seats (accessories) =>page 96
• Luggage compartment =>page 130
• Stowage =>page 150
• Central table =>page 155
A WARNING
Incorrect use of the seat functions can cause serious Injuries.
• Always assume a correct sitting position before you drive and maintain this position throughout the trip. This also applies to all passengers.
• Keep hands, fingers, feet and other body parts away from the moving parts of the seats.
1821 Before the journey
A WARNING
The seats of the 2-seat arrangement are not suitable for the attachment of child seats of any kind.
• Never use a child seat on the 2-seat ar-rangement.
A WARNING
Incorrect adjustment or removal and Installa-tion of single seats and/or the 2-seat arrange-ment can cause accidents and severe Inju-ries.
• All adjustments as well as removing/In-stalling should be carried out only when the vehicle Is stationary; otherwise the single seats and/or the 2-seat arrangement could move unexpectedly when the vehicle Is in motion. Furthermore, an Incorrect seating po-sition Is adopted while adjusting the seat.
• All single seats and the 2-seat arrange-ment must always be fitted In the seat rails and must be securely engaged.
• Never use the table while the vehicle is in motion. All backrests must be In the upright position and securely engaged In this posi-tion while the vehicle Is In motion.
• While the vehicle Is In motion the feet of a fitted single seat must not be positioned close to the removable covers In the seat rails.
• Never move single seats and/or the 2-seat arrangement when the vehicle is on a steep slope. The single seats and/or the 2-seat ar-rangement could move unexpectedly and cause Injuries.
• The area for adjustment of the single seats and/or the 2-seat arrangement should not be restricted by any Items.
• While fitting and removing the single seats and/or the 2-seat arrangement, make sure that the seat feet are not soiled or dam-aged.
• The rotating single seats In the passenger compartment can be engaged securely only when facing either the front or rear of the ve-hicle. .,.
Page 183 of 486
A WARNING (Continued)
• Never use child seats In the groups 0 or 0+ on single seats that face the rear of the vehicle.
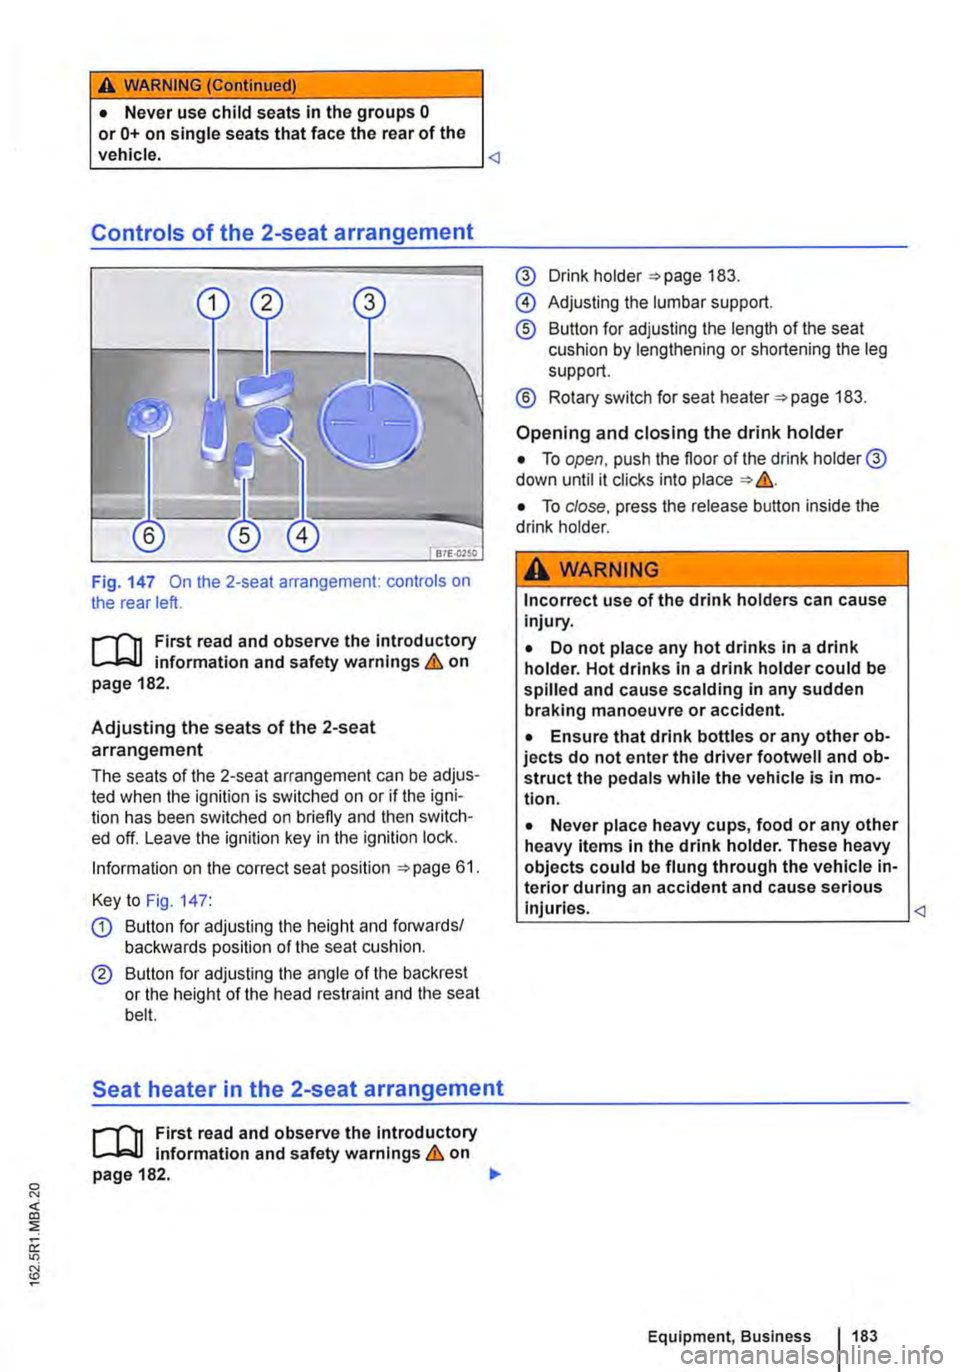
Fig. 147 On the 2-seat arrangement: controls on the rear left.
1"'1'11 First read and observe the Introductory L-J.:.U information and safety warnings & on page 182.
Adjusting the seats of the 2-seat
arrangement
The seats of the 2-seat arrangement can be adjus-ted when the ignition is switched on or if the igni-tion has been switched on briefly and then switch-ed off. Leave the ignition key in the ignition lock.
Information on the correct seat position 61.
Key to Fig. 147:
Q) Button for adjusting the height and forwards/ backwards position of the seat cushion.
® Button for adjusting the angle of the backrest or the height of the head restraint and the seat bell.
Seat heater in the 2-seat arrangement
1"'1'11 First read and observe the Introductory L-J.:.U Information and safety warnings & on page 182. .,..
@ Drink holder 183.
@ Adjusting the lumbar support.
® Button for adjusting the length of the seat cushion by lengthening or shortening the leg support.
® Rotary switch for seat heater 183.
Opening and closing the drink holder
• To open, push the floor of the drink holder@ down until it clicks into place &.
• To close. press the release button inside the drink holder.
A WARNING
Incorrect use of the drink holders can cause Injury.
• Do not place any hot drinks in a drink holder. Hot drinks In a drink holder could be spilled and cause scalding in any sudden braking manoeuvre or accident.
• Ensure that drink bottles or any other ob-jects do not enter the driver footwell and ob-struct the pedals while the vehicle is in mo-tion.
• Never place heavy cups, food or any other heavy items in the drink holder. These heavy objects could be flung through the vehicle in-terior during an accident and cause serious Injuries.
Page 219 of 486
Opening the manual pop-up roof
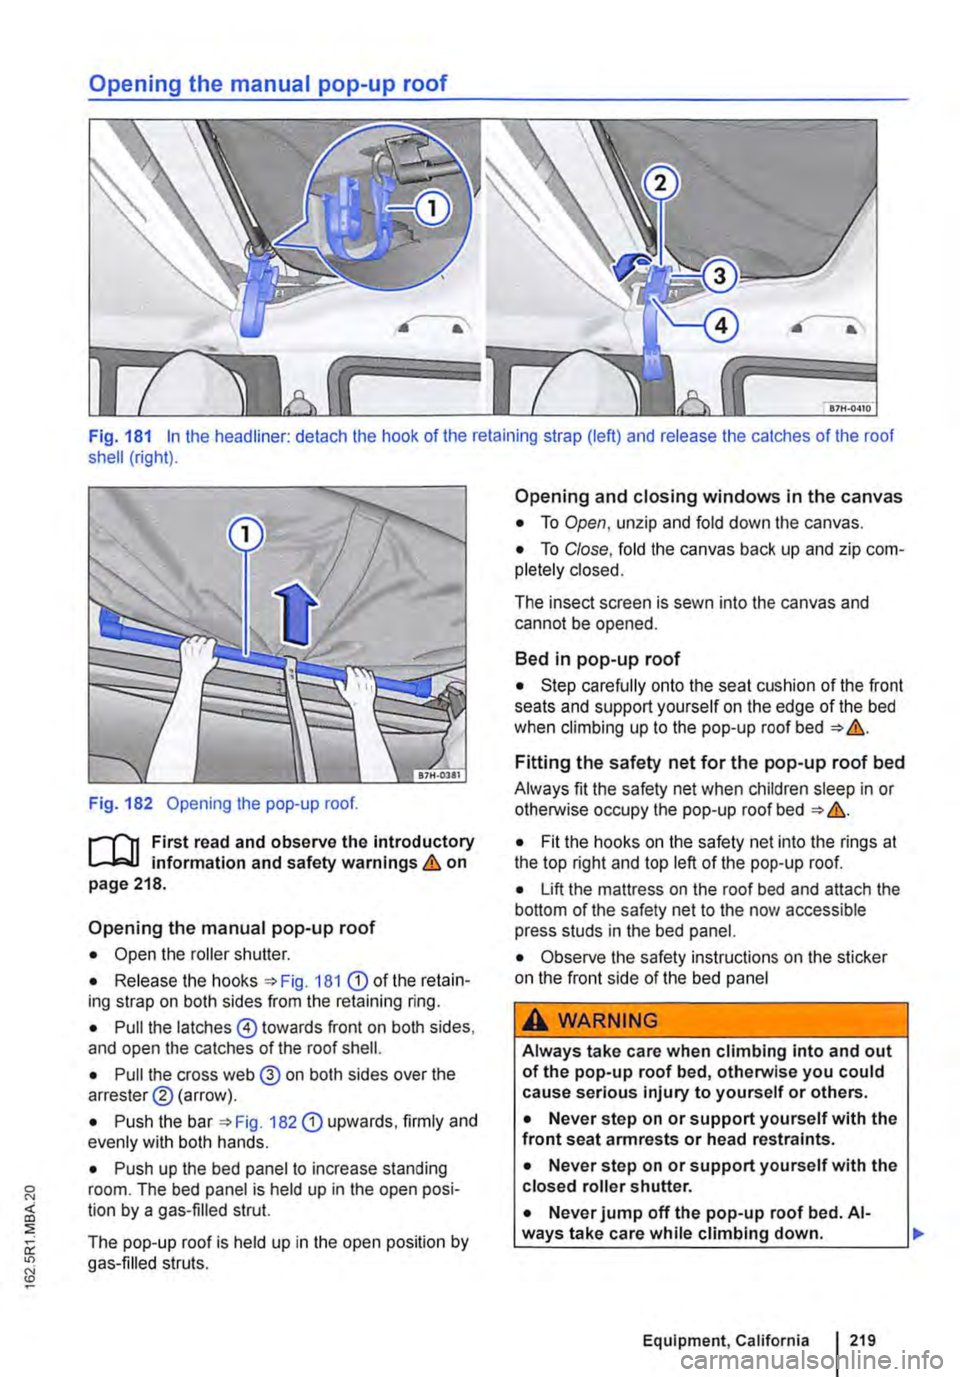
Fig. 181 In the headliner: detach the hook of the retaining strap (left) and release the catches of the roof shell (right).
Fig. 182 Opening the pop-up roof.
r""'('n First read and observe the introductory L-W.I information and safety warnings & on page 218.
Opening the manual pop-up roof
• Open the roller shutter.
• Release the hooks =>Fig. 181 CD of the retain-ing strap on both sides from the retaining ring.
• Pull the latches @) towards front on both sides, and open the catches of the roof shell.
• Pull the cross web @ on both sides over the arrester® (arrow).
• Push the bar 182 CD upwards, firmly and evenly with both hands.
• Push up the bed panel to increase standing room. The bed panel is held up in the open posi-tion by a gas-filled strut.
The pop-up roof is held up in the open position by gas-filled struts.
Opening and closing windows in the canvas
• To Open, unzip and fold down the canvas.
• To Close, fold the canvas back up and zip com-pletely closed.
The insect screen is sewn into the canvas and cannot be opened.
Bed in pop-up roof
• Step carefully onto the seat cushion of the front seats and support yourself on the edge of the bed when climbing up to the pop-up roof bed => &.
Fitting the safety net for the pop-up roof bed
Always fit the safety net when children sleep in or otherwise occupy the pop-up roof bed => &.
• Fit the hooks on the safety net into the rings at the top right and top left of the pop-up roof.
• Lift the mattress on the roof bed and attach the bottom of the safety net to the now accessible press studs in the bed panel.
• Observe the safety instructions on the sticker on the front side of the bed panel
aAWARNING
Always take care when climbing into and out of the pop-up roof bed, otherwise you could cause serious injury to yourself or others.
• Never step on or support yourself with the front seat armrests or head restraints.
• Never step on or support yourself with the closed roller shutter.
• Never jump off the pop-up roof bed. Al-ways take care while climbing down. Ill>
Equipment, California I 219