2021 TOYOTA PROACE EV check engine light
[x] Cancel search: check engine lightPage 154 of 360
154
On starting, the instrument panel lights up and the power indicator needle performs one sweep then moves to the "neutral" position. The steering column automatically unlocks (you may hear a sound and feel the steering wheel move).
Switching off
► If using a conventional or remote control key, turn the key fully to position 1 (Stop).► If using Smart Entry & Start, press the "START/STOP" button.Before exiting the vehicle, check that:– The drive selector is in mode P.– The READY indicator lamp is off.
NOTIC E
The drive selector moves automatically to mode P when the motor is switched off or when the driver's door is opened.
NOTIC E
If the driver's door is opened while the required conditions for stopping are not satisfied, an audible signal is emitted, accompanied by the display of a warning message.
Special case with Smart
Entry & Start
Switching on the ignition without
starting the engine
With the Smart Entry & Start system’s electronic key inside the vehicle, pressing the "START/STOP" button, with no action on the pedals, allows the ignition to be switched on.► Pressing this button again switches off the ignition and allows the vehicle to be locked.
Back-up starting
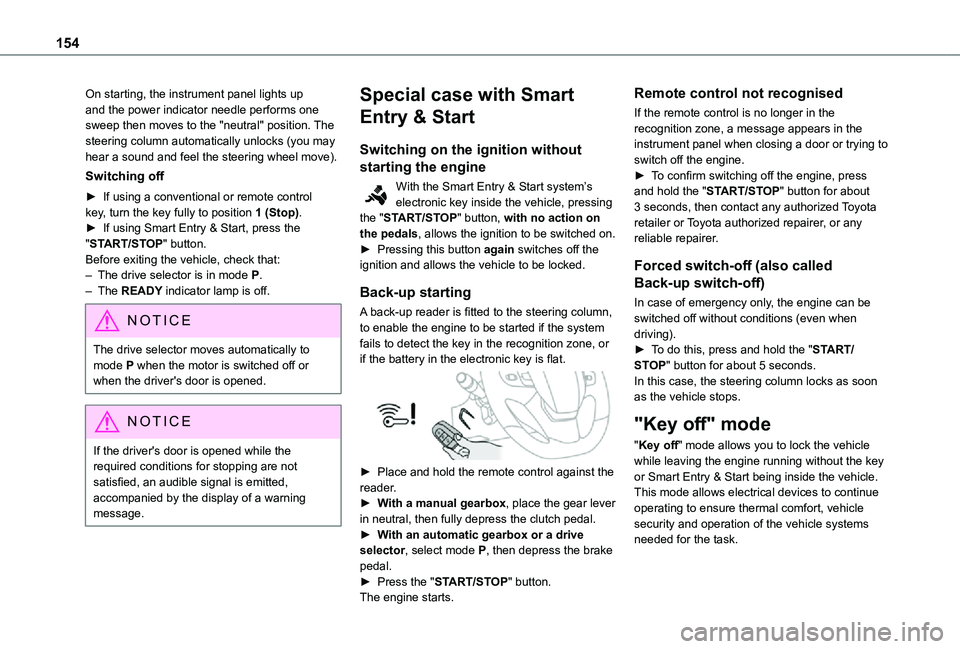
A back-up reader is fitted to the steering column, to enable the engine to be started if the system fails to detect the key in the recognition zone, or if the battery in the electronic key is flat.
► Place and hold the remote control against the reader.► With a manual gearbox, place the gear lever in neutral, then fully depress the clutch pedal.► With an automatic gearbox or a drive selector, select mode P, then depress the brake pedal.► Press the "START/STOP" button.The engine starts.
Remote control not recognised
If the remote control is no longer in the recognition zone, a message appears in the instrument panel when closing a door or trying to switch off the engine.► To confirm switching off the engine, press and hold the "START/STOP" button for about 3 seconds, then contact any authorized Toyota retailer or Toyota authorized repairer, or any reliable repairer.
Forced switch-off (also called
Back-up switch-off)
In case of emergency only, the engine can be switched off without conditions (even when driving).► To do this, press and hold the "START/STOP" button for about 5 seconds.In this case, the steering column locks as soon as the vehicle stops.
"Key off" mode
"Key off" mode allows you to lock the vehicle while leaving the engine running without the key or Smart Entry & Start being inside the vehicle.This mode allows electrical devices to continue operating to ensure thermal comfort, vehicle security and operation of the vehicle systems needed for the task.
Page 159 of 360
159
Driving
6
WARNI NG
If your vehicle has an automatic gearbox and you have to move off on a steep slope (uphill or downhill) with a loaded vehicle, press the brake pedal, select position D, release the parking brake then release the brake pedal.
Operation
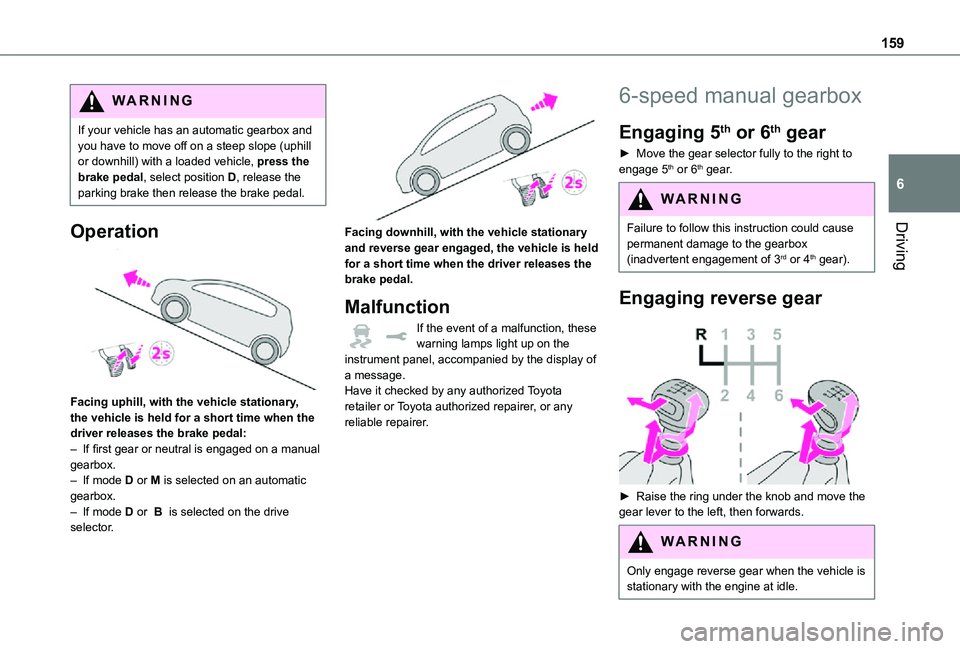
Facing uphill, with the vehicle stationary, the vehicle is held for a short time when the driver releases the brake pedal:– If first gear or neutral is engaged on a manual gearbox.– If mode D or M is selected on an automatic gearbox.– If mode D or B is selected on the drive selector.
Facing downhill, with the vehicle stationary and reverse gear engaged, the vehicle is held for a short time when the driver releases the brake pedal.
Malfunction
If the event of a malfunction, these warning lamps light up on the instrument panel, accompanied by the display of a message.Have it checked by any authorized Toyota retailer or Toyota authorized repairer, or any reliable repairer.
6-speed manual gearbox
Engaging 5th or 6th gear
► Move the gear selector fully to the right to engage 5th or 6th gear.
WARNI NG
Failure to follow this instruction could cause
permanent damage to the gearbox (inadvertent engagement of 3rd or 4th gear).
Engaging reverse gear
► Raise the ring under the knob and move the gear lever to the left, then forwards.
WARNI NG
Only engage reverse gear when the vehicle is stationary with the engine at idle.
Page 164 of 360
164
WARNI NG
In all circumstances, ensure that the selector is in position P before leaving your vehicle.
Malfunction
When the ignition is on, a message appears on the instrument panel to indicate a fault with the gearbox.In this case, the gearbox goes into back-up mode and is locked in 3rd gear. You may feel a significant jolt (without risk to the gearbox) when changing from P to R and from N to R.Do not exceed 62 mph (100 km/h), local speed restrictions permitting.Have it checked by any authorized Toyota retailer or Toyota authorized repairer, or any reliable repairer.
WARNI NG
There is a risk of damaging the gearbox:– If the accelerator and brake pedals are depressed simultaneously.– In the event of a battery failure, forcing the selector from position P to another position.
WARNI NG
If your vehicle has an automatic gearbox, do not try to start the engine by pushing the vehicle.
Drive selector (Electric)
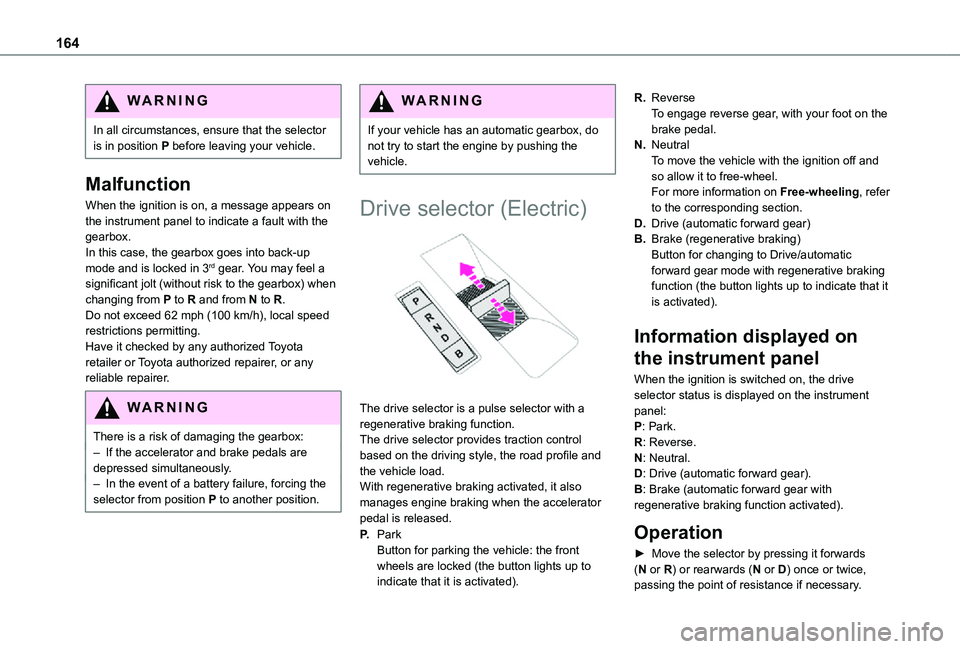
The drive selector is a pulse selector with a regenerative braking function.The drive selector provides traction control based on the driving style, the road profile and the vehicle load.With regenerative braking activated, it also manages engine braking when the accelerator pedal is released.
P.ParkButton for parking the vehicle: the front wheels are locked (the button lights up to indicate that it is activated).
R.ReverseTo engage reverse gear, with your foot on the brake pedal.
N.NeutralTo move the vehicle with the ignition off and so allow it to free-wheel.For more information on Free-wheeling, refer to the corresponding section.
D.Drive (automatic forward gear)
B.Brake (regenerative braking)Button for changing to Drive/automatic forward gear mode with regenerative braking function (the button lights up to indicate that it is activated).
Information displayed on
the instrument panel
When the ignition is switched on, the drive selector status is displayed on the instrument panel:P: Park.R: Reverse.
N: Neutral.D: Drive (automatic forward gear).B: Brake (automatic forward gear with regenerative braking function activated).
Operation
► Move the selector by pressing it forwards (N or R) or rearwards (N or D) once or twice, passing the point of resistance if necessary.
Page 185 of 360
185
Driving
6
Malfunction
In the event of a malfunction with the adaptive cruise control, you will be alerted by an audible signal and the display of the message "Driving aid functions fault".Have it checked by any authorized Toyota retailer or Toyota authorized repairer, or any reliable repairer.
Active Safety Brake with
Collision Risk Alert and
Intelligent emergency
braking assistance
WARNI NG
Refer to the General recommendations on the use of driving and manoeuvring aids.
This system:– warns the driver that their vehicle is at risk of collision with the vehicle in front.– reduces the vehicle's speed to avoid a collision or limit its severity.This system is comprised of three functions:– Collision Risk Alert,
– Intelligent emergency braking assistance (iEBA).– Active Safety Brake (automatic emergency braking).
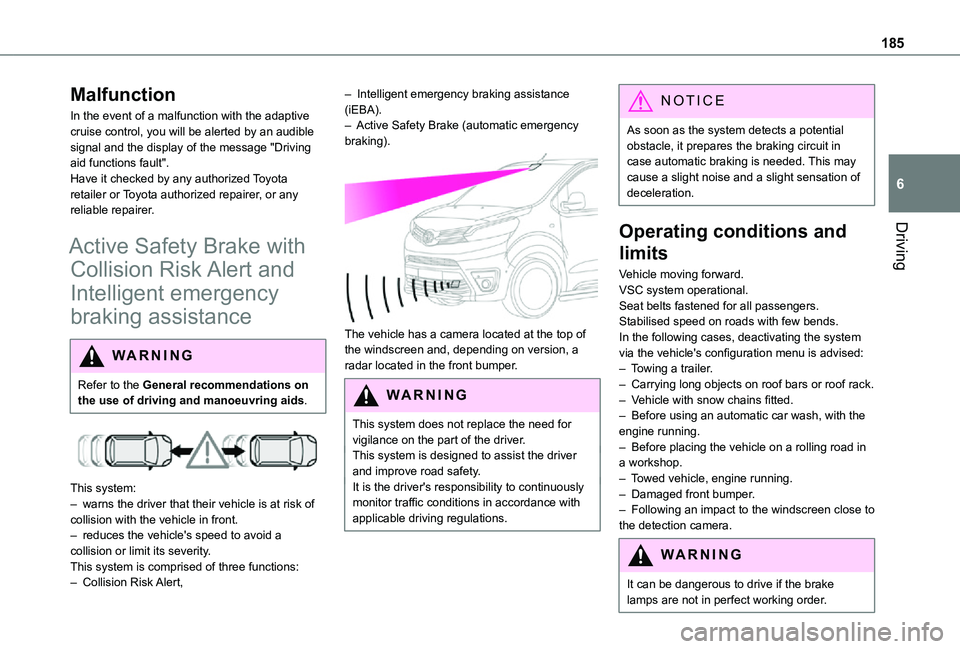
The vehicle has a camera located at the top of the windscreen and, depending on version, a radar located in the front bumper.
W ARNI NG
This system does not replace the need for vigilance on the part of the driver.This system is designed to assist the driver and improve road safety.It is the driver's responsibility to continuously monitor traffic conditions in accordance with applicable driving regulations.
NOTIC E
As soon as the system detects a potential obstacle, it prepares the braking circuit in case automatic braking is needed. This may cause a slight noise and a slight sensation of deceleration.
Operating conditions and
limits
Vehicle moving forward.VSC system operational.Seat belts fastened for all passengers.Stabilised speed on roads with few bends.In the following cases, deactivating the system via the vehicle's configuration menu is advised:– Towing a trailer.– Carrying long objects on roof bars or roof rack.– Vehicle with snow chains fitted.– Before using an automatic car wash, with the engine running.
– Before placing the vehicle on a rolling road in a workshop.– Towed vehicle, engine running.– Damaged front bumper.– Following an impact to the windscreen close to the detection camera.
WARNI NG
It can be dangerous to drive if the brake lamps are not in perfect working order.
Page 187 of 360
187
Driving
6
Operation
The system operates subject to the following conditions:– The vehicle's speed does not exceed 37 mph (60 km/h) when a pedestrian is detected.– The vehicle's speed does not exceed 50 mph (80 km/h) when a stationary vehicle or a cyclist is detected.– The vehicle's speed is between 6 mph and 53 mph (10 km/h and 85 km/h) (versions with camera only) or 87 mph (140 km/h) (versions with camera and radar) when a moving vehicle is detected.This warning lamp flashes (for approximately 10 seconds) as soon as the function applies the vehicle’s brakes.With an automatic gearbox, in the event of automatic emergency braking bringing the vehicle to a complete stop, keep the brake pedal depressed to prevent the vehicle from moving off again.With a manual gearbox, in the event of automatic emergency braking bringing the vehicle to a
complete stop, the engine may stall.
NOTIC E
The driver can maintain control of the vehicle at any time by firmly turning the steering wheel and/or firmly depressing the accelerator pedal.
NOTIC E
Operation of the function may be felt by slight vibration in the brake pedal.If the vehicle comes to a complete stop, automatic braking is maintained for 1 to 2 seconds.
Deactivation/Activation
By default, the system is automatically activated at every engine start.It is set via the vehicle configuration menu.Deactivation of the system is signalled by the illumination of this warning lamp, accompanied by the display of a message.
Malfunction
In the event of a malfunction, this warning lamp comes on on the instrument panel, accompanied by the display of a message and an audible signal.
Have it checked by any authorized Toyota retailer or Toyota authorized repairer, or any reliable repairer.If these warning lamps come on after the engine has been switched off and then restarted, contact any authorized Toyota retailer or Toyota authorized repairer, or any reliable repairer to have the system checked.
These warning lamps light up on the instrument panel to indicate that the driver's and/or front passenger's seat belt is not fastened (depending on version).
Lane departure warning
system
WARNI NG
Refer to the General recommendations on the use of driving and manoeuvring aids.
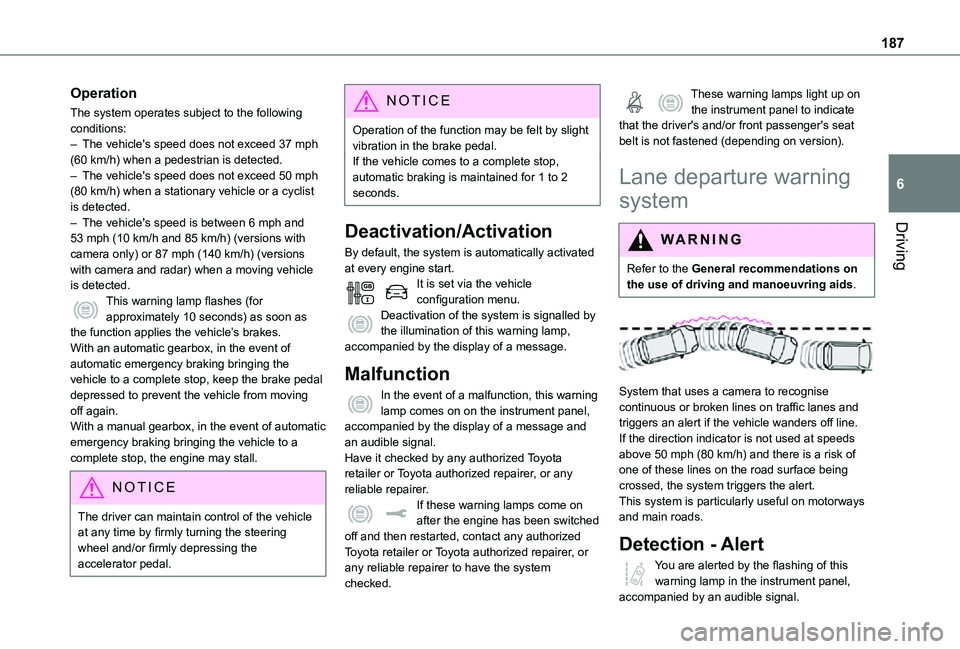
System that uses a camera to recognise continuous or broken lines on traffic lanes and triggers an alert if the vehicle wanders off line. If the direction indicator is not used at speeds above 50 mph (80 km/h) and there is a risk of one of these lines on the road surface being crossed, the system triggers the alert.This system is particularly useful on motorways and main roads.
Detection - Alert
You are alerted by the flashing of this warning lamp in the instrument panel, accompanied by an audible signal.
Page 219 of 360
219
Practical information
7
Air filter
Depending on the environment and the use of the vehicle (e.g. dusty atmosphere, city driving), change it twice as often, if necessary.
Oil filter
Change the oil filter each time the engine oil is changed.
Particle filter (Diesel)
The start of clogging of the particle filter is indicated by the temporary lighting of this warning lamp, accompanied by an alert message.As soon as the traffic conditions permit, regenerate the filter by driving at a speed of at least 60 km/h (37 mph) until the warning lamp goes off.
NOTIC E
If the warning lamp stays on, this indicates a low Diesel additive level.For more information on Checking levels, refer to the corresponding section.
NOTIC E
Following prolonged operation of the vehicle at very low speed or at idle, you may, in exceptional circumstances, notice the emission of water vapour at the exhaust while accelerating. This has no impact on the vehicle’s behaviour or the environment.
NOTIC E
New vehicleDuring the first few particle filter regeneration operations, you may notice a "burning" smell. This is perfectly normal.
Manual gearbox
The gearbox does not require any maintenance (no oil change).
Automatic gearbox
The gearbox does not require any maintenance (no oil change).
Drive selector (Electric)
The drive selector does not require any maintenance.
Manual parking brake
If you notice excessive brake lever travel or decreased effectiveness, the parking
brake must be adjusted, even between two services.This system must be checked by any authorized Toyota retailer or Toyota authorized repairer, or any reliable repairer.
Electric parking brake
This system does not require any routine servicing. However, in the event of a problem, do not hesitate to have the system checked by a TOYOTA dealer or a qualified workshop.
NOTIC E
For more information on the Electric parking brake, refer to the corresponding section.
Brake pads
Brake wear depends on the style of driving, particularly in the case of vehicles used in town, over short distances. It may be necessary to have the condition of the brakes checked, even between vehicle services.Unless there is a leak in the circuit, a drop in the brake fluid level indicates that the brake pads are worn.
Page 238 of 360
238
WARNI NG
The headlamps have polycarbonate lenses with a protective coating:– Do not clean them with a dry or abrasive cloth, nor with detergent or solvent products.– Use a sponge and soapy water or a pH neutral product.– When using a high-pressure washer on persistent marks, do not keep the lance directed towards the headlamps, lamps or their edges for too long, so as not to damage their protective coating and seals.
WARNI NG
Changing a bulb must only be done with the ignition off and after the headlamp / lamp has been switched off for several minutes - risk of serious burns!Do not touch the bulb directly with your fingers; use a lint-free cloth.It is essential only to use anti-ultraviolet (UV) type bulbs, so as not to damage the headlamp.Always replace a failed bulb with a new bulb of the same type and specification. To avoid lighting imbalance, replace the bulbs in pairs.
NOTIC E
Halogen bulbs (Hx)To ensure good quality lighting, check that the bulb is correctly positioned in its housing.
WARNI NG
Opening the bonnet/Accessing the bulbsProceed with caution when the engine is hot - risk of burns!Take care with objects or clothing that could be caught in the blades of the cooling fan - risk of strangulation!
WARNI NG
After changing a bulbTo refit, carry out the operations in reverse order to removal.Close the protective cover very carefully to guarantee the sealing of the lamps.
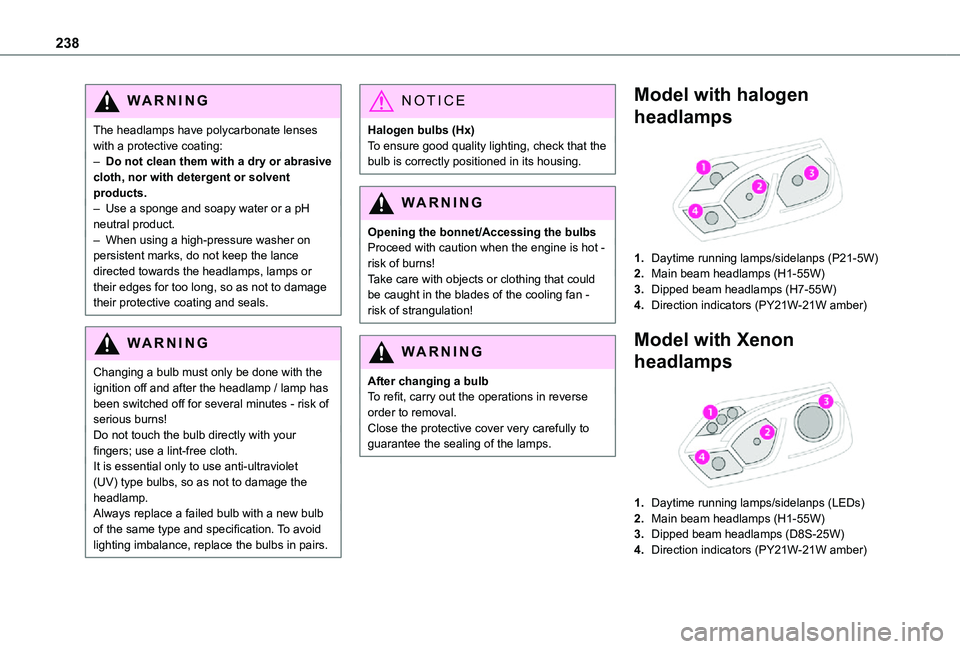
Model with halogen
headlamps
1.Daytime running lamps/sidelanps (P21-5W)
2.Main beam headlamps (H1-55W)
3.Dipped beam headlamps (H7-55W)
4.Direction indicators (PY21W-21W amber)
Model with Xenon
headlamps
1.Daytime running lamps/sidelanps (LEDs)
2.Main beam headlamps (H1-55W)
3.Dipped beam headlamps (D8S-25W)
4.Direction indicators (PY21W-21W amber)
Page 247 of 360
247
In the event of a breakdown
8
Starting using another
battery
If the vehicle's battery is flat, the engine can be started using a backup battery (either external or from another vehicle) and jump leads or using a battery booster.
WARNI NG
Never start the engine by connecting a battery charger.Never use a 24 V or higher battery booster.Check beforehand that the backup battery has a nominal voltage of 12 V and a capacity at least equal to that of the discharged battery.The two vehicles must not be in contact with each other.Switch off all electricity-consuming equipment on both vehicles (audio system, wipers, lighting, etc.).Make sure that the jump leads are well away from the engine’s moving parts (fan, belt, etc.).Do not disconnect the (+) terminal while the engine is running.
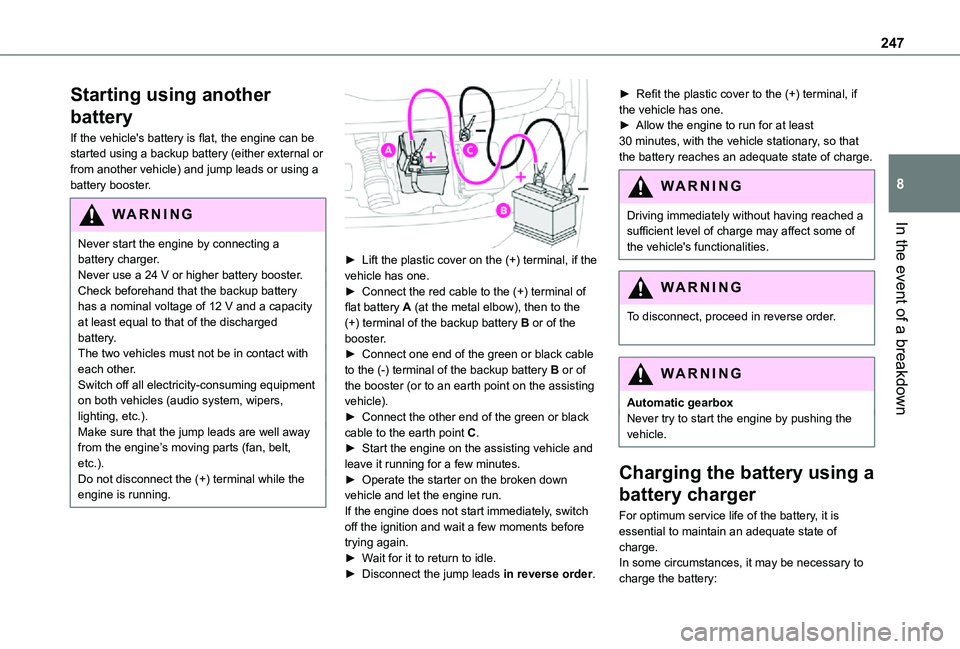
► Lift the plastic cover on the (+) terminal, if the vehicle has one.► Connect the red cable to the (+) terminal of flat battery A (at the metal elbow), then to the (+) terminal of the backup battery B or of the booster.► Connect one end of the green or black cable to the (-) terminal of the backup battery B or of the booster (or to an earth point on the assisting vehicle).► Connect the other end of the green or black cable to the earth point C.► Start the engine on the assisting vehicle and leave it running for a few minutes.► Operate the starter on the broken down vehicle and let the engine run.If the engine does not start immediately, switch off the ignition and wait a few moments before trying again.► Wait for it to return to idle.► Disconnect the jump leads in reverse order.
► Refit the plastic cover to the (+) terminal, if the vehicle has one.► Allow the engine to run for at least 30 minutes, with the vehicle stationary, so that the battery reaches an adequate state of charge.
WARNI NG
Driving immediately without having reached a sufficient level of charge may affect some of
the vehicle's functionalities.
WARNI NG
To disconnect, proceed in reverse order.
WARNI NG
Automatic gearboxNever try to start the engine by pushing the vehicle.
Charging the battery using a
battery charger
For optimum service life of the battery, it is essential to maintain an adequate state of
charge.In some circumstances, it may be necessary to charge the battery: