2021 TOYOTA PROACE CITY VERSO brake fluid
[x] Cancel search: brake fluidPage 11 of 272
11
Instruments
1
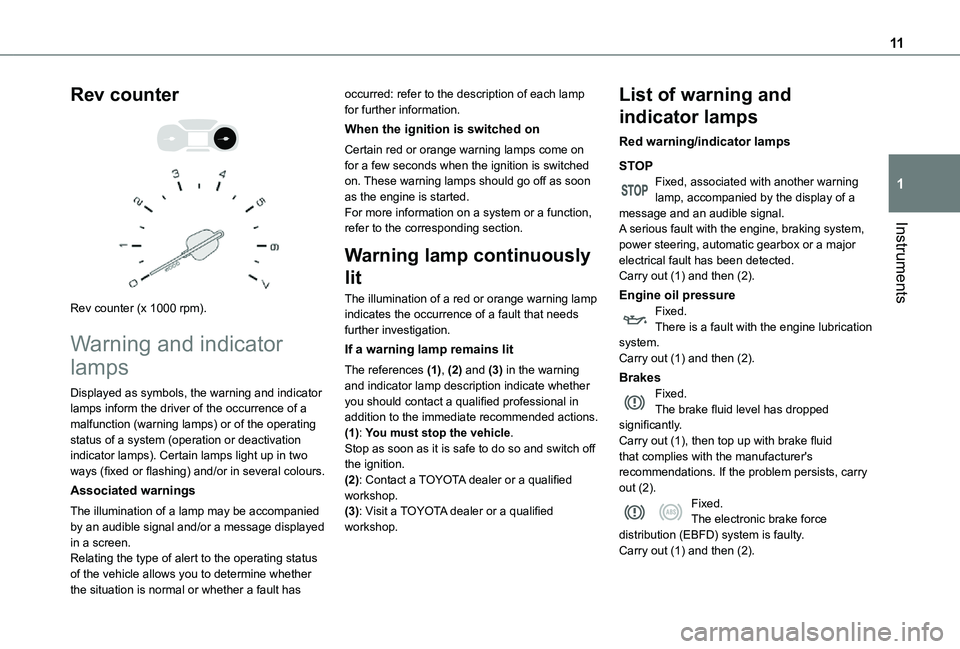
Rev counter
Rev counter (x 1000 rpm).
Warning and indicator
lamps
Displayed as symbols, the warning and indicator lamps inform the driver of the occurrence of a malfunction (warning lamps) or of the operating status of a system (operation or deactivation indicator lamps). Certain lamps light up in two ways (fixed or flashing) and/or in several colours.
Associated warnings
The illumination of a lamp may be accompanied by an audible signal and/or a message displayed in a screen.
Relating the type of alert to the operating status of the vehicle allows you to determine whether the situation is normal or whether a fault has
occurred: refer to the description of each lamp for further information.
When the ignition is switched on
Certain red or orange warning lamps come on for a few seconds when the ignition is switched on. These warning lamps should go off as soon as the engine is started.For more information on a system or a function, refer to the corresponding section.
Warning lamp continuously
lit
The illumination of a red or orange warning lamp indicates the occurrence of a fault that needs further investigation.
If a warning lamp remains lit
The references (1), (2) and (3) in the warning and indicator lamp description indicate whether you should contact a qualified professional in addition to the immediate recommended actions.(1): You must stop the vehicle.
Stop as soon as it is safe to do so and switch off the ignition.(2): Contact a TOYOTA dealer or a qualified workshop.(3): Visit a TOYOTA dealer or a qualified workshop.
List of warning and
indicator lamps
Red warning/indicator lamps
STOPFixed, associated with another warning lamp, accompanied by the display of a message and an audible signal.A serious fault with the engine, braking system, power steering, automatic gearbox or a major electrical fault has been detected.Carry out (1) and then (2).
Engine oil pressureFixed.There is a fault with the engine lubrication system.Carry out (1) and then (2).
BrakesFixed.The brake fluid level has dropped significantly.Carry out (1), then top up with brake fluid
that complies with the manufacturer's recommendations. If the problem persists, carry out (2).Fixed.The electronic brake force distribution (EBFD) system is faulty.Carry out (1) and then (2).
Page 159 of 272
159
Practical information
7
WARNI NG
Cooling of the engine when stoppedThe engine cooling fan may start after the engine has been switched off.Take care with objects or clothing that could be caught in the blades of the fan!
Opening
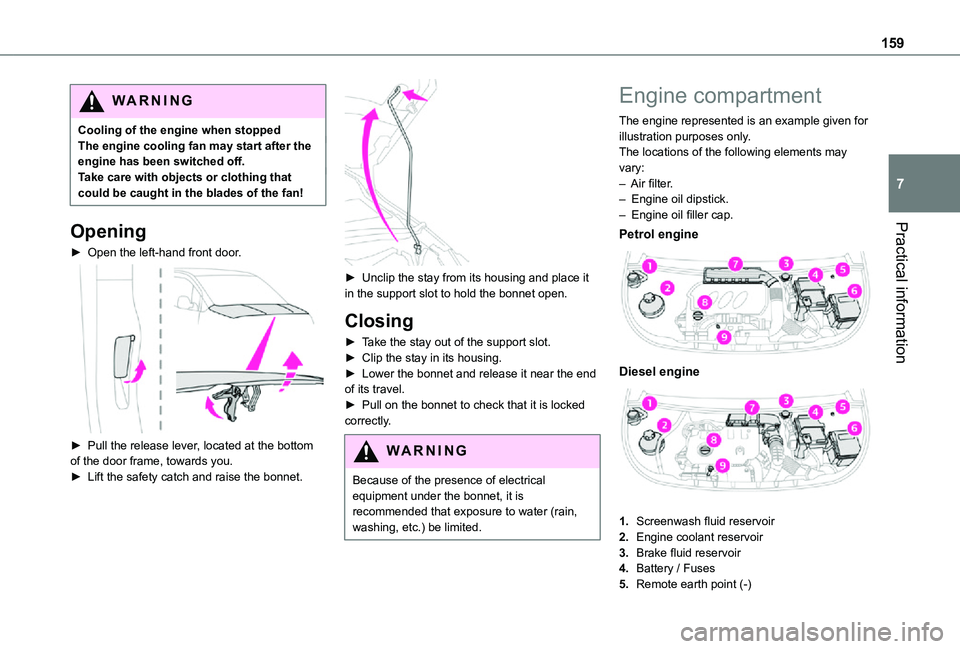
► Open the left-hand front door.
► Pull the release lever, located at the bottom of the door frame, towards you.► Lift the safety catch and raise the bonnet.
► Unclip the stay from its housing and place it in the support slot to hold the bonnet open.
Closing
► Take the stay out of the support slot.► Clip the stay in its housing.► Lower the bonnet and release it near the end of its travel.► Pull on the bonnet to check that it is locked correctly.
WARNI NG
Because of the presence of electrical equipment under the bonnet, it is recommended that exposure to water (rain, washing, etc.) be limited.
Engine compartment
The engine represented is an example given for illustration purposes only.The locations of the following elements may vary:– Air filter.– Engine oil dipstick.– Engine oil filler cap.
Petrol engine
Diesel engine
1.Screenwash fluid reservoir
2.Engine coolant reservoir
3.Brake fluid reservoir
4.Battery / Fuses
5.Remote earth point (-)
Page 161 of 272
161
Practical information
7
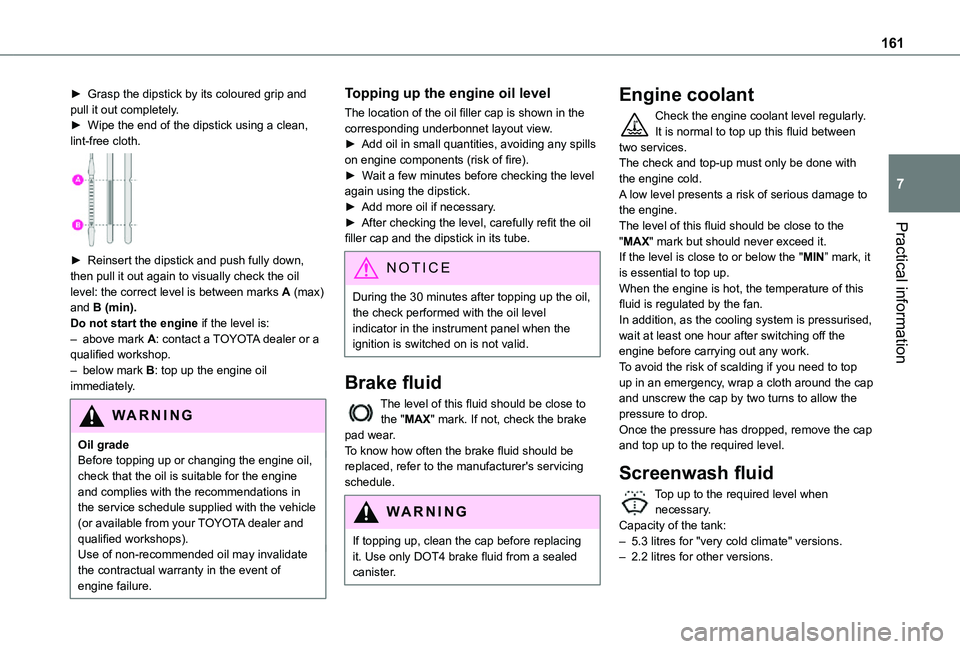
► Grasp the dipstick by its coloured grip and pull it out completely.► Wipe the end of the dipstick using a clean, lint-free cloth.
► Reinsert the dipstick and push fully down, then pull it out again to visually check the oil level: the correct level is between marks A (max) and B (min).Do not start the engine if the level is:– above mark A: contact a TOYOTA dealer or a qualified workshop.– below mark B: top up the engine oil immediately.
WARNI NG
Oil gradeBefore topping up or changing the engine oil, check that the oil is suitable for the engine and complies with the recommendations in the service schedule supplied with the vehicle (or available from your TOYOTA dealer and qualified workshops).Use of non-recommended oil may invalidate the contractual warranty in the event of engine failure.
Topping up the engine oil level
The location of the oil filler cap is shown in the corresponding underbonnet layout view.► Add oil in small quantities, avoiding any spills on engine components (risk of fire).► Wait a few minutes before checking the level again using the dipstick.► Add more oil if necessary.► After checking the level, carefully refit the oil filler cap and the dipstick in its tube.
NOTIC E
During the 30 minutes after topping up the oil, the check performed with the oil level indicator in the instrument panel when the ignition is switched on is not valid.
Brake fluid
The level of this fluid should be close to the "MAX" mark. If not, check the brake pad wear.To know how often the brake fluid should be replaced, refer to the manufacturer's servicing schedule.
WARNI NG
If topping up, clean the cap before replacing
it. Use only DOT4 brake fluid from a sealed canister.
Engine coolant
Check the engine coolant level regularly.It is normal to top up this fluid between two services.The check and top-up must only be done with the engine cold.A low level presents a risk of serious damage to the engine.The level of this fluid should be close to the "MAX" mark but should never exceed it.If the level is close to or below the "MIN” mark, it is essential to top up.When the engine is hot, the temperature of this fluid is regulated by the fan.In addition, as the cooling system is pressurised, wait at least one hour after switching off the engine before carrying out any work.To avoid the risk of scalding if you need to top up in an emergency, wrap a cloth around the cap and unscrew the cap by two turns to allow the pressure to drop.Once the pressure has dropped, remove the cap
and top up to the required level.
Screenwash fluid
Top up to the required level when necessary.Capacity of the tank:– 5.3 litres for "very cold climate" versions.– 2.2 litres for other versions.
Page 163 of 272

163
Practical information
7
NOTIC E
A clogged passenger compartment filter can adversely affect air conditioning system performance and generate undesirable odours.
Air filter
Depending on the environment and the use of the vehicle (e.g. dusty atmosphere, city driving), change it twice as often, if necessary.
Oil filter
Change the oil filter each time the engine oil is changed.
Particle filter (Diesel)
When the particle filter is approaching saturation, this warning lamp comes on temporarily, accompanied by a message warning of the risk
of filter clogging.As soon as the traffic conditions permit, regenerate the filter by driving at a speed of at least 60 km/h (37 mph) until the warning lamp goes off.
NOTIC E
If the warning lamp stays on, this indicates a low Diesel additive level.For more information on Checking levels, refer to the corresponding section.
NOTIC E
Following prolonged operation of the vehicle at very low speed or at idle, you may, in exceptional circumstances, notice the emission of water vapour at the exhaust while accelerating. This has no impact on the vehicle’s behaviour or the environment.
NOTIC E
New vehicleDuring the first few particle filter regeneration operations, you may notice a "burning" smell. This is perfectly normal.
Manual gearbox
The gearbox does not require any maintenance (no oil change).
Automatic gearbox
The gearbox does not require any maintenance (no oil change).
Brake pads
Brake wear depends on the style of driving, particularly in the case of vehicles used in town, over short distances. It may be necessary to have the condition of the brakes checked, even between vehicle services.Unless there is a leak in the circuit, a drop in the brake fluid level indicates that the brake pads are worn.
NOTIC E
After washing the vehicle, moisture, or in wintry conditions, ice can form on the brake discs and pads: braking efficiency may be reduced. Gently dab the brakes to dry and defrost them.
Brake disc wear
For information on checking brake disc wear, contact a TOYOTA dealer or a qualified workshop.
Page 171 of 272
171
In the event of a breakdown
8
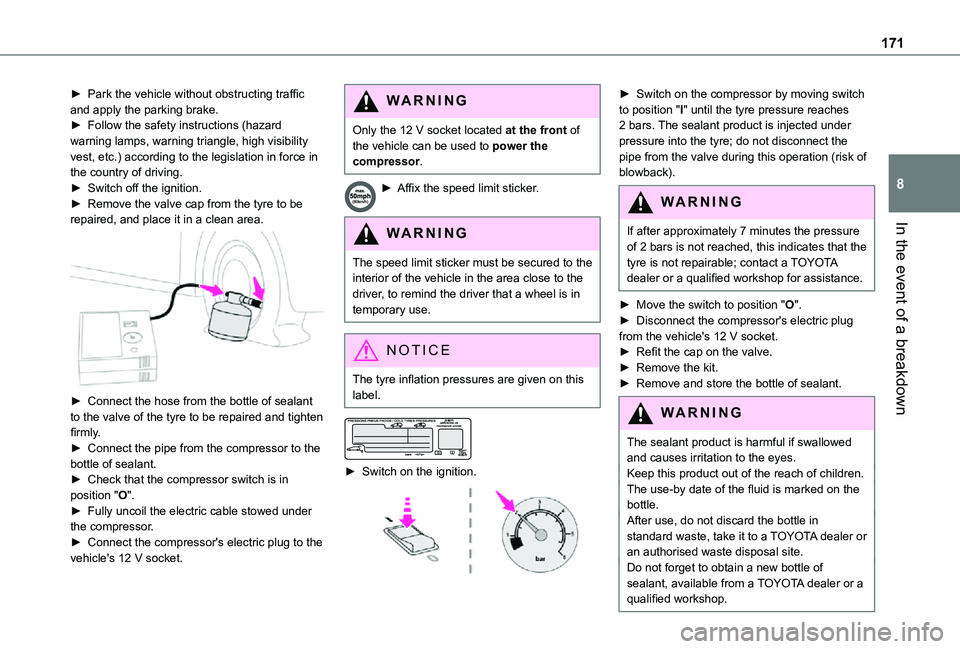
► Park the vehicle without obstructing traffic and apply the parking brake.► Follow the safety instructions (hazard warning lamps, warning triangle, high visibility vest, etc.) according to the legislation in force in the country of driving.► Switch off the ignition.► Remove the valve cap from the tyre to be repaired, and place it in a clean area.
► Connect the hose from the bottle of sealant to the valve of the tyre to be repaired and tighten firmly.► Connect the pipe from the compressor to the bottle of sealant.► Check that the compressor switch is in position "O".► Fully uncoil the electric cable stowed under the compressor.► Connect the compressor's electric plug to the vehicle's 12 V socket.
WARNI NG
Only the 12 V socket located at the front of the vehicle can be used to power the compressor.
► Affix the speed limit sticker.
WARNI NG
The speed limit sticker must be secured to the interior of the vehicle in the area close to the driver, to remind the driver that a wheel is in temporary use.
NOTIC E
The tyre inflation pressures are given on this label.
► Switch on the ignition.
► Switch on the compressor by moving switch to position "I" until the tyre pressure reaches 2 bars. The sealant product is injected under pressure into the tyre; do not disconnect the pipe from the valve during this operation (risk of blowback).
WARNI NG
If after approximately 7 minutes the pressure
of 2 bars is not reached, this indicates that the tyre is not repairable; contact a TOYOTA dealer or a qualified workshop for assistance.
► Move the switch to position "O".► Disconnect the compressor's electric plug from the vehicle's 12 V socket.► Refit the cap on the valve.► Remove the kit.► Remove and store the bottle of sealant.
WARNI NG
The sealant product is harmful if swallowed and causes irritation to the eyes.Keep this product out of the reach of children.The use-by date of the fluid is marked on the bottle.After use, do not discard the bottle in standard waste, take it to a TOYOTA dealer or
an authorised waste disposal site.Do not forget to obtain a new bottle of sealant, available from a TOYOTA dealer or a qualified workshop.
Page 252 of 272

252
Filter, particle 162–163Filter, passenger compartment 55, 162Finisher 176Fitting a wheel 174–176Fitting roof bars 157–158Fittings, interior 48, 52Flap, fuel filler 152–153Flashing indicators 67–68, 180Fluid, brake 161Fluid, engine coolant 161Foglamp, rear 180Foglamps 180Foglamps, front 66, 178Foglamps, rear 66Folding the rear seats 44–45Frequency (radio) 239Fuel 7, 151Fuel consumption 7Fuel tank 151, 153Fusebox, dashboard 182Fusebox, engine compartment 182, 184Fuses 182–184
G
Gauge, fuel 151–152Gearbox, automatic 104, 108, 11 0–11 3, 11 5, 163Gearbox, manual 108–109, 11 5, 163Gear lever, automatic gearbox 11 0–11 3Gear lever, manual gearbox 109
Gear shift indicator ~ Gear efficiency indicator 11 3Glove box 48G.P.S. 232
H
Hazard warning lamps 55, 78headlamp adjustment 70Headlamp adjustment 70Headlamps, automatic dipping 69–70, 140Headlamps, automatic illumination 67–69Headlamps, dipped beam 66, 178Headlamps, halogen 177Headlamps, main beam 66, 178–179Head restraints, front 47Head restraints, rear 44Head-up display 11 7–11 8Heating 55–57, 61–63Heating, additional 35, 62–63Heating, programmable 35, 62–63
Hill Assist Descent Control (HADC) 82–83Hill Descent Control 82–83Hill start assist 108–109Horn 78
I
Ignition 104, 244Ignition on 104
Immobiliser, electronic 101Indicator, coolant temperature 16Indicator lamps, operation 66Indicators, direction 67Inflating tyres 164, 194Inflating tyres and accessories (using the kit) 170, 172Infrared camera 11 9Instrument panel 9, 120Internet browser 232, 237ISOFIX 96
J
Jack 173Jump starting 185
K
Key 23, 25–26, 28–29
Key, electronic 23–24, 104Keyless Entry a nd Starting 23, 25–27, 102, 104Key with remote control 26–27Kit, hands-free 202–203, 217–218, 242Kit, puncture repair 169Kit, temporary puncture repair 169–170, 172–173
Page 253 of 272
253
Alphabetical index
L
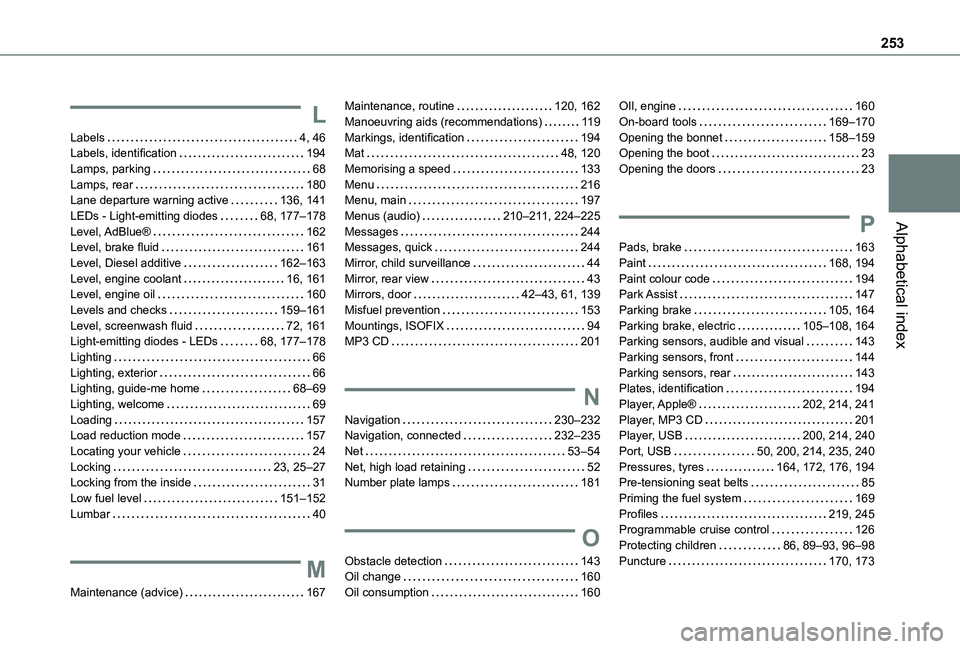
Labels 4, 46Labels, identification 194Lamps, parking 68Lamps, rear 180Lane departure warning active 136, 141LEDs - Light-emitting diodes 68, 177–178Level, AdBlue® 162Level, brake fluid 161Level, Diesel additive 162–163Level, engine coolant 16, 161Level, engine oil 160Levels and checks 159–161Level, screenwash fluid 72, 161Light-emitting diodes - LEDs 68, 177–178Lighting 66Lighting, exterior 66Lighting, guide-me home 68–69Lighting, welcome 69Loading 157Load reduction mode 157
Locating your vehicle 24Locking 23, 25–27Locking from the inside 31Low fuel level 151–152Lumbar 40
M
Maintenance (advice) 167
Maintenance, routine 120, 162Manoeuvring aids (recommendations) 11 9Markings, identification 194Mat 48, 120Memorising a speed 133Menu 216Menu, main 197Menus (audio) 210–2 11, 224–225Messages 244Messages, quick 244Mirror, child surveillance 44Mirror, rear view 43Mirrors, door 42–43, 61, 139Misfuel prevention 153Mountings, ISOFIX 94MP3 CD 201
N
Navigation 230–232Navigation, connected 232–235
Net 53–54Net, high load retaining 52Number plate lamps 181
O
Obstacle detection 143Oil change 160Oil consumption 160
OIl, engine 160On-board tools 169–170Opening the bonnet 158–159Opening the boot 23Opening the doors 23
P
Pads, brake 163Paint 168, 194Paint colour code 194Park Assist 147Parking brake 105, 164Parking brake, electric 105–108, 164Parking sensors, audible and visual 143Parking sensors, front 144Parking sensors, rear 143Plates, identification 194Player, Apple® 202, 214, 241Player, MP3 CD 201Player, USB 200, 214, 240
Port, USB 50, 200, 214, 235, 240Pressures, tyres 164, 172, 176, 194Pre-tensioning seat belts 85Priming the fuel system 169Profiles 219, 245Programmable cruise control 126Protecting children 86, 89–93, 96–98Puncture 170, 173