2021 TOYOTA PROACE CITY VERSO fuel
[x] Cancel search: fuelPage 166 of 272
166
If swallowed, immediately wash out the mouth with clean water and then drink plenty of water.In certain conditions (high temperature, for example), the risk of release of ammonia cannot be excluded: do not inhale the fluid. Ammonia vapours have an irritant effect on mucous membranes (eyes, nose and throat).
WARNI NG
Store AdBlue® out of the reach of children, in
its original container.
Procedure
Before starting the top-up procedure, ensure that the vehicle is parked on a flat and level surface.In wintry conditions, ensure that the temperature of the vehicle is above -11 °C. Otherwise the AdBlue® may be frozen and so cannot be poured into its tank. Park the vehicle in a warmer area for a few hours to allow the top-up to be carried out.
WARNI NG
Never put the AdBlue® into the Diesel fuel tank.
WARNI NG
If any AdBlue® is splashed, or if there are any spillages on the bodywork, rinse immediately with cold water or wipe with a damp cloth.If the fluid has crystallised, clean it off using a sponge and hot water.
WARNI NG
Important: in the event of a top-up after a breakdown because of a lack of AdBlue, it is essential to wait around 5 minutes before switching on the ignition, without opening the driver’s door, unlocking the vehicle, introducing the key into the ignition switch, or introducing the key of the “Keyless Entry and Starting ” system into the passenger compartment.Switch on the ignition, then wait for 10 seconds before starting the engine.
► Switch off the ignition and remove the key from the switch to switch off the engine.or► With Keyless Entry and Starting, press the "START/STOP" button to switch off the engine.
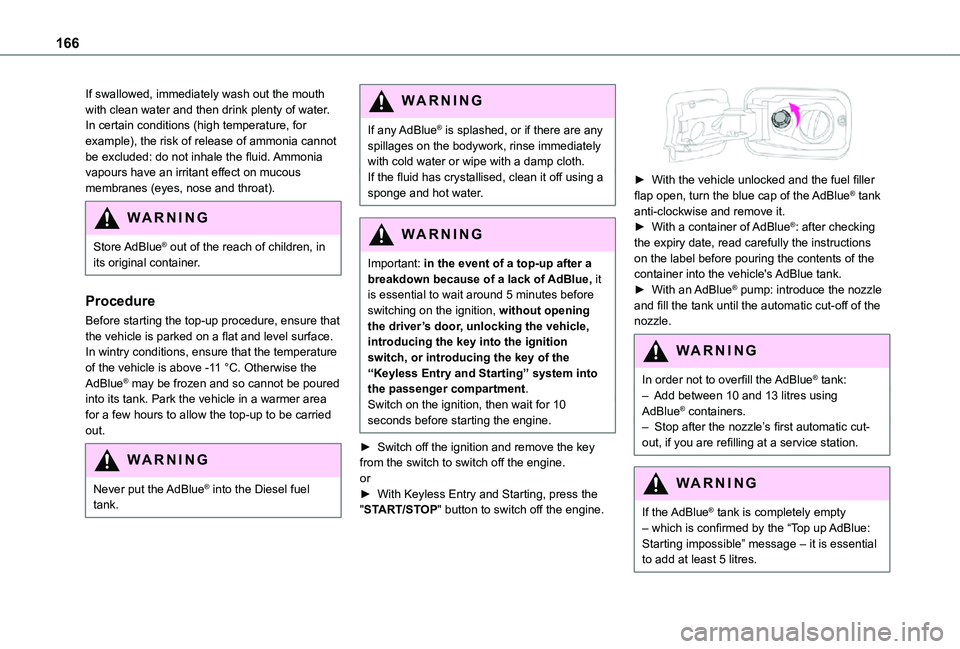
► With the vehicle unlocked and the fuel filler flap open, turn the blue cap of the AdBlue® tank anti-clockwise and remove it.► With a container of AdBlue®: after checking the expiry date, read carefully the instructions on the label before pouring the contents of the container into the vehicle's AdBlue tank.► With an AdBlue® pump: introduce the nozzle and fill the tank until the automatic cut-off of the nozzle.
WARNI NG
In order not to overfill the AdBlue® tank:– Add between 10 and 13 litres using AdBlue® containers.– Stop after the nozzle’s first automatic cut-out, if you are refilling at a service station.
WARNI NG
If the AdBlue® tank is completely empty – which is confirmed by the “Top up AdBlue: Starting impossible” message – it is essential to add at least 5 litres.
Page 167 of 272
167
Practical information
7
After refilling
► Refit the blue cap to the tank filler and turn it clockwise, as far as it will go.► Close the fuel filler flap.
Do not dispose of AdBlue® bottles or containers in the household waste.Place them in a container reserved for this purpose or take them back to where you purchased them.
Free-wheeling
In certain situations, you must allow the vehicle to free-wheel (while being towed, on a rolling road, in an automatic car wash, or being transported by rail or sea freight, etc.).The procedure varies according to the type of gearbox and parking brake.
With a manual gearbox and
electric parking brake /
Release procedure
► With the engine running and while depressing the brake pedal, move the gear selector to the neutral position.
► While depressing the brake pedal, switch off the ignition.► Release the brake pedal, then switch on the ignition again.► While depressing the brake pedal, press the control lever to release the parking brake.► Release the brake pedal, then switch off the ignition.
Reverting to normal operation
► While depressing the brake pedal, start the engine.
With an automatic gearbox
and electric parking brake /
Release procedure
► With the engine running and while depressing the brake pedal, set the gear selector to N.► While depressing the brake pedal, switch off the ignition.
► Release the brake pedal, then switch on the ignition again.► While depressing the brake pedal, press the control lever to release the parking brake.► Release the brake pedal, then switch off the ignition.
Reverting to normal operation
► While depressing the brake pedal, start the engine.
NOTIC E
Keyless Entry and StartingYou must not depress the brake pedal while switching the ignition on or off. If you do, the engine will start, requiring you to restart the procedure.
Advice on care and
maintenance
General recommendations
Observe the following recommendations to avoid damaging your vehicle.
Exterior
WARNI NG
Never use a high-pressure jet wash in the engine compartment, due to the risk of damaging electrical components.Do not wash the vehicle in strong sunshine or extremely cold conditions.
Page 169 of 272
169
In the event of a breakdown
8
Running out of fuel
(Diesel)
On vehicles fitted with Diesel engines, the fuel system must be primed if you run out of fuel.If the engine does not start first time, do not keep trying, but start the procedure again from the beginning.
NOTIC E
For more information on Misfuel prevention (Diesel), refer to the corresponding section.
With Euro 6.2/6.3 engines
► Switch on the ignition (without starting the engine).► Wait around 1 minute and switch off the ignition.► Operate the starter motor to start the engine.If the engine does not start at the first attempt, do not keep trying, but restart the procedure.
Tool kit
► For easier access, move the seat(s) forward.
Accessing the tools
With a temporary puncture repair kit
The kit is located under the right-hand front seat.
With spare wheel
The jack is located under the right-hand front seat.The tools are located under the left-hand front seat.
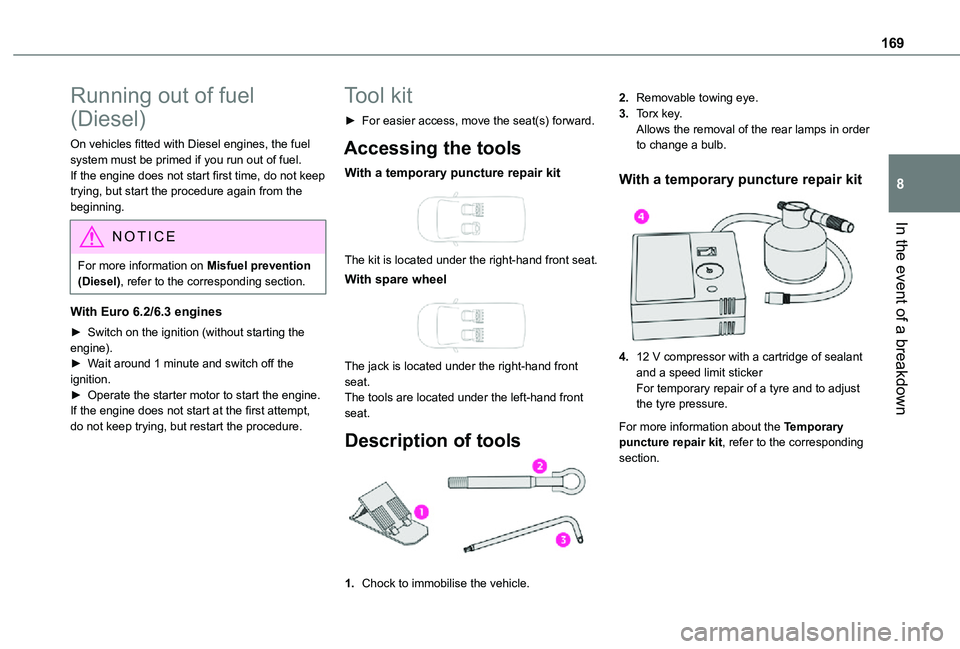
Description of tools
1.Chock to immobilise the vehicle.
2.Removable towing eye.
3.Torx key.Allows the removal of the rear lamps in order to change a bulb.
With a temporary puncture repair kit
4.12 V compressor with a cartridge of sealant and a speed limit stickerFor temporary repair of a tyre and to adjust the tyre pressure.
For more information about the Temporary puncture repair kit, refer to the corresponding section.
Page 192 of 272
192
Engines and towed loads - PETROL EURO 6.3
Engine1.2Turbo 110HP1.2Turbo 130HP
GearboxManual 6-speedAutomatic 8-speed
CodeEB2ADT MB6 STTDEB2ADTS ATN8 STTD
LengthL1L2L1L2
Model Code5 seats
ERHNP2-AERHNP2-CERHNS3-AERHNS3-C
7 seats
ERHNP2-BERHNP2-DERHNS3-BERHNS3-D
Cubic capacity (cc)1,1991,199
Max. power: EC standard (kW)8196
FuelUnleadedUnleaded
Braked trailer (within the GTW limit) on a 12% slope
5 seats1,150 kg (2,535 lb)1,100 kg (2,425 lb)1,200 kg (2,645 lb)1,150 kg (2,535 lb)
7 seats1,000 kg (2,204 lb)900 kg (1,984 lb) / 950 kg (2,094 lb)
1,050 kg (2,314 lb)1 000 kg (2,204 lb) / 950 kg (2,094 lb)
Unbraked trailer5 seats720 kg (1,587 lb) / 730 kg (1,609 lb)
750 kg (1,653 lb)740 kg (1,631 lb) / 750 kg (1,653 lb)
750 kg (1,653 lb)
7 seats750 kg (1,653 lb)750 kg (1,653 lb)
Maximum authorised nose/towball weight5 seats74 kg (163 lb)74 kg (163 lb)74 kg (163 lb)74 kg (163 lb)
7 seats50 kg (110 lb) / 70 kg (154 lb)50 kg (110 lb)70 kg (154 lb) / 50 kg (110 lb)50 kg (110 lb)
Page 193 of 272
193
Technical data
9
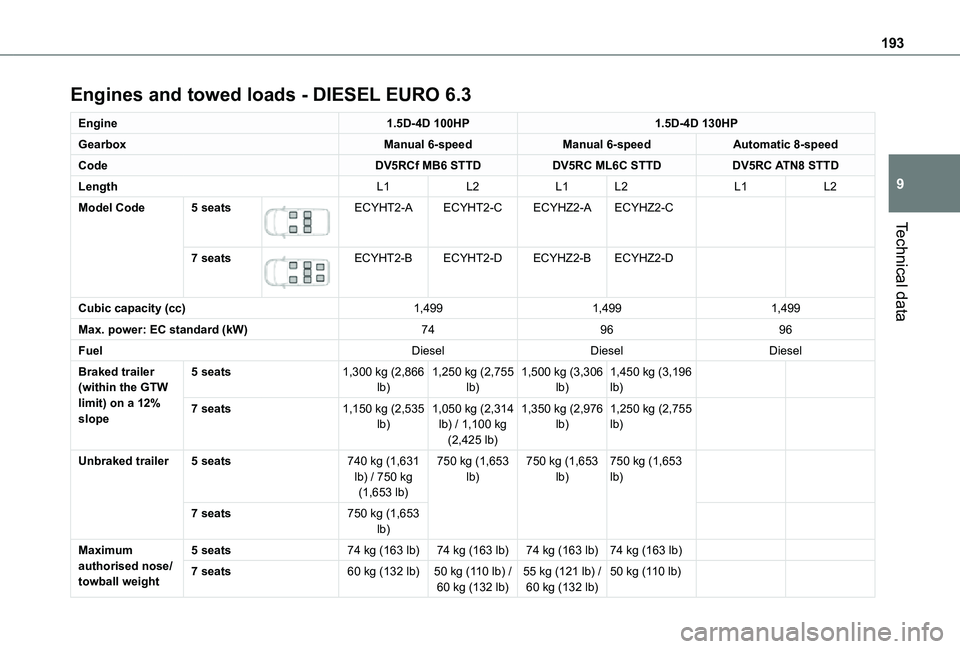
Engines and towed loads - DIESEL EURO 6.3
Engine1.5D-4D 100HP1.5D-4D 130HP
GearboxManual 6-speedManual 6-speedAutomatic 8-speed
CodeDV5RCf MB6 STTDDV5RC ML6C STTDDV5RC ATN8 STTD
LengthL1L2L1L2L1L2
Model Code5 seats
ECYHT2-AECYHT2-CECYHZ2-AECYHZ2-C
7 seats
ECYHT2-BECYHT2-DECYHZ2-BECYHZ2-D
Cubic capacity (cc)1,4991,4991,499
Max. power: EC standard (kW)749696
FuelDieselDieselDiesel
Braked trailer (within the GTW limit) on a 12% slope
5 seats1,300 kg (2,866 lb)1,250 kg (2,755 lb)1,500 kg (3,306 lb)1,450 kg (3,196 lb)
7 seats1,150 kg (2,535 lb)1,050 kg (2,314 lb) / 1,100 kg (2,425 lb)
1,350 kg (2,976 lb)1,250 kg (2,755 lb)
Unbraked trailer5 seats740 kg (1,631 lb) / 750 kg (1,653 lb)
750 kg (1,653 lb)750 kg (1,653 lb)750 kg (1,653 lb)
7 seats750 kg (1,653 lb)
Maximum authorised nose/towball weight
5 seats74 kg (163 lb)74 kg (163 lb)74 kg (163 lb)74 kg (163 lb)
7 seats60 kg (132 lb)50 kg (110 lb) / 60 kg (132 lb)55 kg (121 lb) / 60 kg (132 lb)50 kg (110 lb)
Page 219 of 272
219
TOYOTA Connect Radio
11
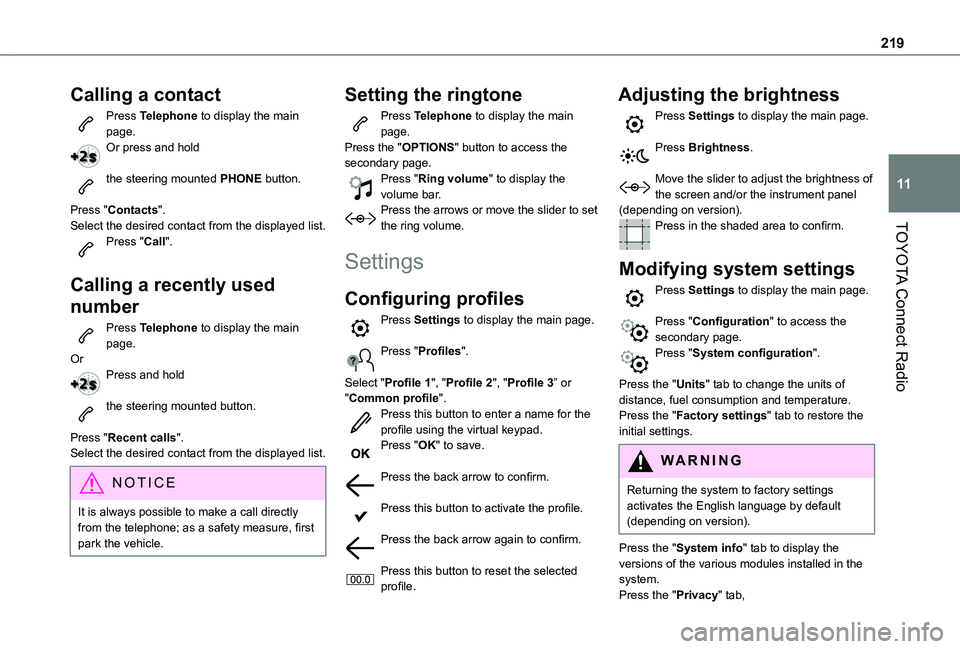
Calling a contact
Press Telephone to display the main page. Or press and hold
the steering mounted PHONE button.
Press "Contacts".Select the desired contact from the displayed list.Press "Call".
Calling a recently used
number
Press Telephone to display the main page.OrPress and hold
the steering mounted button.
Press "Recent calls".
Select the desired contact from the displayed list.
NOTIC E
It is always possible to make a call directly from the telephone; as a safety measure, first park the vehicle.
Setting the ringtone
Press Telephone to display the main page. Press the "OPTIONS" button to access the secondary page.Press "Ring volume" to display the volume bar.Press the arrows or move the slider to set the ring volume.
Settings
Configuring profiles
Press Settings to display the main page.
Press "Profiles".
Select "Profile 1", "Profile 2", "Profile 3” or "Common profile".Press this button to enter a name for the profile using the virtual keypad.
Press "OK" to save.
Press the back arrow to confirm.
Press this button to activate the profile.
Press the back arrow again to confirm.
Press this button to reset the selected profile.
Adjusting the brightness
Press Settings to display the main page.
Press Brightness.
Move the slider to adjust the brightness of the screen and/or the instrument panel (depending on version).Press in the shaded area to confirm.
Modifying system settings
Press Settings to display the main page.
Press "Configuration" to access the secondary page.Press "System configuration".
Press the "Units" tab to change the units of distance, fuel consumption and temperature.Press the "Factory settings" tab to restore the initial settings.
WARNI NG
Returning the system to factory settings activates the English language by default (depending on version).
Press the "System info" tab to display the versions of the various modules installed in the system.Press the "Privacy" tab,
Page 234 of 272
234
Press “OK” to confirm your selection.
NOTIC E
The "Notifications", in the upper bar, can be accessed at any time.
NOTIC E
Danger zone alerts may or may not be displayed, depending on the applicable legislation and subscription to the corresponding service.
When "TOMTOM TRAFFIC” appears, the services are available.
NOTIC E
The services offered with connected navigation are as follows.A Connected Services pack:– Weather,– Filling stations,– Car park,– Traffic,– POI local search.A Danger area pack (optional).
Declaration: "Risk areas
alert"
WARNI NG
To send information about danger zones, select the option:Allow declaration of danger zones
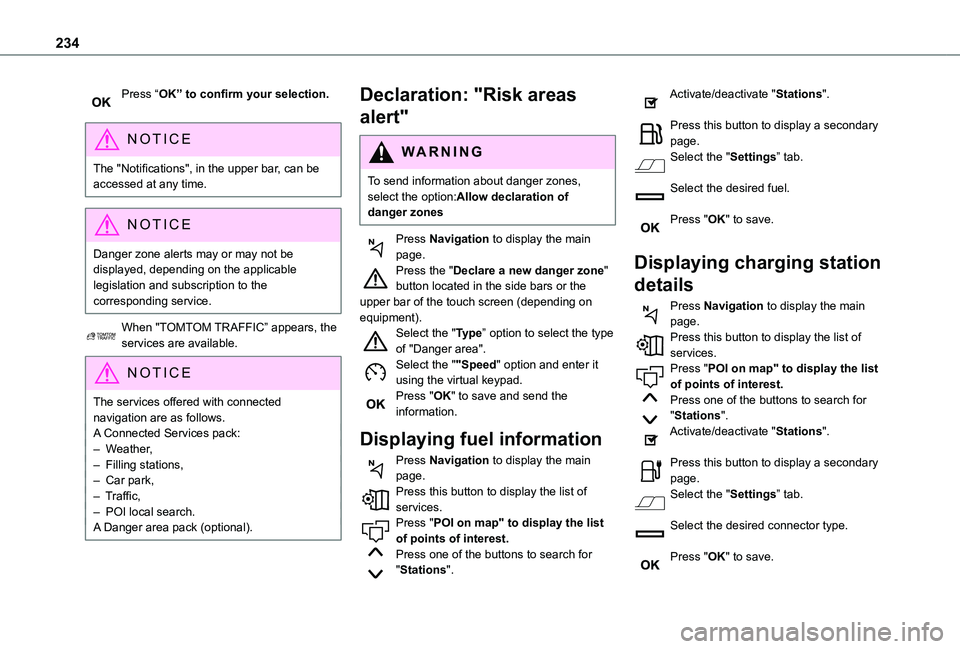
Press Navigation to display the main
page.Press the "Declare a new danger zone" button located in the side bars or the upper bar of the touch screen (depending on equipment).Select the "Type” option to select the type of "Danger area".Select the ""Speed" option and enter it using the virtual keypad.Press "OK" to save and send the information.
Displaying fuel information
Press Navigation to display the main page.Press this button to display the list of services.Press "POI on map" to display the list of points of interest.Press one of the buttons to search for "Stations".
Activate/deactivate "Stations".
Press this button to display a secondary page.Select the "Settings” tab.
Select the desired fuel.
Press "OK" to save.
Displaying charging station
details
Press Navigation to display the main page.Press this button to display the list of services.Press "POI on map" to display the list of points of interest.Press one of the buttons to search for "Stations".Activate/deactivate "Stations".
Press this button to display a secondary page.Select the "Settings” tab.
Select the desired connector type.
Press "OK" to save.
Page 246 of 272
246
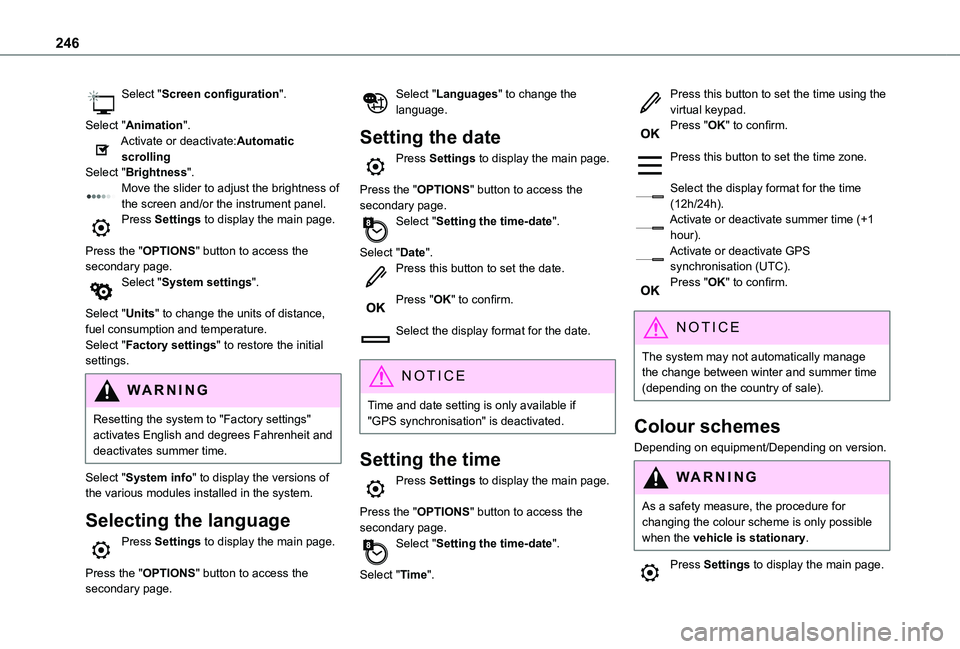
Select "Screen configuration".
Select "Animation".Activate or deactivate:Automatic scrollingSelect "Brightness".Move the slider to adjust the brightness of the screen and/or the instrument panel.Press Settings to display the main page.
Press the "OPTIONS" button to access the secondary page.Select "System settings".
Select "Units" to change the units of distance, fuel consumption and temperature.Select "Factory settings" to restore the initial settings.
WARNI NG
Resetting the system to "Factory settings" activates English and degrees Fahrenheit and deactivates summer time.
Select "System info" to display the versions of the various modules installed in the system.
Selecting the language
Press Settings to display the main page.
Press the "OPTIONS" button to access the secondary page.
Select "Languages" to change the language.
Setting the date
Press Settings to display the main page.
Press the "OPTIONS" button to access the secondary page.Select "Setting the time-date".
Select "Date".Press this button to set the date.
Press "OK" to confirm.
Select the display format for the date.
NOTIC E
Time and date setting is only available if "GPS synchronisation" is deactivated.
Setting the time
Press Settings to display the main page.
Press the "OPTIONS" button to access the secondary page.Select "Setting the time-date".
Select "Time".
Press this button to set the time using the virtual keypad.Press "OK" to confirm.
Press this button to set the time zone.
Select the display format for the time (12h/24h).Activate or deactivate summer time (+1 hour).Activate or deactivate GPS synchronisation (UTC).Press "OK" to confirm.
NOTIC E
The system may not automatically manage the change between winter and summer time (depending on the country of sale).
Colour schemes
Depending on equipment/Depending on version.
WARNI NG
As a safety measure, the procedure for changing the colour scheme is only possible when the vehicle is stationary.
Press Settings to display the main page.