2021 TOYOTA PROACE CITY VERSO mirror
[x] Cancel search: mirrorPage 119 of 272
11 9
Driving
6
Driving and manoeuvring
aids - General
recommendations
NOTIC E
Driving and manoeuvring aids cannot, in any circumstances, replace the need for vigilance on the part of the driver.The driver must comply with the Highway Code, must remain in control of the vehicle in all circumstances and must be able to retake control of it at all times. The driver must adapt the speed to climactic conditions, traffic and the state of the road.It is the driver's responsibility to constantly check the traffic, to assess the relative distances and speeds of other vehicles and to anticipate their movements before indicating and changing lane.The systems cannot exceed the limits of the
laws of physics.
NOTIC E
Driving aidsYou should hold the steering wheel with both hands, always use the interior and exterior rear view mirrors, always keep the feet close to the pedals and take a break every two hours.
NOTIC E
Manoeuvring aidsThe driver must always check the surroundings of the vehicle before and during the whole manoeuvre, in particular using the mirrors.
WARNI NG
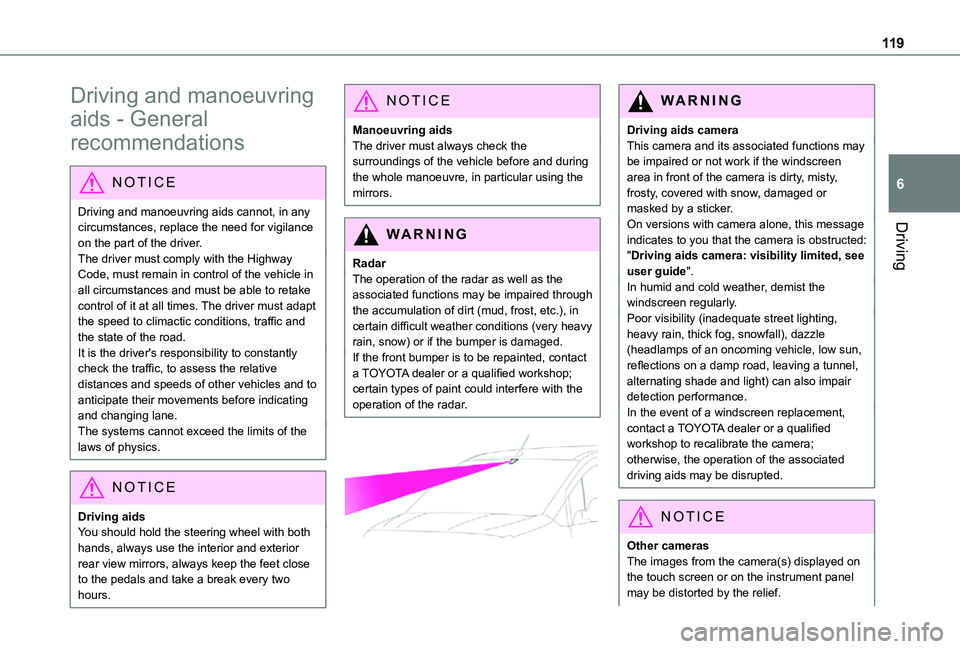
RadarThe operation of the radar as well as the associated functions may be impaired through the accumulation of dirt (mud, frost, etc.), in certain difficult weather conditions (very heavy rain, snow) or if the bumper is damaged.If the front bumper is to be repainted, contact a TOYOTA dealer or a qualified workshop; certain types of paint could interfere with the operation of the radar.
WARNI NG
Driving aids cameraThis camera and its associated functions may be impaired or not work if the windscreen area in front of the camera is dirty, misty, frosty, covered with snow, damaged or masked by a sticker.On versions with camera alone, this message indicates to you that the camera is obstructed: "Driving aids camera: visibility limited, see user guide".In humid and cold weather, demist the windscreen regularly.Poor visibility (inadequate street lighting, heavy rain, thick fog, snowfall), dazzle (headlamps of an oncoming vehicle, low sun, reflections on a damp road, leaving a tunnel, alternating shade and light) can also impair detection performance.In the event of a windscreen replacement, contact a TOYOTA dealer or a qualified workshop to recalibrate the camera;
otherwise, the operation of the associated driving aids may be disrupted.
NOTIC E
Other camerasThe images from the camera(s) displayed on the touch screen or on the instrument panel may be distorted by the relief.
Page 120 of 272
120
In the presence of areas in shade, or in conditions of bright sunlight or inadequate lighting, the image may be darkened and with lower contrast.Obstacles may appear further away than they actually are.
WARNI NG
SensorsThe operation of the sensors as well as the associated functions may be disturbed by sound interference such as that emitted by noisy vehicles and machinery (e.g. lorries, pneumatic drills), by the accumulation of snow or dead leaves on the road or in the event of damaged bumpers and mirrors.When reverse gear is engaged, an audible signal (long beep) indicates that the sensors may be dirty.A front or rear impact to the vehicle can upset the sensors’ settings, which is not
always detected by the system: distance measurements may be distorted.The sensors do not systematically detect obstacles that are too low (pavements, studs) or too thin (trees, posts, wire fences).Certain obstacles located in the sensors’ blind spots may not be detected or may no longer be detected during the manoeuvre.Certain materials (fabrics) absorb sound waves: pedestrians may not be detected.
NOTIC E
MaintenanceClean the bumpers and door mirrors and the field of vision of the cameras regularly.When washing your vehicle at high pressure, direct the spray from at least 30 cm (0 ft 11") away from the sensors and cameras.
WARNI NG
MatsThe use of mats not approved by TOYOTA may interfere with the operation of the speed limiter or cruise control.To avoid any risk of jamming the pedals:► ensure that the mat is secured correctly,► never fit one mat on top of another.
NOTIC E
Units of speed
Ensure that the units of speed displayed on the instrument panel (km/h or mph) are those for the country you are driving in.If this is not the case, when the vehicle is stationary, set the display to the required units of speed so that it complies with what is authorised locally.In case of doubt, contact a TOYOTA dealer or a qualified workshop.
Speed Limit Recognition
and Recommendation
Refer to the General recommendations on the use of driving and manoeuvring aids.
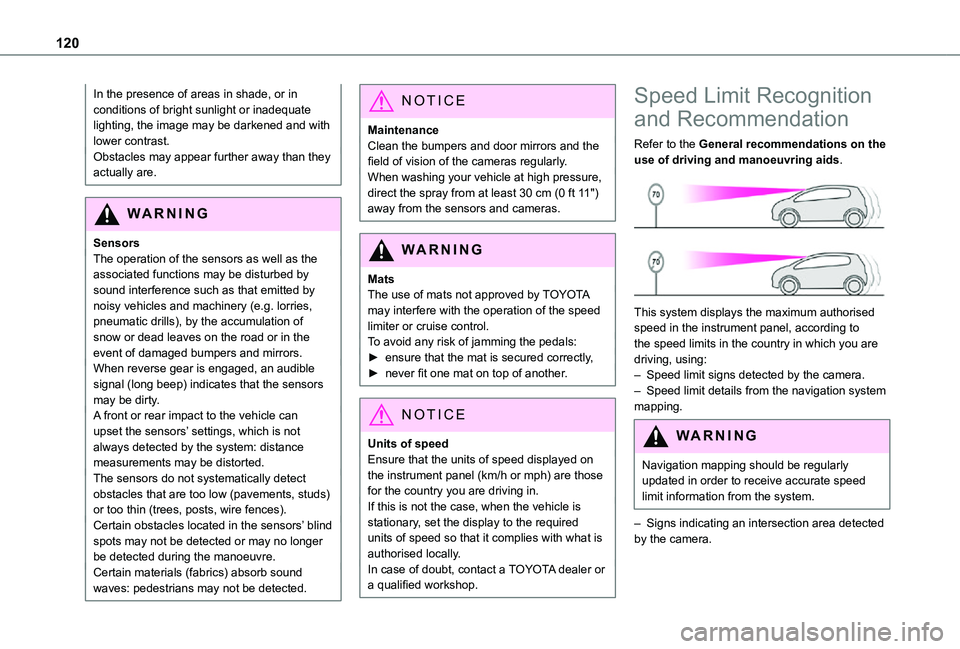
This system displays the maximum authorised speed in the instrument panel, according to the speed limits in the country in which you are driving, using:– Speed limit signs detected by the camera.– Speed limit details from the navigation system mapping.
WARNI NG
Navigation mapping should be regularly updated in order to receive accurate speed limit information from the system.
– Signs indicating an intersection area detected by the camera.
Page 139 of 272
139
Driving
6
– inactivity by the driver detected during correction.
NOTIC E
During a correction, if the driver is inactive (not holding the steering wheel for 10 seconds), a warning message appears.If the driver remains inactive (not holding the steering wheel for 2 more seconds), the
correction is interrupted.
WARNI NG
The following situations may interfere with the operation of the system or prevent it from working:– insufficient contrast between the road surface and the shoulders (e.g. shade),– lane markings worn, hidden (snow, mud) or multiple (roadworks, etc.),– running close to the vehicle in front (the lane markings may not be detected),– roads that are narrow, winding, etc.
Risk of undesirable operation
We recommend deactivating the system in the following driving situations:
– driving on damaged, unstable or very slippery (ice) road surfaces,– unfavourable weather conditions,– driving on a speed circuit,
– driving on a rolling road.
Deactivation / Activation
► Press this button to deactivate / reactivate the system at any time. Deactivation is signalled by the lighting of the indicator lamp in the button and this warning lamp in the instrument panel.The system is automatically reactivated every time the ignition is switched on.
Malfunction
In the event of a system malfunction, these warning lamps come on on the instrument panel, accompanied by an onscreen message and an audible signal.Have the system checked by a TOYOTA dealer or a qualified workshop.
Blind Spot Monitoring
System
Refer to the General recommendations on the use of driving and manoeuvring aids.
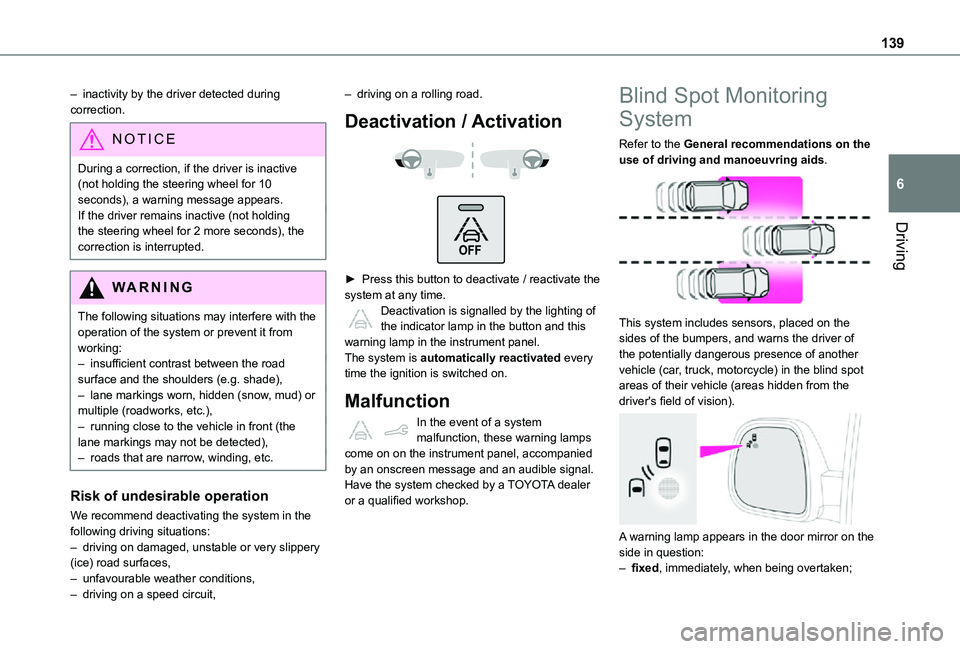
This system includes sensors, placed on the sides of the bumpers, and warns the driver of the potentially dangerous presence of another vehicle (car, truck, motorcycle) in the blind spot areas of their vehicle (areas hidden from the driver's field of vision).
A warning lamp appears in the door mirror on the side in question:– fixed, immediately, when being overtaken;
Page 141 of 272
141
Driving
6
Malfunction
If the event of malfunction, this warning lamp comes on in the instrument panel, accompanied by the display of a message.Contact a TOYOTA dealer or a qualified workshop to have the system checked.
NOTIC E
The system may suffer temporary interference
in certain weather conditions (rain, hail, etc.).In particular, driving on a wet surface or moving from a dry area to a wet area can cause false alerts (for example, the presence of a fog of water droplets in the blind spot angle is interpreted as a vehicle).In bad or wintry weather, ensure that the sensors are not covered by mud, ice or snow.Take care not to cover the warning zone in the door mirrors or the detection zones on the front and rear bumpers with adhesive labels or other objects; they may hamper correct operation of the system.
Active Blind Spot
Monitoring System
In addition to the fixed warning lamp in the door mirror on the side in question, a correction of trajectory will be felt if you attempt to cross a lane marking with the direction indicators on, to help you avoid a collision.This system is the combination of the Active Lane Departure Warning System and Blind Spot Monitoring System.These two functions must be activated and in operation.The speed of the vehicle must be between 65 and 140 km/h (40 and 87 mph) inclusive.These functions are especially suitable for driving on motorways and main roads.For more information on the Active Lane Departure Warning System and Blind Spot Monitoring System, refer to the corresponding sections.
WARNI NG
This system is a driving aid which cannot, in any circumstances, replace the need for vigilance on the part of the driver.
Distraction detection
Refer to the General recommendations on the use of driving and manoeuvring aids.Take a break in case of feeling tired or at least every 2 hours.Depending on version, the function consists of just the "Coffee Break Alert" system, or of this combined with the "Driver Attention Warning" system.
WARNI NG
These systems are in no way designed to keep the driver awake or to prevent the driver from falling asleep at the wheel. It is the driver’s responsibility to stop if feeling tired.
Activation/Deactivation
The function is activated or deactivated via the vehicle configuration menu.The state of the system stays in the memory when the ignition is switched off.
Page 146 of 272
146
to be seen. It is automatically deleted if the vehicle remains stationary for too long.
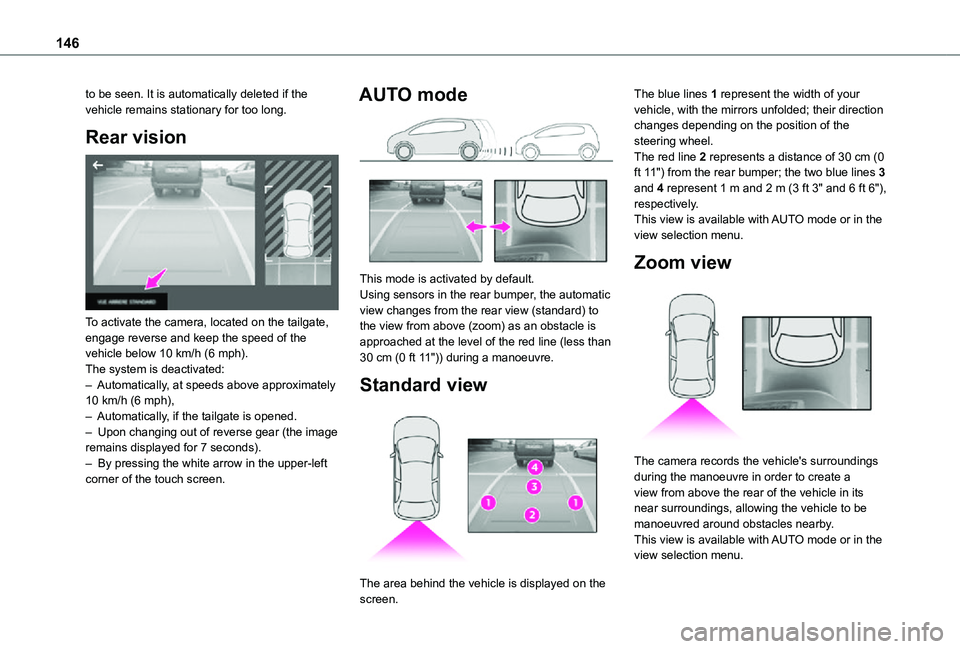
Rear vision
To activate the camera, located on the tailgate, engage reverse and keep the speed of the vehicle below 10 km/h (6 mph).The system is deactivated:– Automatically, at speeds above approximately 10 km/h (6 mph),– Automatically, if the tailgate is opened.– Upon changing out of reverse gear (the image remains displayed for 7 seconds).– By pressing the white arrow in the upper-left corner of the touch screen.
AUTO mode
This mode is activated by default.Using sensors in the rear bumper, the automatic view changes from the rear view (standard) to the view from above (zoom) as an obstacle is approached at the level of the red line (less than 30 cm (0 ft 11")) during a manoeuvre.
Standard view
The area behind the vehicle is displayed on the
screen.
The blue lines 1 represent the width of your vehicle, with the mirrors unfolded; their direction changes depending on the position of the steering wheel.The red line 2 represents a distance of 30 cm (0 ft 11") from the rear bumper; the two blue lines 3 and 4 represent 1 m and 2 m (3 ft 3" and 6 ft 6"), respectively.This view is available with AUTO mode or in the view selection menu.
Zoom view
The camera records the vehicle's surroundings during the manoeuvre in order to create a view from above the rear of the vehicle in its near surroundings, allowing the vehicle to be manoeuvred around obstacles nearby.This view is available with AUTO mode or in the view selection menu.
Page 147 of 272
147
Driving
6
NOTIC E
Obstacles may appear further away than they actually are in reality.It is important to check the sides of the vehicle during the manoeuvre, using the mirrors.The rear parking sensors also provide information on the vehicle's surroundings.
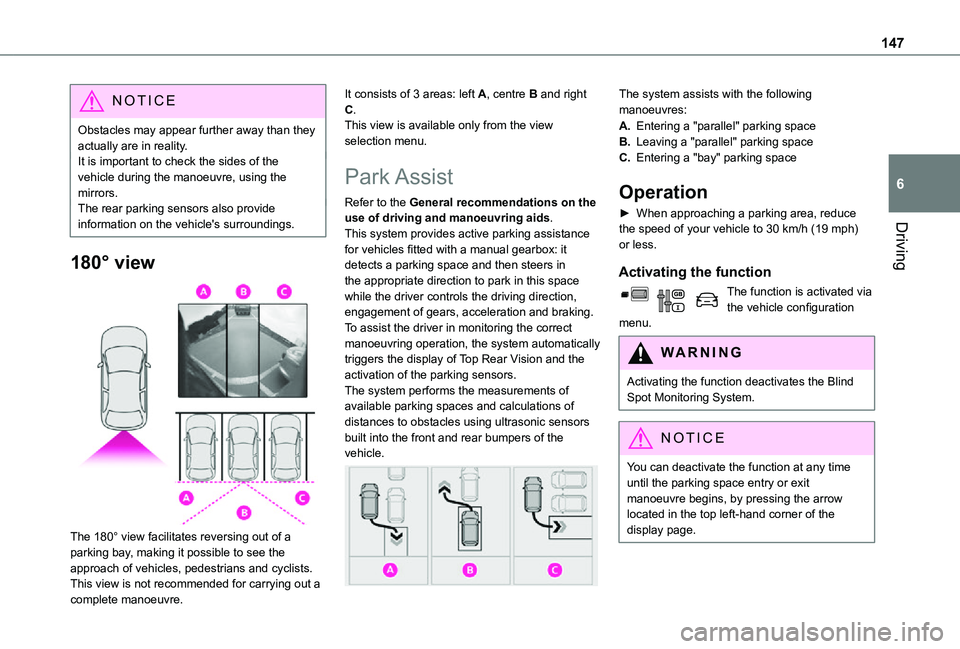
180° view
The 180° view facilitates reversing out of a parking bay, making it possible to see the approach of vehicles, pedestrians and cyclists.This view is not recommended for carrying out a
complete manoeuvre.
It consists of 3 areas: left A, centre B and right C.This view is available only from the view selection menu.
Park Assist
Refer to the General recommendations on the use of driving and manoeuvring aids.This system provides active parking assistance for vehicles fitted with a manual gearbox: it detects a parking space and then steers in the appropriate direction to park in this space while the driver controls the driving direction, engagement of gears, acceleration and braking.To assist the driver in monitoring the correct manoeuvring operation, the system automatically triggers the display of Top Rear Vision and the activation of the parking sensors.The system performs the measurements of available parking spaces and calculations of distances to obstacles using ultrasonic sensors built into the front and rear bumpers of the
vehicle.
The system assists with the following manoeuvres:
A.Entering a "parallel" parking space
B.Leaving a "parallel" parking space
C.Entering a "bay" parking space
Operation
► When approaching a parking area, reduce the speed of your vehicle to 30 km/h (19 mph) or less.
Activating the function
The function is activated via the vehicle configuration menu.
WARNI NG
Activating the function deactivates the Blind Spot Monitoring System.
NOTIC E
You can deactivate the function at any time until the parking space entry or exit manoeuvre begins, by pressing the arrow located in the top left-hand corner of the display page.
Page 183 of 272

183
In the event of a breakdown
8
GoodFailed
Tweezers
NOTIC E
Installing electrical accessoriesYour vehicle's electrical system is designed to operate with standard or optional equipment.Before installing other electrical equipment or accessories on your vehicle, contact a TOYOTA dealer or a qualified workshop.
WARNI NG
TOYOTA will not accept responsibility for the cost incurred in repairing your vehicle or for rectifying malfunctions resulting from the installation of accessories not supplied and not recommended by TOYOTA and not installed in accordance with its instructions, in
particular when the combined consumption of all of the additional equipment connected exceeds 10 milliamperes.
NOTIC E
For more information on installing a towbar or TAXI type equipment, contact a TOYOTA dealer.
Dashboard fuses
The fusebox is placed in the lower dashboard (left-hand side).
Access to the fuses
► Unclip the cover by pulling at the top left, then right.The fuses described below vary according to the equipment in your vehicle.
Fuse No.Rating (A)Functions
F110Wireless smartphone charger, interior electrochrome rear view mirror.
F415Horn.
F620Screenwash pump.
F71012 V socket (rear).
F1030Electric locks module.
F1310Telematics and radio controls.
F145Alarm, advanced telematic unit.
F193Trailer interface unit.
F235Generic trailer interface unit.
F275Additional heating.
F2920Audio system, touch screen.
Page 184 of 272

184
Fuse No.Rating (A)Functions
F3115Audio system (as an accessory).
F321512 V socket (front).
F345Mirror control.
F365USB port.
Engine compartment fuses
The fusebox is placed in the engine compartment near the battery.
Access to the fuses
► Release the two latches A.► Remove the cover.► Change the fuse.
► When you have finished, close the cover carefully then engage the two latches A, to ensure correct sealing of the fusebox.
Fuse No.Rating(A)Functions
F1615Front foglamp.
F1810Right-hand main beam headlamp.
F1910Left-hand main beam headlamp.
F2940Windscreen wipers.
12 V battery
Procedure for starting the engine using another battery or charging a discharged battery.
Lead-acid starter batteries
EC O
Batteries contain harmful substances such as
sulphuric acid and lead.They must be disposed of in accordance with regulations and must not, in any circumstances, be discarded with household waste.Take used remote control batteries and vehicle batteries to a special collection point.
WARNI NG
Protect your eyes and face before handling the battery.All operations on the battery must be carried out in a well ventilated area and away from naked flames and sources of sparks, so as to avoid the risk of explosion or fire.Wash your hands afterwards.