2021 TOYOTA PROACE CITY VERSO rear view mirror
[x] Cancel search: rear view mirrorPage 119 of 272

11 9
Driving
6
Driving and manoeuvring
aids - General
recommendations
NOTIC E
Driving and manoeuvring aids cannot, in any circumstances, replace the need for vigilance on the part of the driver.The driver must comply with the Highway Code, must remain in control of the vehicle in all circumstances and must be able to retake control of it at all times. The driver must adapt the speed to climactic conditions, traffic and the state of the road.It is the driver's responsibility to constantly check the traffic, to assess the relative distances and speeds of other vehicles and to anticipate their movements before indicating and changing lane.The systems cannot exceed the limits of the
laws of physics.
NOTIC E
Driving aidsYou should hold the steering wheel with both hands, always use the interior and exterior rear view mirrors, always keep the feet close to the pedals and take a break every two hours.
NOTIC E
Manoeuvring aidsThe driver must always check the surroundings of the vehicle before and during the whole manoeuvre, in particular using the mirrors.
WARNI NG
RadarThe operation of the radar as well as the associated functions may be impaired through the accumulation of dirt (mud, frost, etc.), in certain difficult weather conditions (very heavy rain, snow) or if the bumper is damaged.If the front bumper is to be repainted, contact a TOYOTA dealer or a qualified workshop; certain types of paint could interfere with the operation of the radar.
WARNI NG
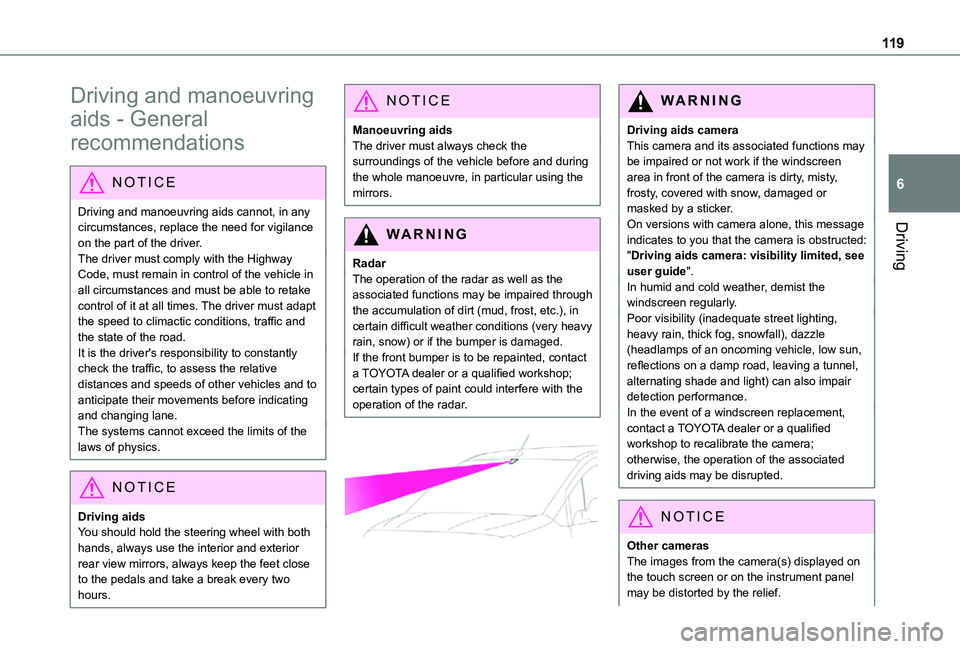
Driving aids cameraThis camera and its associated functions may be impaired or not work if the windscreen area in front of the camera is dirty, misty, frosty, covered with snow, damaged or masked by a sticker.On versions with camera alone, this message indicates to you that the camera is obstructed: "Driving aids camera: visibility limited, see user guide".In humid and cold weather, demist the windscreen regularly.Poor visibility (inadequate street lighting, heavy rain, thick fog, snowfall), dazzle (headlamps of an oncoming vehicle, low sun, reflections on a damp road, leaving a tunnel, alternating shade and light) can also impair detection performance.In the event of a windscreen replacement, contact a TOYOTA dealer or a qualified workshop to recalibrate the camera;
otherwise, the operation of the associated driving aids may be disrupted.
NOTIC E
Other camerasThe images from the camera(s) displayed on the touch screen or on the instrument panel may be distorted by the relief.
Page 146 of 272

146
to be seen. It is automatically deleted if the vehicle remains stationary for too long.
Rear vision
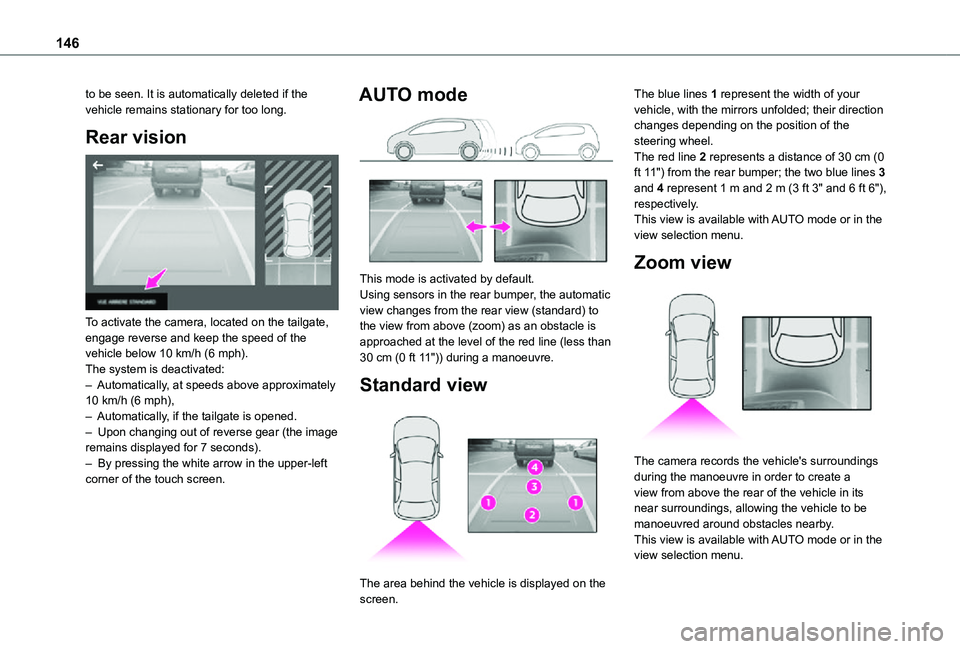
To activate the camera, located on the tailgate, engage reverse and keep the speed of the vehicle below 10 km/h (6 mph).The system is deactivated:– Automatically, at speeds above approximately 10 km/h (6 mph),– Automatically, if the tailgate is opened.– Upon changing out of reverse gear (the image remains displayed for 7 seconds).– By pressing the white arrow in the upper-left corner of the touch screen.
AUTO mode
This mode is activated by default.Using sensors in the rear bumper, the automatic view changes from the rear view (standard) to the view from above (zoom) as an obstacle is approached at the level of the red line (less than 30 cm (0 ft 11")) during a manoeuvre.
Standard view
The area behind the vehicle is displayed on the
screen.
The blue lines 1 represent the width of your vehicle, with the mirrors unfolded; their direction changes depending on the position of the steering wheel.The red line 2 represents a distance of 30 cm (0 ft 11") from the rear bumper; the two blue lines 3 and 4 represent 1 m and 2 m (3 ft 3" and 6 ft 6"), respectively.This view is available with AUTO mode or in the view selection menu.
Zoom view
The camera records the vehicle's surroundings during the manoeuvre in order to create a view from above the rear of the vehicle in its near surroundings, allowing the vehicle to be manoeuvred around obstacles nearby.This view is available with AUTO mode or in the view selection menu.
Page 147 of 272

147
Driving
6
NOTIC E
Obstacles may appear further away than they actually are in reality.It is important to check the sides of the vehicle during the manoeuvre, using the mirrors.The rear parking sensors also provide information on the vehicle's surroundings.
180° view
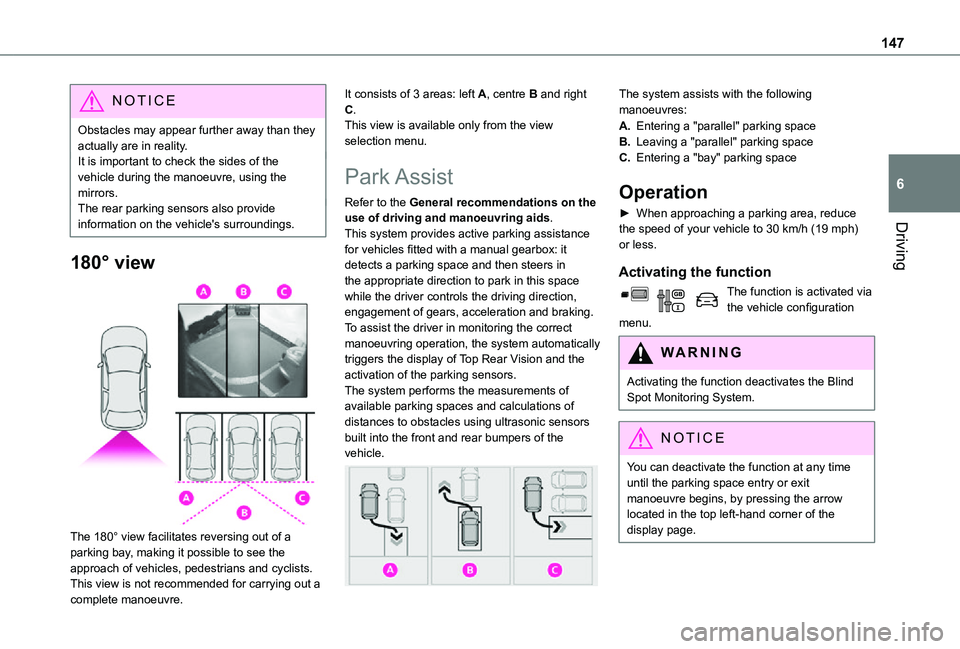
The 180° view facilitates reversing out of a parking bay, making it possible to see the approach of vehicles, pedestrians and cyclists.This view is not recommended for carrying out a
complete manoeuvre.
It consists of 3 areas: left A, centre B and right C.This view is available only from the view selection menu.
Park Assist
Refer to the General recommendations on the use of driving and manoeuvring aids.This system provides active parking assistance for vehicles fitted with a manual gearbox: it detects a parking space and then steers in the appropriate direction to park in this space while the driver controls the driving direction, engagement of gears, acceleration and braking.To assist the driver in monitoring the correct manoeuvring operation, the system automatically triggers the display of Top Rear Vision and the activation of the parking sensors.The system performs the measurements of available parking spaces and calculations of distances to obstacles using ultrasonic sensors built into the front and rear bumpers of the
vehicle.
The system assists with the following manoeuvres:
A.Entering a "parallel" parking space
B.Leaving a "parallel" parking space
C.Entering a "bay" parking space
Operation
► When approaching a parking area, reduce the speed of your vehicle to 30 km/h (19 mph) or less.
Activating the function
The function is activated via the vehicle configuration menu.
WARNI NG
Activating the function deactivates the Blind Spot Monitoring System.
NOTIC E
You can deactivate the function at any time until the parking space entry or exit manoeuvre begins, by pressing the arrow located in the top left-hand corner of the display page.
Page 183 of 272

183
In the event of a breakdown
8
GoodFailed
Tweezers
NOTIC E
Installing electrical accessoriesYour vehicle's electrical system is designed to operate with standard or optional equipment.Before installing other electrical equipment or accessories on your vehicle, contact a TOYOTA dealer or a qualified workshop.
WARNI NG
TOYOTA will not accept responsibility for the cost incurred in repairing your vehicle or for rectifying malfunctions resulting from the installation of accessories not supplied and not recommended by TOYOTA and not installed in accordance with its instructions, in
particular when the combined consumption of all of the additional equipment connected exceeds 10 milliamperes.
NOTIC E
For more information on installing a towbar or TAXI type equipment, contact a TOYOTA dealer.
Dashboard fuses
The fusebox is placed in the lower dashboard (left-hand side).
Access to the fuses
► Unclip the cover by pulling at the top left, then right.The fuses described below vary according to the equipment in your vehicle.
Fuse No.Rating (A)Functions
F110Wireless smartphone charger, interior electrochrome rear view mirror.
F415Horn.
F620Screenwash pump.
F71012 V socket (rear).
F1030Electric locks module.
F1310Telematics and radio controls.
F145Alarm, advanced telematic unit.
F193Trailer interface unit.
F235Generic trailer interface unit.
F275Additional heating.
F2920Audio system, touch screen.
Page 253 of 272

253
Alphabetical index
L
Labels 4, 46Labels, identification 194Lamps, parking 68Lamps, rear 180Lane departure warning active 136, 141LEDs - Light-emitting diodes 68, 177–178Level, AdBlue® 162Level, brake fluid 161Level, Diesel additive 162–163Level, engine coolant 16, 161Level, engine oil 160Levels and checks 159–161Level, screenwash fluid 72, 161Light-emitting diodes - LEDs 68, 177–178Lighting 66Lighting, exterior 66Lighting, guide-me home 68–69Lighting, welcome 69Loading 157Load reduction mode 157
Locating your vehicle 24Locking 23, 25–27Locking from the inside 31Low fuel level 151–152Lumbar 40
M
Maintenance (advice) 167
Maintenance, routine 120, 162Manoeuvring aids (recommendations) 11 9Markings, identification 194Mat 48, 120Memorising a speed 133Menu 216Menu, main 197Menus (audio) 210–2 11, 224–225Messages 244Messages, quick 244Mirror, child surveillance 44Mirror, rear view 43Mirrors, door 42–43, 61, 139Misfuel prevention 153Mountings, ISOFIX 94MP3 CD 201
N
Navigation 230–232Navigation, connected 232–235
Net 53–54Net, high load retaining 52Number plate lamps 181
O
Obstacle detection 143Oil change 160Oil consumption 160
OIl, engine 160On-board tools 169–170Opening the bonnet 158–159Opening the boot 23Opening the doors 23
P
Pads, brake 163Paint 168, 194Paint colour code 194Park Assist 147Parking brake 105, 164Parking brake, electric 105–108, 164Parking sensors, audible and visual 143Parking sensors, front 144Parking sensors, rear 143Plates, identification 194Player, Apple® 202, 214, 241Player, MP3 CD 201Player, USB 200, 214, 240
Port, USB 50, 200, 214, 235, 240Pressures, tyres 164, 172, 176, 194Pre-tensioning seat belts 85Priming the fuel system 169Profiles 219, 245Programmable cruise control 126Protecting children 86, 89–93, 96–98Puncture 170, 173