2021 TOYOTA PROACE CITY VERSO maintenance
[x] Cancel search: maintenancePage 151 of 272
151
Practical information
7
Compatibility of fuels
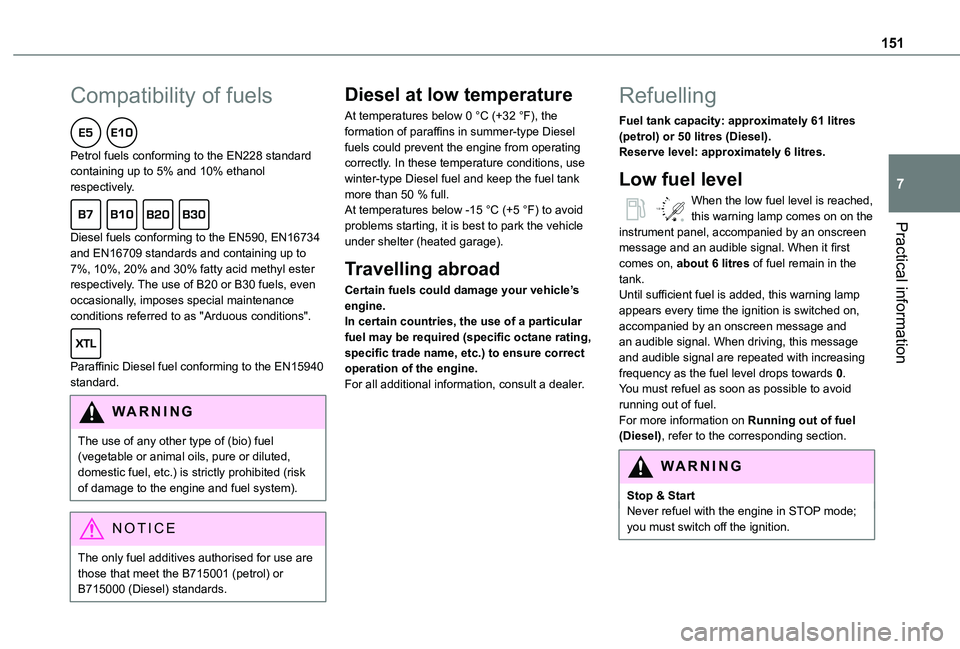
Petrol fuels conforming to the EN228 standard containing up to 5% and 10% ethanol respectively.
Diesel fuels conforming to the EN590, EN16734 and EN16709 standards and containing up to 7%, 10%, 20% and 30% fatty acid methyl ester respectively. The use of B20 or B30 fuels, even occasionally, imposes special maintenance conditions referred to as "Arduous conditions".
Paraffinic Diesel fuel conforming to the EN15940 standard.
WARNI NG
The use of any other type of (bio) fuel (vegetable or animal oils, pure or diluted, domestic fuel, etc.) is strictly prohibited (risk of damage to the engine and fuel system).
NOTIC E
The only fuel additives authorised for use are those that meet the B715001 (petrol) or B715000 (Diesel) standards.
Diesel at low temperature
At temperatures below 0 °C (+32 °F), the formation of paraffins in summer-type Diesel fuels could prevent the engine from operating correctly. In these temperature conditions, use winter-type Diesel fuel and keep the fuel tank more than 50 % full.At temperatures below -15 °C (+5 °F) to avoid problems starting, it is best to park the vehicle under shelter (heated garage).
Travelling abroad
Certain fuels could damage your vehicle’s engine.In certain countries, the use of a particular fuel may be required (specific octane rating, specific trade name, etc.) to ensure correct operation of the engine.For all additional information, consult a dealer.
Refuelling
Fuel tank capacity: approximately 61 litres (petrol) or 50 litres (Diesel).Reserve level: approximately 6 litres.
Low fuel level
/2
1 1When the low fuel level is reached, this warning lamp comes on on the instrument panel, accompanied by an onscreen message and an audible signal. When it first comes on, about 6 litres of fuel remain in the tank.Until sufficient fuel is added, this warning lamp appears every time the ignition is switched on, accompanied by an onscreen message and an audible signal. When driving, this message and audible signal are repeated with increasing frequency as the fuel level drops towards 0.You must refuel as soon as possible to avoid running out of fuel.For more information on Running out of fuel (Diesel), refer to the corresponding section.
W
ARNI NG
Stop & StartNever refuel with the engine in STOP mode; you must switch off the ignition.
Page 162 of 272
162
Fluid specification
The fluid must be topped up with a ready-to-use mixture.In winter (temperatures below zero), a liquid containing an agent to prevent freezing must be used which is appropriate for the prevailing conditions, in order to protect the elements of the system (pump, tank, ducts, jets, etc.).
WARNI NG
Filling with pure water is prohibited under all circumstances (risk of freezing, limestone deposits, etc.).
Diesel fuel additive (Diesel
with particle filter)
or On reaching the minimum level in the particle filter additive tank, this warning lamp comes on fixed, accompanied by an audible warning and a message warning that the additive level is too low.
Topping up
This additive must be topped up without delay by a TOYOTA dealer or a qualified workshop.
AdBlue (Diesel engines)
An alert is triggered when the reserve level is reached.For more information on the AdBlue range indicators, refer to the corresponding section.To avoid the vehicle being immobilised in accordance with regulations, you must top up the AdBlue tank.For more information on the Supply of AdBlue, refer to the corresponding section.
Checks
Unless otherwise indicated, check these components in accordance with the manufacturer's service schedule and according to your engine.Otherwise, have them checked by a TOYOTA dealer or a qualified workshop.
WARNI NG
Only use products recommended by TOYOTA or products of equivalent quality and specification.In order to optimise the operation of components as important as those in the braking system, TOYOTA selects and offers very specific products.
12 V battery
The battery does not require any maintenance.However, check regularly that the terminals are correctly tightened (versions without quick release terminals) and that the connections are clean.
NOTIC E
For more information on the precautions to take before any work on the 12 V battery, refer to the corresponding section.
WARNI NG
Versions equipped with Stop & Start are fitted with a 12 V lead-acid battery of specific technology and specification.Its replacement should be carried out only by a TOYOTA dealer or a qualified workshop.
Passenger compartment
filter
Depending on the environment and the use of the vehicle (e.g. dusty atmosphere, city driving), change it twice as often, if necessary.
Page 163 of 272

163
Practical information
7
NOTIC E
A clogged passenger compartment filter can adversely affect air conditioning system performance and generate undesirable odours.
Air filter
Depending on the environment and the use of the vehicle (e.g. dusty atmosphere, city driving), change it twice as often, if necessary.
Oil filter
Change the oil filter each time the engine oil is changed.
Particle filter (Diesel)
When the particle filter is approaching saturation, this warning lamp comes on temporarily, accompanied by a message warning of the risk
of filter clogging.As soon as the traffic conditions permit, regenerate the filter by driving at a speed of at least 60 km/h (37 mph) until the warning lamp goes off.
NOTIC E
If the warning lamp stays on, this indicates a low Diesel additive level.For more information on Checking levels, refer to the corresponding section.
NOTIC E
Following prolonged operation of the vehicle at very low speed or at idle, you may, in exceptional circumstances, notice the emission of water vapour at the exhaust while accelerating. This has no impact on the vehicle’s behaviour or the environment.
NOTIC E
New vehicleDuring the first few particle filter regeneration operations, you may notice a "burning" smell. This is perfectly normal.
Manual gearbox
The gearbox does not require any maintenance (no oil change).
Automatic gearbox
The gearbox does not require any maintenance (no oil change).
Brake pads
Brake wear depends on the style of driving, particularly in the case of vehicles used in town, over short distances. It may be necessary to have the condition of the brakes checked, even between vehicle services.Unless there is a leak in the circuit, a drop in the brake fluid level indicates that the brake pads are worn.
NOTIC E
After washing the vehicle, moisture, or in wintry conditions, ice can form on the brake discs and pads: braking efficiency may be reduced. Gently dab the brakes to dry and defrost them.
Brake disc wear
For information on checking brake disc wear, contact a TOYOTA dealer or a qualified workshop.
Page 167 of 272
167
Practical information
7
After refilling
► Refit the blue cap to the tank filler and turn it clockwise, as far as it will go.► Close the fuel filler flap.
Do not dispose of AdBlue® bottles or containers in the household waste.Place them in a container reserved for this purpose or take them back to where you purchased them.
Free-wheeling
In certain situations, you must allow the vehicle to free-wheel (while being towed, on a rolling road, in an automatic car wash, or being transported by rail or sea freight, etc.).The procedure varies according to the type of gearbox and parking brake.
With a manual gearbox and
electric parking brake /
Release procedure
► With the engine running and while depressing the brake pedal, move the gear selector to the neutral position.
► While depressing the brake pedal, switch off the ignition.► Release the brake pedal, then switch on the ignition again.► While depressing the brake pedal, press the control lever to release the parking brake.► Release the brake pedal, then switch off the ignition.
Reverting to normal operation
► While depressing the brake pedal, start the engine.
With an automatic gearbox
and electric parking brake /
Release procedure
► With the engine running and while depressing the brake pedal, set the gear selector to N.► While depressing the brake pedal, switch off the ignition.
► Release the brake pedal, then switch on the ignition again.► While depressing the brake pedal, press the control lever to release the parking brake.► Release the brake pedal, then switch off the ignition.
Reverting to normal operation
► While depressing the brake pedal, start the engine.
NOTIC E
Keyless Entry and StartingYou must not depress the brake pedal while switching the ignition on or off. If you do, the engine will start, requiring you to restart the procedure.
Advice on care and
maintenance
General recommendations
Observe the following recommendations to avoid damaging your vehicle.
Exterior
WARNI NG
Never use a high-pressure jet wash in the engine compartment, due to the risk of damaging electrical components.Do not wash the vehicle in strong sunshine or extremely cold conditions.
Page 170 of 272
170
With spare wheel
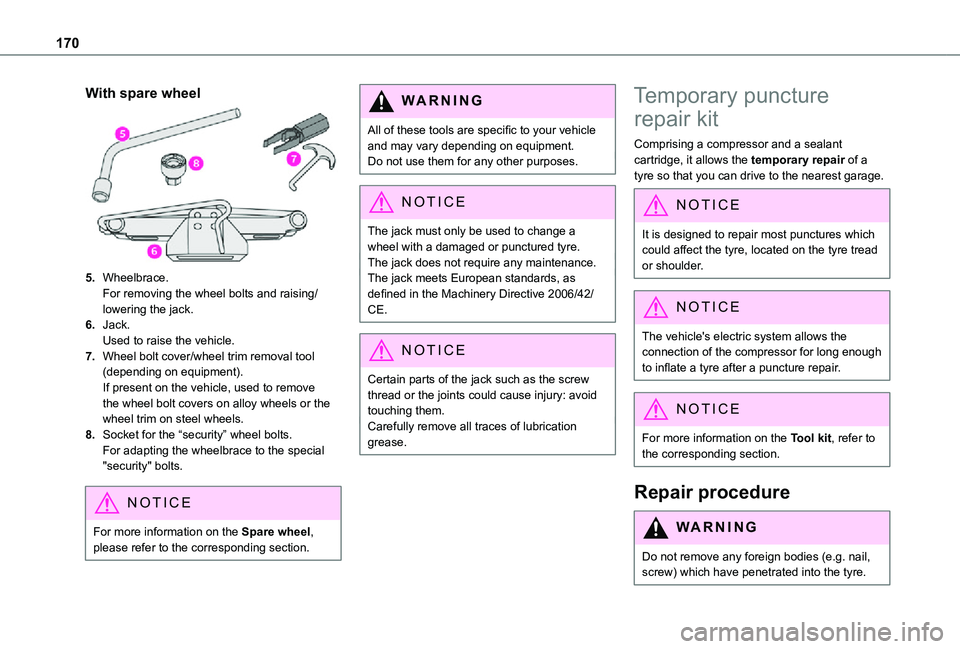
5.Wheelbrace.For removing the wheel bolts and raising/lowering the jack.
6.Jack.Used to raise the vehicle.
7.Wheel bolt cover/wheel trim removal tool (depending on equipment).If present on the vehicle, used to remove the wheel bolt covers on alloy wheels or the wheel trim on steel wheels.
8.Socket for the “security” wheel bolts.For adapting the wheelbrace to the special "security" bolts.
NOTIC E
For more information on the Spare wheel, please refer to the corresponding section.
WARNI NG
All of these tools are specific to your vehicle and may vary depending on equipment.Do not use them for any other purposes.
NOTIC E
The jack must only be used to change a
wheel with a damaged or punctured tyre.The jack does not require any maintenance.The jack meets European standards, as defined in the Machinery Directive 2006/42/CE.
NOTIC E
Certain parts of the jack such as the screw thread or the joints could cause injury: avoid touching them.Carefully remove all traces of lubrication grease.
Temporary puncture
repair kit
Comprising a compressor and a sealant cartridge, it allows the temporary repair of a tyre so that you can drive to the nearest garage.
NOTIC E
It is designed to repair most punctures which
could affect the tyre, located on the tyre tread or shoulder.
NOTIC E
The vehicle's electric system allows the connection of the compressor for long enough to inflate a tyre after a puncture repair.
NOTIC E
For more information on the Tool kit, refer to the corresponding section.
Repair procedure
WARNI NG
Do not remove any foreign bodies (e.g. nail, screw) which have penetrated into the tyre.
Page 197 of 272
197
Bluetooth® audio system
10
Menus
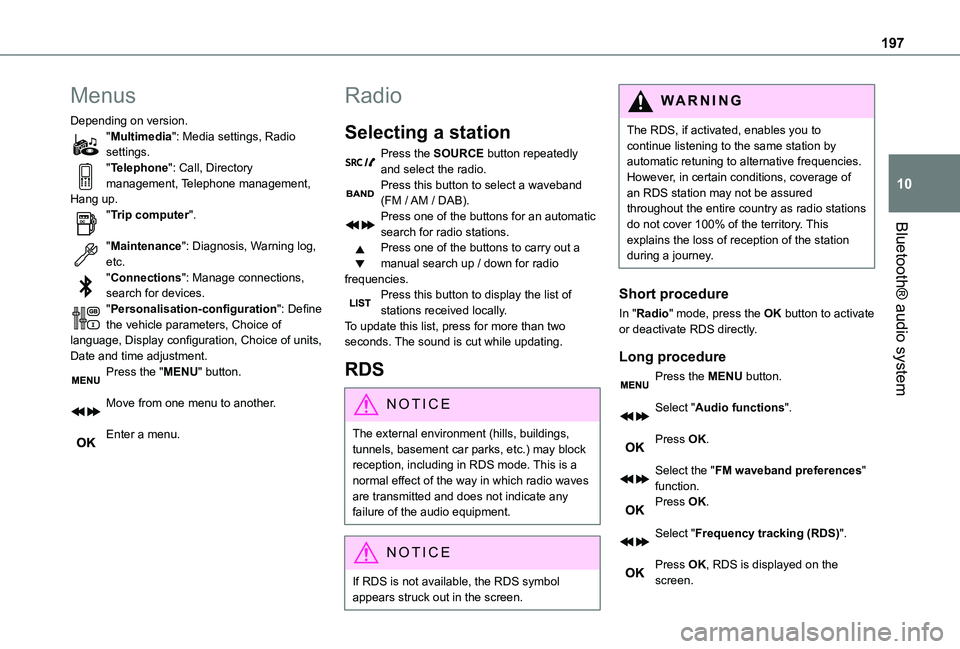
Depending on version."Multimedia": Media settings, Radio settings."Telephone": Call, Directory management, Telephone management, Hang up."Trip computer".
"Maintenance": Diagnosis, Warning log, etc."Connections": Manage connections, search for devices."Personalisation-configuration": Define the vehicle parameters, Choice of language, Display configuration, Choice of units, Date and time adjustment.Press the "MENU" button.
Move from one menu to another.
Enter a menu.
Radio
Selecting a station
Press the SOURCE button repeatedly and select the radio.Press this button to select a waveband (FM / AM / DAB).Press one of the buttons for an automatic search for radio stations.Press one of the buttons to carry out a manual search up / down for radio frequencies.Press this button to display the list of stations received locally.To update this list, press for more than two seconds. The sound is cut while updating.
RDS
NOTIC E
The external environment (hills, buildings, tunnels, basement car parks, etc.) may block reception, including in RDS mode. This is a normal effect of the way in which radio waves are transmitted and does not indicate any failure of the audio equipment.
NOTIC E
If RDS is not available, the RDS symbol appears struck out in the screen.
WARNI NG
The RDS, if activated, enables you to continue listening to the same station by automatic retuning to alternative frequencies. However, in certain conditions, coverage of an RDS station may not be assured throughout the entire country as radio stations do not cover 100% of the territory. This explains the loss of reception of the station during a journey.
Short procedure
In "Radio" mode, press the OK button to activate or deactivate RDS directly.
Long procedure
Press the MENU button.
Select "Audio functions".
Press OK.
Select the "FM waveband preferences" function.Press OK.
Select "Frequency tracking (RDS)".
Press OK, RDS is displayed on the screen.
Page 250 of 272
250
A
ABS 78Accessories 75, 104Access to the 3rd row 46Access to the spare wheel 173Active Safety Brake 133–135AdBlue® 164AdBlue® tank 166Additive, Diesel 162–163Adjusting headlamps 70Adjusting head restraints 47Adjusting seat 40, 46Adjusting the air distribution 57–58Adjusting the air flow 57–58Adjusting the date 220, 246Adjusting the height and reach of the steering wheel 42Adjusting the lumbar support 40Adjusting the temperature 57–58Adjusting the time 220, 246Advanced Grip Control 80–81
Advice on care and maintenance 167Advice on driving 7, 99–100Airbags 86, 88–89, 91Airbags, curtain 87, 89Airbags, front 86, 88, 92Airbags, lateral 87–88Air conditioning 55, 58, 59, 61Air conditioning, digital 60Air conditioning, dual-zone automatic 57–58
Air conditioning, electronic (with display screen) 61Air conditioning, manual 56–57Air intake 57–58Air vents 55Alarm 34–36Android Auto connection 236Anti-lock braking system (ABS) 78–79Antitheft / Immobiliser 25Apple CarPlay connection 216, 235Applications 237Armrest 40Armrest, front 48Assistance call 76–77Assistance, emergency braking 79, 135Audible warning 78Audio streaming (Bluetooth) 201, 214, 241
B
Battery 157, 184, 187
Battery, 12 V 162, 184–186Battery, charging 186Battery, remote control 30, 64Bench seat, one-piece, fixed 46Blind spot monitoring system 140Blind spot monitoring system, active 141Blind spot sensors 139, 141Bluetooth (hands-free) 202–203, 217–218, 242Bluetooth (telephone) 217–218, 242–243
Bodywork 168Bonnet 158–159Boot lid 27, 29Bottle holder 48Brake discs 163Brake lamps 180Brakes 163Braking assistance system 78–79Braking, automatic emergency 133–135Braking, dynamic emergency 106–108Brightness 219Bulbs 177Bulbs (changing) 176–178Bulbs (changing, type) 177
C
Capacity, fuel tank 151–152Cap, fuel filler 152Care of the bodywork 168CD 201, 214
CD, MP3 201, 214Central locking 24, 27Changing a bulb 176–178Changing a fuse 182–184Changing a wheel 170, 173Changing a wiper blade 72–73Changing the remote control battery 30Charger, induction 51Charger, wireless 51Checking the levels 160–161
Page 253 of 272
253
Alphabetical index
L
Labels 4, 46Labels, identification 194Lamps, parking 68Lamps, rear 180Lane departure warning active 136, 141LEDs - Light-emitting diodes 68, 177–178Level, AdBlue® 162Level, brake fluid 161Level, Diesel additive 162–163Level, engine coolant 16, 161Level, engine oil 160Levels and checks 159–161Level, screenwash fluid 72, 161Light-emitting diodes - LEDs 68, 177–178Lighting 66Lighting, exterior 66Lighting, guide-me home 68–69Lighting, welcome 69Loading 157Load reduction mode 157
Locating your vehicle 24Locking 23, 25–27Locking from the inside 31Low fuel level 151–152Lumbar 40
M
Maintenance (advice) 167
Maintenance, routine 120, 162Manoeuvring aids (recommendations) 11 9Markings, identification 194Mat 48, 120Memorising a speed 133Menu 216Menu, main 197Menus (audio) 210–2 11, 224–225Messages 244Messages, quick 244Mirror, child surveillance 44Mirror, rear view 43Mirrors, door 42–43, 61, 139Misfuel prevention 153Mountings, ISOFIX 94MP3 CD 201
N
Navigation 230–232Navigation, connected 232–235
Net 53–54Net, high load retaining 52Number plate lamps 181
O
Obstacle detection 143Oil change 160Oil consumption 160
OIl, engine 160On-board tools 169–170Opening the bonnet 158–159Opening the boot 23Opening the doors 23
P
Pads, brake 163Paint 168, 194Paint colour code 194Park Assist 147Parking brake 105, 164Parking brake, electric 105–108, 164Parking sensors, audible and visual 143Parking sensors, front 144Parking sensors, rear 143Plates, identification 194Player, Apple® 202, 214, 241Player, MP3 CD 201Player, USB 200, 214, 240
Port, USB 50, 200, 214, 235, 240Pressures, tyres 164, 172, 176, 194Pre-tensioning seat belts 85Priming the fuel system 169Profiles 219, 245Programmable cruise control 126Protecting children 86, 89–93, 96–98Puncture 170, 173