2021 TOYOTA PROACE CITY fog light
[x] Cancel search: fog lightPage 16 of 272
16
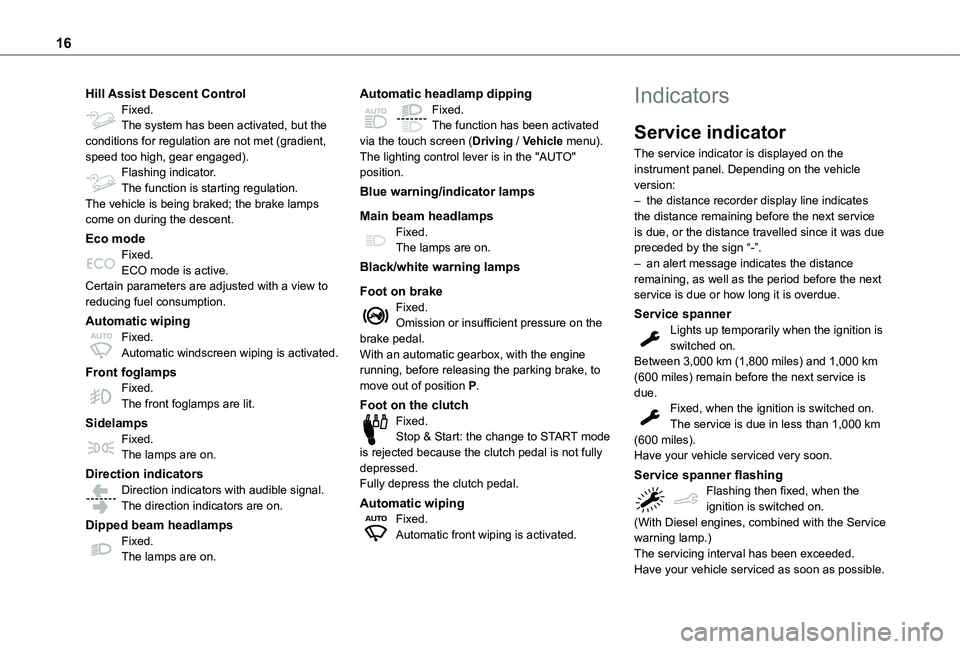
Hill Assist Descent ControlFixed.The system has been activated, but the conditions for regulation are not met (gradient, speed too high, gear engaged).Flashing indicator.The function is starting regulation.The vehicle is being braked; the brake lamps come on during the descent.
Eco modeFixed.ECO mode is active.Certain parameters are adjusted with a view to reducing fuel consumption.
Automatic wipingFixed.Automatic windscreen wiping is activated.
Front foglampsFixed.The front foglamps are lit.
SidelampsFixed.
The lamps are on.
Direction indicatorsDirection indicators with audible signal.The direction indicators are on.
Dipped beam headlampsFixed.The lamps are on.
Automatic headlamp dippingFixed.The function has been activated via the touch screen (Driving / Vehicle menu).The lighting control lever is in the "AUTO" position.
Blue warning/indicator lamps
Main beam headlampsFixed.The lamps are on.
Black/white warning lamps
Foot on brakeFixed.Omission or insufficient pressure on the brake pedal.With an automatic gearbox, with the engine running, before releasing the parking brake, to move out of position P.
Foot on the clutchFixed.Stop & Start: the change to START mode
is rejected because the clutch pedal is not fully depressed.Fully depress the clutch pedal.
Automatic wipingFixed.Automatic front wiping is activated.
Indicators
Service indicator
The service indicator is displayed on the instrument panel. Depending on the vehicle version:– the distance recorder display line indicates the distance remaining before the next service is due, or the distance travelled since it was due preceded by the sign “-”.– an alert message indicates the distance remaining, as well as the period before the next service is due or how long it is overdue.
Service spannerLights up temporarily when the ignition is switched on.Between 3,000 km (1,800 miles) and 1,000 km (600 miles) remain before the next service is due.Fixed, when the ignition is switched on.The service is due in less than 1,000 km (600 miles).
Have your vehicle serviced very soon.
Service spanner flashingFlashing then fixed, when the ignition is switched on.(With Diesel engines, combined with the Service warning lamp.)The servicing interval has been exceeded.Have your vehicle serviced as soon as possible.
Page 70 of 272
70
Lighting control lever
Main lighting
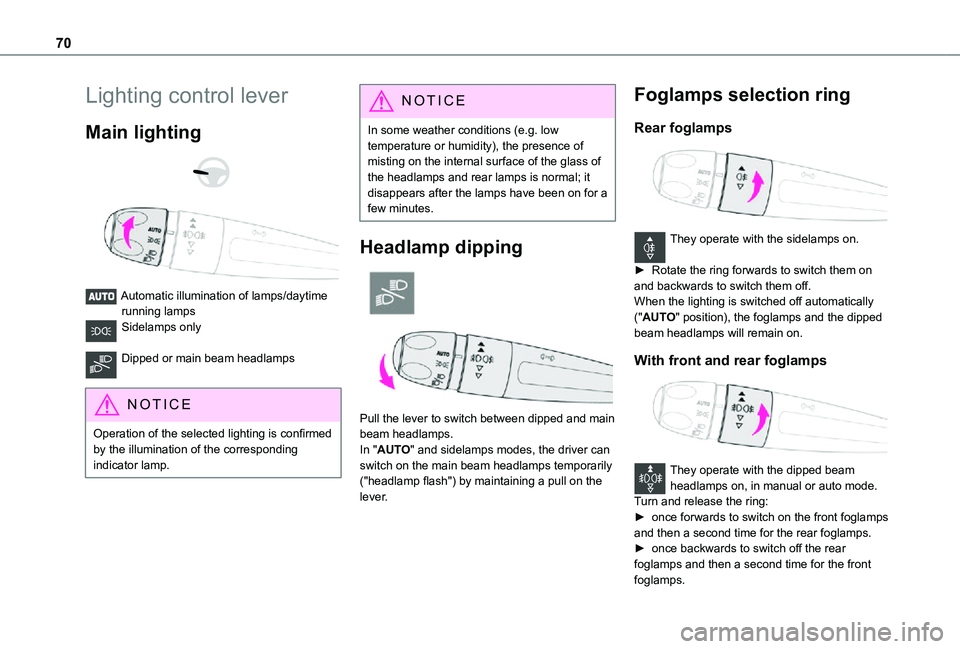
Automatic illumination of lamps/daytime running lampsSidelamps only
Dipped or main beam headlamps
NOTIC E
Operation of the selected lighting is confirmed by the illumination of the corresponding indicator lamp.
NOTIC E
In some weather conditions (e.g. low temperature or humidity), the presence of misting on the internal surface of the glass of the headlamps and rear lamps is normal; it disappears after the lamps have been on for a few minutes.
Headlamp dipping
Pull the lever to switch between dipped and main beam headlamps.
In "AUTO" and sidelamps modes, the driver can switch on the main beam headlamps temporarily ("headlamp flash") by maintaining a pull on the lever.
Foglamps selection ring
Rear foglamps
They operate with the sidelamps on.
► Rotate the ring forwards to switch them on and backwards to switch them off.When the lighting is switched off automatically ("AUTO" position), the foglamps and the dipped beam headlamps will remain on.
With front and rear foglamps
They operate with the dipped beam headlamps on, in manual or auto mode.Turn and release the ring:► once forwards to switch on the front foglamps and then a second time for the rear foglamps.► once backwards to switch off the rear foglamps and then a second time for the front foglamps.
Page 71 of 272
71
Lighting and visibility
4
If the lighting is switched off automatically ("AUTO" position) or the dipped beam headlamps are switched off manually, the foglamps and sidelamps will remain on.► Turn the ring backwards to switch the foglamps off; the sidelamps will then switch off.
NOTIC E
When the lighting is left onAn audible signal when a front door is opened warns the driver that the vehicle's exterior lighting is on, with the ignition off and in manual lighting mode.In this case, switching off the lighting stops the audible signal.The lighting goes off when you switch off the ignition, but you can always switch it on again using the lighting control lever.
NOTIC E
Travelling abroad
If using your vehicle in a country that drives on the other side of the road, the headlamps must be adjusted to avoid dazzling on-coming drivers.Contact a TOYOTA dealer or a qualified workshop.
WARNI NG
In good or rainy weather, by both day and night, use of the front foglamps and the rear foglamps are prohibited. In these situations, the power of their beams may dazzle other drivers. They should only be used in fog or falling snow.In these weather conditions, it is your responsibility to switch on the foglamps and dipped headlamps manually as the sunshine sensor may detect sufficient light.Switch off the front and rear foglamps when they are no longer necessary.
WARNI NG
Never look too closely at the luminous beam of LED headlamps: risk of serious eye injury.
Direction indicators
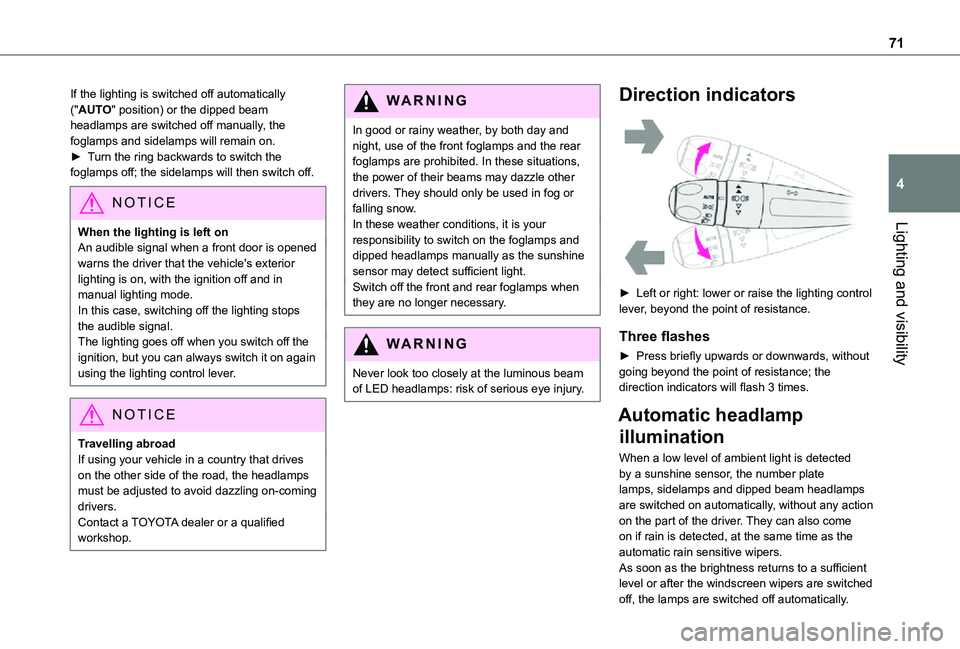
► Left or right: lower or raise the lighting control lever, beyond the point of resistance.
Three flashes
► Press briefly upwards or downwards, without going beyond the point of resistance; the direction indicators will flash 3 times.
Automatic headlamp
illumination
When a low level of ambient light is detected by a sunshine sensor, the number plate lamps, sidelamps and dipped beam headlamps are switched on automatically, without any action on the part of the driver. They can also come on if rain is detected, at the same time as the automatic rain sensitive wipers.As soon as the brightness returns to a sufficient level or after the windscreen wipers are switched off, the lamps are switched off automatically.
Page 72 of 272
72
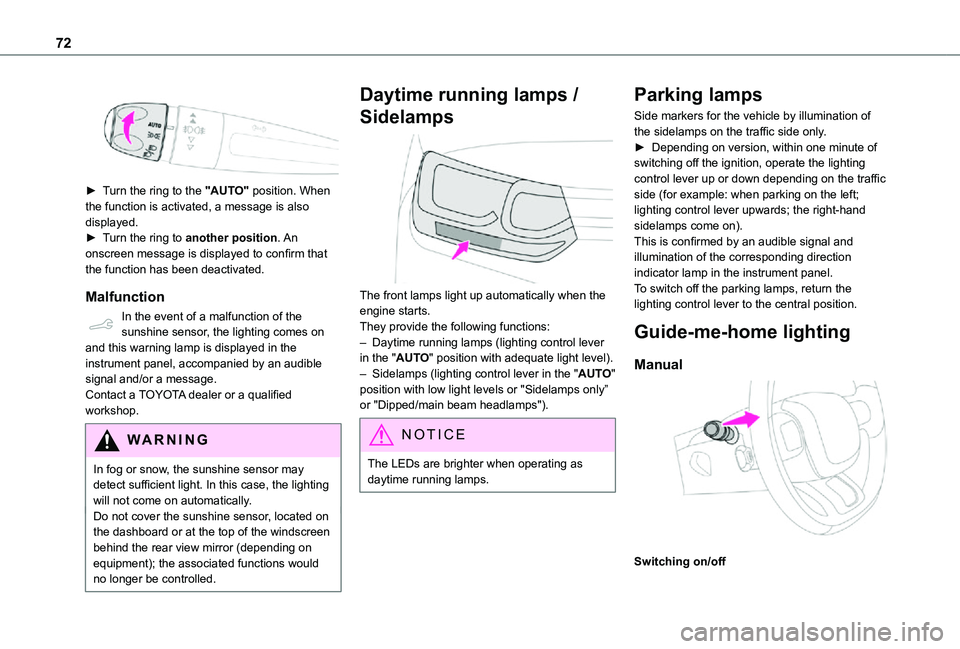
► Turn the ring to the "AUTO" position. When the function is activated, a message is also displayed.► Turn the ring to another position. An
onscreen message is displayed to confirm that the function has been deactivated.
Malfunction
In the event of a malfunction of the sunshine sensor, the lighting comes on and this warning lamp is displayed in the instrument panel, accompanied by an audible signal and/or a message.Contact a TOYOTA dealer or a qualified workshop.
WARNI NG
In fog or snow, the sunshine sensor may detect sufficient light. In this case, the lighting will not come on automatically.Do not cover the sunshine sensor, located on the dashboard or at the top of the windscreen behind the rear view mirror (depending on equipment); the associated functions would no longer be controlled.
Daytime running lamps /
Sidelamps
The front lamps light up automatically when the engine starts.They provide the following functions:– Daytime running lamps (lighting control lever in the "AUTO" position with adequate light level).– Sidelamps (lighting control lever in the "AUTO" position with low light levels or "Sidelamps only” or "Dipped/main beam headlamps").
NOTIC E
The LEDs are brighter when operating as daytime running lamps.
Parking lamps
Side markers for the vehicle by illumination of the sidelamps on the traffic side only.► Depending on version, within one minute of switching off the ignition, operate the lighting control lever up or down depending on the traffic side (for example: when parking on the left; lighting control lever upwards; the right-hand sidelamps come on).This is confirmed by an audible signal and illumination of the corresponding direction indicator lamp in the instrument panel.To switch off the parking lamps, return the lighting control lever to the central position.
Guide-me-home lighting
Manual
Switching on/off
Page 74 of 272
74
indicator lamps come on on the instrument panel.The function is deactivated if the fog lamps are switched on or the system detects dense fog.When the fog lamps are switched off or the vehicle leaves the area of dense fog, the function is automatically reactivated.This indicator lamp goes out when the function is deactivated.
Pause
If the situation requires a change of headlamp beam, the driver can take over at any time.► A "headlamp flash" pauses the function and the system changes to "automatic illumination of headlamps" mode:– if the "AUTO" and "Dipped beam" indicator lamps were on, the system changes to main beam,– if the "AUTO" and "Main beam" indicator lamps were on, the system changes to dipped beam.To reactivate the system, flash the headlamps
again.
NOTIC E
The system may suffer interference or not work correctly:– under conditions of poor visibility (snow, heavy rain, etc.),
– if the windscreen in front of the camera is dirty, misted or obscured (for example, by a sticker, etc.),– if the vehicle is facing highly reflective signs.When the system detects thick fog, it temporarily deactivates the function.The system is not able to detect:– road users that do not have their own lighting, such as pedestrians,– vehicles whose lighting is obscured (for example: vehicles running behind a safety barrier on a motorway),– vehicles at the top or bottom of a steep slope, on winding roads, on crossroads.
WARNI NG
Clean the windscreen regularly, particularly the area in front of the camera.The internal surface of the windscreen can also become misted around the camera. In humid and cold weather, demist the windscreen regularly.Do not allow snow to accumulate on the bonnet or roof of the vehicle as this could obstruct the detection camera.
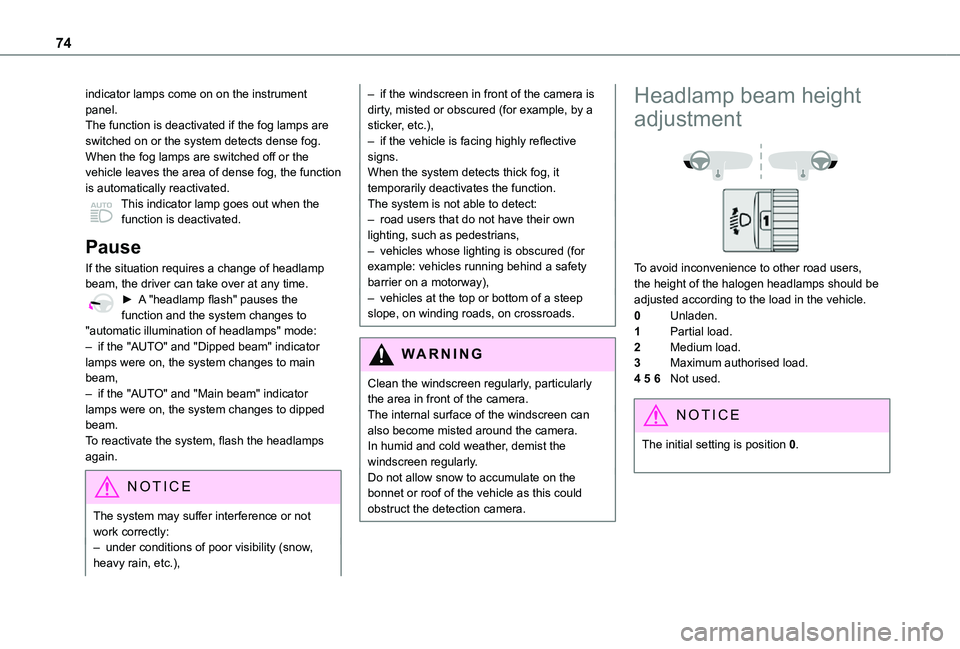
Headlamp beam height
adjustment
To avoid inconvenience to other road users, the height of the halogen headlamps should be adjusted according to the load in the vehicle.
0Unladen.
1Partial load.
2Medium load.
3Maximum authorised load.
4 5 6Not used.
NOTIC E
The initial setting is position 0.
Page 120 of 272
120
WARNI NG
Driving aids cameraThis camera and its associated functions may be impaired or not work if the windscreen area in front of the camera is dirty, misty, frosty, covered with snow, damaged or masked by a sticker.On versions with camera alone, this message indicates to you that the camera is obstructed: "Driving aids camera: visibility limited, see user guide".In humid and cold weather, demist the windscreen regularly.Poor visibility (inadequate street lighting, heavy rain, thick fog, snowfall), dazzle (headlamps of an oncoming vehicle, low sun, reflections on a damp road, leaving a tunnel, alternating shade and light) can also impair detection performance.In the event of a windscreen replacement, contact a TOYOTA dealer or a qualified workshop to recalibrate the camera;
otherwise, the operation of the associated driving aids may be disrupted.
NOTIC E
Other camerasThe images from the camera(s) displayed on the touch screen or on the instrument panel may be distorted by the relief.
In the presence of areas in shade, or in conditions of bright sunlight or inadequate lighting, the image may be darkened and with lower contrast.Obstacles may appear further away than they actually are.
WARNI NG
SensorsThe operation of the sensors as well as the associated functions may be disturbed by sound interference such as that emitted by noisy vehicles and machinery (e.g. lorries, pneumatic drills), by the accumulation of snow or dead leaves on the road or in the event of damaged bumpers and mirrors.When reverse gear is engaged, an audible signal (long beep) indicates that the sensors may be dirty.A front or rear impact to the vehicle can upset the sensors’ settings, which is not
always detected by the system: distance measurements may be distorted.The sensors do not systematically detect obstacles that are too low (pavements, studs) or too thin (trees, posts, wire fences).Certain obstacles located in the sensors’ blind spots may not be detected or may no longer be detected during the manoeuvre.Certain materials (fabrics) absorb sound waves: pedestrians may not be detected.
NOTIC E
MaintenanceClean the bumpers and door mirrors and the field of vision of the cameras regularly.When washing your vehicle at high pressure, direct the spray from at least 30 cm (0 ft 11") away from the sensors and cameras.
WARNI NG
MatsThe use of mats not approved by TOYOTA may interfere with the operation of the speed limiter or cruise control.To avoid any risk of jamming the pedals:► ensure that the mat is secured correctly,► never fit one mat on top of another.
NOTIC E
Units of speed
Ensure that the units of speed displayed on the instrument panel (km/h or mph) are those for the country you are driving in.If this is not the case, when the vehicle is stationary, set the display to the required units of speed so that it complies with what is authorised locally.In case of doubt, contact a TOYOTA dealer or a qualified workshop.
Page 142 of 272
142
This alert is issued via the display of a message encouraging you to take a break, accompanied by an audible signal.If the driver does not follow this advice, the alert is repeated hourly until the vehicle is stopped.The system resets itself if one of the following conditions is met:– engine running, the vehicle has been stationary for more than 15 minutes,– the ignition has been switched off for a few minutes,– the driver's seat belt is unfastened and their door is opened.
NOTIC E
As soon as the speed of the vehicle drops below 65 km/h (40 mph), the system goes into standby.The driving time is counted again once the speed is above 65 km/h (40 mph).
Driver Attention Warning
Depending on version, the "Coffee Break Alert" system is combined with the "Driver Attention Warning" system.
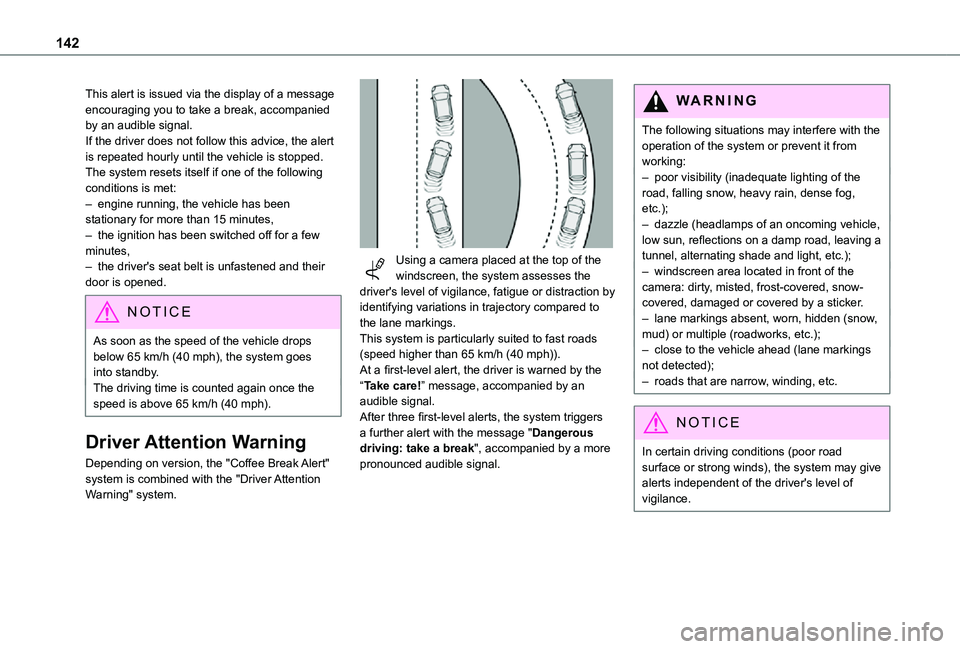
Using a camera placed at the top of the windscreen, the system assesses the driver's level of vigilance, fatigue or distraction by identifying variations in trajectory compared to the lane markings.This system is particularly suited to fast roads (speed higher than 65 km/h (40 mph)).At a first-level alert, the driver is warned by the “Take care!” message, accompanied by an audible signal.After three first-level alerts, the system triggers a further alert with the message "Dangerous driving: take a break", accompanied by a more pronounced audible signal.
WARNI NG
The following situations may interfere with the operation of the system or prevent it from working:– poor visibility (inadequate lighting of the road, falling snow, heavy rain, dense fog, etc.);– dazzle (headlamps of an oncoming vehicle, low sun, reflections on a damp road, leaving a tunnel, alternating shade and light, etc.);– windscreen area located in front of the camera: dirty, misted, frost-covered, snow-covered, damaged or covered by a sticker.– lane markings absent, worn, hidden (snow, mud) or multiple (roadworks, etc.);– close to the vehicle ahead (lane markings not detected);– roads that are narrow, winding, etc.
NOTIC E
In certain driving conditions (poor road surface or strong winds), the system may give alerts independent of the driver's level of vigilance.
Page 176 of 272
176
WARNI NG
Opening the bonnet / Accessing the bulbsWith the engine warm, proceed with caution - risk of burns!Take care with objects or clothing that could be caught in the blades of the cooling fan - risk of strangulation!
NOTIC E
Halogen bulbs (Hx)To ensure good quality lighting, check that the bulb is correctly positioned in its housing.
WARNI NG
After changing a bulb
To refit, carry out the fitting operations in reverse order.Close the protective cover very carefully to guarantee the sealing of the lamps.
Types of bulb
Various types of bulb are fitted on the vehicle. To remove them:
Type AAll-glass bulb: pull gently as it is fitted by pressure.
Type BBayonet bulb: press on the bulb then turn it anti-clockwise.
Type CHalogen bulb: release the retaining spring from its housing.
Type DHalogen bulb: turn the bulb anti-clockwise.
NOTIC E
When each operation has been completed, check the operation of the lighting.
Front lamps
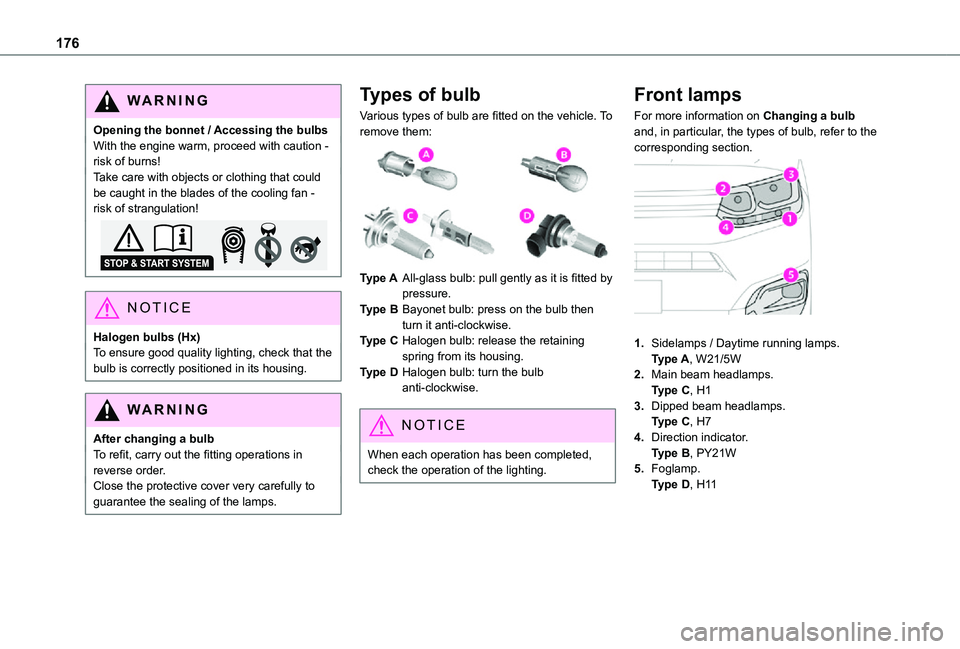
For more information on Changing a bulb and, in particular, the types of bulb, refer to the corresponding section.
1.Sidelamps / Daytime running lamps.Type A, W21/5W
2.Main beam headlamps.Type C, H1
3.Dipped beam headlamps.Type C, H7
4.Direction indicator.Type B, PY21W
5.Foglamp.Type D, H11