2021 TOYOTA PROACE CITY EV air condition
[x] Cancel search: air conditionPage 221 of 320
221
Practical information
7
With drive selector and
electric parking brake /
Release procedure
► With the vehicle stationary and the engine running, depress the brake pedal and select mode N.Within 5 seconds:► Depress and hold the brake pedal, then observe this order: switch off the ignition (if start with START/STOP, press and hold the button for 2 seconds) and move the push selector forwards or backwards.► Release the brake pedal, then switch on the ignition again.► Place your foot on the brake and press the electric parking brake control to release it.► Release the brake pedal, then switch off the ignition.
NOTIC E
Keyless Entry and StartingYou must not depress the brake pedal while switching the ignition on again, then switching it off. If you do, the engine will start, requiring you to restart the procedure.
WARNI NG
A message is displayed on the instrument panel to confirm the unlocking of the wheels for 15 minutes.When the vehicle is free-wheeling, the audio system cannot be updated (message displayed on the instrument panel).
Reverting to normal operation
► While depressing the brake pedal, restart the engine, then set the gear selector to P.
Advice on care and
maintenance
General recommendations
Observe the following recommendations to avoid damaging the vehicle.
Exterior
WARNI NG
Never use a high-pressure jet wash in the engine compartment - risk of damaging the electrical components!Do not wash the vehicle in bright sunshine or extremely cold conditions.
NOTIC E
When washing the vehicle at an automatic roller-brush car wash, be sure to lock the doors and, depending on version, remove the electronic key.When using a pressure washer, hold the lance at least 30 cm from the vehicle (particularly when cleaning areas containing chipped paint, sensors or seals).Promptly clean up any stains containing chemicals liable to damage the vehicle's paint (including tree resin, bird droppings, insect secretions, pollen and tar).If justified by the environment, clean the vehicle frequently to remove salty deposits (in coastal areas), soot (in industrial areas) and mud/salts (in wet or cold areas). These substances can be highly corrosive.Contact any authorized Toyota retailer or Toyota authorized repairer, or any reliable repairer for advice on removing stubborn stains requiring special products (such as tar
or insect removers).Preferably, have paint touch-ups performed by any authorized Toyota retailer or Toyota authorized repairer, or any reliable repairer.
Page 230 of 320
230
After changing a wheel
Stow the punctured wheel in the carrier.
WARNI NG
With a non-standard spare wheel
Deactivate certain driving aid functions (Active Safety Brake, Adaptative cruise control, etc.).Do not exceed the maximum authorised speed of 50 mph (80 km/h) or the maximum distance of 50 miles (80 km).Driving with more than one spare wheel of this type is prohibited.The wheel trim from the replaced wheel must not be refitted.
WARNI NG
Visit a Toyota dealer or a qualified workshop.Have the tightening of the spare wheel's bolts and its tyre pressure checked.Have the punctured tyre examined. After inspection, the technician will advice you on whether the tyre can be repaired or if it must be replaced.
NOTIC E
Wheel with wheel trimWhen refitting the wheel, refit the wheel trim, starting by aligning the cutout with the valve and then pushing the trim into place all round its edge with the palm of your hand.
NOTIC E
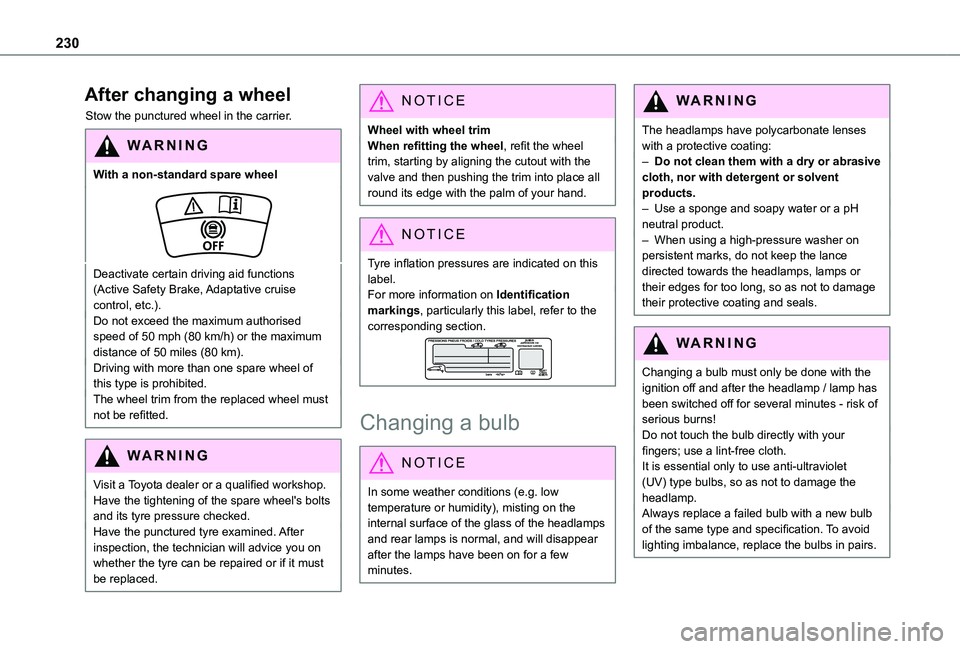
Tyre inflation pressures are indicated on this label.For more information on Identification markings, particularly this label, refer to the corresponding section.
Changing a bulb
NOTIC E
In some weather conditions (e.g. low temperature or humidity), misting on the internal surface of the glass of the headlamps and rear lamps is normal, and will disappear after the lamps have been on for a few minutes.
WARNI NG
The headlamps have polycarbonate lenses with a protective coating:– Do not clean them with a dry or abrasive cloth, nor with detergent or solvent products.– Use a sponge and soapy water or a pH neutral product.– When using a high-pressure washer on persistent marks, do not keep the lance directed towards the headlamps, lamps or their edges for too long, so as not to damage their protective coating and seals.
WARNI NG
Changing a bulb must only be done with the ignition off and after the headlamp / lamp has been switched off for several minutes - risk of serious burns!Do not touch the bulb directly with your fingers; use a lint-free cloth.It is essential only to use anti-ultraviolet (UV) type bulbs, so as not to damage the headlamp.Always replace a failed bulb with a new bulb of the same type and specification. To avoid lighting imbalance, replace the bulbs in pairs.
Page 239 of 320
239
In the event of a breakdown
8
Charging the battery using a
battery charger
For optimum service life of the battery, it is essential to maintain an adequate state of charge.In some circumstances, it may be necessary to charge the battery:– using the vehicle mainly for short journeys;– if the vehicle is to be taken off the road for several weeks.Contact a TOYOTA dealer or a qualified workshop.
WARNI NG
To charge the vehicle's battery yourself, use only a charger compatible with lead-acid batteries with a nominal voltage of 12 V.
WARNI NG
Follow the instructions provided by the manufacturer of the charger.Never reverse polarities.
NOTIC E
It is not necessary to disconnect the battery.
► Switch off the ignition.
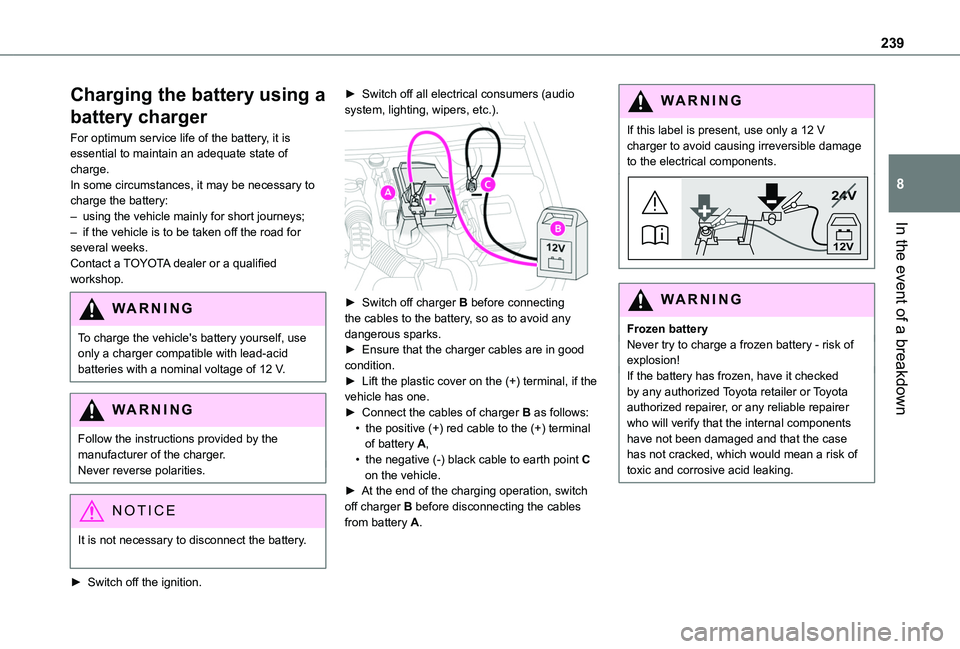
► Switch off all electrical consumers (audio system, lighting, wipers, etc.).
► Switch off charger B before connecting the cables to the battery, so as to avoid any dangerous sparks.► Ensure that the charger cables are in good condition.► Lift the plastic cover on the (+) terminal, if the vehicle has one.► Connect the cables of charger B as follows:• the positive (+) red cable to the (+) terminal of battery A,
• the negative (-) black cable to earth point C on the vehicle.► At the end of the charging operation, switch off charger B before disconnecting the cables from battery A.
WARNI NG
If this label is present, use only a 12 V charger to avoid causing irreversible damage to the electrical components.
24V
12V
WARNI NG
Frozen batteryNever try to charge a frozen battery - risk of explosion!If the battery has frozen, have it checked by any authorized Toyota retailer or Toyota authorized repairer, or any reliable repairer who will verify that the internal components have not been damaged and that the case has not cracked, which would mean a risk of toxic and corrosive acid leaking.
Page 248 of 320
248
Engine technical data and
towed loads
Engines
The engine characteristics are given in the vehicle's registration document, as well as in sales brochures.Only the values available at the time of publication are presented in the tables.Contact any authorized Toyota retailer or Toyota authorized repairer, or any reliable repairer to obtain missing values.
NOTIC E
The maximum power corresponds to the value type-approved on a test bed, under conditions defined by European legislation (Directive 1999/99/EC).
For more information, contact a any authorized Toyota retailer or Toyota authorized repairer, or any reliable repairer.
Weights and towed loads
The weights and towed loads relating to the vehicle are indicated on the registration document, as well as in sales brochures.These values are also indicated on the manufacturer's plate or label.For more information, contact a any authorized Toyota retailer or Toyota authorized repairer, or any reliable repairer.The GTW (Gross Train Weight) and towed load values indicated are valid up to a maximum altitude of 1,000 metres. The towed load value must be reduced by 10% for each additional 1,000 metres of altitude.The maximum authorised nose weight corresponds to the weight permitted on the towball.
WARNI NG
When exterior temperatures are high, the vehicle performance may be limited in order to protect the engine. When the exterior temperature is higher than 37°C, reduce the towed weight.
WARNI NG
Towing even with a lightly loaded vehicle can adversely affect its road holding.Braking distances are increased when towing a trailer.When using a vehicle to tow, never exceed a speed of 62 mph (100 km/h) (observe the local legislation in force).
NOTIC E
If the exterior temperature is high, it is recommended that the engine is allowed to idle for 1 to 2 minutes after the vehicle comes to a stop, to facilitate its cooling.
Page 255 of 320
255
Touch screen BLUETOOTH audio system
10
Touch screen
BLUETOOTH audio
system
Multimedia audio system -
Bluetooth® telephone
NOTIC E
The functions and settings described vary according to the vehicle version and configuration.
WARNI NG
For safety reasons and because they require sustained attention by the driver, the following operations must be carried out with the vehicle stationary and the ignition on:– Pairing the smartphone with the system in Bluetooth mode.– Using the smartphone.– Changing the system settings and configuration.
NOTIC E
The system is protected in such a way that it will only operate in the vehicle.The Energy Economy Mode message is displayed when the system is about to enter the corresponding mode.
First steps
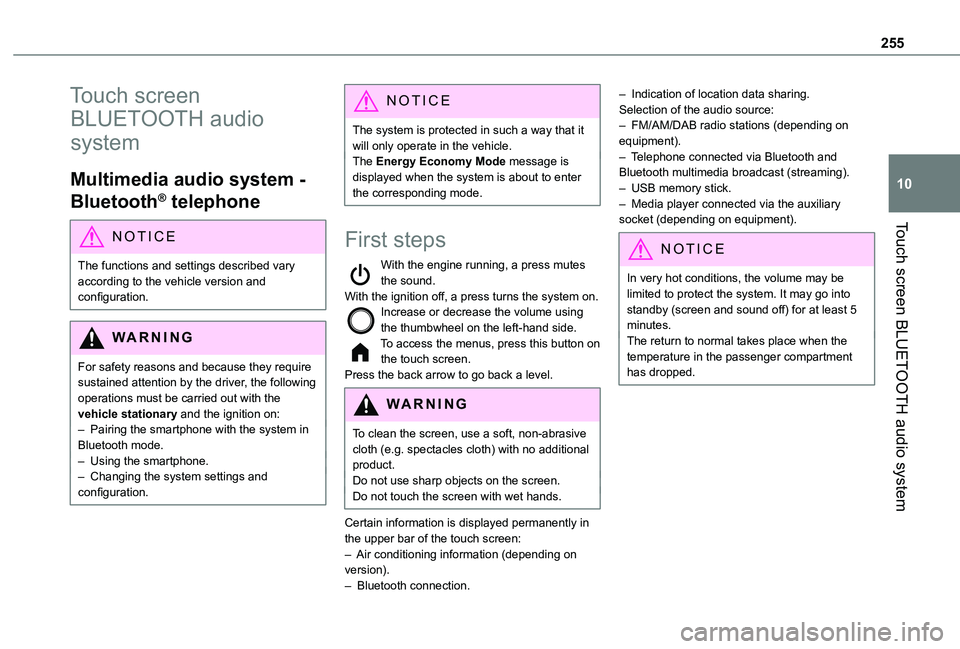
With the engine running, a press mutes the sound.With the ignition off, a press turns the system on.Increase or decrease the volume using the thumbwheel on the left-hand side.To access the menus, press this button on the touch screen.Press the back arrow to go back a level.
WARNI NG
To clean the screen, use a soft, non-abrasive cloth (e.g. spectacles cloth) with no additional product.Do not use sharp objects on the screen.Do not touch the screen with wet hands.
Certain information is displayed permanently in the upper bar of the touch screen:– Air conditioning information (depending on version).– Bluetooth connection.
– Indication of location data sharing.Selection of the audio source:– FM/AM/DAB radio stations (depending on equipment).– Telephone connected via Bluetooth and Bluetooth multimedia broadcast (streaming).– USB memory stick.– Media player connected via the auxiliary socket (depending on equipment).
NOTIC E
In very hot conditions, the volume may be limited to protect the system. It may go into standby (screen and sound off) for at least 5 minutes.The return to normal takes place when the temperature in the passenger compartment has dropped.
Page 257 of 320
257
Touch screen BLUETOOTH audio system
10
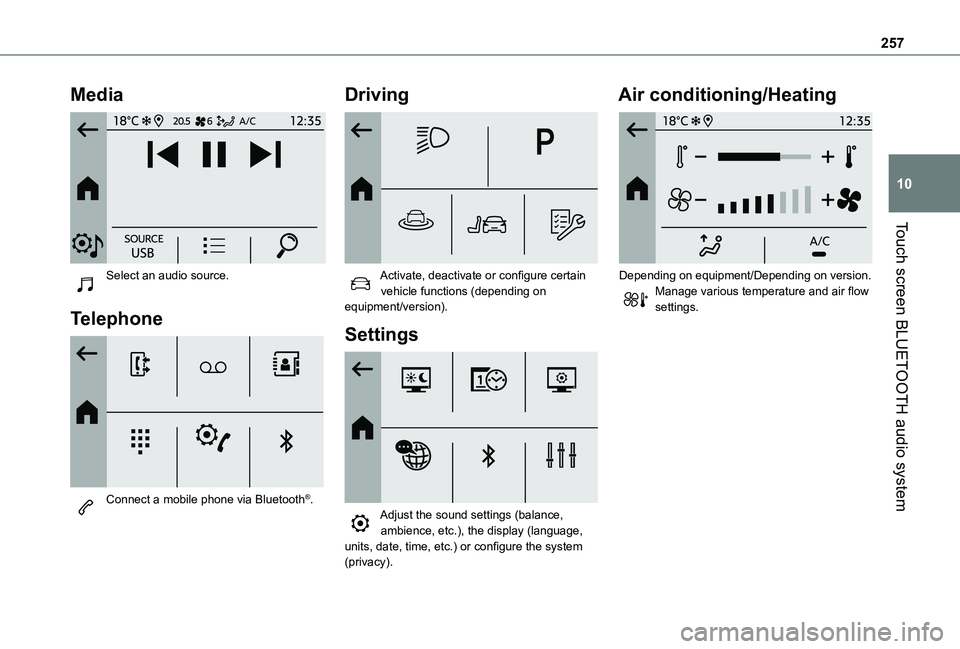
Media
Select an audio source.
Telephone
Connect a mobile phone via Bluetooth®.
Driving
Activate, deactivate or configure certain vehicle functions (depending on equipment/version).
Settings
Adjust the sound settings (balance, ambience, etc.), the display (language,
units, date, time, etc.) or configure the system (privacy).
Air conditioning/Heating
Depending on equipment/Depending on version.Manage various temperature and air flow settings.
Page 265 of 320
265
TOYOTA Connect Radio
11
TOYOTA Connect Radio
Multimedia audio system -
Applications - Bluetooth®
telephone
NOTIC E
The functions and settings described vary
according to the vehicle version and configuration, as well as the country of sale.
WARNI NG
For safety reasons and because they require sustained attention by the driver, the following operations must be carried out with the vehicle stationary and the ignition on:– Pairing the smartphone with the system via Bluetooth.– Using the smartphone.– Connecting to the CarPlay® or Android Auto applications (certain applications stop displaying when the vehicle is moving).– Changing the system settings and configuration.
NOTIC E
The system is protected so that it only operates in the vehicle.The message Energy economy mode is displayed when the system is about to go into standby.
First steps
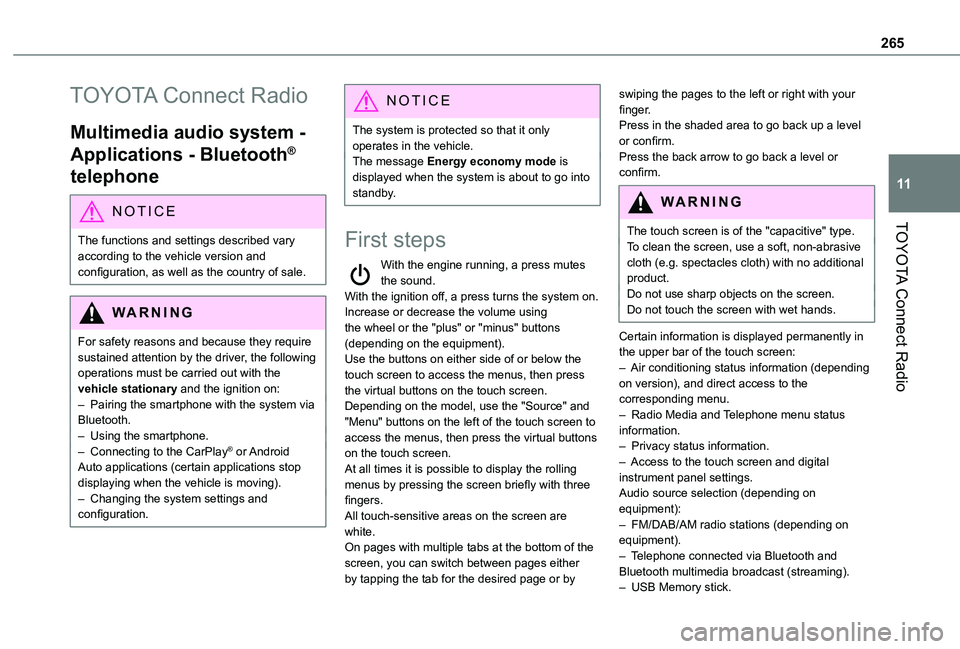
With the engine running, a press mutes the sound.With the ignition off, a press turns the system on.Increase or decrease the volume using the wheel or the "plus" or "minus" buttons (depending on the equipment).Use the buttons on either side of or below the touch screen to access the menus, then press the virtual buttons on the touch screen.Depending on the model, use the "Source" and "Menu" buttons on the left of the touch screen to access the menus, then press the virtual buttons
on the touch screen.At all times it is possible to display the rolling menus by pressing the screen briefly with three fingers.All touch-sensitive areas on the screen are white.On pages with multiple tabs at the bottom of the screen, you can switch between pages either by tapping the tab for the desired page or by
swiping the pages to the left or right with your finger.Press in the shaded area to go back up a level or confirm.Press the back arrow to go back a level or confirm.
WARNI NG
The touch screen is of the "capacitive" type.
To clean the screen, use a soft, non-abrasive cloth (e.g. spectacles cloth) with no additional product.Do not use sharp objects on the screen.Do not touch the screen with wet hands.
Certain information is displayed permanently in the upper bar of the touch screen:– Air conditioning status information (depending on version), and direct access to the corresponding menu.– Radio Media and Telephone menu status information.– Privacy status information.– Access to the touch screen and digital instrument panel settings.Audio source selection (depending on equipment):– FM/DAB/AM radio stations (depending on equipment).– Telephone connected via Bluetooth and Bluetooth multimedia broadcast (streaming).– USB Memory stick.
Page 268 of 320
268
Navigation
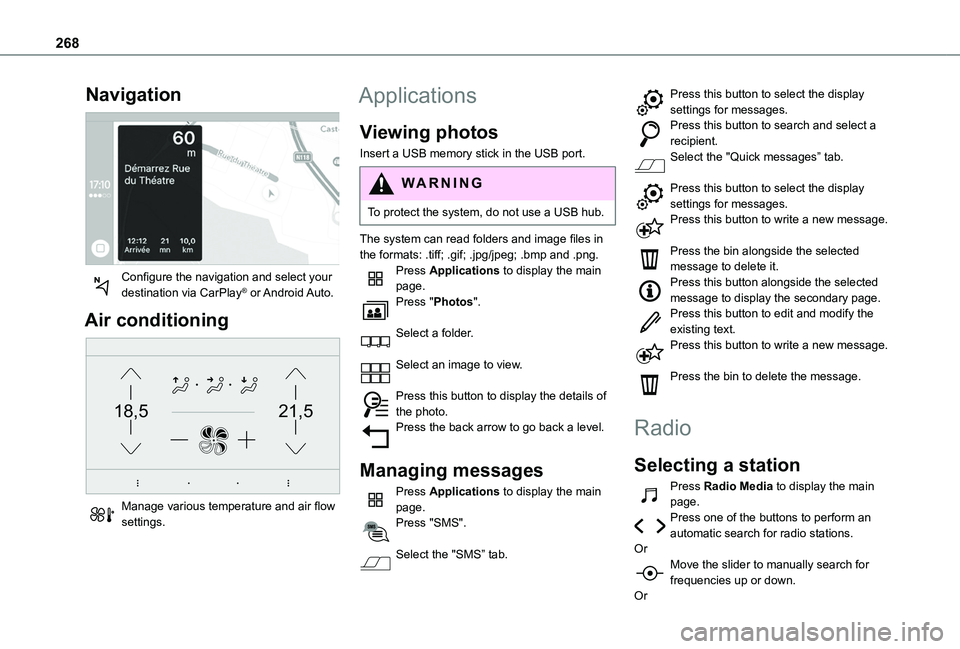
Configure the navigation and select your destination via CarPlay® or Android Auto.
Air conditioning
21,518,5
Manage various temperature and air flow settings.
Applications
Viewing photos
Insert a USB memory stick in the USB port.
WARNI NG
To protect the system, do not use a USB hub.
The system can read folders and image files in
the formats: .tiff; .gif; .jpg/jpeg; .bmp and .png.Press Applications to display the main page.Press "Photos".
Select a folder.
Select an image to view.
Press this button to display the details of the photo.Press the back arrow to go back a level.
Managing messages
Press Applications to display the main page.Press "SMS".
Select the "SMS” tab.
Press this button to select the display settings for messages.Press this button to search and select a recipient.Select the "Quick messages” tab.
Press this button to select the display settings for messages.Press this button to write a new message.
Press the bin alongside the selected message to delete it.Press this button alongside the selected message to display the secondary page.Press this button to edit and modify the existing text.Press this button to write a new message.
Press the bin to delete the message.
Radio
Selecting a station
Press Radio Media to display the main page.Press one of the buttons to perform an automatic search for radio stations.OrMove the slider to manually search for frequencies up or down.
Or