2021 TOYOTA PROACE CITY EV ABS
[x] Cancel search: ABSPage 156 of 320
156
The sensors do not systematically detect obstacles that are too low (pavements, studs) or too thin (trees, posts, wire fences).Certain obstacles located in the sensors’ blind spots may not be detected or may no longer be detected during the manoeuvre.Certain materials (fabrics) absorb sound waves: pedestrians may not be detected.
NOTIC E
MaintenanceClean the bumpers and door mirrors and the field of vision of the cameras regularly.When washing your vehicle at high pressure, direct the spray from at least 30 cm away from the radar, sensors and cameras.
WARNI NG
Mats/Pedal trimsThe use of mats or pedal trims not approved
by TOYOTA may interfere with the operation of the speed limiter or cruise control.To avoid any risk of jamming the pedals:– Ensure that the mat is secured correctly.– Never fit one mat on top of another.
NOTIC E
Units of speedEnsure that the units of speed displayed on the instrument panel (km/h or mph) are those for the country you are driving in.If this is not the case, when the vehicle is stationary, set the display to the required units of speed so that it complies with what is authorised locally.In case of doubt, contact any authorized Toyota retailer or Toyota authorized repairer, or any reliable repairer.
Speed Limit Recognition
and Recommendation
WARNI NG
For more information, refer to the General recommendations on the use of driving and manoeuvring aids.
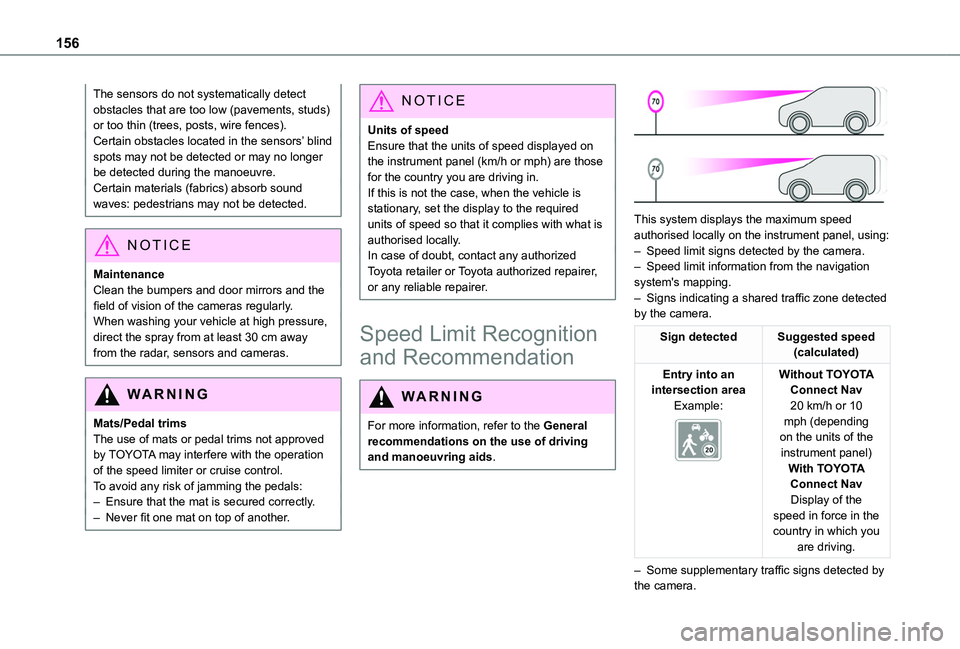
This system displays the maximum speed authorised locally on the instrument panel, using:
– Speed limit signs detected by the camera.– Speed limit information from the navigation system's mapping.– Signs indicating a shared traffic zone detected by the camera.
Sign detectedSuggested speed (calculated)
Entry into an intersection areaExample:
Without TOYOTA Connect Nav20 km/h or 10 mph (depending on the units of the instrument panel)With TOYOTA Connect NavDisplay of the speed in force in the country in which you are driving.
– Some supplementary traffic signs detected by the camera.
Page 179 of 320
179
Driving
6
Driver Attention Alert
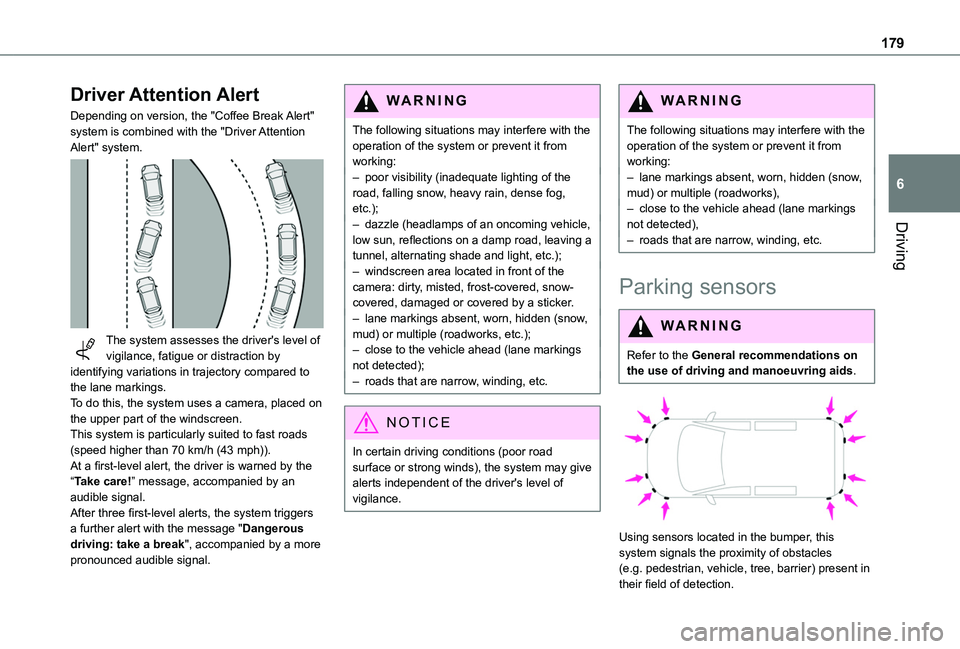
Depending on version, the "Coffee Break Alert" system is combined with the "Driver Attention Alert" system.
The system assesses the driver's level of vigilance, fatigue or distraction by identifying variations in trajectory compared to the lane markings.To do this, the system uses a camera, placed on the upper part of the windscreen.This system is particularly suited to fast roads
(speed higher than 70 km/h (43 mph)).At a first-level alert, the driver is warned by the “Take care!” message, accompanied by an audible signal.After three first-level alerts, the system triggers a further alert with the message "Dangerous driving: take a break", accompanied by a more pronounced audible signal.
WARNI NG
The following situations may interfere with the operation of the system or prevent it from working:– poor visibility (inadequate lighting of the road, falling snow, heavy rain, dense fog, etc.);– dazzle (headlamps of an oncoming vehicle, low sun, reflections on a damp road, leaving a tunnel, alternating shade and light, etc.);– windscreen area located in front of the camera: dirty, misted, frost-covered, snow-covered, damaged or covered by a sticker.– lane markings absent, worn, hidden (snow, mud) or multiple (roadworks, etc.);– close to the vehicle ahead (lane markings not detected);– roads that are narrow, winding, etc.
NOTIC E
In certain driving conditions (poor road surface or strong winds), the system may give alerts independent of the driver's level of vigilance.
WARNI NG
The following situations may interfere with the operation of the system or prevent it from working:– lane markings absent, worn, hidden (snow, mud) or multiple (roadworks),– close to the vehicle ahead (lane markings not detected),– roads that are narrow, winding, etc.
Parking sensors
WARNI NG
Refer to the General recommendations on the use of driving and manoeuvring aids.
Using sensors located in the bumper, this
system signals the proximity of obstacles (e.g. pedestrian, vehicle, tree, barrier) present in their field of detection.
Page 235 of 320
235
In the event of a breakdown
8
Rear lamps
For more information on Changing a bulb and, in particular, the types of bulb, refer to the corresponding section.
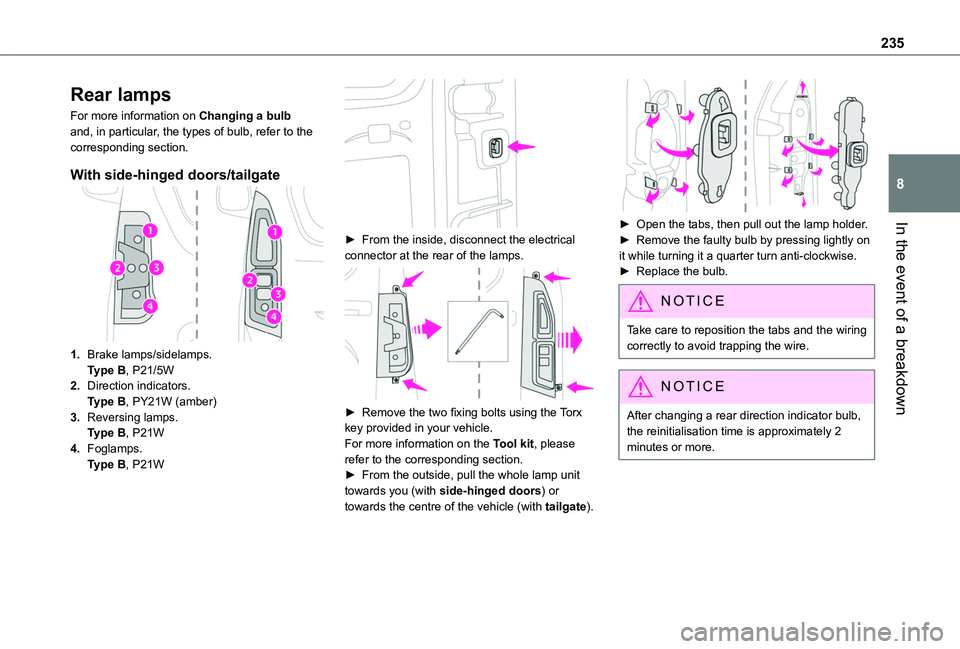
With side-hinged doors/tailgate
1.Brake lamps/sidelamps.Type B, P21/5W
2.Direction indicators.Type B, PY21W (amber)
3.Reversing lamps.Type B, P21W
4.Foglamps.Type B, P21W
► From the inside, disconnect the electrical connector at the rear of the lamps.
► Remove the two fixing bolts using the Torx key provided in your vehicle.For more information on the Tool kit, please refer to the corresponding section.► From the outside, pull the whole lamp unit towards you (with side-hinged doors) or towards the centre of the vehicle (with tailgate).
► Open the tabs, then pull out the lamp holder.► Remove the faulty bulb by pressing lightly on it while turning it a quarter turn anti-clockwise.► Replace the bulb.
NOTIC E
Take care to reposition the tabs and the wiring correctly to avoid trapping the wire.
NOTIC E
After changing a rear direction indicator bulb, the reinitialisation time is approximately 2
minutes or more.
Page 265 of 320
265
TOYOTA Connect Radio
11
TOYOTA Connect Radio
Multimedia audio system -
Applications - Bluetooth®
telephone
NOTIC E
The functions and settings described vary
according to the vehicle version and configuration, as well as the country of sale.
WARNI NG
For safety reasons and because they require sustained attention by the driver, the following operations must be carried out with the vehicle stationary and the ignition on:– Pairing the smartphone with the system via Bluetooth.– Using the smartphone.– Connecting to the CarPlay® or Android Auto applications (certain applications stop displaying when the vehicle is moving).– Changing the system settings and configuration.
NOTIC E
The system is protected so that it only operates in the vehicle.The message Energy economy mode is displayed when the system is about to go into standby.
First steps
With the engine running, a press mutes the sound.With the ignition off, a press turns the system on.Increase or decrease the volume using the wheel or the "plus" or "minus" buttons (depending on the equipment).Use the buttons on either side of or below the touch screen to access the menus, then press the virtual buttons on the touch screen.Depending on the model, use the "Source" and "Menu" buttons on the left of the touch screen to access the menus, then press the virtual buttons
on the touch screen.At all times it is possible to display the rolling menus by pressing the screen briefly with three fingers.All touch-sensitive areas on the screen are white.On pages with multiple tabs at the bottom of the screen, you can switch between pages either by tapping the tab for the desired page or by
swiping the pages to the left or right with your finger.Press in the shaded area to go back up a level or confirm.Press the back arrow to go back a level or confirm.
WARNI NG
The touch screen is of the "capacitive" type.
To clean the screen, use a soft, non-abrasive cloth (e.g. spectacles cloth) with no additional product.Do not use sharp objects on the screen.Do not touch the screen with wet hands.
Certain information is displayed permanently in the upper bar of the touch screen:– Air conditioning status information (depending on version), and direct access to the corresponding menu.– Radio Media and Telephone menu status information.– Privacy status information.– Access to the touch screen and digital instrument panel settings.Audio source selection (depending on equipment):– FM/DAB/AM radio stations (depending on equipment).– Telephone connected via Bluetooth and Bluetooth multimedia broadcast (streaming).– USB Memory stick.
Page 306 of 320
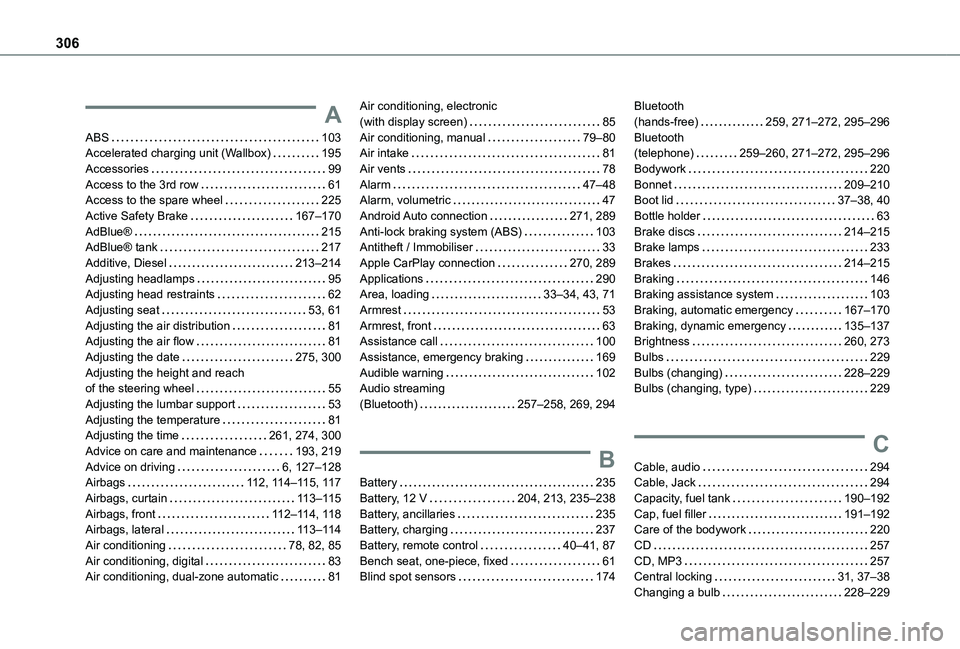
306
A
ABS 103Accelerated charging unit (Wallbox) 195Accessories 99Access to the 3rd row 61Access to the spare wheel 225Active Safety Brake 167–170AdBlue® 215AdBlue® tank 217Additive, Diesel 213–214Adjusting headlamps 95Adjusting head restraints 62Adjusting seat 53, 61Adjusting the air distribution 81Adjusting the air flow 81Adjusting the date 275, 300Adjusting the height and reach of the steering wheel 55Adjusting the lumbar support 53Adjusting the temperature 81Adjusting the time 261, 274, 300
Advice on care and maintenance 193, 219Advice on driving 6, 127–128Airbags 11 2, 11 4–11 5, 11 7Airbags, curtain 11 3–11 5Airbags, front 11 2–11 4, 11 8Airbags, lateral 11 3–11 4Air conditioning 78, 82, 85Air conditioning, digital 83Air conditioning, dual-zone automatic 81
Air conditioning, electronic (with display screen) 85Air conditioning, manual 79–80Air intake 81Air vents 78Alarm 47–48Alarm, volumetric 47Android Auto connection 271, 289Anti-lock braking system (ABS) 103Antitheft / Immobiliser 33Apple CarPlay connection 270, 289Applications 290Area, loading 33–34, 43, 71Armrest 53Armrest, front 63Assistance call 100Assistance, emergency braking 169Audible warning 102Audio streaming (Bluetooth) 257–258, 269, 294
B
Battery 235Battery, 12 V 204, 213, 235–238Battery, ancillaries 235Battery, charging 237Battery, remote control 40–41, 87Bench seat, one-piece, fixed 61Blind spot sensors 174
Bluetooth (hands-free) 259, 271–272, 295–296Bluetooth (telephone) 259–260, 271–272, 295–296Bodywork 220Bonnet 209–210Boot lid 37–38, 40Bottle holder 63Brake discs 214–215Brake lamps 233Brakes 214–215Braking 146Braking assistance system 103Braking, automatic emergency 167–170Braking, dynamic emergency 135–137Brightness 260, 273Bulbs 229Bulbs (changing) 228–229Bulbs (changing, type) 229
C
Cable, audio 294Cable, Jack 294Capacity, fuel tank 190–192Cap, fuel filler 191–192Care of the bodywork 220CD 257CD, MP3 257Central locking 31, 37–38Changing a bulb 228–229