Page 50 of 212

Starting and Powering
Off
Starting When you open a door, Model X powers on
the instrument panel and touchscreen and you
can operate all controls.
To drive Model X:
1. PRESS THE BRAKE PEDAL - Model X
powers on and is ready to drive.
2. SELECT A GEAR - Move the gear lever all
the way down for Drive and all the way up
for Reverse. See Shifting Gears on page
52.
Note: If Passive Entry is off and you do not
press the brake pedal to start Model X within
approximately five minutes, a message
displays on the instrument panel and you must
use the key to lock then unlock Model X again before starting the vehicle.
Everything you need to know when driving
Model X displays on the instrument panel.
Key Not Inside
If Model X does not detect a key when you
press the brake, the instrument panel displays
a message telling you that a key is not inside.
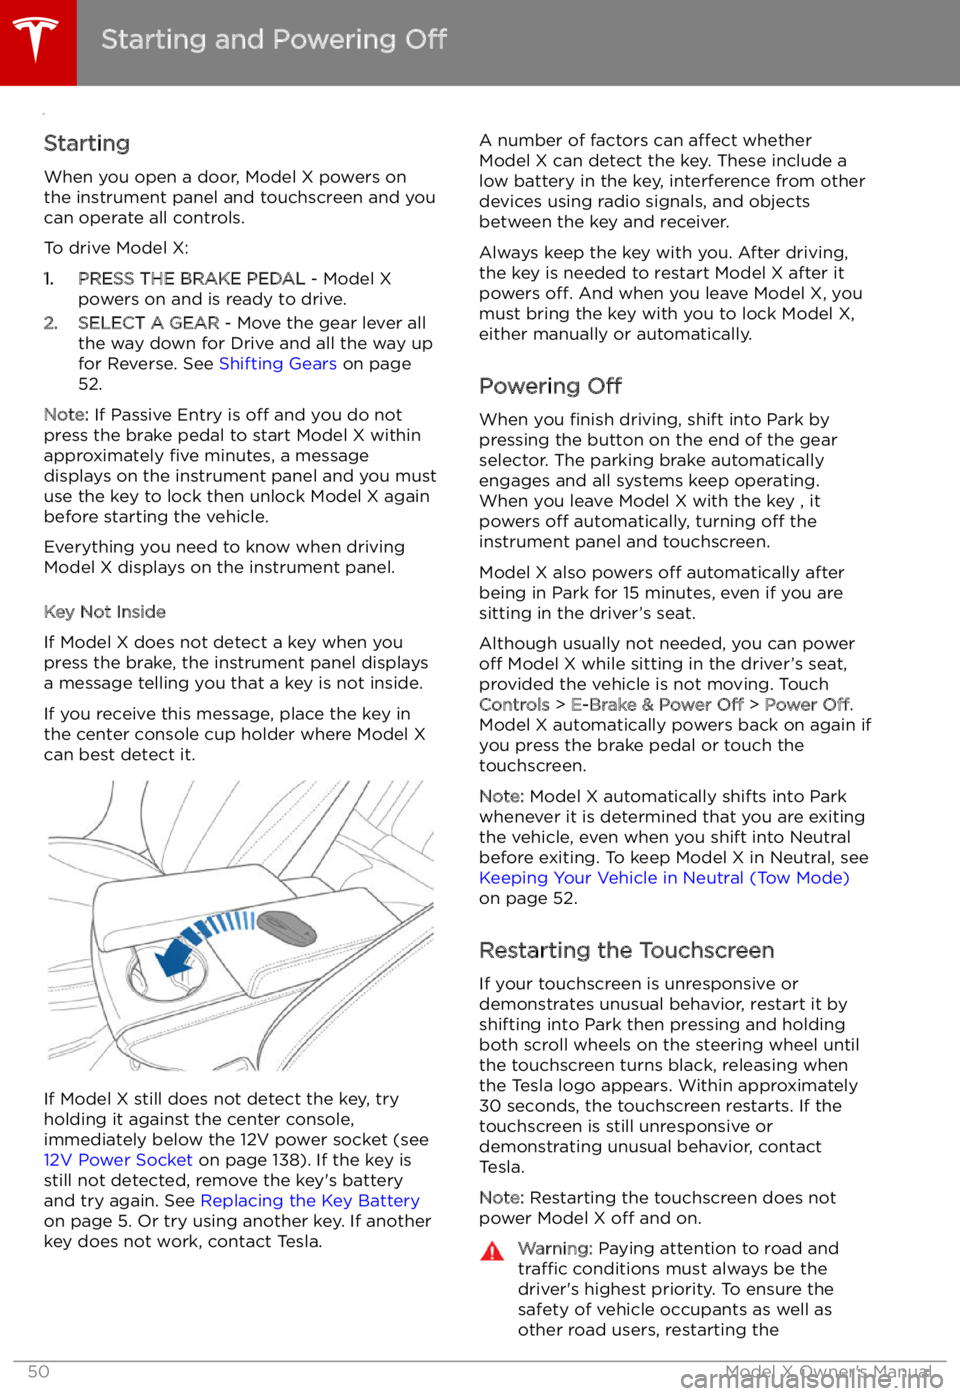
If you receive this message, place the key in
the center console cup holder where Model X can best detect it.
If Model X still does not detect the key, try
holding it against the center console,
immediately below the 12V power socket (see
12V Power Socket on page 138). If the key is
still not detected, remove the key
Page 84 of 212

Warning: You must use the Model X trailer
hitch when towing a trailer. Never attempt
to attach a different type of trailer hitch.
To install the trailer hitch:
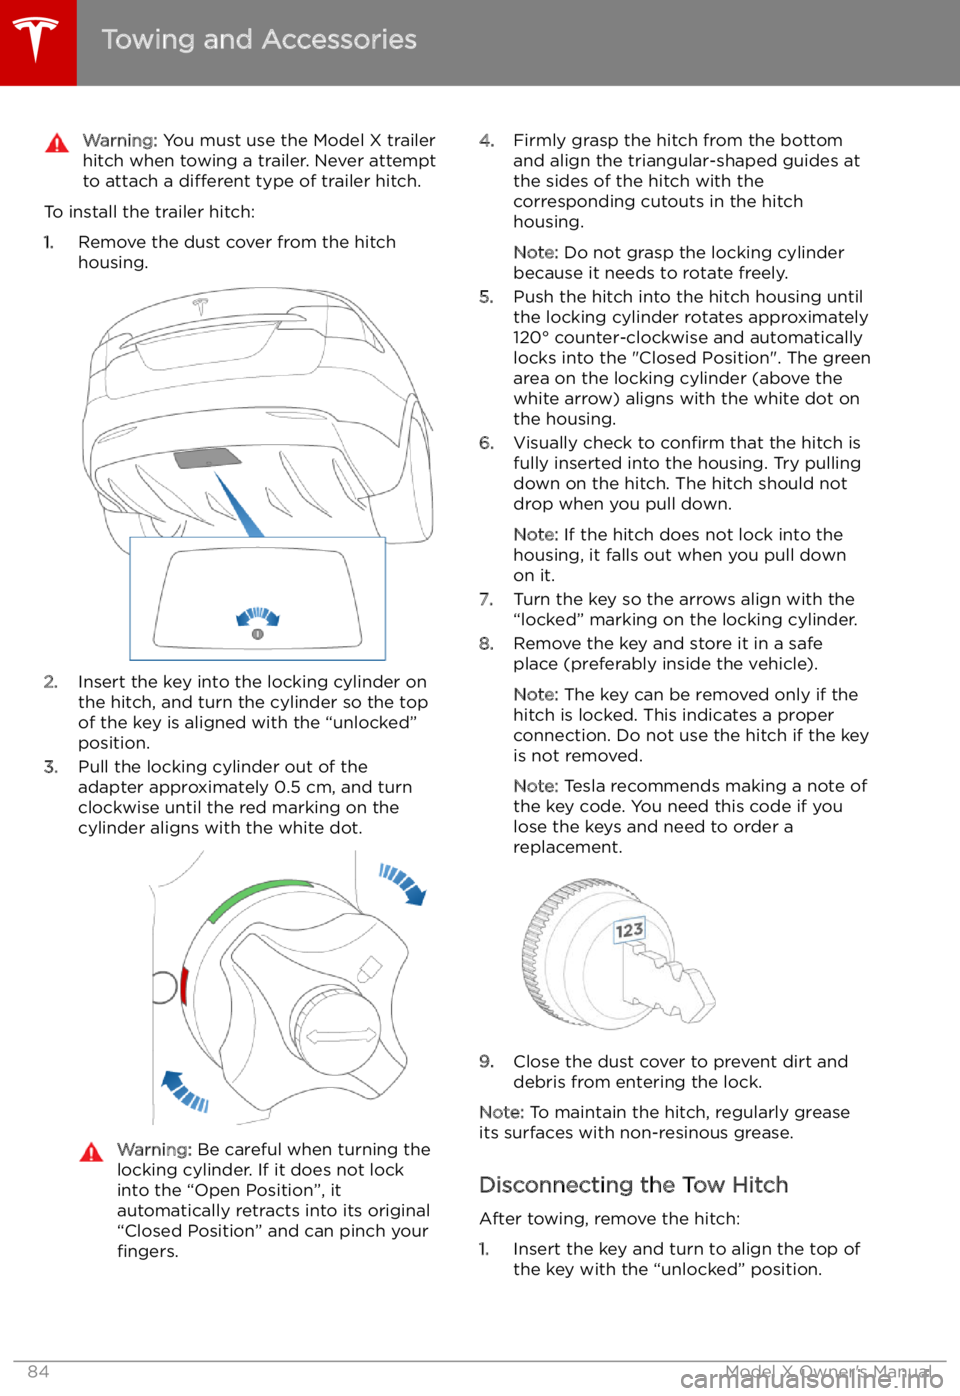
1. Remove the dust cover from the hitch
housing.
2. Insert the key into the locking cylinder on
the hitch, and turn the cylinder so the top of the key is aligned with the “unlocked”
position.
3. Pull the locking cylinder out of the
adapter approximately 0.5 cm, and turn
clockwise until the red marking on the
cylinder aligns with the white dot.
Warning: Be careful when turning the
locking cylinder. If it does not lock
into the “Open Position”, it
automatically retracts into its original
“Closed Position” and can pinch your fingers.4. Firmly grasp the hitch from the bottom
and align the triangular-shaped guides at
the sides of the hitch with the
corresponding cutouts in the hitch
housing.
Note: Do not grasp the locking cylinder
because it needs to rotate freely.
5. Push the hitch into the hitch housing until
the locking cylinder rotates approximately
120
Page 103 of 212
Note: Summon requires that Model X can
detect a valid key nearby.
Note: Summon cancels if your phone enters
sleep mode or is turned off.
Stopping or Canceling Summon
You can stop Model X at any time while
Summon is active by pressing any button on
the key or by using the mobile app. Summon
also cancels when:
Page 139 of 212
The 12V power sockets are suitable for
accessories requiring up to 11A continuous
draw (15A peak) or a maximum of 150
continuous watts (180 watts peak).
Note: In situations where Model X is unable to
detect the key (low battery, interference, etc.),
place it immediately below the 12V power
socket in the center console where Model X can best detect it.
Warning: The power socket and an
accessory
Page 148 of 212
Security Settings
About the Security System
If Model X does not detect a key nearby and a
locked door or trunk is opened, an alarm sounds and the headlights and turn signals
Page 158 of 212
Charging Instructions
Opening the Charge Port The charge port is located on the left side of
Model X, behind a door that is part of the rear
tail light assembly. Park so that the charge
cable easily reaches the charge port.
With Model X unlocked (or a recognized key is
within range) and in Park, press and release
the button on the Tesla charge cable to open the charge port door.
You can also open the charge port door using
any of these methods:
Page 159 of 212

If the charge port light turns red while
charging, a fault is detected. Check the instrument panel or touchscreen for a
message describing the fault. A fault can
occur due to something as common as a power outage. If a power outage occurs,
charging resumes automatically when power
is restored.
Note: When charging, particularly at high
currents, the refrigerant compressor and fan
operate as needed to keep the Battery cool.
Therefore, it is normal to hear sounds during charging.
Note: Air conditioning performance is
generally not affected by charging. However,
under certain circumstances (for example, you
are charging at high currents during a
particularly warm day), the air coming from
the vents may not be as cool as expected and
a message displays on the instrument panel.
This is normal behavior and ensures that the Battery stays within an optimum temperature
range while charging to support longevity and
optimum performance.Warning: Never spray liquid at a high
velocity (for example, if using a pressure
washer) towards the charge port while
charging. Failure to follow these
instructions can result in serious injury or
damage to the vehicle, charging
equipment, or property.
Stopping Charging
Stop charging at any time by disconnecting
the charge cable or touching Stop Charging
on the touchscreen.
Note: To prevent unauthorized unplugging of
the charge cable, Model X must be unlocked
or able to recognize your key before you can
disconnect the charge cable.
To disconnect the charge cable:
1. Press and hold the button on a Tesla
connector to release the latch. You can
also touch Stop Charging on the charging
screen (see Changing Charge Settings on
page 159).
2. Pull the connector from the charge port.
3. Push the charge port door closed.
Note: If Model X is equipped with a motorized
charge port door, it automatically closes when
you remove the charge cable.
Caution: Tesla strongly recommends
leaving Model X plugged in when not inuse. This maintains the Battery at the
optimum level of charge.
Charge Port Light
Page 163 of 212
Maintenance
Maintenance Schedule
Service Intervals
Regular maintenance is the key to ensuring
the continued reliability and efficiency of your
Model X.
Maintain the correct tire pressures, and take
Model X to Tesla at the regularly scheduled
maintenance intervals of every 12 months, or
every 20,000 km, whichever comes first. It is
also important to perform the daily and
monthly checks described below.
Model X should be serviced by Tesla-certified
technicians. Damages or failures caused by
maintenance or repairs performed by non-
Tesla certified technicians are not covered by
the warranty.
Daily Checks