Page 173 of 281
If the touchscreen displays a message indicating that a software update was not
successfully completed, contact Tesla.
Charging
If Model S is charging when the software
update begins, charging stops. Charging
resumes automatically when the software
update is complete. If you are driving
Model S at the scheduled update time, the update is
canceled and must be rescheduled.
Viewing Release Notes
When a software update is complete, read the
release notes displayed on the touchscreen to
learn about changes or new features. To
display release notes about the current
version of your vehicle
Page 175 of 281
NOTE: In extremely cold weather or icy
conditions, it is possible that your charge port
latch may freeze in place. In cases where you
cannot remove or insert the charge cable, or
the vehicle is not Supercharging due to the latch being frozen in place, use your Tesla
mobile app to precondition your vehicle on
HI for approximately 30-45 minutes (you must
use your mobile app to precondition the
vehicle; setting your climate to
HI using the
touchscreen is not effective). This can help
thaw ice on the charge port latch so the charge cable can be removed or inserted.
Controls
The Controls tab allows you do the following:
Page 177 of 281
High Voltage Components
1.
Heat Pump Assembly
2.
Front Drive Unit (Long Range Drive Unit shown)
3.
High Voltage Battery Service Panel
4.
High Voltage Battery
5.
High Voltage Busbars
6.
Rear Drive Unit (Long Range Drive Unit shown)
7.
Charge Port
WARNING: The high voltage system has no user serviceable parts. Do not disassemble, remove or replace high voltage components, cables or connectors. High voltage cables are typically colored orange for easy identification.
WARNING: Read and follow all instructions provided on the labels that are attached to Model S. These labels are there for your safety.WARNING: In the unlikely event that a fire occurs, immediately contact your local fire emergency responders.
Electric Vehicle Components
175Charging
Page 178 of 281
Charging Equipment
Charging equipment designed specifically to
charge your Model S is available from Tesla. A
Tesla Wall Connector, which installs in your
parking space, is the fastest way to charge
Model S in daily use.
In most market regions, Model S is equipped
with a Mobile Connector and the adapter(s)
needed to plug into the most commonly used power outlets. When using the Mobile
Connector,
first plug the Mobile Connector
into the power outlet, attach an adapter (if
needed), and then plug in
Model S. For more
information about your Mobile Connector, see
the Mobile Connector Owner
Page 179 of 281
About the Battery
Model S has one of the most sophisticated
battery systems in the world. The most
important way to preserve the Battery is to
LEAVE YOUR VEHICLE PLUGGED IN when
you are not using it. This is particularly important if you are not planning to drive
Model S for several weeks.
NOTE: When left idle and unplugged, your
vehicle periodically uses energy from the
Battery for system tests and recharging the
12V battery when necessary.
There is no advantage to waiting until the
Battery
Page 181 of 281

Charging Status
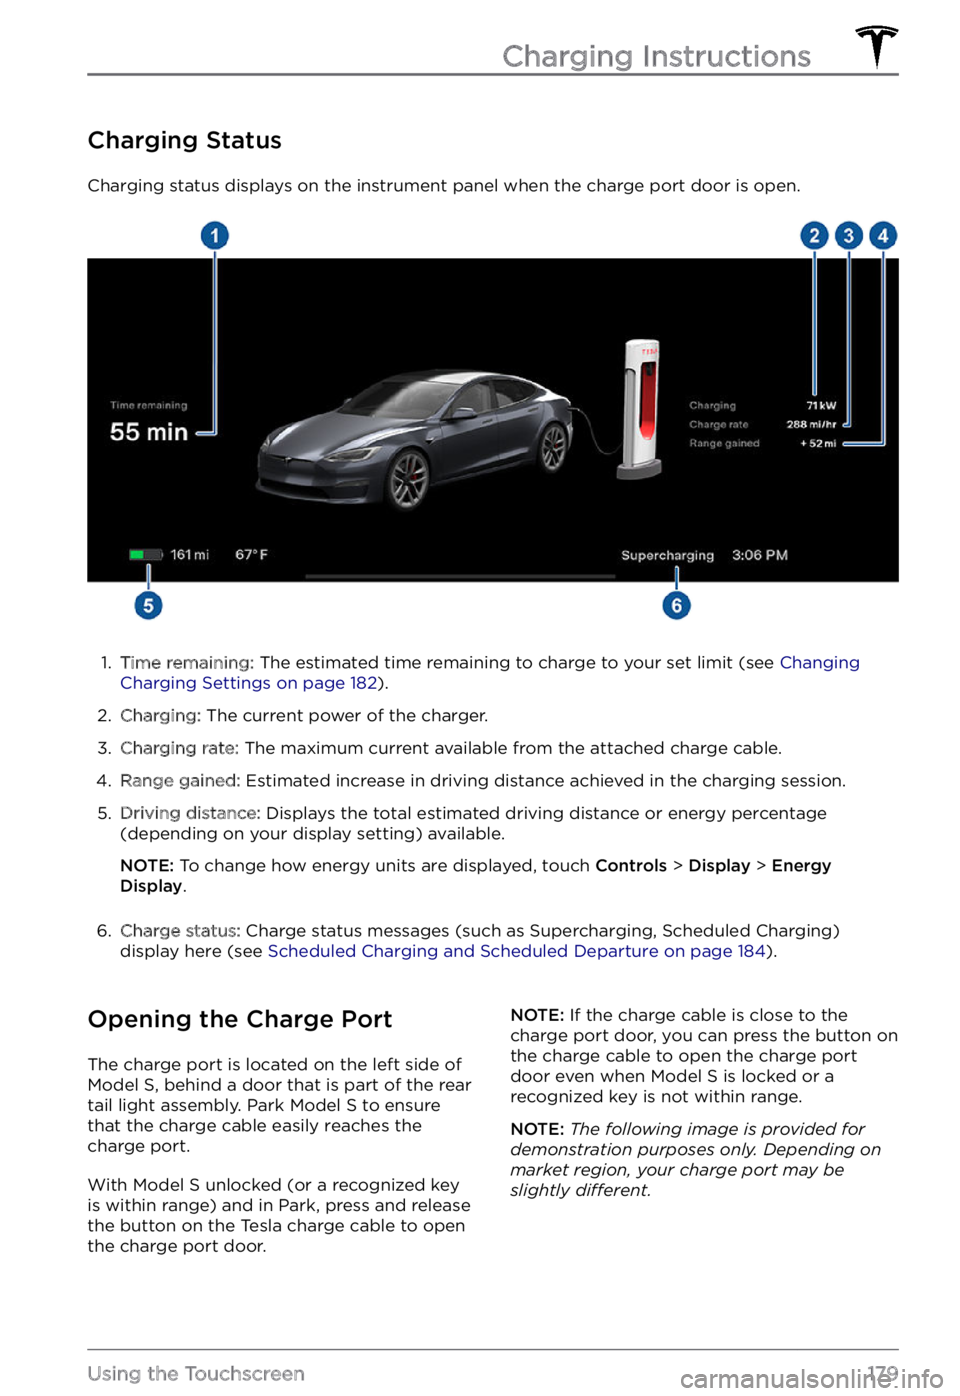
Charging status displays on the instrument panel when the charge port door is open.
1.
Time remaining: The estimated time remaining to charge to your set limit (see Changing Charging Settings on page 182).
2.
Charging: The current power of the charger.
3.
Charging rate: The maximum current available from the attached charge cable.
4.
Range gained: Estimated increase in driving distance achieved in the charging session.
5.
Driving distance: Displays the total estimated driving distance or energy percentage
(depending on your display setting) available.
NOTE: To change how energy units are displayed, touch Controls > Display > Energy Display.
6.
Charge status: Charge status messages (such as Supercharging, Scheduled Charging)
display here (see Scheduled Charging and Scheduled Departure on page 184).
Opening the Charge Port
The charge port is located on the left side of Model S, behind a door that is part of the rear
tail light assembly. Park Model S to ensure
that the charge cable easily reaches the
charge port.
With Model S unlocked (or a recognized key is within range) and in Park, press and release
the button on the Tesla charge cable to open the charge port door.
NOTE: If the charge cable is close to the
charge port door, you can press the button on
the charge cable to open the charge port
door even when Model S is locked or a recognized key is not within range.
NOTE: The following image is provided for demonstration purposes only. Depending on market region, your charge port may be slightly di
Page 184 of 281

2. While holding the public charging handle
in one hand and the adapter in the other
hand, press and hold the button on the
public charging handle and pull both
outwards, removing the handle and adapter at the same time.
NOTE: If the charging station handle
separates from the adapter, leaving the
adapter in
Model S, use the touchscreen
to unlock the charge port (touch the
charging icon on the overhead view of the
vehicle).
3.
Press and hold the charging handle button again to release the adapter from
the charging handle.
NOTE: The charge port automatically closes
within approximately 10 seconds of removing
the connector from the charge port.
CAUTION: Tesla strongly recommends leaving Model S plugged in when not in use. This maintains the Battery at the optimum level of charge.
Manually Releasing Charge
Cable
If the usual methods for releasing a charge
cable from the charge port (using the charge
handle release button, touchscreen, or mobile
app) do not work, carefully follow these steps:
1.
Ensure that Model S is not actively
charging by displaying the charging
screen on the touchscreen. If necessary,
touch
Stop Charging.
2.
Open the rear trunk.
3.
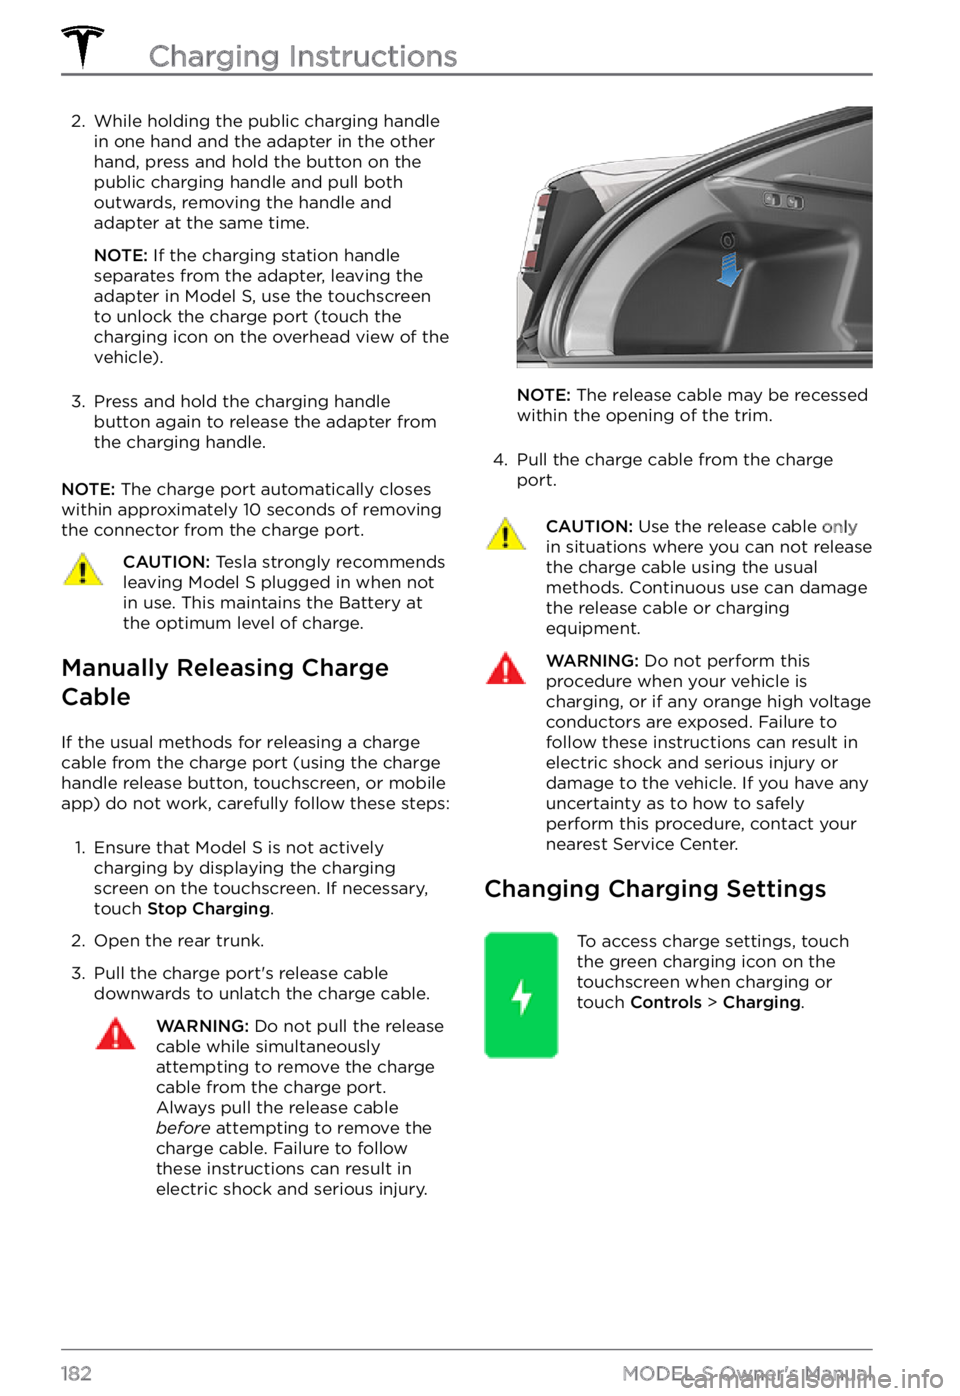
Pull the charge port
Page 185 of 281

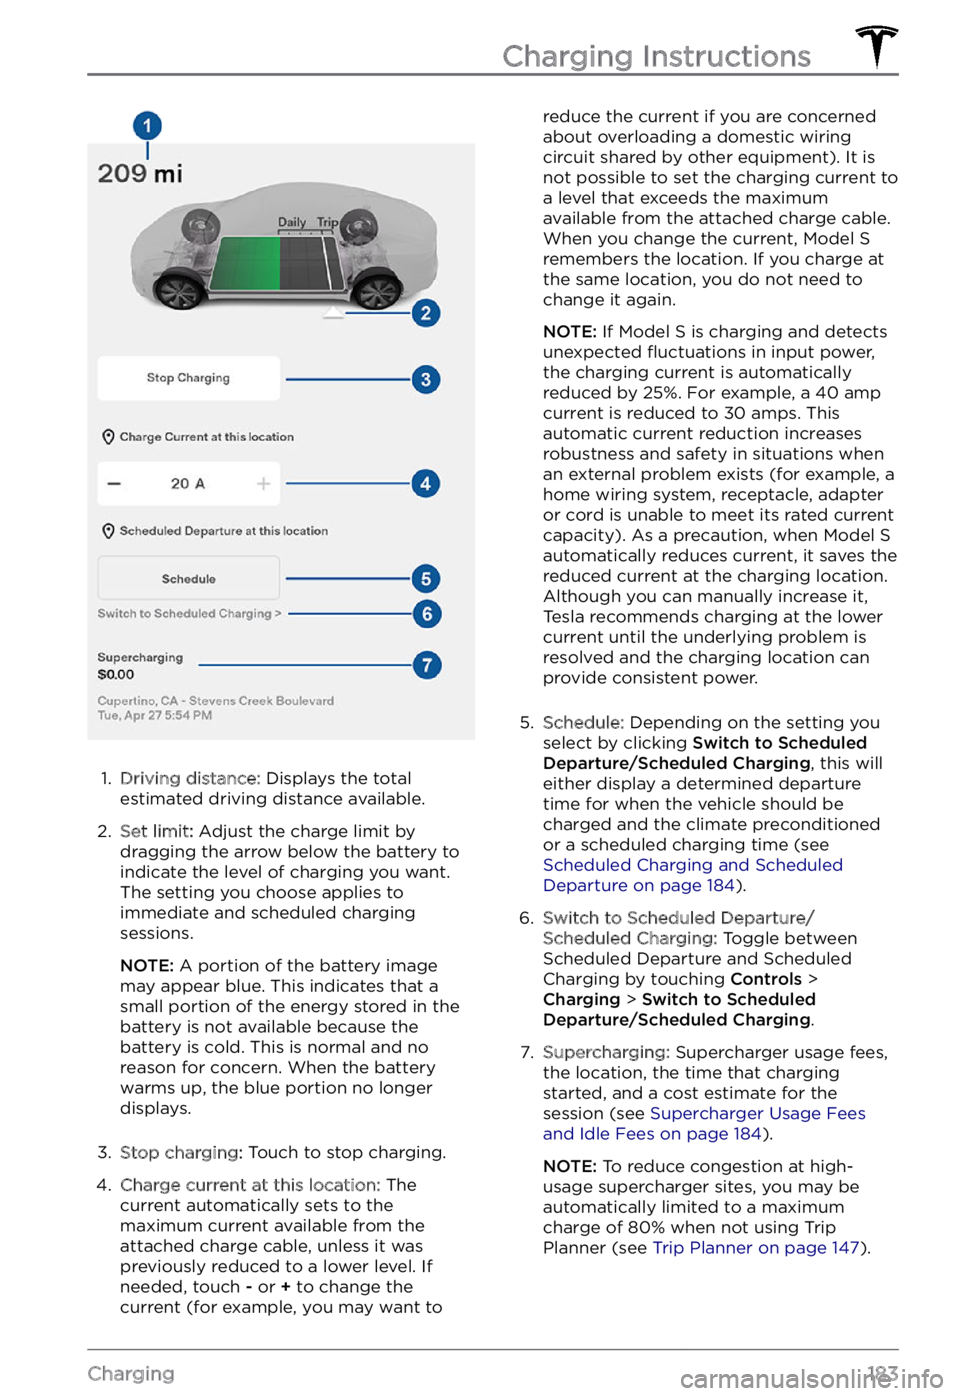
1.
Driving distance: Displays the total
estimated driving distance available.
2.
Set limit: Adjust the charge limit by
dragging the arrow below the battery to
indicate the level of charging you want.
The setting you choose applies to
immediate and scheduled charging
sessions.
NOTE: A portion of the battery image
may appear blue. This indicates that a
small portion of the energy stored in the
battery is not available because the
battery is cold. This is normal and no
reason for concern. When the battery warms up, the blue portion no longer displays.
3.
Stop charging: Touch to stop charging.
4.
Charge current at this location: The
current automatically sets to the
maximum current available from the
attached charge cable, unless it was previously reduced to a lower level. If
needed, touch
- or + to change the
current (for example, you may want to
reduce the current if you are concerned
about overloading a domestic wiring
circuit shared by other equipment). It is
not possible to set the charging current to
a level that exceeds the maximum
available from the attached charge cable.
When you change the current,
Model S remembers the location. If you charge at
the same location, you do not need to
change it again.
NOTE: If Model S is charging and detects
unexpected