Page 94 of 248
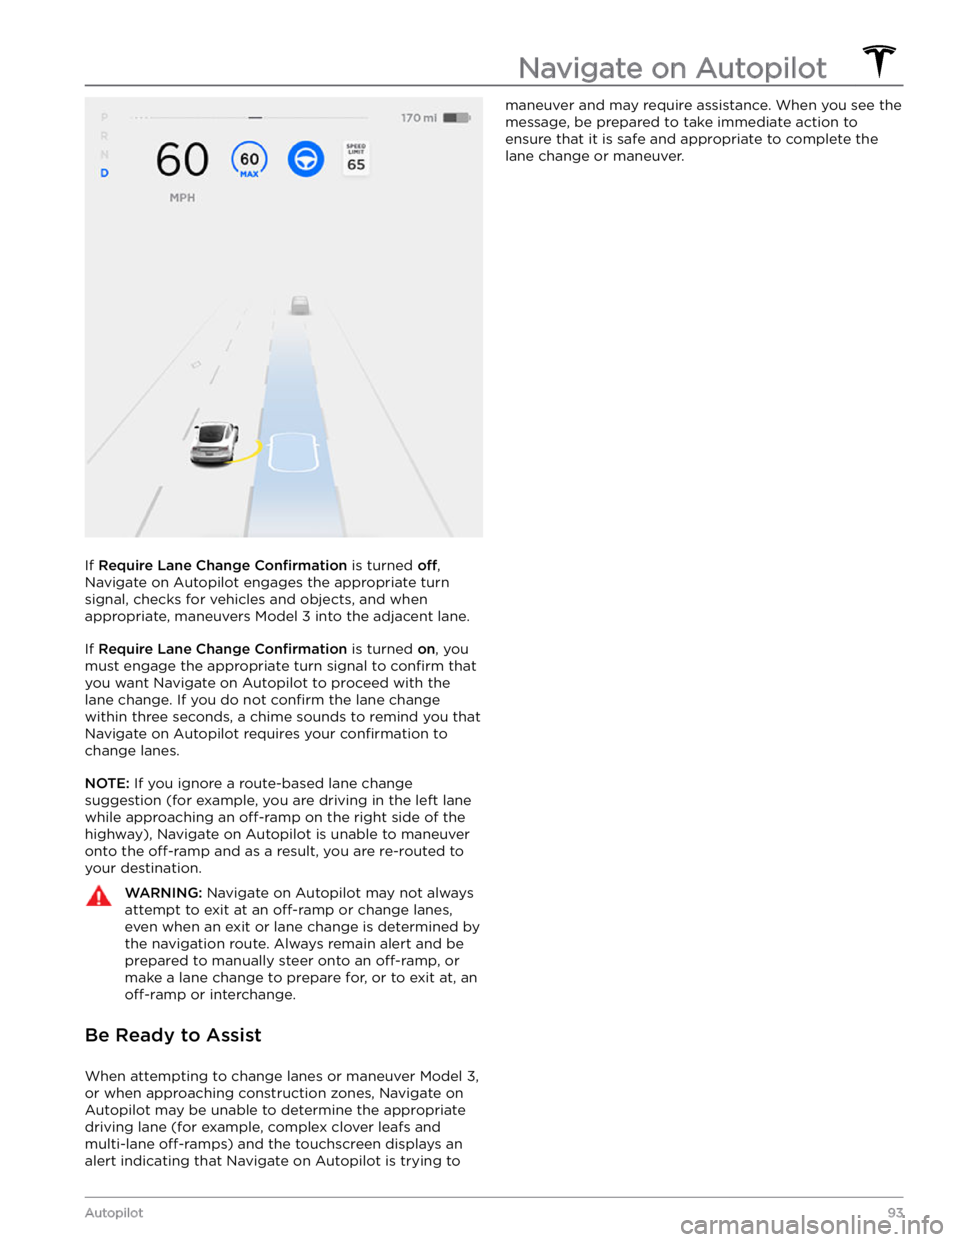
Whenever Navigate on Autopilot is active, the
touchscreen displays the driving lane as a single blue
line in front of
Model 3:
When Navigate on Autopilot is active and you approach an
off-ramp or freeway interchange along your
navigation route, the appropriate turn signal engages and Autosteer maneuvers
Model 3 onto the off-ramp or
interchange.
WARNING: Never depend on Navigate on
Autopilot to determine an appropriate lane at an
off-ramp. Stay alert and perform visual checks to
ensure that the driving lane is safe and
appropriate.
When you leave a controlled-access road (for example, you exit a freeway or you enter a section of the navigation route that is no longer supported), Navigate on Autopilot reverts back to Autosteer
Page 95 of 248

If Require Lane Change Confirmation is turned off,
Navigate on Autopilot engages the appropriate turn signal, checks for vehicles and objects, and when appropriate, maneuvers
Model 3 into the adjacent lane.
If Require Lane Change Confirmation is turned on, you
must
engage the appropriate turn signal to confirm that
you want Navigate on Autopilot to proceed with the lane change. If you do not
confirm the lane change
within three seconds, a chime sounds to remind you that Navigate on Autopilot requires your
confirmation to
change lanes.
NOTE: If you ignore a route-based lane change
suggestion (for example, you are driving in the left lane while approaching an
off-ramp on the right side of the
highway), Navigate on Autopilot is unable to maneuver onto the
off-ramp and as a result, you are re-routed to
your destination.
WARNING: Navigate on Autopilot may not always
attempt to exit at an off-ramp or change lanes,
even when an exit or lane change is determined by
the navigation route. Always remain alert and be
prepared to manually steer onto an off-ramp, or
make a lane change to prepare for, or to exit at, an
off-ramp or interchange.
Be Ready to Assist
When attempting to change lanes or maneuver Model 3,
or when approaching construction zones, Navigate on Autopilot may be unable to determine the appropriate driving lane (for example, complex clover leafs and
multi-lane
off-ramps) and the touchscreen displays an
alert indicating that Navigate on Autopilot is trying to
maneuver and may require assistance. When you see the
message, be prepared to take immediate action to ensure that it is safe and appropriate to complete the lane change or maneuver.
Navigate on Autopilot
93Autopilot
Page 100 of 248

Stop Signs and Road Markings
When driving with Autosteer or Traffic-aware Cruise Control engaged, and Traffic Light and Stop Sign Control
enabled,
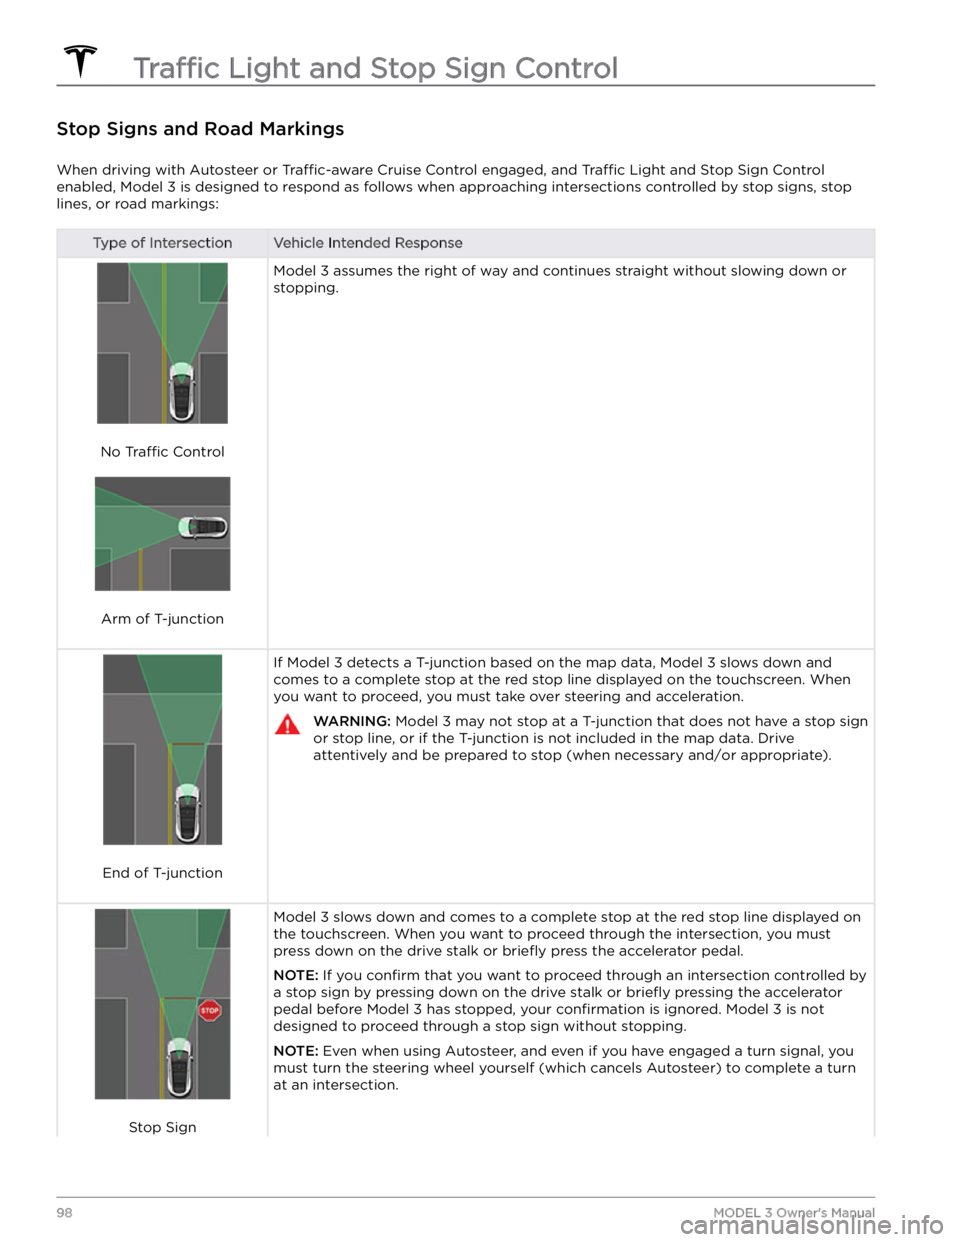
Model 3 is designed to respond as follows when approaching intersections controlled by stop signs, stop
lines, or road markings:
Type of IntersectionVehicle Intended Response
No Traffic Control
Arm of T-junction
Model 3 assumes the right of way and continues straight without slowing down or
stopping.
End of T-junction
If Model 3 detects a T-junction based on the map data, Model 3 slows down and
comes to a complete stop at the red stop line displayed on the
touchscreen. When
you want to proceed, you must take over steering and acceleration.
WARNING: Model 3 may not stop at a T-junction that does not have a stop sign
or stop line, or if the T-junction is not included in the map data. Drive
attentively and be prepared to stop (when necessary and/or appropriate).
Stop Sign
Model 3 slows down and comes to a complete stop at the red stop line displayed on
the
touchscreen. When you want to proceed through the intersection, you must
press down on the drive stalk or briefly press the accelerator pedal.
NOTE: If you confirm that you want to proceed through an intersection controlled by
a stop sign by
pressing down on the drive stalk or briefly pressing the accelerator
pedal before
Model 3 has stopped, your confirmation is ignored. Model 3 is not
designed to proceed through a stop sign without stopping.
NOTE: Even when using Autosteer, and even if you have engaged a turn signal, you
must turn the
steering wheel yourself (which cancels Autosteer) to complete a turn
at an intersection.
Traffic Light and Stop Sign Control
98MODEL 3 Owner
Page 111 of 248
Model 3 monitors the markers on the lane you are
driving in as well as the surrounding areas for the presence of vehicles or other objects.
When an object is detected in your blind spot or near
the side of
Model 3 (such as a vehicle, guard rail, etc.),
the
touchscreen displays colored lines radiating from the
image of your vehicle. The location of the lines correspond to the location of the detected object. The color of the lines (white, yellow, orange, or red)
represent the object
Page 117 of 248

How Speed Assist Works
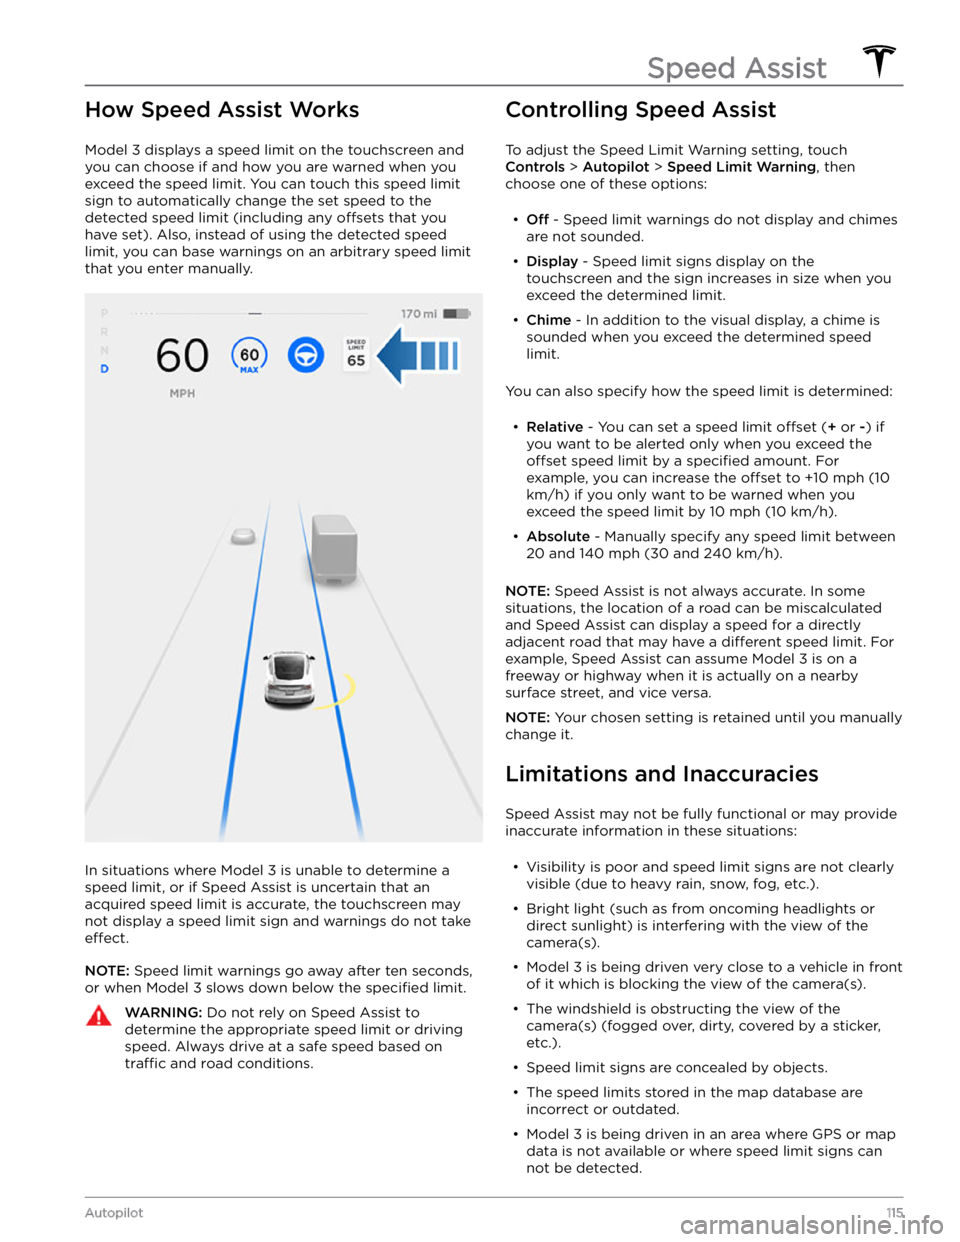
Model 3 displays a speed limit on the touchscreen and
you can choose if and how you are warned when you exceed the speed limit.
You can touch this speed limit
sign to automatically change the set speed to the
detected speed limit (including any offsets that you
have set). Also, instead of using the detected speed
limit, you can base warnings on an arbitrary speed limit that you enter manually.
In situations where Model 3 is unable to determine a
speed limit, or if Speed Assist is uncertain that an acquired speed limit is accurate, the
touchscreen may
not display a speed limit sign and warnings do not take
effect.
NOTE: Speed limit warnings go away after ten seconds,
or when
Model 3 slows down below the specified limit.
WARNING: Do not rely on Speed Assist to
determine the appropriate speed limit or driving
speed. Always drive at a safe speed based on
traffic and road conditions.
Controlling Speed Assist
To adjust the Speed Limit Warning setting, touch
Controls > Autopilot > Speed Limit Warning, then
choose one of these options:
Page 119 of 248

OverviewTouch Controls on the bottom corner of
the touchscreen to control features and
customize
Model 3 to suit your
preferences. The Controls window appears
over the map. Touch an option on the left
side of the window to display the
associated controls and settings. By default,
Quick Controls displays for quicker
access to commonly used settings.
To close the Controls window, touch the X
in the top left corner, touch Controls again,
or swipe down on the window.
When an information icon displays beside a
specific setting, touch it to display a
popup that provides helpful details about
the associated setting.
NOTE: The following illustrations are for demonstration
purposes only. Depending on vehicle options, software version and market region, the options available may be
different.
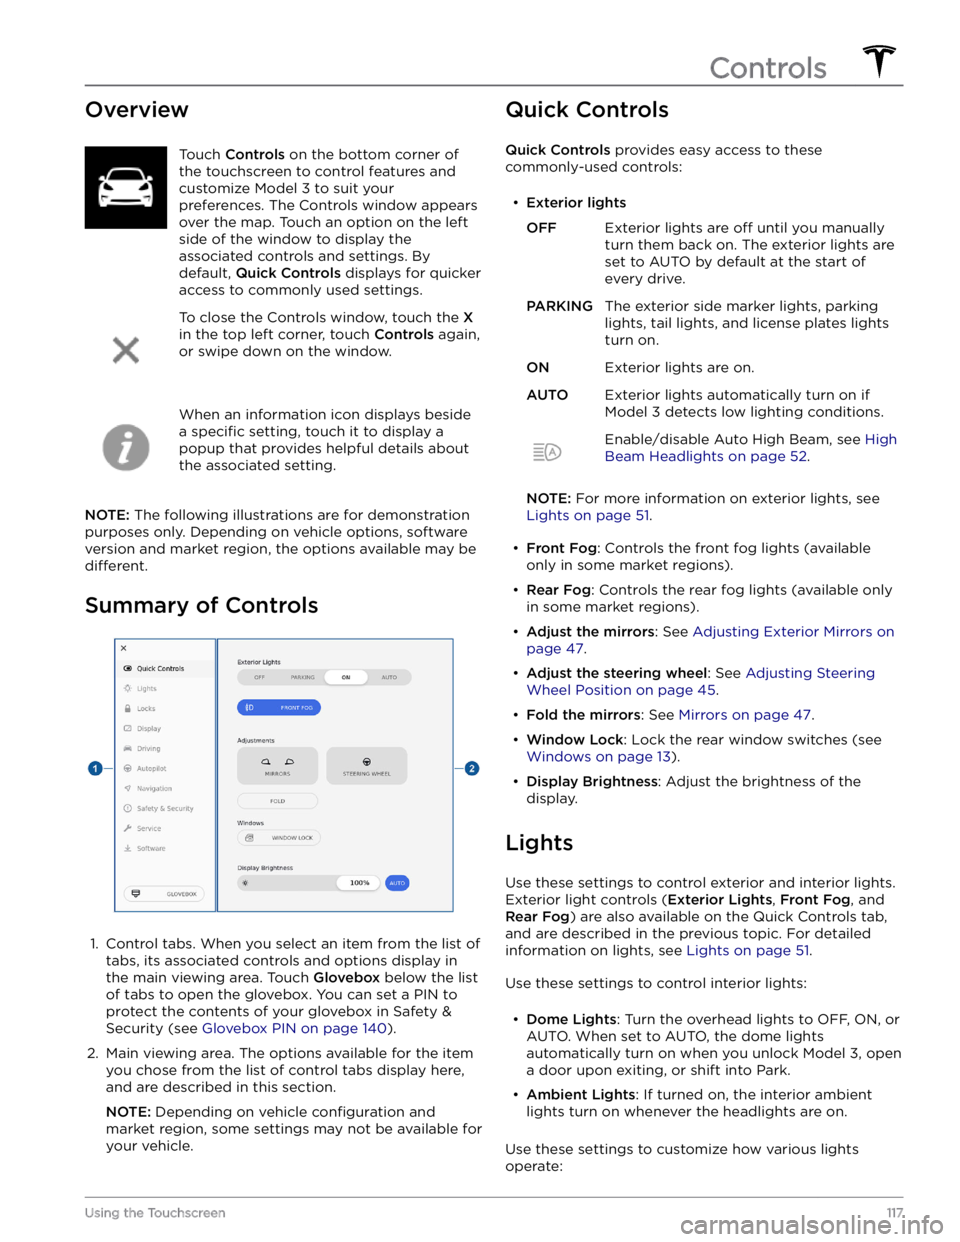
Summary of Controls
1.
Control tabs. When you select an item from the list of tabs, its associated controls and options display in the main viewing area. Touch
Glovebox below the list
of tabs to open the glovebox. You can set a PIN to
protect the contents of your glovebox in Safety & Security (see
Glovebox PIN on page 140).
2.
Main viewing area. The options available for the item you chose from the list of control tabs display here, and are described in this section.
NOTE: Depending on vehicle configuration and
market region, some settings may not be available for
your vehicle.
Quick Controls
Quick Controls provides easy access to these
commonly-used controls:
Page 121 of 248
NOTE: When Chill is selected, Chill displays on the
touchscreen above the driving speed.
NOTE: If equipped with the Acceleration Upgrade
package, the modes of acceleration are
Chill and Sport.
Steering Mode: Adjust the amount of effort required to
turn the steering wheel.
Sport feels more responsive
whereas
Comfort feels easier to drive and park (see
Adjusting Steering Effort on page 45).
Stopping Mode: Choose how you want Model 3 to
behave once regenerative braking has reduced the driving speed to a very low speed, a driving gear is still
engaged, and both the accelerator and brake pedals are
released. See
Stopping Mode on page 59. You can adjust
this setting only when
Model 3 is in Park.
Track Mode: (available on Performance vehicles only)
when enabled, this mode
modifies the vehicle
Page 126 of 248
1.
Touch to turn the climate control system off.
2.
The fan icon represents the general settings tab and displays by default. Touch the seat heater icon to access
controls for the front
and rear seat heaters (see Operating Seat Heaters on page 125).
3.
Choose where air flows into the cabin (windshield, face-level, or foot-level vents). You can choose more than one
location.
NOTE: When air is directed to the foot-level vents, air continues to flow to the windshield vents to assist in
defogging. When air is directed to the face-level vents, air does not
flow to the windshield.
4.
Touch to adjust how air flows from the driver