Page 94 of 172

SAFETY AND SECURITY OVERVIEW
STARLINK®Safety and Security services* are designed to help in your time of need. These
include Advanced Automatic Collision Notification, SOS Emergency Assistance, Enhanced
Roadside Assistance, Stolen Vehicle Recovery, the added convenience of Remote Engine
Start with Climate Control, and so much more.
With the SUBARU STARLINK
®system integrated into your vehicle, advanced safety and
security technology is just a button press away. The SUBARU STARLINK®experience
includes in-vehicle call center support, maintenance and diagnostic alerts as well as
remote services that keep you connected to your Subaru vehicle.
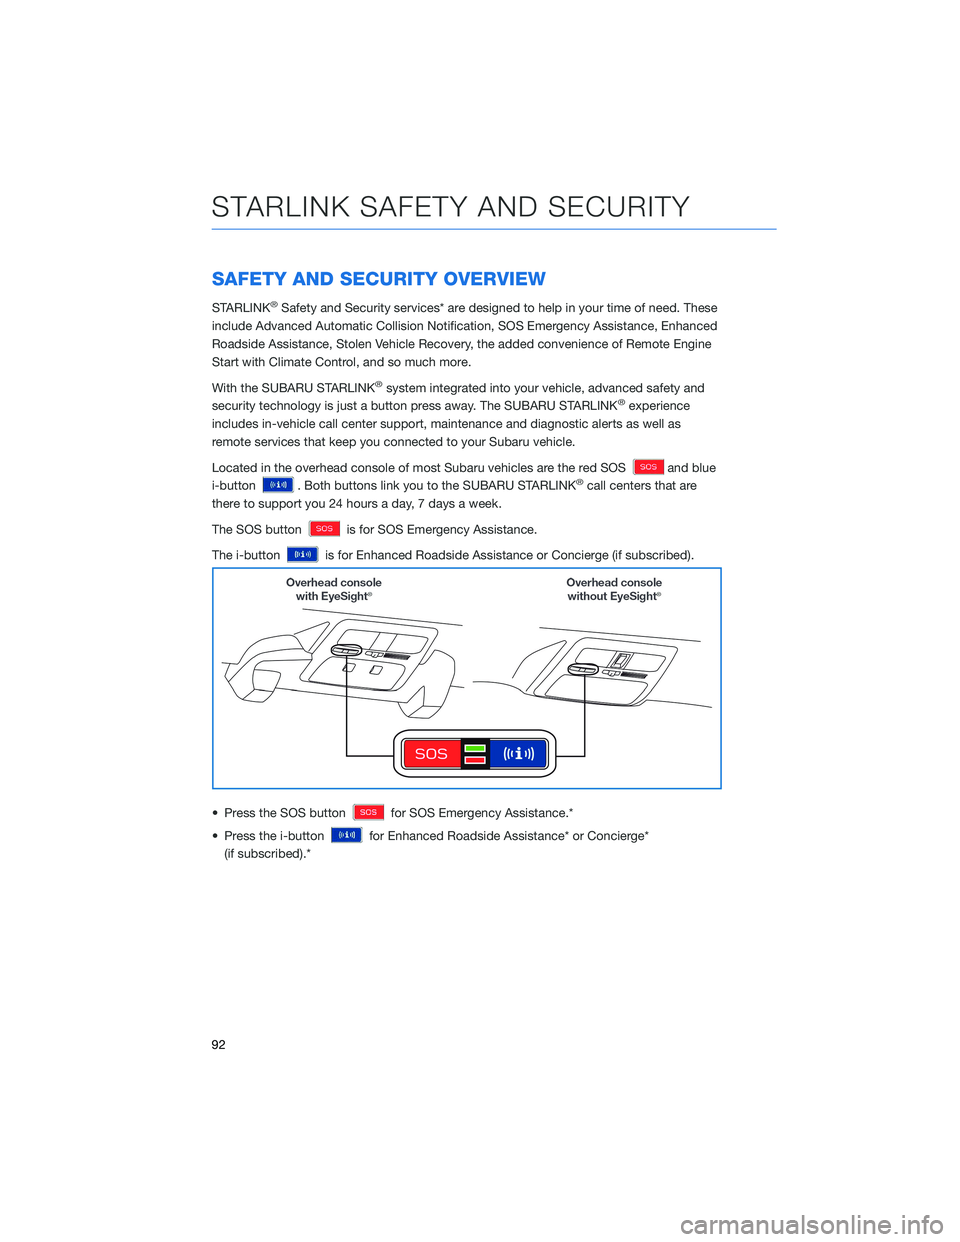
Located in the overhead console of most Subaru vehicles are the red SOS
and blue
i-button
. Both buttons link you to the SUBARU STARLINK®call centers that are
there to support you 24 hours a day, 7 days a week.
The SOS button
is for SOS Emergency Assistance.
The i-button
is for Enhanced Roadside Assistance or Concierge (if subscribed).
• Press the SOS button
for SOS Emergency Assistance.*
• Press the i-button
for Enhanced Roadside Assistance* or Concierge*
(if subscribed).*
STARLINK SAFETY AND SECURITY
92
Page 99 of 172
SETTING FUNCTION
Incoming
Call
VolumeSets the volume of the received call.
Call
VolumeSets the call volume.
SMS/MMS
Ringtone
VolumeSets the SMS/MMS ringtone volume.
SMS/MMS
Read Out
VolumeSets the SMS/MMS read out volume.
Voice
VolumeSets the voice recognition prompts volume.
PHONE
This system supports Bluetooth®, a wireless data system, allowing you to make and
receive calls without taking your hands off the steering wheel.
In the settings menu, you will be able to manage devices, adjust phone book and message
settings, and adjust other phone/Bluetooth
®settings.
To access the phone settings screen, press the “Home” button, select “Settings”, then
select the “Phone” menu.
SETTINGS AND UPDATES
97
Page 115 of 172

Rear Cross-Traffic Alert (RCTA)
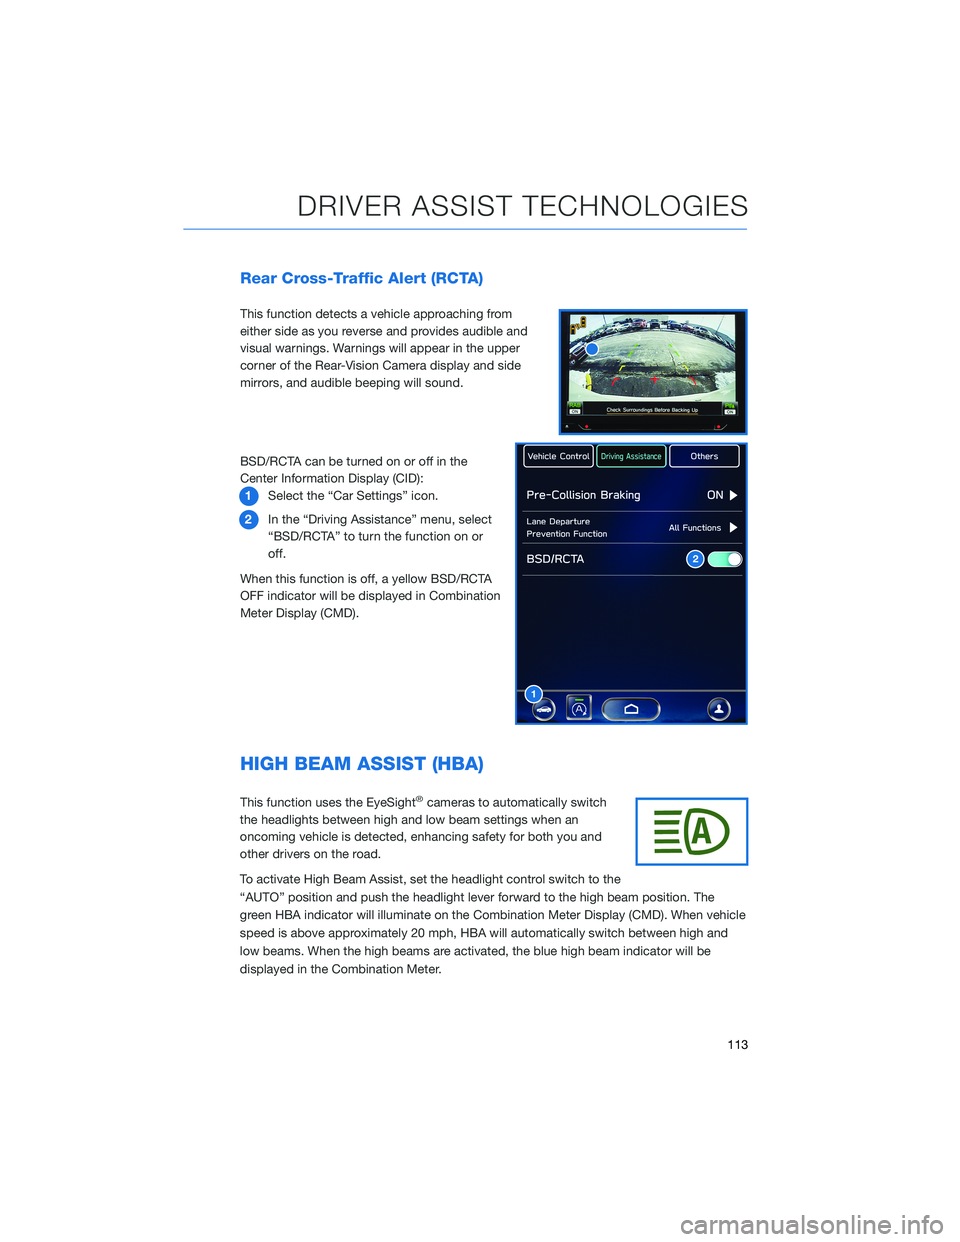
This function detects a vehicle approaching from
either side as you reverse and provides audible and
visual warnings. Warnings will appear in the upper
corner of the Rear-Vision Camera display and side
mirrors, and audible beeping will sound.
BSD/RCTA can be turned on or off in the
Center Information Display (CID):
1Select the “Car Settings” icon.
2In the “Driving Assistance” menu, select
“BSD/RCTA” to turn the function on or
off.
When this function is off, a yellow BSD/RCTA
OFF indicator will be displayed in Combination
Meter Display (CMD).
HIGH BEAM ASSIST (HBA)
This function uses the EyeSight®cameras to automatically switch
the headlights between high and low beam settings when an
oncoming vehicle is detected, enhancing safety for both you and
other drivers on the road.
To activate High Beam Assist, set the headlight control switch to the
“AUTO” position and push the headlight lever forward to the high beam position. The
green HBA indicator will illuminate on the Combination Meter Display (CMD). When vehicle
speed is above approximately 20 mph, HBA will automatically switch between high and
low beams. When the high beams are activated, the blue high beam indicator will be
displayed in the Combination Meter.
1
2
DRIVER ASSIST TECHNOLOGIES
113
Page 129 of 172
3For 11.6-inch display models, select
“Auto”. For Dual 7.0-inch display models,
select “Sync With Phone”.
4Select “Back”.
The clock automatically adjusts as follows:
• 11.6-inch display with navigation system: Automatically adjusts the clock when a GPS
signal is available.
• 11.6-inch display without navigation system: Automatically adjusts the clock when a
STARLINK
®Safety and Security signal is available.
• Dual 7.0-inch display: Automatically adjusts the clock when a phone is paired and
connected via Bluetooth
®. “Phonebook Download” must be enabled in the Phone
Settings.
For step-by-step procedure to pair a phone to the SUBARU STARLINK
®Touchscreen, see
page 130 for Android devices or page 133 for Apple devices.
3
4
HOW TO APPENDIX
127
Page 132 of 172
To set a seat position with the access key fob:
1. Make sure the select lever is in the “P” position with the parking brake applied and the
ignition “OFF”.
2. Adjust the seat to the desired position.
3. While holding the “SET” button, press and hold the unlock button on the access key
fob. A chirp sounds when the position is registered.
To retrieve the seat position set with the access key fob:
1. Hold the access key fob.
2. Unlock and open the driver’s door.
BLUETOOTH®PAIRING
Pairing an Android Device
1To pair an Android device, start by
touching the “Phone” button on the
Home screen.
2If there is no phone connected, it will ask
you, “Do you want to add a device?”.
Select “Yes”. If a device has already been
paired, select “Add Device”.
HOW TO APPENDIX
130
Page 133 of 172
3The screen to the right will be displayed
when pairing mode is in progress. The
device name will most likely be Subaru,
but be sure to make note of what name it
is so you can find it on your phone.
4On your Android device, go to “Settings” (it can
be found under apps).
5Next select “Connected Devices” or
“Connections”.
6Now select “Bluetooth”. This will show a screen
to “Pair New Device” or it will be showing the
nearby devices to add. Select “Subaru”, if shown
on the list, or “Pair New Device”.
HOW TO APPENDIX
131
Page 134 of 172
7Now select “OK” to pair the devices.
Make sure to allow access to your
messages and call history in the “Allow
Access to Messages” popup box.
8Select “Yes” to transfer your contacts.
9If you cannot access your phonebook or
messages, go back to your phone’s
Bluetooth
®settings and select the gear
icon next to your vehicle’s device name
and ensure all settings are enabled.
HOW TO APPENDIX
132
Page 136 of 172
5Select “Bluetooth”.
6Now select “Subaru”, or the device name from
step 3, if not “Subaru”.
HOW TO APPENDIX
134