Page 52 of 172

FUEL FILLER LID
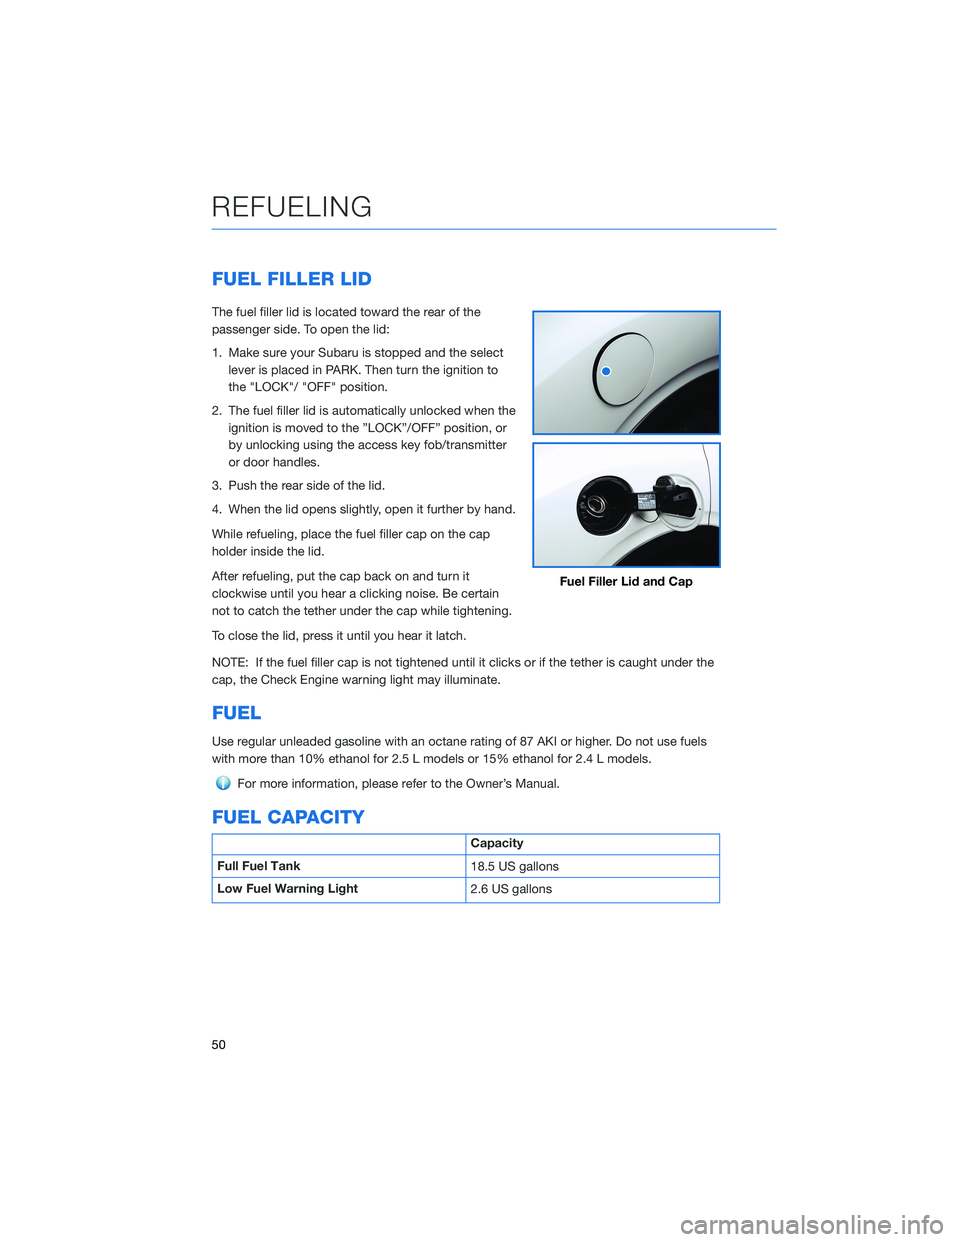
The fuel filler lid is located toward the rear of the
passenger side. To open the lid:
1. Make sure your Subaru is stopped and the select
lever is placed in PARK. Then turn the ignition to
the "LOCK"/ "OFF" position.
2. The fuel filler lid is automatically unlocked when the
ignition is moved to the ”LOCK”/OFF” position, or
by unlocking using the access key fob/transmitter
or door handles.
3. Push the rear side of the lid.
4. When the lid opens slightly, open it further by hand.
While refueling, place the fuel filler cap on the cap
holder inside the lid.
After refueling, put the cap back on and turn it
clockwise until you hear a clicking noise. Be certain
not to catch the tether under the cap while tightening.
To close the lid, press it until you hear it latch.
NOTE: If the fuel filler cap is not tightened until it clicks or if the tether is caught under the
cap, the Check Engine warning light may illuminate.
FUEL
Use regular unleaded gasoline with an octane rating of 87 AKI or higher. Do not use fuels
with more than 10% ethanol for 2.5 L models or 15% ethanol for 2.4 L models.
For more information, please refer to the Owner’s Manual.
FUEL CAPACITY
Capacity
Full Fuel Tank
18.5 US gallons
Low Fuel Warning Light
2.6 US gallons
Fuel Filler Lid and Cap
REFUELING
50
Page 80 of 172
5Type your name in using the keyboard
screen, select “Next”, and select “Next”
on the following screen to go to phone
pairing.
6Select “Add Phone” to pair your phone to
the system (see page 130 and 133 in the
How To Appendix) or select your phone if
it is already paired.
7Select “Finish”.
CREATING A DRIVER PROFILE
78
Page 86 of 172
MAKING A CALL
You can make a call through voice recognition
by touching the “Voice Recognition Switch” on
the steering wheel to start the voice
recognition system. After pressing the “Voice
Recognition Switch”, wait for the “Voice
Guidance” screen to appear on the
Touchscreen and say “Call [name and phone
type]” or “Dial [number]”.
To make a call from the Touchscreen, start by
pushing the “Home” button and then select
“Phone”. After the phone screen displays,
select the method you would like to use to
make a call.
• Recent – Allows you to call someone that
has recently called you or that you called.
• Favorites – Allows you to place a call to one
of your favorites on your phone.
• Phonebook – Will display the phonebook
that is on your phone.
• Messages – Allows you to call someone that
recently sent you a text message.
• Keypad – Allow you to dial any number you
would like.
PHONE
84
Page 90 of 172
SiriusXM®Travel Link
SiriusXM®U.S. satellite and data services are
available in the 48 states of the contiguous
USA and DC.
Data service information, comprising sports,
weather, stock and fuel, can be received via
the SiriusXM
®Radio.
To receive the data service information in the
vehicle, a subscription to the SiriusXM
®
Satellite Radio Service is necessary following a
free trial.
SUBARU STARLINK®MOBILE APP
There are several key applications that can be loaded to your phone and used while in your
Subaru to help you while you drive. You must also download and log in to the SUBARU
STARLINK
®app on your phone to use these apps.
To download the SUBARU STARLINK
®app, go to the Apple App Store or the Google Play
Store and search for SUBARU STARLINK®in the menu.
Below are a few apps that you may find helpful.
APPS
88
Page 95 of 172

• To cancel a SOS Emergency Assistance, Enhanced Roadside Assistance or a Concierge
call, press and hold the same button for approximately two seconds or select the “End
Call” button if displayed on the Touchscreen.
Head towww.Subaru.com/STARLINKto see all the SUBARU
STARLINK
®subscription services and packages.
* Access to STARLINK®Safety and Security services requires an active
STARLINK®subscription. Remote Engine Start available on keyless access
with push-button start vehicles. Remote Engine Start with Climate Control
available on vehicles with keyless access with push-button start and
automatic climate control. Not available on vehicles with manual
transmission.
ENROLLMENT
To enroll in SUBARU STARLINK®and access remote services, a MySubaru account is
required. MySubaru is the Subaru owner website that allows you to access vehicle remote
services, user preferences, diagnostic alerts and other useful features enabled by your
STARLINK
®Safety Plus, STARLINK®Security Plus and STARLINK®Concierge
subscription.
Your retailer may have created an account for you during the delivery process. However,
you can also create a MySubaru account onwww.mysubaru.com.
Enrollment in SUBARU STARLINK
®can be done online at MySubaru.com, through the
MySubaru Mobile App, at your Subaru retailer or by calling a STARLINK®Customer Care
Representative at:1-855-753-2495
NOTE: Please have your Vehicle Identification Number (VIN) available, as you will need it
to complete this step. After the enrollment process, you will learn more about the features
in detail at MySubaru.com.
STARLINK SAFETY AND SECURITY
93
Page 130 of 172
MEMORY HEIGHT(if equipped)
With the Memory Height function, you can set
where the Power Rear Gate gate stops when it
opens. This is a great feature to limit the
upward travel of the rear gate to ensure you
can reach it or to prevent the rear gate from
contacting a garage ceiling.
To set the height:
1In the Center Information Display (CID)
press the “Home” Button.
2Select “Settings”.
3Select “Car”.
4Select “Power Rear Gate”.
5Turn on “Power Rear Gate Memory”.
6Open the rear gate using the
Power Rear Gate Button.
Pause the rear gate when it
reaches the desired height
by pressing the Power Rear
Gate Button on the rear gate,
instrument panel, or key fob.
6
HOW TO APPENDIX
128
Page 131 of 172

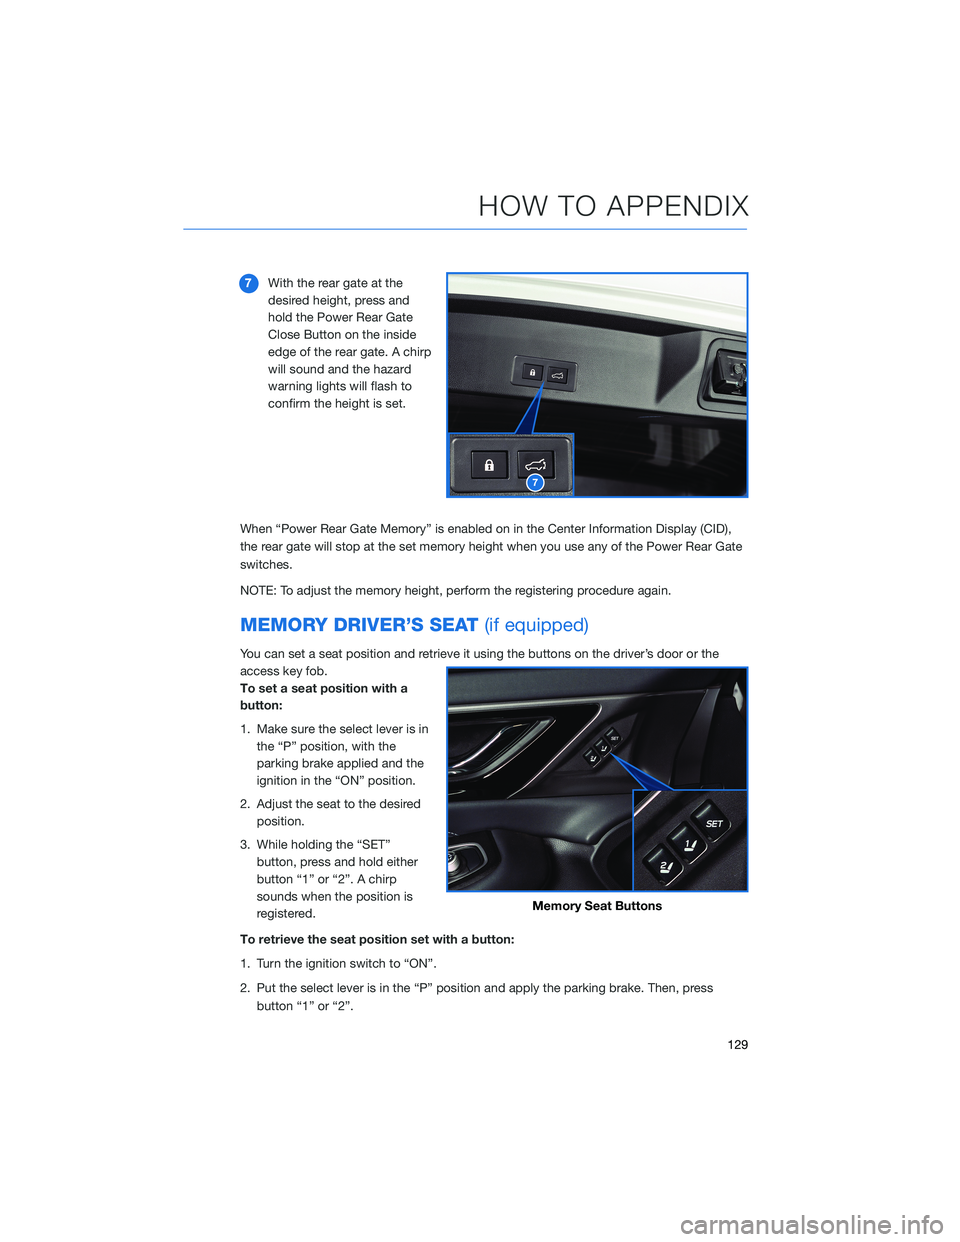
7With the rear gate at the
desired height, press and
hold the Power Rear Gate
Close Button on the inside
edge of the rear gate. A chirp
will sound and the hazard
warning lights will flash to
confirm the height is set.
When “Power Rear Gate Memory” is enabled on in the Center Information Display (CID),
the rear gate will stop at the set memory height when you use any of the Power Rear Gate
switches.
NOTE: To adjust the memory height, perform the registering procedure again.
MEMORY DRIVER’S SEAT(if equipped)
You can set a seat position and retrieve it using the buttons on the driver’s door or the
access key fob.
To set a seat position with a
button:
1. Make sure the select lever is in
the “P” position, with the
parking brake applied and the
ignition in the “ON” position.
2. Adjust the seat to the desired
position.
3. While holding the “SET”
button, press and hold either
button “1” or “2”. A chirp
sounds when the position is
registered.
To retrieve the seat position set with a button:
1. Turn the ignition switch to “ON”.
2. Put the select lever is in the “P” position and apply the parking brake. Then, press
button “1” or “2”.
7
Memory Seat Buttons
HOW TO APPENDIX
129
Page 132 of 172
To set a seat position with the access key fob:
1. Make sure the select lever is in the “P” position with the parking brake applied and the
ignition “OFF”.
2. Adjust the seat to the desired position.
3. While holding the “SET” button, press and hold the unlock button on the access key
fob. A chirp sounds when the position is registered.
To retrieve the seat position set with the access key fob:
1. Hold the access key fob.
2. Unlock and open the driver’s door.
BLUETOOTH®PAIRING
Pairing an Android Device
1To pair an Android device, start by
touching the “Phone” button on the
Home screen.
2If there is no phone connected, it will ask
you, “Do you want to add a device?”.
Select “Yes”. If a device has already been
paired, select “Add Device”.
HOW TO APPENDIX
130