Page 4 of 164

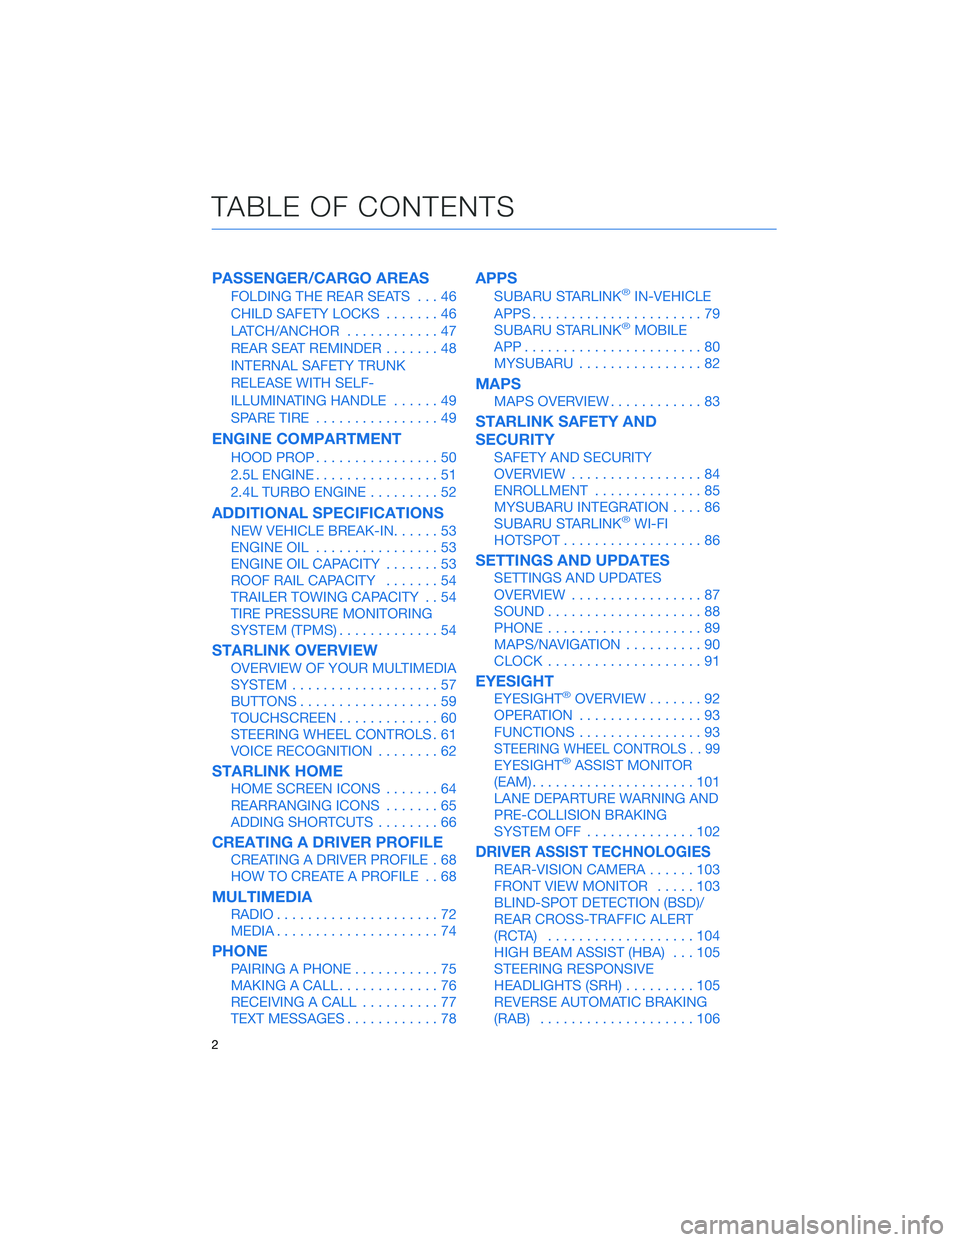
PASSENGER/CARGO AREAS
FOLDING THE REAR SEATS...46
CHILD SAFETY LOCKS.......46
LATCH/ANCHOR............47
REAR SEAT REMINDER.......48
INTERNAL SAFETY TRUNK
RELEASE WITH SELF-
ILLUMINATING HANDLE......49
SPARE TIRE................49
ENGINE COMPARTMENT
HOOD PROP................50
2.5L ENGINE................51
2.4L TURBO ENGINE.........52
ADDITIONAL SPECIFICATIONS
NEW VEHICLE BREAK-IN......53
ENGINE OIL................53
ENGINE OIL CAPACITY.......53
ROOF RAIL CAPACITY.......54
TRAILER TOWING CAPACITY . . 54
TIRE PRESSURE MONITORING
SYSTEM (TPMS).............54
STARLINK OVERVIEW
OVERVIEW OF YOUR MULTIMEDIA
SYSTEM...................57
BUTTONS..................59
TOUCHSCREEN.............60
STEERING WHEEL CONTROLS . 61
VOICE RECOGNITION........62
STARLINK HOME
HOME SCREEN ICONS.......64
REARRANGING ICONS.......65
ADDING SHORTCUTS........66
CREATING A DRIVER PROFILE
CREATING A DRIVER PROFILE . 68
HOW TO CREATE A PROFILE . . 68
MULTIMEDIA
RADIO.....................72
MEDIA.....................74
PHONE
PAIRING A PHONE...........75
MAKING A CALL.............76
RECEIVING A CALL..........77
TEXT MESSAGES............78
APPS
SUBARU STARLINK®IN-VEHICLE
APPS......................79
SUBARU STARLINK
®MOBILE
APP.......................80
MYSUBARU................82
MAPS
MAPS OVERVIEW............83
STARLINK SAFETY AND
SECURITY
SAFETY AND SECURITY
OVERVIEW.................84
ENROLLMENT..............85
MYSUBARU INTEGRATION....86
SUBARU STARLINK
®WI-FI
HOTSPOT..................86
SETTINGS AND UPDATES
SETTINGS AND UPDATES
OVERVIEW.................87
SOUND....................88
PHONE....................89
MAPS/NAVIGATION..........90
CLOCK....................91
EYESIGHT
EYESIGHT®OVERVIEW.......92
OPERATION................93
FUNCTIONS................93
STEERING WHEEL CONTROLS . . 99
EYESIGHT®ASSIST MONITOR
(EAM).....................101
LANE DEPARTURE WARNING AND
PRE-COLLISION BRAKING
SYSTEM OFF..............102
DRIVER ASSIST TECHNOLOGIES
REAR-VISION CAMERA......103
FRONT VIEW MONITOR.....103
BLIND-SPOT DETECTION (BSD)/
REAR CROSS-TRAFFIC ALERT
(RCTA)...................104
HIGH BEAM ASSIST (HBA)...105
STEERING RESPONSIVE
HEADLIGHTS (SRH).........105
REVERSE AUTOMATIC BRAKING
(RAB)....................106
TABLE OF CONTENTS
2
Page 5 of 164
DRIVERFOCUS DISTRACTION
MITIGATION SYSTEM
DRIVERFOCUS®OVERVIEW . . 107
DRIVERFOCUS®
COMPONENTS.............107
DROWSY/INATTENTIVE
WARNINGS................109
DRIVER PROFILE/CONVENIENCE
SETTINGS.................109
DRIVER MONITORING SYSTEM
OFF......................111
CARE AND LIMITATIONS
STEREO CAMERA
PRECAUTIONS.............112
WINDSHIELD GLASS AND
DASHBOARD..............112
FRONT VIEW
LEGACY..................113
EYESIGHT DISCLAIMER
EYESIGHT®DISCLAIMER....114
HOW TO APPENDIX
HOW TO OVERVIEW.........115
SETTING THE CLOCK.......115
MEMORY DRIVER’S SEAT....120
BLUETOOTH
®PAIRING......121
ANDROID AUTO™..........127
APPLE CARPLAY
®..........128
WI-FI.....................130
MAPS....................133
FIRMWARE AND SOFTWARE
UPDATES.................152
INDEX.....................153
TABLE OF CONTENTS
3
Page 60 of 164

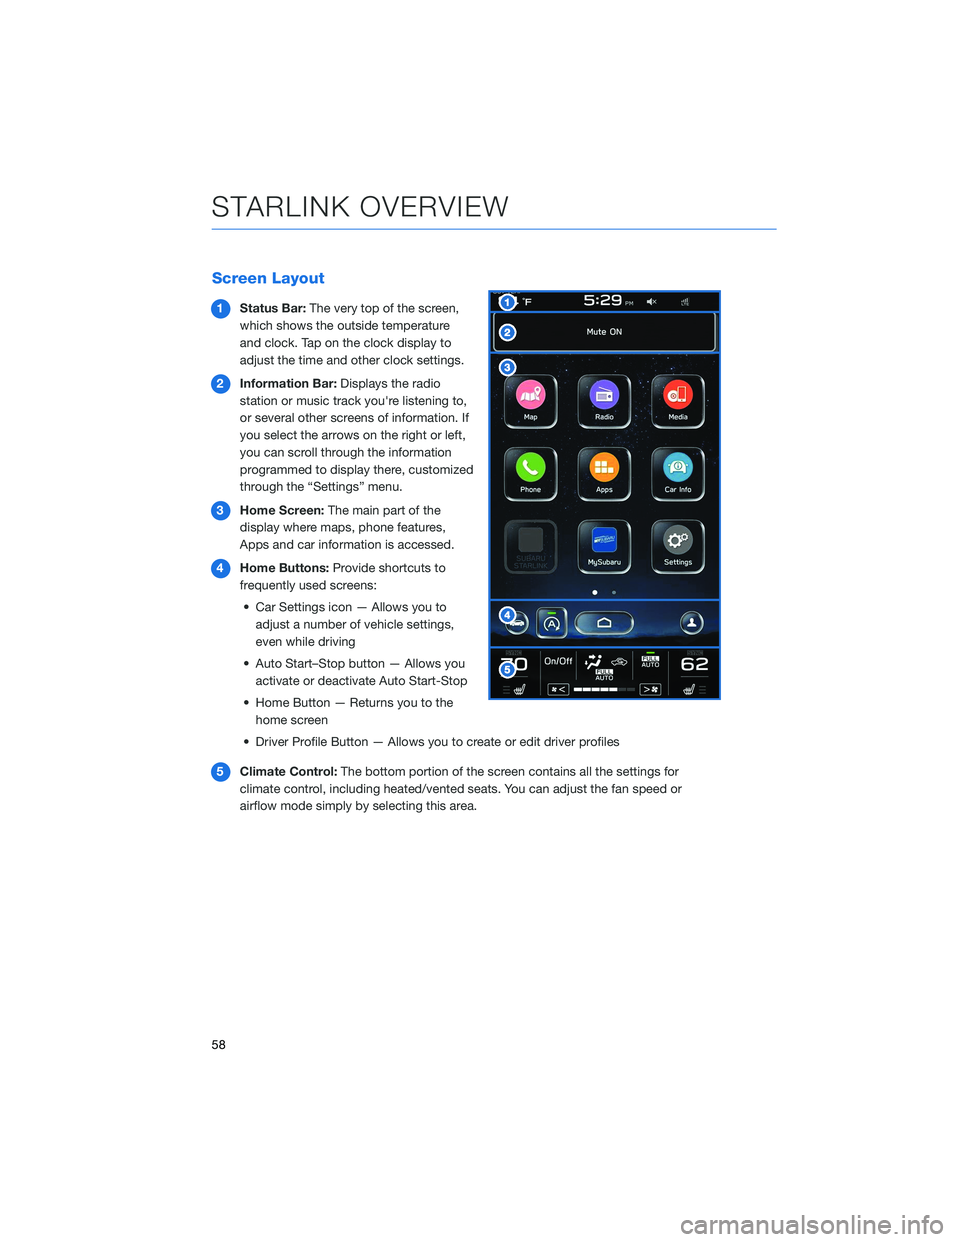
Screen Layout
1Status Bar:The very top of the screen,
which shows the outside temperature
and clock. Tap on the clock display to
adjust the time and other clock settings.
2Information Bar:Displays the radio
station or music track you're listening to,
or several other screens of information. If
you select the arrows on the right or left,
you can scroll through the information
programmed to display there, customized
through the “Settings” menu.
3Home Screen:The main part of the
display where maps, phone features,
Apps and car information is accessed.
4Home Buttons:Provide shortcuts to
frequently used screens:
• Car Settings icon — Allows you to
adjust a number of vehicle settings,
even while driving
• Auto Start–Stop button — Allows you
activate or deactivate Auto Start-Stop
• Home Button — Returns you to the
home screen
• Driver Profile Button — Allows you to create or edit driver profiles
5Climate Control:The bottom portion of the screen contains all the settings for
climate control, including heated/vented seats. You can adjust the fan speed or
airflow mode simply by selecting this area.
STARLINK OVERVIEW
58
Page 93 of 164

Updating Over-the-Air
To check for available updates over-the-air, first connect to a Wi-Fi network (see page
130). Map updates can be found by selecting “Settings”, then “Navigation” on the
Touchscreen.
For step by step directions for updating your maps through Wi-Fi, please refer to
page 150.
Updating Maps Using Your PC/MAC
Maps can also be updated using a USB memory device, which will
allow the entire map program to be updated at one time. This is a
great option if you are going to take a cross-country trip and your
maps have not been updated in a while.
To update the map using a USB memory device, start by going to
www.subaru-maps.com.
CLOCK
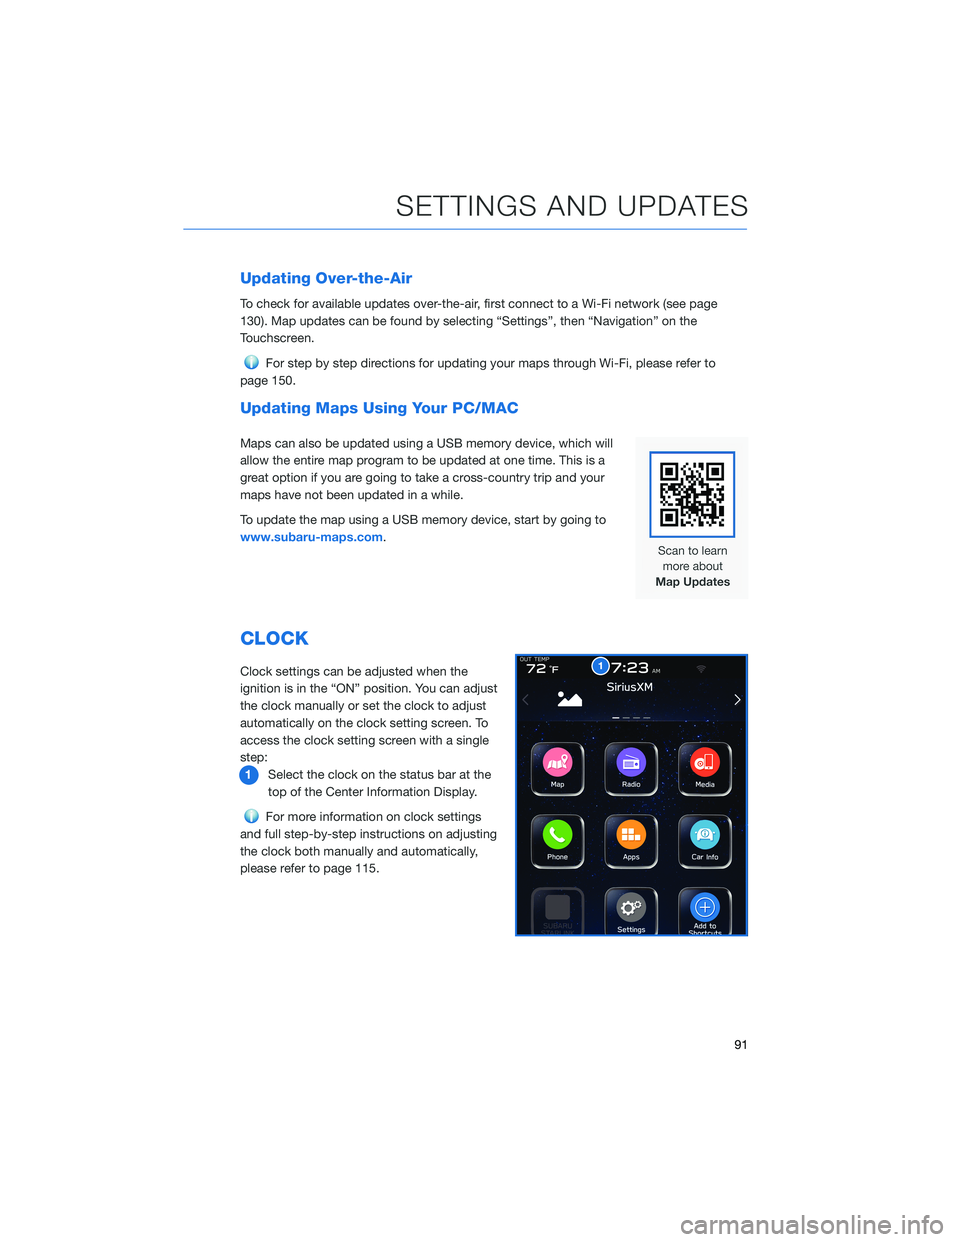
Clock settings can be adjusted when the
ignition is in the “ON” position. You can adjust
the clock manually or set the clock to adjust
automatically on the clock setting screen. To
access the clock setting screen with a single
step:
1Select the clock on the status bar at the
top of the Center Information Display.
For more information on clock settings
and full step-by-step instructions on adjusting
the clock both manually and automatically,
please refer to page 115.
1
SETTINGS AND UPDATES
91
Page 117 of 164
HOW TO OVERVIEW
This “How To” appendix provides detailed, step-by-step instructions to easily connect with
features of your Legacy.
If you need some help with these features or want to
learn more, we are here to assist you:
Your Subaru Owner’s Manuals:
Located in the glovebox
Online Subaru Owner’s Resources:
www.subaru.com/owners
Subaru Customer Support:
www.subaru.com/customer-support
1-800-782-2783 (1-800-SUBARU3 )
SETTING THE CLOCK
Clock settings can be adjusted when the ignition is in the “ON” position. You can adjust
the clock manually or set the clock to adjust automatically in the clock setting screen. To
directly access the clock setting screen, you can select the clock on the status bar at the
top of the Center Information Display. Full directions for accessing the clock settings and
adjusting the clock manually or automatically are given below.
For more information, please refer to “Basic Functions” in the STARLINK®Owner’s
Manual.
HOW TO APPENDIX
115
Page 118 of 164
Manually
To set the clock manually:
1Select the Clock Display in the Status
Bar.
2Select “Time Setting”.
NOTE: On this screen, you can also
adjust the clock format (12H or 24H) and,
for vehicles with navigation, adjust the
time zone and Daylight Saving Time. The
recommended settings for these are
“Auto.”
1
2
HOW TO APPENDIX
116
Page 120 of 164
Automatically
To set the clock automatically:
1Select the Clock Display in the Status
Bar.
2Select “Time Setting”.
NOTE: On this screen, you can also
adjust the clock format (12H or 24H) and,
for vehicles with navigation, adjust the
time zone and Daylight Saving Time. The
recommended settings for these are
“Auto.”
1
2
HOW TO APPENDIX
118
Page 121 of 164
3For 11.6-inch display models, select
“Auto”. For Dual 7.0-inch display models,
select “Sync With Phone”.
4Select “Back”.
The clock automatically adjusts as follows:
• 11.6-inch display with navigation system: Automatically adjusts the clock when a GPS
signal is available.
• 11.6-inch display without navigation system: Automatically adjusts the clock when a
STARLINK
®Safety and Security signal is available.
• Dual 7.0-inch display: Automatically adjusts the clock when a phone is paired and
connected via Bluetooth
®. “Phonebook Download” must be enabled in the Phone
Settings.
For step-by-step procedure to pair a phone to the SUBARU STARLINK
®Touchscreen, see
page 121 for Android devices or page 124 for Apple devices.
3
4
HOW TO APPENDIX
119