Page 3 of 164

PURPOSE OF THIS GUIDE
WELCOME................. 4
IMPORTANT SAFETY
INFORMATION.............. 4
OWNER’S RESOURCES....... 5
IN CASE OF EMERGENCY..... 6
TOWING YOUR ALL-WHEEL
DRIVE SUBARU............. 7
ENTRY AND EXIT
KEYLESS ENTRY............ 8
KEYLESS ACCESS WITH PUSH
BUTTON START.............10
INSTRUMENT PANEL........12
GETTING COMFORTABLE
SEATING...................14
TILT AND TELESCOPIC STEERING
COLUMN...................17
POWER EXTERIOR MIRRORS . . 17
REAR VIEW MIRROR.........19
POWER WINDOWS..........20
CENTER CONSOLE STORAGE . 21
POWER MOONROOF........21
CLIMATE CONTROL..........22
ACCESSORY CONNECTIONS . . 29
CONTROLS
INSTRUMENT PANEL SWITCHES
(LOWER LEFT)..............30AUDIO CONTROLS...........30
ADVANCED ADAPTIVE CRUISE
CONTROL..................31
I SWITCH...................31
LIGHT CONTROLS...........32
TURN SIGNALS.............33
WINDSHIELD WIPERS........33
OVERHEAD CONSOLE........34
GAUGES AND WARNING
LIGHTS
COMBINATION METER.......35
WARNING AND INDICATOR
LIGHTS....................35
OPERATING THE VEHICLE
IGNITION SWITCH...........36
PUSH-BUTTON IGNITION
SWITCH...................36
STARTING THE VEHICLE......36
DRIVING THE VEHICLE.......37
AUTO START–STOP..........39
ELECTRONIC PARKING BRAKE
(EPB).....................42
TURNING OFF THE VEHICLE...44
REFUELING
FUEL FILLER LID............45
FUEL......................45
FUEL CAPACITY.............45
TABLE OF CONTENTS
Page 35 of 164

Daytime Running Lights
The daytime running lights automatically turn on when the engine is running, the parking
brake is released, the select lever is out of the “P” position, and the light switch is set to
Off, “AUTO”, or “
”. Always turn on the headlights when it’s dark outside by rotating
the dial to the “
” or “AUTO” position.
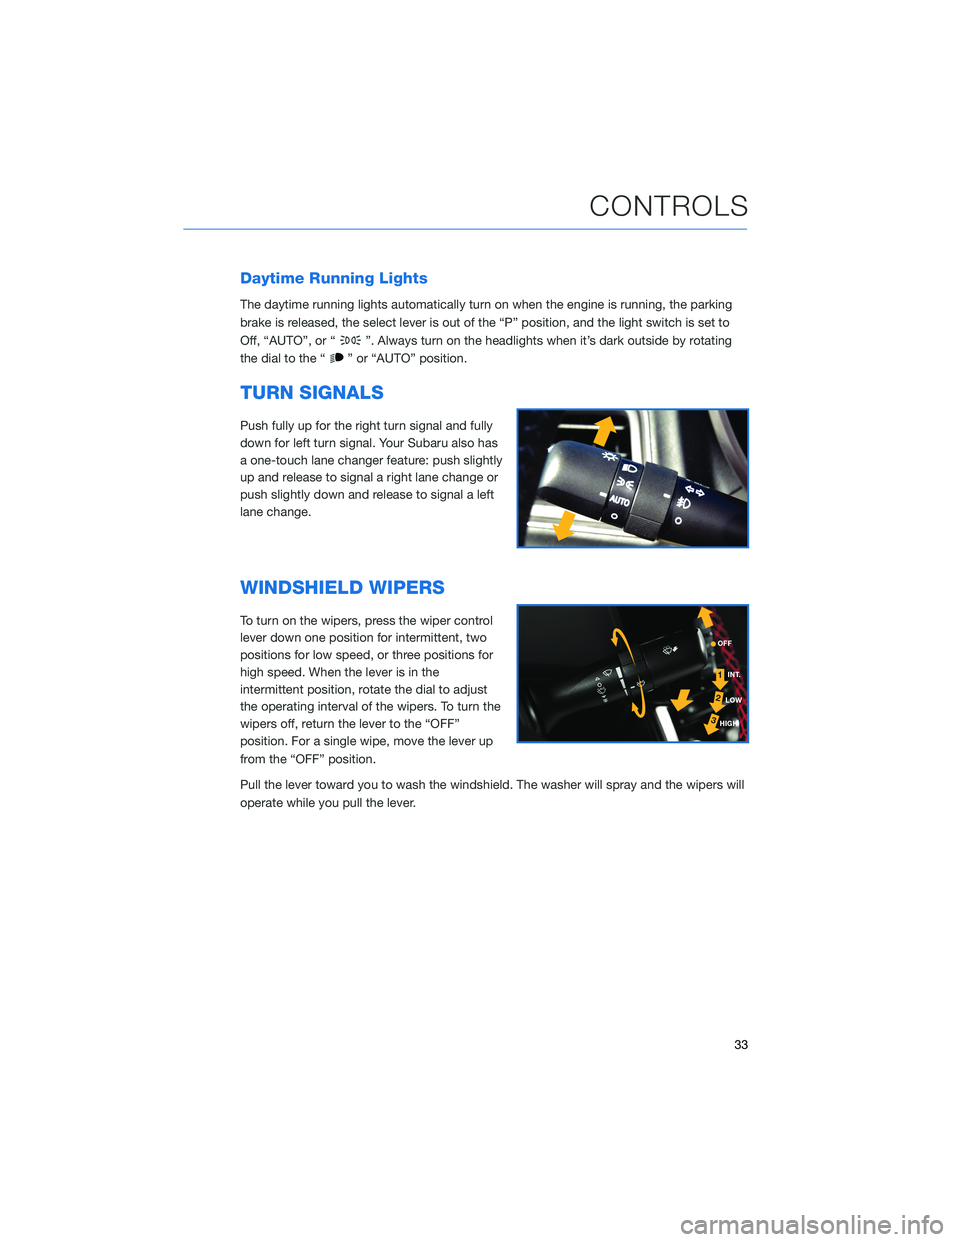
TURN SIGNALS
Push fully up for the right turn signal and fully
down for left turn signal. Your Subaru also has
a one-touch lane changer feature: push slightly
up and release to signal a right lane change or
push slightly down and release to signal a left
lane change.
WINDSHIELD WIPERS
To turn on the wipers, press the wiper control
lever down one position for intermittent, two
positions for low speed, or three positions for
high speed. When the lever is in the
intermittent position, rotate the dial to adjust
the operating interval of the wipers. To turn the
wipers off, return the lever to the “OFF”
position. For a single wipe, move the lever up
from the “OFF” position.
Pull the lever toward you to wash the windshield. The washer will spray and the wipers will
operate while you pull the lever.
CONTROLS
33
Page 37 of 164
COMBINATION METER
1Tachometer
2Combination Meter Display (CMD)
3Speedometer
4Fuel gauge5Trip meter and odometer
6Select lever/gear position indicator
7Engine coolant temperature gauge
WARNING AND INDICATOR LIGHTS
Red lights indicate immediate attention is required. Some examples are:
Seatbelt
warningDoor
openBrake system
Yellow lights indicate caution. Some examples are:
Low fuelEngine oil
level warning
lightTire pressure
warning light
Green and blue lights are for information. Some examples are:
Headlight
indicator
lightAuto Vehicle
Hold ONHigh beam
indicator
light
GAUGES AND WARNING LIGHTS
35
Page 38 of 164

IGNITION SWITCH
The ignition switch has four positions:
LOCK:You can only insert or remove the key in this position.
ACC (Accessory):Provides power to the radio and accessory power outlets.
ON:All electrical systems are available. The key returns to this position after starting the
engine.
START:Turn the key to this position to start the engine.
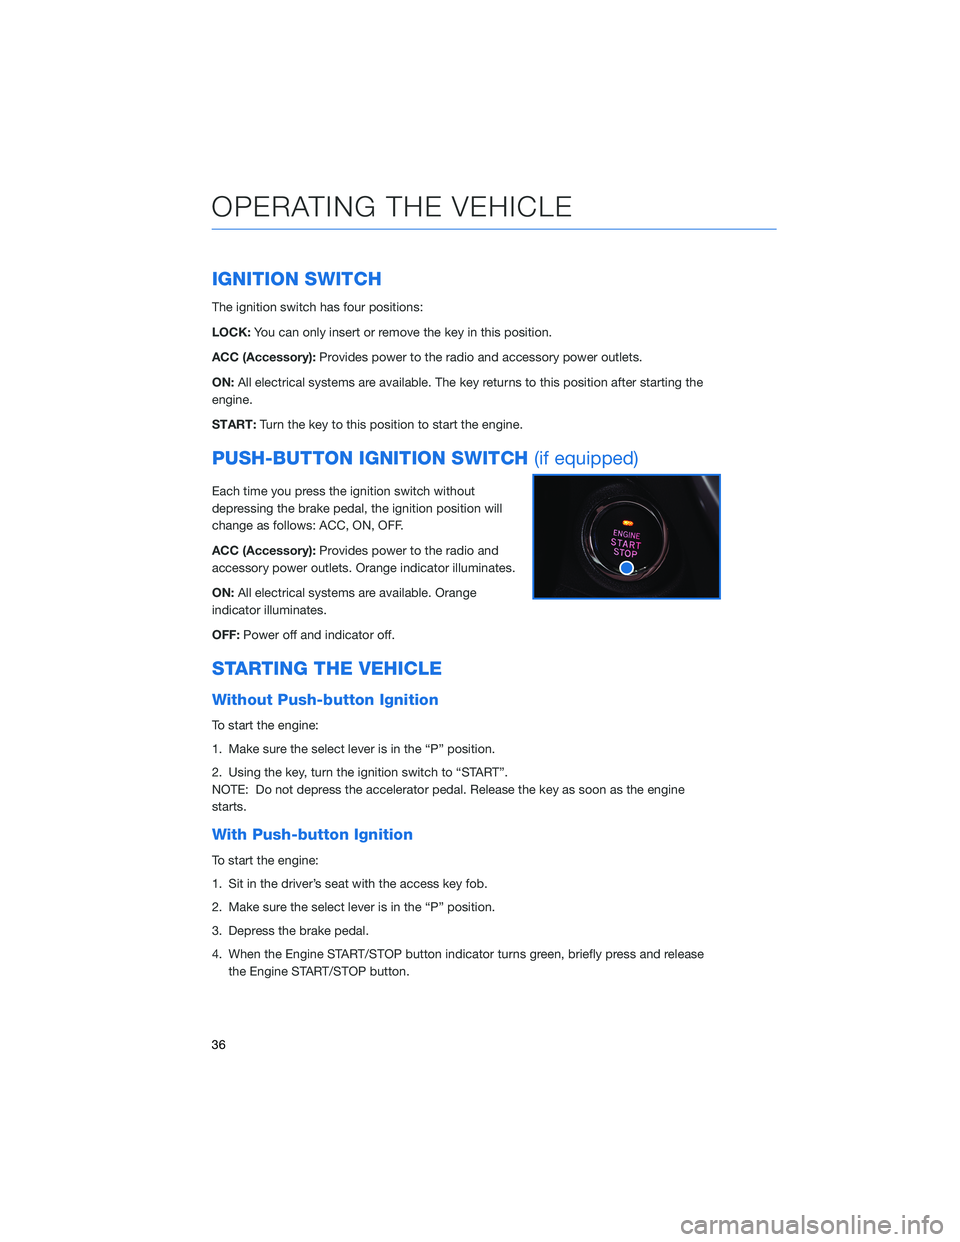
PUSH-BUTTON IGNITION SWITCH(if equipped)
Each time you press the ignition switch without
depressing the brake pedal, the ignition position will
change as follows: ACC, ON, OFF.
ACC (Accessory):Provides power to the radio and
accessory power outlets. Orange indicator illuminates.
ON:All electrical systems are available. Orange
indicator illuminates.
OFF:Power off and indicator off.
STARTING THE VEHICLE
Without Push-button Ignition
To start the engine:
1. Make sure the select lever is in the “P” position.
2. Using the key, turn the ignition switch to “START”.
NOTE: Do not depress the accelerator pedal. Release the key as soon as the engine
starts.
With Push-button Ignition
To start the engine:
1. Sit in the driver’s seat with the access key fob.
2. Make sure the select lever is in the “P” position.
3. Depress the brake pedal.
4. When the Engine START/STOP button indicator turns green, briefly press and release
the Engine START/STOP button.
OPERATING THE VEHICLE
36
Page 41 of 164

AUTO START–STOP
The Auto Start-Stop system is designed to automatically stop and restart the engine when
the vehicle is stationary for a short period of time (while waiting for a traffic light or in a
traffic jam) after the engine has warmed up. The system operates in order to reduce fuel
consumption, exhaust emissions and undesired idling noise.
Auto Start-Stop System ON/OFF
The Auto Start-Stop system can be turned on
and off in the Center Information Display (CID)
by using the Auto Start-Stop button on the
Home screen.
NOTE: The system will default to ON after the
vehicle has been shut off.
When the Auto Start-Stop system is turned OFF, the Auto Start-Stop OFF indicator
light in the combination meter display will illuminate. This is a solid yellow indicator.
System Operation
So that it can be used safely and comfortably, in addition to driver operations, the Auto
Start-Stop system is designed to constantly monitor the vehicle conditions as well as the
environment inside and outside the vehicle, in order to control stopping and restarting of
the engine.
After the vehicle has been completely stopped by depressing the brake pedal
with the select lever in the “D” position, the engine will be automatically
stopped.
If you release the brake pedal with the select lever kept in the “D” position, the
engine will be automatically restarted.
Auto Vehicle Hold (AVH) also integrates seamlessly with Auto Start-Stop functions. With
AVH, the parking brake automatically applies, so you can sit without your foot on the brake
pedal. To restart the engine, just gently press down on the accelerator pedal.
OPERATING THE VEHICLE
39
Page 43 of 164
INDICATOR PATTERN CONDITION
Solid green This indicator light illuminates when the engine
has been temporarily stopped by the Auto
Start-Stop system. It will turn off when the engine
is restarted.
Solid White Operational conditions have not been met, the
engine will not stop and this light will illuminate.
The light goes out once the brake pedal is
released.
Solid Yellow This light indicates that the system has been
turned off. The light will turn off once the system is
turned back on.
Flashing Yellow A fault has been detected with the Start-Stop
system. Please contact your authorized Subaru
Retailer.
OPERATING THE VEHICLE
41
Page 44 of 164
ELECTRONIC PARKING BRAKE (EPB)
To apply the parking brake,
depress the brake pedal and pull
up the parking brake switch. The
indicator light on the parking
brake switch will illuminate and
“PARK” will appear in the
Combination Meter.
To release the parking brake
manually, depress the brake pedal
and push the parking brake
switch down. To automatically
release the parking brake, gently
press the accelerator pedal with
the select lever in the “D” or “R” position.
NOTE: Automatic parking brake release will not work unless all the doors are closed and
your seatbelt is fastened.
OPERATING THE VEHICLE
42
Page 45 of 164
Auto Vehicle Hold (AVH)
Auto Vehicle Hold gives your feet a break by
automatically holding your Subaru in place
when at a complete stop, such as at a traffic
signal, even after you release the brake pedal.
To turn on Auto Vehicle Hold:
1On the Home screen select the “Car
Settings” icon.
2In the “Vehicle Control” menu, select
“Auto Vehicle Hold”. The AVH indicator
will illuminate in the combination meter.
While your Subaru is being held by this
function, the operation indicator in the
combination meter will illuminate. The function
is canceled when you depress the accelerator
pedal or the brake pedal.
Select “Auto Vehicle Hold” again to turn it off.
The function works with the select lever in
either the “D” or “R” position.
NOTE:
• For this system to work your seatbelt must
be fastened.
• Make sure to turn off this function before
entering an automatic car wash.
1
2
ICON MODE
Auto Vehicle Hold
ON
Auto Vehicle Hold
IN OPERATION
OPERATING THE VEHICLE
43