2021 SUBARU ASCENT ignition
[x] Cancel search: ignitionPage 46 of 140

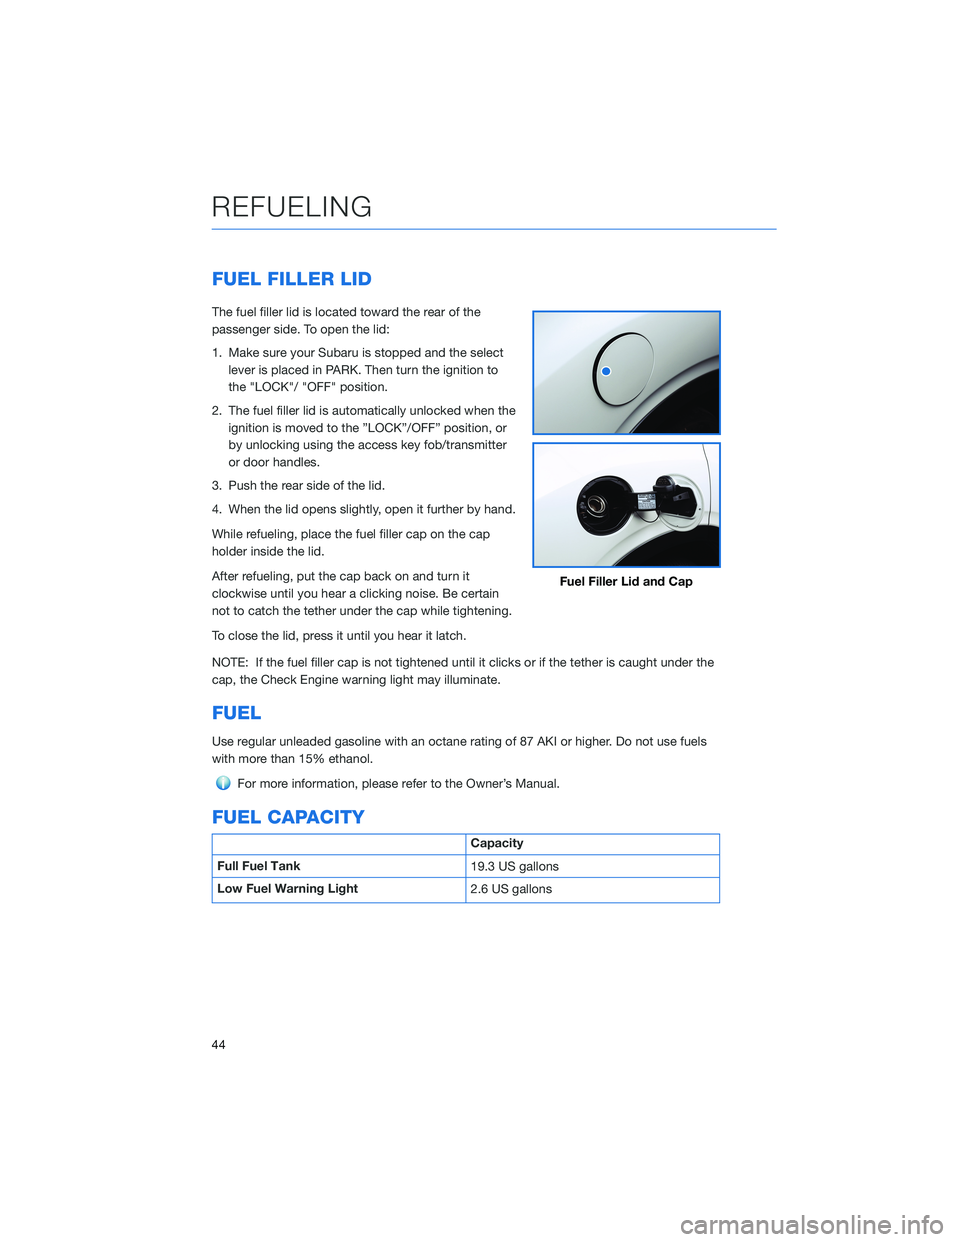
FUEL FILLER LID
The fuel filler lid is located toward the rear of the
passenger side. To open the lid:
1. Make sure your Subaru is stopped and the select
lever is placed in PARK. Then turn the ignition to
the "LOCK"/ "OFF" position.
2. The fuel filler lid is automatically unlocked when the
ignition is moved to the ”LOCK”/OFF” position, or
by unlocking using the access key fob/transmitter
or door handles.
3. Push the rear side of the lid.
4. When the lid opens slightly, open it further by hand.
While refueling, place the fuel filler cap on the cap
holder inside the lid.
After refueling, put the cap back on and turn it
clockwise until you hear a clicking noise. Be certain
not to catch the tether under the cap while tightening.
To close the lid, press it until you hear it latch.
NOTE: If the fuel filler cap is not tightened until it clicks or if the tether is caught under the
cap, the Check Engine warning light may illuminate.
FUEL
Use regular unleaded gasoline with an octane rating of 87 AKI or higher. Do not use fuels
with more than 15% ethanol.
For more information, please refer to the Owner’s Manual.
FUEL CAPACITY
Capacity
Full Fuel Tank
19.3 US gallons
Low Fuel Warning Light
2.6 US gallons
Fuel Filler Lid and Cap
REFUELING
44
Page 50 of 140

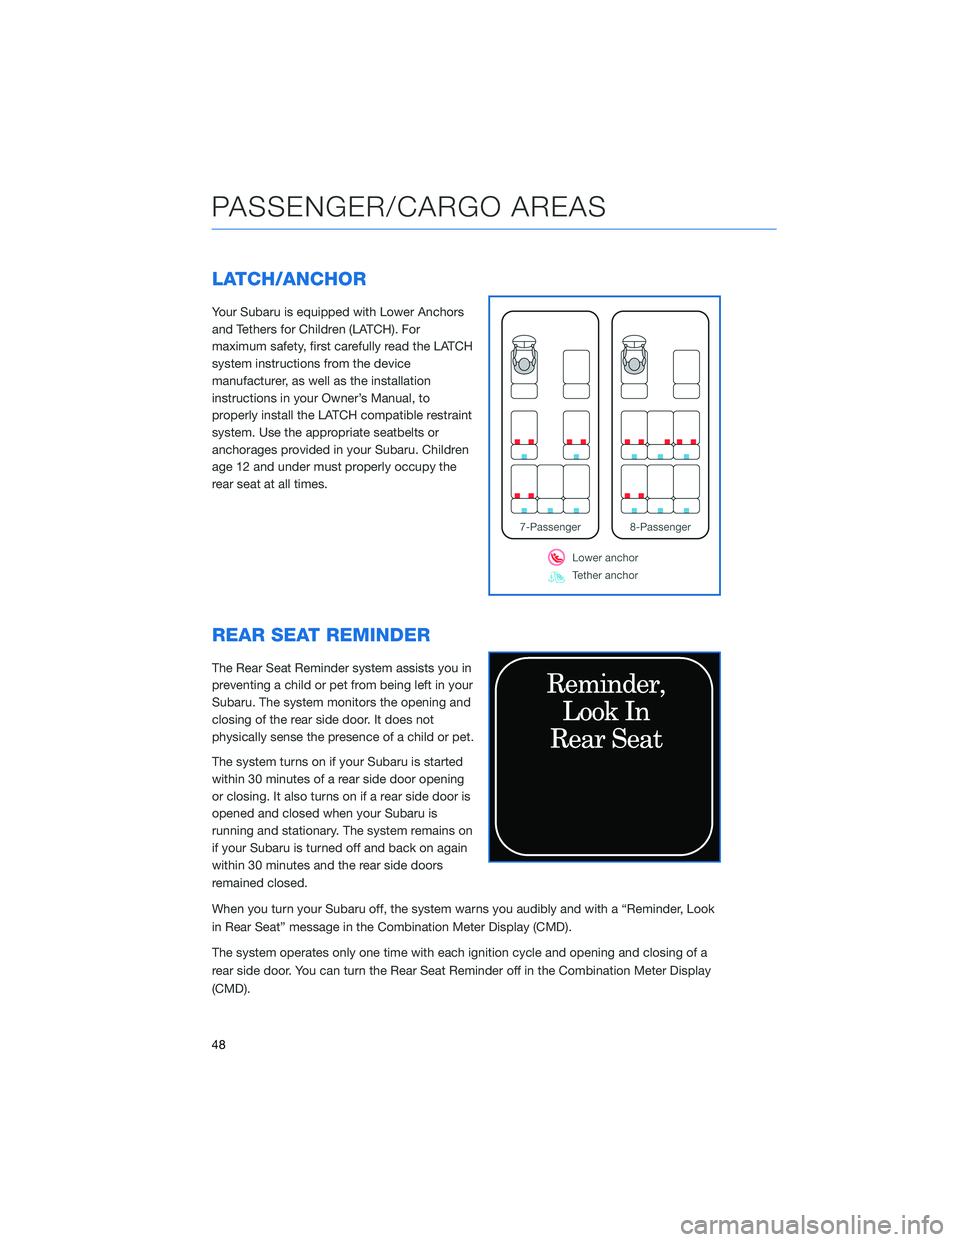
LATCH/ANCHOR
Your Subaru is equipped with Lower Anchors
and Tethers for Children (LATCH). For
maximum safety, first carefully read the LATCH
system instructions from the device
manufacturer, as well as the installation
instructions in your Owner’s Manual, to
properly install the LATCH compatible restraint
system. Use the appropriate seatbelts or
anchorages provided in your Subaru. Children
age 12 and under must properly occupy the
rear seat at all times.
REAR SEAT REMINDER
The Rear Seat Reminder system assists you in
preventing a child or pet from being left in your
Subaru. The system monitors the opening and
closing of the rear side door. It does not
physically sense the presence of a child or pet.
The system turns on if your Subaru is started
within 30 minutes of a rear side door opening
or closing. It also turns on if a rear side door is
opened and closed when your Subaru is
running and stationary. The system remains on
if your Subaru is turned off and back on again
within 30 minutes and the rear side doors
remained closed.
When you turn your Subaru off, the system warns you audibly and with a “Reminder, Look
in Rear Seat” message in the Combination Meter Display (CMD).
The system operates only one time with each ignition cycle and opening and closing of a
rear side door. You can turn the Rear Seat Reminder off in the Combination Meter Display
(CMD).
PASSENGER/CARGO AREAS
48
Page 51 of 140

Passenger Occupant Detection and Seatbelt Reminders
To help keep your passengers
safe, your Subaru has a
passenger occupant detection
and seatbelt reminder system for
each seat, including the second
and third rows.
If passengers in the second or
third row do not fasten their
seatbelts while the ignition is in
the "ON" position, the seatbelt
warning lights illuminate or blink
for the specific seat, and a
warning chime may sound.
For more information, please
refer to “Seatbelt Warning Light and Chime” in your Subaru Owner’s Manual.
CARGO COVER(if equipped)
Use the detachable cargo cover to protect
contents in the cargo area from direct sunlight.
Pull the cover toward the rear of your Subaru
and insert both ends of the cover into the
guides.
Store the cover under the floor of the cargo
area when not in use. Instructions for
operation are included on the cargo cover
housing.
Cargo Area and Cover
PASSENGER/CARGO AREAS
49
Page 59 of 140

5Seek
Press the seek up or seek down button to seek the next or previous radio frequency.
You can also use the seek up or down buttons to select different audio tracks from
media sources. Press and hold to fast-forward or rewind.
CD Player Functions
6Load
Insert the disc into the loading slot. The CD will automatically be drawn in and begin
playing the first track.
7Eject
Press the Eject button on the left side of the loading slot to remove the CD from the
player.
Other Functions
8Home
Displays the Home screen apps. The Home screen allows you to customize which
apps appear and rearrange the icons in a personalized order.
9Map(if equipped)
Displays the map and navigation features available on the screen.
10Apps
Displays the installed apps that are available on your vehicle. These apps can be
rearranged on your Home screen for your preference.
Controlling the Volume
Adjusting the Volume:Turn the VOLUME knob to adjust the volume. The volume stays at
the level you set after an ignition cycle.
Muting the Volume:You can mute the audio system by pressing the volume knob once,
and un-mute the audio by pressing the knob again. It will un-mute automatically after an
ignition cycle.
Turning the System Off:To turn the audio system off, press and hold the volume knob for
about three seconds. The system remains off after an ignition cycle. Press the volume
knob again to turn the audio system back on.
STARLINK OVERVIEW
57
Page 106 of 140

MEMORY HEIGHT(if equipped)
You can set where the rear gate stops when it opens. This is a great feature to limit the
upward travel of the rear gate to ensure you can reach it or to prevent the rear gate from
contacting a garage ceiling. To set the height perform the following procedure with the
ignition switch in the “LOCK/OFF” position:
1Make sure the Memory
Height Switch is the “OFF”
position (the switch is raised
and you can see a white line
on the top).
2Open the rear gate using the
Power Rear Gate Button.
Pause the rear gate when it
reaches the desired height
by pressing the Power Rear
Gate Button on the rear
gate, instrument panel, or
key fob.
Memory Height Button
Power Rear Gate Button
HOW TO APPENDIX
104
Page 108 of 140

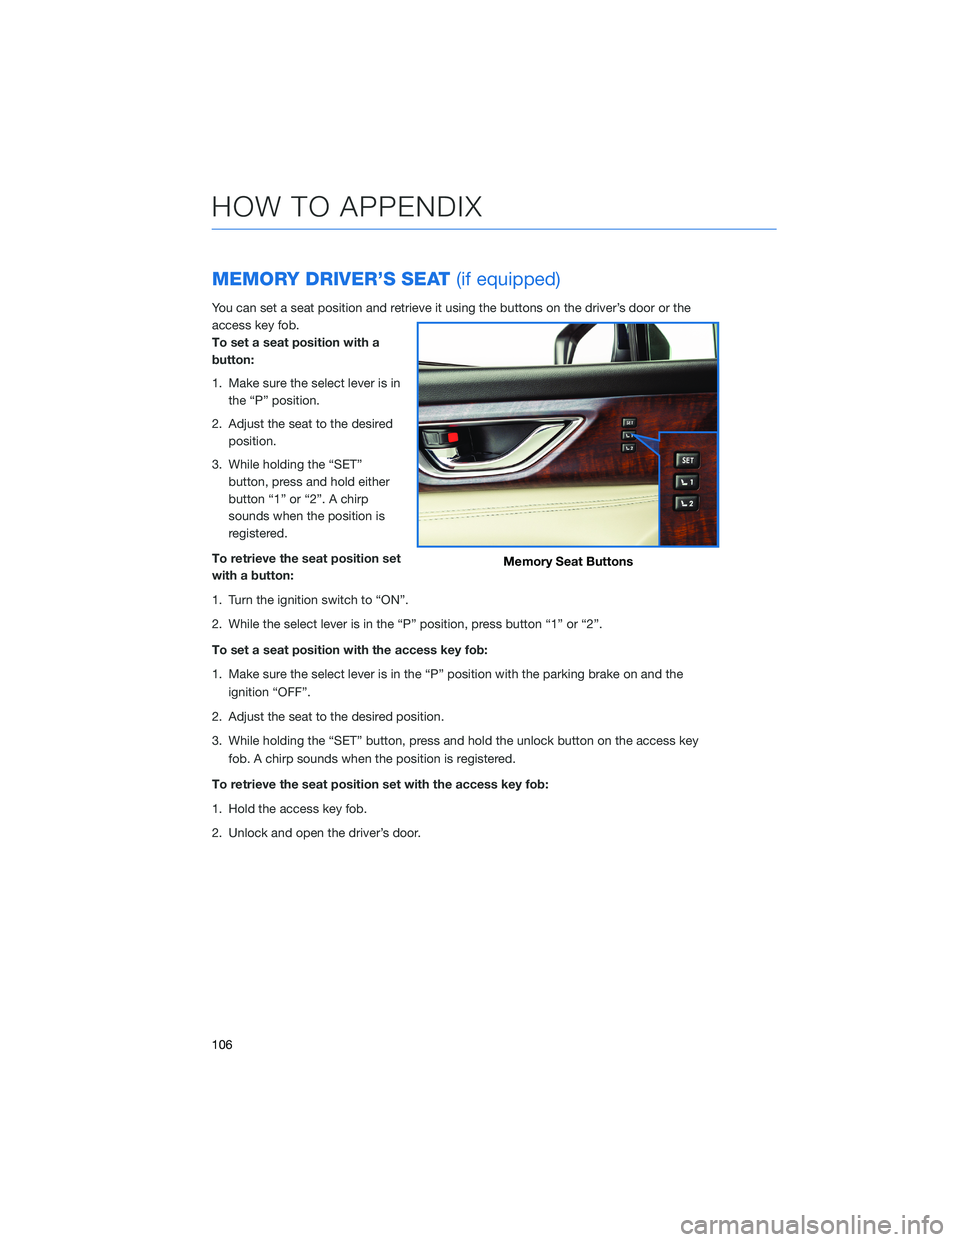
MEMORY DRIVER’S SEAT(if equipped)
You can set a seat position and retrieve it using the buttons on the driver’s door or the
access key fob.
To set a seat position with a
button:
1. Make sure the select lever is in
the “P” position.
2. Adjust the seat to the desired
position.
3. While holding the “SET”
button, press and hold either
button “1” or “2”. A chirp
sounds when the position is
registered.
To retrieve the seat position set
with a button:
1. Turn the ignition switch to “ON”.
2. While the select lever is in the “P” position, press button “1” or “2”.
To set a seat position with the access key fob:
1. Make sure the select lever is in the “P” position with the parking brake on and the
ignition “OFF”.
2. Adjust the seat to the desired position.
3. While holding the “SET” button, press and hold the unlock button on the access key
fob. A chirp sounds when the position is registered.
To retrieve the seat position set with the access key fob:
1. Hold the access key fob.
2. Unlock and open the driver’s door.
Memory Seat Buttons
HOW TO APPENDIX
106
Page 133 of 140

FOLDING THE REAR SEATS....... 46
Second-Row Seat . . . . .......46
Third-Row Seat . . . . .........47
FRONT VIEW MONITOR......... 97
FUEL . . . . . . . . . ........... 44
FUEL CAPACITY . . ............ 44
FUEL FILLER LID . . . .......... 44
FUNCTIONS . . . . ............ 87
Advanced Adaptive Cruise Control with
Lane Centering . . . . . ........90
Conventional Cruise Control......92
Lane Departure Prevention . . . . . . 90
Lane Departure Warning . . . . . . . . 89
Lane Sway Warning..........89
Lead Vehicle Start Alert . . . . . . . . 92
Pre-Collision Brake Assist.......88
Pre-Collision Braking..........88
Pre-Collision Throttle Management . . 88
H
HIGH BEAM ASSIST (HBA)....... 99
HOME SCREEN ICONS . . . . . . . . . 62
HOOD PROP . . . . ............ 51
HOW TO OVERVIEW .......... 103
I
IGNITION SWITCH . ........... 38
IMPORTANT SAFETY INFORMATION . . 4
IN CASE OF EMERGENCY . . . . . . . . 5
Subaru Roadside Assistance . . . . . . 5
SUBARU STARLINK
®Safety and
Security . . . . . . . . . .........5
INSTRUMENT PANEL SWITCHES (LOWER
LEFT) . . . . . . . ........... 30
I/SET SWITCH . . . . ........... 31
J
JACK AND TOOLS . ........... 50K
KEYLESS ACCESS WITH PUSH BUTTON
START .................. 9
Locking Using Door Handles ......9
Locking Using the Rear Gate . . . . . 10
Unlocking Using Door Handles .....9
Unlocking Using the Rear Gate....10
KEYLESS ENTRY . ............. 7
Automatic Door Locking/Unlocking . . 8
L
LANE DEPARTURE WARNING AND
PRE-COLLISION BRAKING SYSTEM
OFF ................... 96
Lane Departure Warning OFF
Switch . . . . ..............96
Pre-Collision Braking OFF Switch . . 96
LATCH/ANCHOR . . ........... 48
LIGHT CONTROLS . ........... 32
Daytime Running Lights . .......33
Illumination Brightness . ........33
M
MAKING A CALL . . . .......... 68
MAPS . . . ................ 121
Arrival Time/Distance.........126
Canceling Guidance . . ........126
Finding a Destination by Address . . 121
Finding a Destination by POI.....122
Guidance Screen Icons . .......124
Map Updates .............127
Map View/Perspective . . . .....125
Map Zoom . . . . . . . . . ......124
Nearest Gas Station ..........126
Route Options . . . . . . . ......123
Saving Destination as a Favorite . . 123
Shortest/Fastest/Economic .....123
Traffic Information . ..........125
MAPS/NAVIGATION . . . ......... 82
Checking for Map Updates......82
INDEX
131
Page 134 of 140

Updating Maps Over-the-Air .....82
Updating Maps Using Your
PC/MAC . . . . . . . . . . .......83
MAPS OVERVIEW . . . . . ........ 76
MEDIA................... 67
Aux Input . . . . . . . . . ........67
Bluetooth
®................67
CD ....................67
USB / iPod . . . . . . . .........67
MEMORY DRIVER’S SEAT . . . . . . . 106
MEMORY HEIGHT . . . . . . . . . . . 104
MYSUBARU . . . . . . .......... 75
Service Appointment Scheduler . . . 75
MYSUBARU INTEGRATION ....... 78
N
NEW VEHICLE BREAK-IN........ 53
O
ONE-TOUCH INTERIOR LIGHTING . . 35
OPERATION . . . . . . . . . . . . . . . . 87
OVERHEAD CONSOLE . . ........ 36
OVERVIEW OF YOUR MULTIMEDIA
SYSTEM . . . . . . . . . . . . . . . . . 56
Various Systems . . . . . . . . . . . . 56
OWNER’S RESOURCES . . . . . . . . . . 4
P
PAIRING A PHONE . . . . ........ 68
PHONE................... 81
POWER EXTERIOR MIRRORS ..... 19
Power Folding Mirrors .........20
POWER MOONROOF . . . . . ..... 22
Opening/Closing the Sunshade . . . . 22
Sliding the Moonroof . .........22
Tilting the Moonroof . . . . . . . . . . 22
POWER REAR GATE (PRG) ....... 11
From the Rear of the Vehicle.....12
Power Rear Gate Button ........11
Power Rear Gate Lock . ........13POWER WINDOWS............ 21
PUSH-BUTTON IGNITION SWITCH . . 38
R
RADIO.................... 66
AM/FM Radio..............66
Presets..................67
Satellite Radio . . . . . . . . . . . . . . 66
REARRANGING ICONS .......... 62
REAR SEAT REMINDER......... 48
Passenger Occupant Detection and
Seatbelt Reminders ...........49
REAR VIEW MIRROR . . . . . . ..... 20
Auto-dimming Mirror . . . . . . . . . . 20
HomeLink
®5 Accessory Mirror . . . 20
Smart Rearview Mirror . . . . . . . . . 21
REAR-VISION CAMERA . . . . ..... 97
REAR WINDOW WIPER . . . . . . . . . 35
RECEIVING A CALL ............ 69
REVERSE AUTOMATIC BRAKING
(RAB) .................. 99
ROOF RAIL CAPACITY .......... 54
S
SAFETY AND SECURITY OVERVIEW . . 77
SEATING.................. 16
Head Restraint Adjustment . . . . . . 18
Manual Seats . . . . . .........16
Power Driver’s Seat (if equipped) . . . 17
Seatbelt Adjuster . . . . . . . .....18
SETTINGS AND UPDATES
OVERVIEW............... 80
Connect to Home Wi-Fi . . . . . . . . 80
Performing Software Updates .....80
SOUND................... 81
SPARE TIRE................ 50
STARTING THE VEHICLE ......... 38
Without Push-button Ignition.....38
With Push-button Ignition . ......38
STEERING RESPONSIVE HEADLIGHTS
(SRH) . . . . . . . . . . . . . . . . . . 99
INDEX
132