2021 Peugeot Landtrek Instrument
[x] Cancel search: InstrumentPage 109 of 176
107
In the event of a breakdown
8
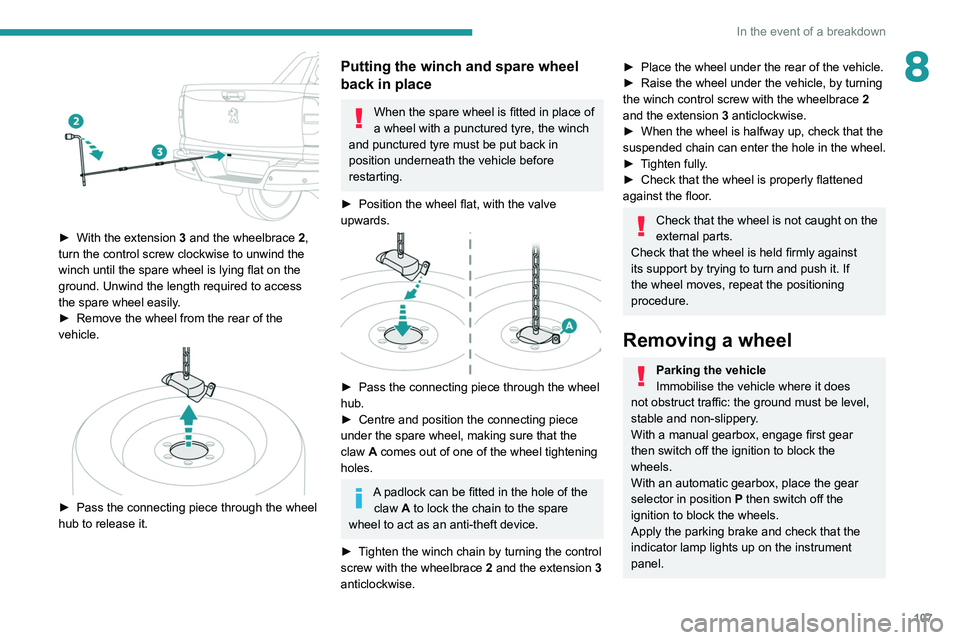
► With the extension 3 and the wheelbrace 2,
turn the control screw clockwise to unwind the
winch until the spare wheel is lying flat on the
ground. Unwind the length required to access
the spare wheel easily.
►
Remove the wheel from the rear of the
vehicle.
► Pass the connecting piece through the wheel
hub to release it.
Putting the winch and spare wheel
back in place
When the spare wheel is fitted in place of
a wheel with a punctured tyre, the winch
and punctured tyre must be put back in
position underneath the vehicle before
restarting.
►
Position the wheel flat, with the valve
upwards.
► Pass the connecting piece through the wheel
hub.
►
Centre and position the connecting piece
under the spare wheel, making sure that the
claw
A comes out of one of the wheel tightening
holes.
A padlock can be fitted in the hole of the claw A to lock the chain to the spare
wheel to act as an anti-theft device.
►
T
ighten the winch chain by turning the control
screw with the wheelbrace 2 and the extension 3
anticlockwise.
► Place the wheel under the rear of the vehicle.
► Raise the wheel under the vehicle, by turning
the winch control screw with the wheelbrace 2
and the extension 3 anticlockwise.
►
When the wheel is halfway up, check that the
suspended
chain can enter the hole in the wheel.
►
T
ighten fully.
►
Check that the wheel is properly flattened
against the floor
.
Check that the wheel is not caught on the
external parts.
Check that the wheel is held firmly against
its support by trying to turn and push it. If
the wheel moves, repeat the positioning
procedure.
Removing a wheel
Parking the vehicle
Immobilise the vehicle where it does
not obstruct traffic: the ground must be level,
stable and non-slippery.
With a manual gearbox, engage first gear
then switch off the ignition to block the
wheels.
With an automatic gearbox, place the gear
selector in position P then switch off the
ignition to block the wheels.
Apply the parking brake and check that the
indicator lamp lights up on the instrument
panel.
Page 141 of 176

139
Alphabetical index
Courtesy lamp, rear 38
Courtesy lamps
38
Cruise control
76–78
Cup holder
36
D
Date (setting) 13, 136
Daytime running lamps
43, 110
Deactivating the passenger airbag
55, 58
Defrosting
35
Defrosting, front
35
Demisting
35
Demisting, front
35
Demisting, rear
35
Demisting, rear screen
35
Dials and gauges
7
Dimensions
125
Dipstick
92
Direction indicators
43–44, 110–112
Display screen, instrument panel
7
Door pockets
36
Doors
21
Driving
61–62
Driving aids camera (warnings)
74
Driving aids (recommendations)
74
Driving economically
6
Dynamic stability control (DSC)
49–50
E
EBFD 49
Eco-driving (advice)
6
ECO mode
71
Electric windows
24
Electronic brake force distribution (EBFD)
49
Emergency braking assistance (EBA)
49
Emergency switching off
66
Emergency warning lamps
48, 104
Engine
96
Engine compartment
91
Engine, Diesel
88, 91, 105, 124
Engine, petrol
91, 123
Engines
122–124
Environment
6, 21
ESC (electronic stability control)
49
Extinguisher
104
F
Filling the fuel tank 88
Filter, air
94, 99
Filter, Diesel fuel
100
Filter, oil
94, 100
Filter, particle
95
Filter, passenger compartment
31, 94, 98
Fitting a wheel
107, 109
Fitting roof bars
90
Fittings, front
36
Fittings, interior
36–37
Fittings, rear 38–39
Flap, fuel filler
88
Flashing indicators
43–44, 111
Floor storage compartment
30
Fluid, brake
93
Fluid, engine coolant
93
Fluid, power steering
93
Foglamps, front
42–43, 110
Foglamps, rear
42
Folding bench seat
30
Folding the rear seat backrest
27
Folding the rear seats
29–30
Front map reading lights
38
Fuel
6, 88
Fuel consumption
6
Fuel tank
88
Fusebox, dashboard
11 3
Fusebox, engine compartment
113, 115
Fuses
113–115
G
Gauge, fuel 88
Gearbox, automatic
69, 72, 95, 118
Gearbox, manual
69, 72, 95
Gear lever, manual gearbox
69
Gear shift indicator ~ Gear efficiency
indicator
73
Glove box
36
Grab handles
36
Page 142 of 176
140
Alphabetical index
H
Hazard warning lamps 48, 104
headlamp adjustment
44
Headlamp adjustment
44
Headlamp beam height
44
Headlamps, automatic illumination
44
Headlamps, dipped beam
11 0 – 111
Headlamps, halogen
11 0 – 111
Headlamps, main beam
11 0 – 111
Head restraints, front
25
Head restraints, rear
27, 29–30
Heating
31–33, 35
Hill Assist Descent Control (HADC)
51
Hill start assist
72–73
Hooks
38
Horn
49
I
Ignition 66
Ignition on
66
Ignition switch
63–64
Immobiliser, electronic
63
Indicator, coolant temperature
11
Indicators, direction
43, 111
Inflating tyres
95, 126
Infrared camera
75
Instrument panel
7, 12, 75
ISOFIX mountings
59
J
Jack 106–107
Jump starting
11 7
K
Key 16–17, 20
Key, electronic
18–19
Keyless Entry and Starting
18, 65
Key not recognised
66
Key with remote control
16–17, 63
Kit, hands-free
129–130, 134
L
Labels, identification 125
Lamps, parking
44
Lamps, rear
11 2
Lams with Full LED technology
43
Lane Departure Warning System
(LDWS)
78, 80
Leather (care)
103
LEDs - Light-emitting diodes
43, 110, 112
Level, brake fluid
93
Level, Diesel additive
95
Level, engine coolant
11, 93
Level, engine oil
92
Level, power steering fluid
93
Levels and checks
91–94
Level, screenwash fluid 46, 94
Light-emitting diodes - LEDs
43, 110, 112
Lighting
40
Lighting, cornering
43
Lighting dimmer
12
Lighting, exterior
42
Lighting, guide-me home
45
Lighting, interior
38
Lighting, mood
12
Lighting, welcome
45
Loading
40, 90
Load restraint
40
Locating your vehicle
17
Locking
17–18
Locking from the inside
19
Locking the doors
19
Low fuel level
88
M
Maintenance 96
Maintenance (advice)
102
Maintenance, routine
75, 94, 96
Manoeuvring aids (recommendations)
74
Map reading lamps
38
Markings, identification
125
Mat
37, 75
Mirror, rear view
28
Mirrors, door
28, 35
Mirror, vanity
36
Mode, driving
71
Page 167 of 176

1
Overview
Instruments and controls
These illustrations and descriptions are intended
as a guide. The presence and location of some
elements vary depending on the version or trim
level.
1.Electric windows
Central locking/unlocking
2. Side switch panel
3. Horn
Driver front airbag
4. Instrument panel
5. Front courtesy/map reading lamps
6. Glasses holder
7. Interior rear view mirror
8. Monochrome screen or touch screen
9. Heating/air conditioning controls
10. Central switch panel (lower and upper)
11 . Audio USB socket/Charger USB socket
12. Key ignition switch or button START/STOP 13.
2H, 4H and 4L transmission mode selector
14. Gearbox
15. Sport/Eco button
16. Parking brake
Cigarette lighter/12 V (120 W) accessory socket
17. Front passenger airbag
18. Glove box
19. Deactivate front passenger airbag (on the
side of the dashboard)
Page 168 of 176
2
Access
Alarm
(Depending on version)
System which protects and provides a deterrent
against theft and break-ins.
Exterior perimeter monitoring
The system checks for opening of the vehicle.
The alarm goes off if anyone tries to open a door
or the bonnet, for example.
For all work on the alarm system, contact
a PEUGEOT dealer or a qualified
workshop.
Locking the vehicle with
alarm system
Activation
► Switch off the ignition and exit the vehicle.► Lock the vehicle using the remote control or with the Keyless Entry and Starting system.When the monitoring system is active,
this indicator lamp flashes once per
second on the instrument panel and the direction
indicators flash for about 2 seconds.
The exterior perimeter monitoring is activated
after 5 seconds.
If an opening (door or bonnet) is not
closed correctly, exterior perimeter
monitoring cannot be activated.
Deactivation
► Press the remote control unlocking button.
or
► Unlock the vehicle with the Keyless Entry and Starting system.
The monitoring system is deactivated: the
indicator lamp on the instrument panel goes off
and the direction indicators flash for about 2
seconds.
If the vehicle automatically locks itself
again (as happens if a door is not
opened within 30 seconds of unlocking), the
monitoring system is automatically
reactivated.
Page 169 of 176
3
Driving
6Driving recommendations
► Observe the driving regulations and remain vigilant whatever the traffic conditions.► Monitor your surroundings and keep your hands on the wheel to be able to react to
anything that may happen any time.
► Drive smoothly, anticipate the need for braking and maintain a longer safety distance,
especially in bad weather.
► Stop the vehicle to carry out operations that require close attention (such as adjustments).► During long trips, take a break every 2 hours.
On flooded roads
We strongly advise against driving on flooded
roads, as this could cause serious damage to the
engine or gearbox, as well as to your vehicle's
electrical systems.
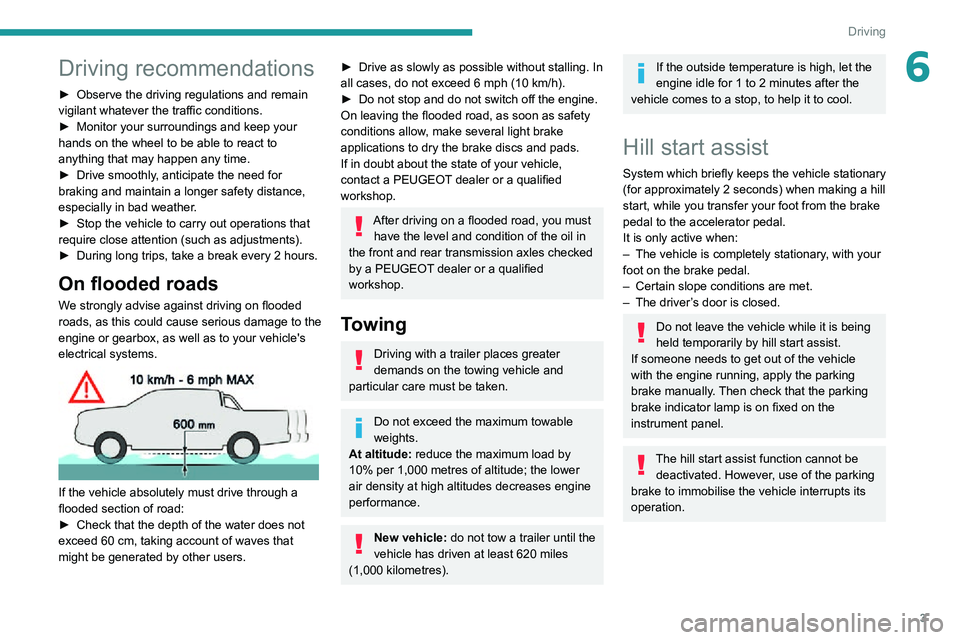
If the vehicle absolutely must drive through a
flooded section of road:
► Check that the depth of the water does not exceed 60 cm, taking account of waves that might be generated by other users.
► Drive as slowly as possible without stalling. In all cases, do not exceed 6 mph (10 km/h).► Do not stop and do not switch off the engine.On leaving the flooded road, as soon as safety
conditions allow, make several light brake
applications to dry the brake discs and pads.
If in doubt about the state of your vehicle,
contact a PEUGEOT dealer or a qualified
workshop.
After driving on a flooded road, you must
have the level and condition of the oil in
the front and rear transmission axles checked
by a PEUGEOT dealer or a qualified
workshop.
Towing
Driving with a trailer places greater
demands on the towing vehicle and
particular care must be taken.
Do not exceed the maximum towable
weights.
At altitude: reduce the maximum load by
10% per 1,000 metres of altitude; the lower
air density at high altitudes decreases engine
performance.
New vehicle: do not tow a trailer until the
vehicle has driven at least 620 miles
(1,000 kilometres).
If the outside temperature is high, let the
engine idle for 1 to 2 minutes after the
vehicle comes to a stop, to help it to cool.
Hill start assist
System which briefly keeps the vehicle stationary (for approximately 2 seconds) when making a hill start, while you transfer your foot from the brake
pedal to the accelerator pedal.
It is only active when:
– The vehicle is completely stationary , with your foot on the brake pedal.– Certain slope conditions are met.– The driver’s door is closed.
Do not leave the vehicle while it is being
held temporarily by hill start assist.
If someone needs to get out of the vehicle
with the engine running, apply the parking
brake manually. Then check that the parking
brake indicator lamp is on fixed on the
instrument panel.
The hill start assist function cannot be deactivated. However, use of the parking
brake to immobilise the vehicle interrupts its
operation.
Page 170 of 176
4
Driving
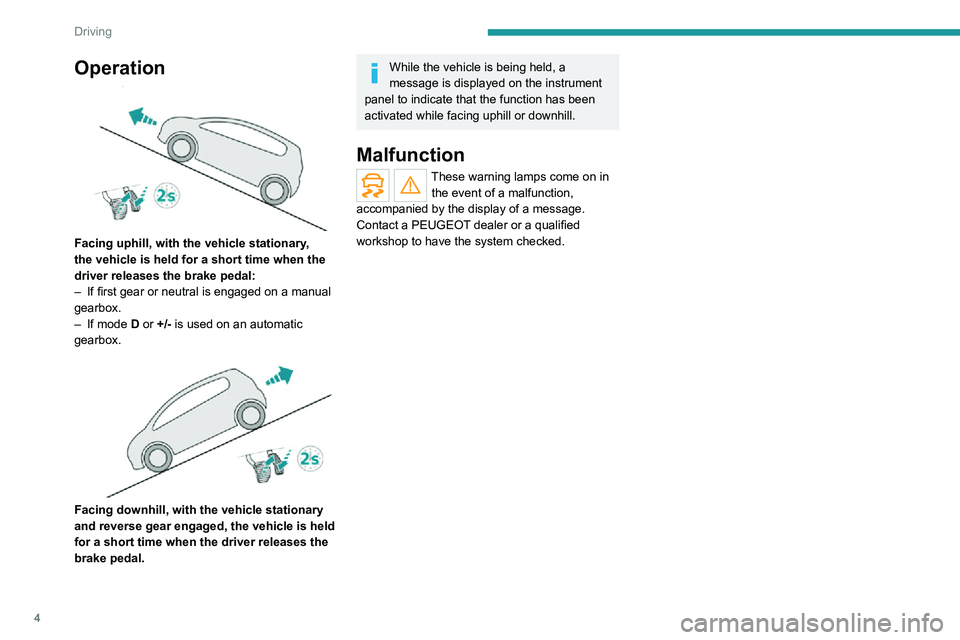
Operation
Facing uphill, with the vehicle stationary,
the vehicle is held for a short time when the
driver releases the brake pedal:
– If first gear or neutral is engaged on a manual gearbox.– If mode D or +/- is used on an automatic
gearbox.
Facing downhill, with the vehicle stationary
and reverse gear engaged, the vehicle is held
for a short time when the driver releases the
brake pedal.
While the vehicle is being held, a
message is displayed on the instrument
panel to indicate that the function has been
activated while facing uphill or downhill.
Malfunction
These warning lamps come on in the event of a malfunction,
accompanied by the display of a message.
Contact a PEUGEOT dealer or a qualified
workshop to have the system checked.