2021 PEUGEOT BOXER clock
[x] Cancel search: clockPage 19 of 212
17
Instruments
1
Menu...
Press... Sub-menu...Press... Select...Validate
and exitAllows you to...
4 Activation of Trip B
ON View a second "Trip B"
distance.
OFF
5 Traffic sign
ON Activate/Deactivate the
reading of signs.
OFF
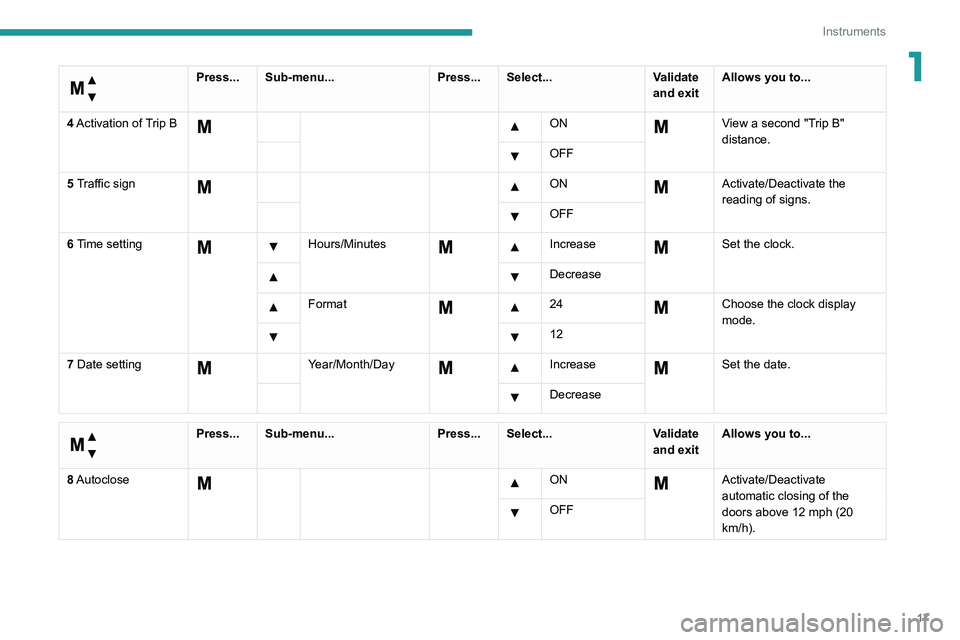
6 Time setting
Hours/Minutes Increase Set the clock.
Decrease
Format 24Choose the clock display
mode.
12
7 Date setting
Year/Month/Day Increase Set the date.
Decrease
Menu…
Press... Sub-menu... Press... Select...Validate
and exitAllows you to...
8 Autoclose
ON Activate/Deactivate
automatic closing of the
doors above 12 mph (20
km/h).
OFF
Page 23 of 212

21
Instruments
1Touch screen audio and telematics system
This audio system control panel, located in the
centre of the dashboard, gives access to menus
in order to customise some equipment.
The corresponding information is displayed in
the touch screen.
It is available in 9 languages: German, English,
Spanish, French, Italian, Dutch, Polish,
Portuguese and Turkish.
For safety reasons, some menus are only
accessible with the ignition off.
Provides access to the “Settings” menu.
Allows you to scroll up in a menu or
increase a value.
Allows you to scroll down in a menu or decrease a value.
"Settings" menu
1. "Display"
2. "Voice commands"
3. “Clock and Date”
4. "Safety/Assistance"
5. “Lights”
6. “Doors & locking”
7. "Audio"
8. "Telephone/Bluetooth"
9. “Radio setting”
10. "Restore Settings" to return to the
manufacturer’s default settings.
11 . “Delete pers. data“ to delete all your
personal data, related to the Bluetooth
equipment, in the audio system.
For more information on audio,
telephone, radio and navigation, refer to
the corresponding sections.
The settings in sub-menus 4, 5 and 6
vary depending on the equipment
installed on the vehicle.
From the "Display" sub-menu, it is possible to:
–
select "Languages" and choose one of the
languages mentioned above,
–
select "Unit of measurement" and set the
consumption (mpg, l/100 km), distances (miles,
km) and temperature (°F
, °C), –
select "T
rip B display" to activate or deactivate
trip B of the trip computer (On, Off).
From the "Safety/Assistance" sub-menu, it is
possible to:
–
select "Parkview Camera", then "Reversing
camera" to activate or deactivate its use (On,
Off),
–
select “Parkview Camera", then "Camera
delay" to activate or deactivate the maintaining
of the display for 10 seconds or up to 1
1 mph (18
km/h) (On, Off),
–
select "T
raffic Sign" to activate or deactivate
its use (On, Off),
–
select "Passenger airbag" to activate or
deactivate its use (On, Off).
From the "Lights" sub-menu, it is possible to:
–
select "Daytime running lamps" to activate or
deactivate their use (On, Off),
–
select "Auto. main beam headlamps" to
activate or deactivate its use (On, Off),
–
select "Headlamp sensor" to adjust its
sensitivity (1, 2, 3).
From the "Doors & locking" sub-menu, it is
possible to:
–
select "Autoclose" to activate or deactivate its
use (On, Off).
Setting the date and time
Using the MODE control panel
► Press the “MODE” button.
Page 24 of 212
22
Instruments
► Select the "Time setting" menu to set the time
and the clock format (24h or 12h) or select the
"Date setting" menu to set the day, month and
year.
For more information on Vehicle configuration
(MODE), refer to the corresponding section.
Using the touch screen audio and
telematics system
From the "Clock and Date" sub-menu:
► Select "T ime setting and format" to set the
hour, minutes and seconds and choose the
format (24h, 12h with am or pm).
►
Select "Date setting" to set the day
, month
and year.
To set the time manually, "Time Synchro" must be deactivated (Off).
Trip computer
Information displayed about the current journey
(range, current fuel consumption, average fuel
consumption, etc.).
This function is not available on electric vehicles.
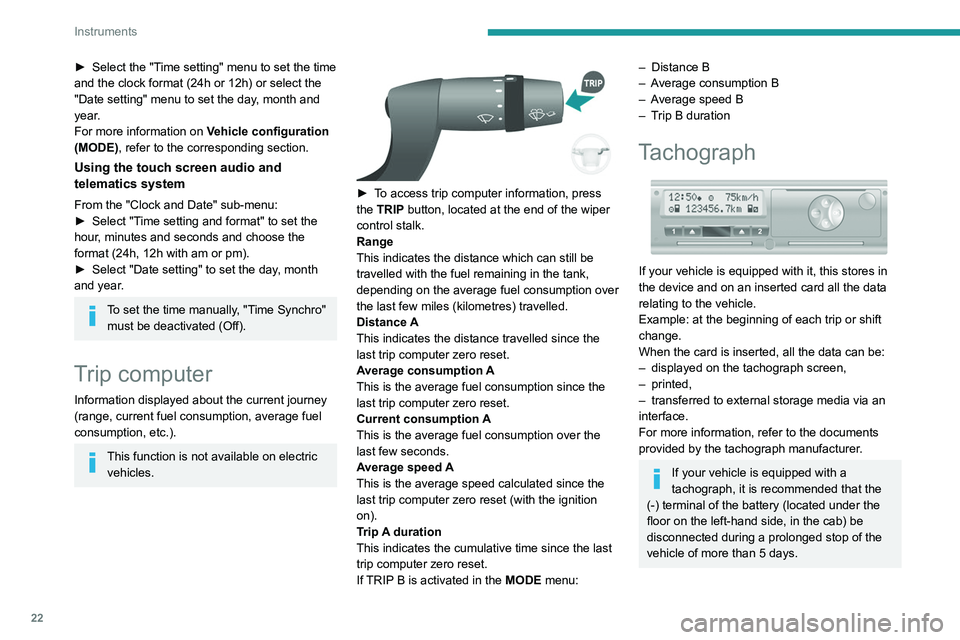
► To access trip computer information, press
the TRIP button, located at the end of the wiper
control stalk.
Range
This indicates the distance which can still be
travelled with the fuel remaining in the tank,
depending on the average fuel consumption over
the last few miles (kilometres) travelled.
Distance A
This
indicates the distance travelled since the
last trip computer zero reset.
Average consumption A
This is the average fuel consumption since the
last trip computer zero reset.
Current consumption A
This is the average fuel consumption over the
last few seconds.
Average speed A
This is the average speed calculated since the
last trip computer zero reset (with the ignition
on).
Trip A duration
This
indicates the cumulative time since the last
trip computer zero reset.
If TRIP B is activated in the MODE menu:
– Distance B
– A verage consumption B
–
A
verage speed B
–
T
rip B duration
Tachograph
If your vehicle is equipped with it, this stores in
the device and on an inserted card all the data
relating to the vehicle.
Example: at the beginning of each trip or shift
change.
When the card is inserted, all the data can be:
–
displayed on the tachograph screen,
–
printed,
–
transferred to external storage media via an
interface.
For more information, refer to the documents
provided by the tachograph manufacturer
.
If your vehicle is equipped with a
tachograph, it is recommended that the
(-) terminal of the battery (located under the
floor on the left-hand side, in the cab) be
disconnected
during a prolonged stop of the
vehicle of more than 5 days.
Page 27 of 212
25
Access
2Summary of the main functions of the key
Type of keyUnlocking the cabLocking the doorsUnlocking the rear doors
Basic key Turn anti-clockwise (driver’s side). Turn clockwise (driver’s side). -
Remote control key
Signalling
Direction indicators 2 flashes.1 flash.2 flashes.
Central locking control indicator
lamp on the dashboard Off.
Fixed for approximately 3
seconds, then flashing.Flashing.
Using the key in the driver's door lock does not activate/deactivate the alarm.
Locking/Unlocking from
the inside
Cab and loading area
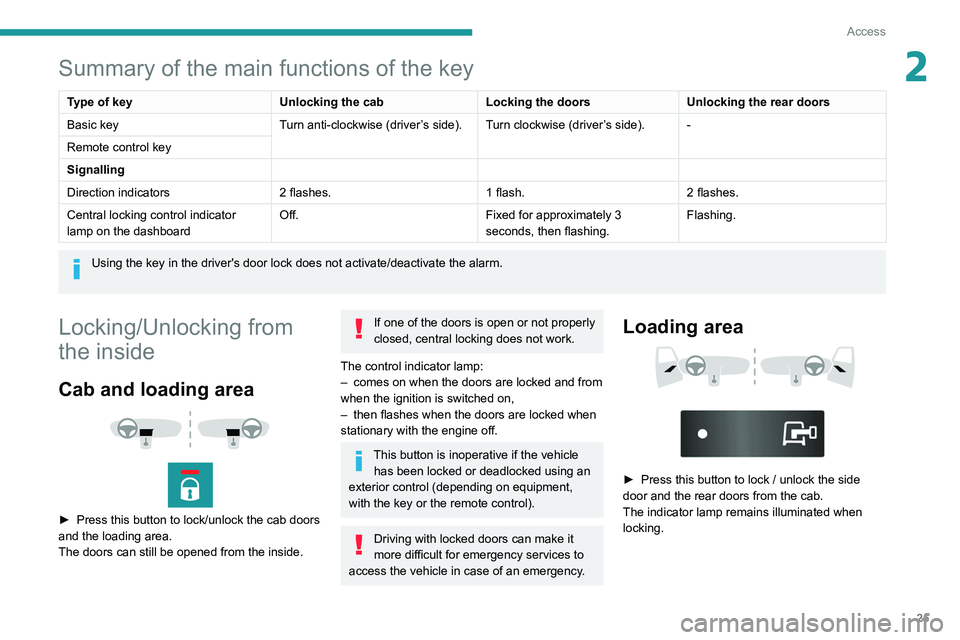
► Press this button to lock/unlock the cab doors
and the loading area.
The doors can still be opened from the inside.
If one of the doors is open or not properly
closed, central locking does not work.
The control indicator lamp:
–
comes on when the doors are locked and from
when the ignition is switched on,
–
then flashes when the doors are locked when
stationary with the engine off.
This button is inoperative if the vehicle has been locked or deadlocked using an
exterior control (depending on equipment,
with the key or the remote control).
Driving with locked doors can make it
more difficult for emergency services to
access the vehicle in case of an emergency.
Loading area
► Press this button to lock / unlock the side
door and the rear doors from the cab.
The indicator lamp remains illuminated when
locking.
Page 42 of 212
40
Ease of use and comfort
If the vehicle is equipped with an additional
air conditioning unit, located at the rear of the
vehicle: the distribution rail located in the roof
and the individualised air vents ensure a perfect
diffusion of cold air.
The hot air diffused from the front air conditioning
unit to the floor is distributed at the height of the
rear passengers' feet in rows 2 and 3.
A hot air vent, located on the left-hand rear
wheel arch, may complement the system for the
rear passengers’ feet in row 3.
Activation/Deactivation
► From the driver's seat, press this
button located on the MODE
control panel
to activate the operation of the rear controls. The
indicator lamp comes on.
Pressing again on this button deactivates the
operation of the rear controls. The indicator lamp
goes off.
Setting the comfort
temperature
► Turn control 1 to select a position between
blue (cold) and red (hot) so as to adjust the
temperature to your requirements.
The OFF control on the "Mono-zone" central control panel switches the
function off.
However, a back-up system will automatically
ventilate the rear circuit, even if the control is
in position 0, to avoid the formation of mist.
Air flow
► Set control 2 to the desired position to
increase or decrease the air flow.
Additional programmable heating
The additional programmable heating gradually
brings the engine to a good temperature to
facilitate its starting.
An built-in clock allows the time of its triggering
to be programmed. The passenger compartment
will warm up faster.
The warming-up of the passenger
compartment, de-icing and demisting are
facilitated. The control panel for the programmable
additional heating is located next to the steering
wheel, below the
MODE control panel.
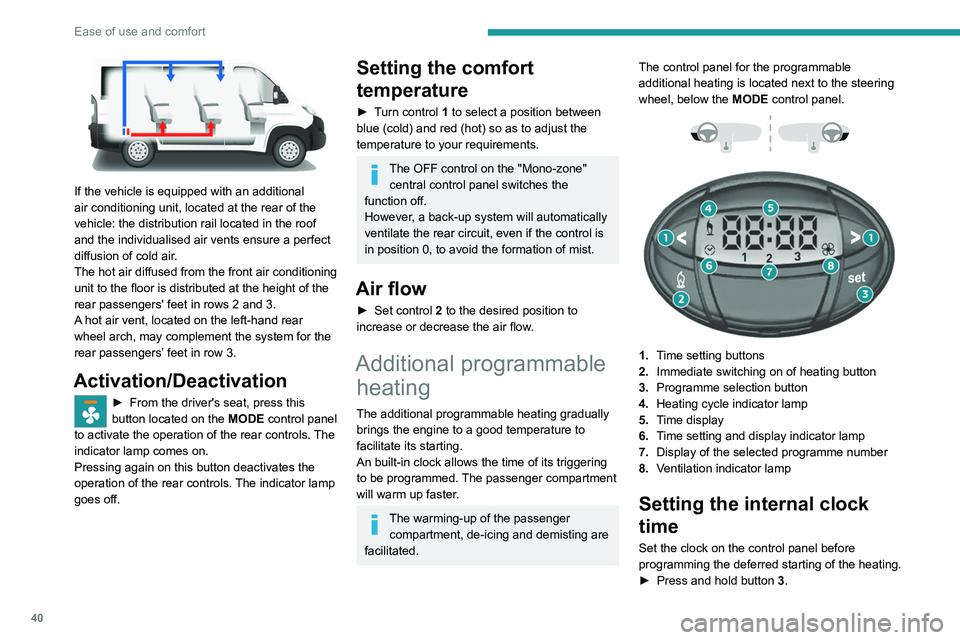
1. Time setting buttons
2. Immediate switching on of heating button
3. Programme selection button
4. Heating cycle indicator lamp
5. Time display
6. Time setting and display indicator lamp
7. Display of the selected programme number
8. Ventilation indicator lamp
Setting the internal clock
time
Set the clock on the control panel before
programming the deferred starting of the heating.
►
Press and hold button 3
.
Page 98 of 212
96
Practical information
Fuel
The capacity of the tank is about 90 litres.
Fuel tanks of different capacities may be fitted,
60 and 120 litres, depending on the engine.
Low fuel level
When the low fuel tank level E (Empty) is
reached, this warning lamp comes on.
At this moment, you have approximately 10 or
12 litres left in the reserve, depending on the
capacity of your tank and the engine.
You must refuel as soon as possible to avoid
running out of fuel.
Refuelling
The fuel tank must be filled with the engine off.
► Open the fuel filler flap.
►
Hold the black filler cap with one hand.
►
With the other hand, insert the key and turn it
anti-clockwise.
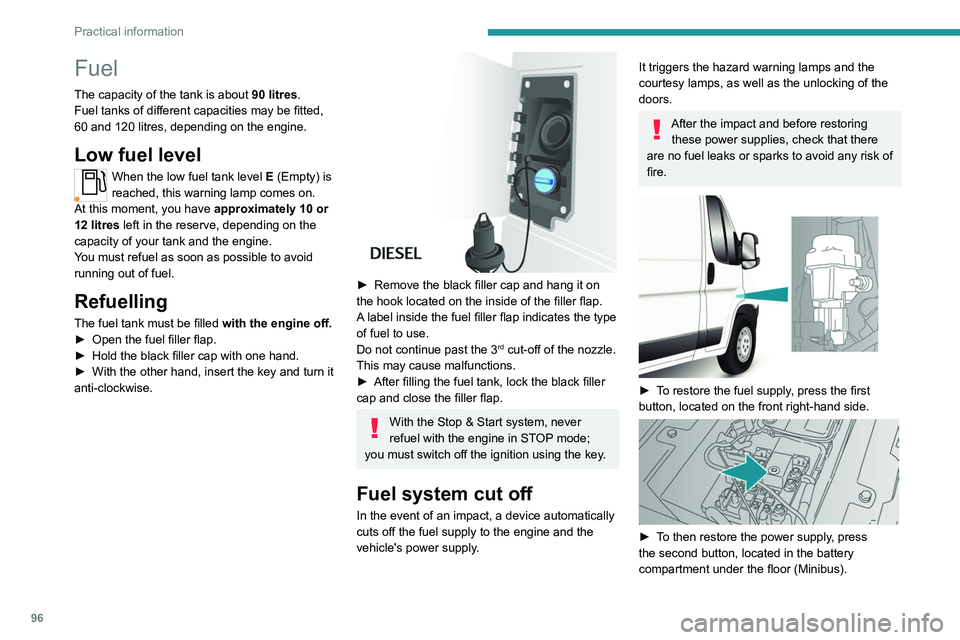
► Remove the black filler cap and hang it on
the hook located on the inside of the filler flap.
A
label inside the fuel filler flap indicates the type
of fuel to use.
Do not continue past the 3
rd cut-off of the nozzle.
This may cause malfunctions.
►
After filling the fuel tank, lock the black filler
cap and close the filler flap.
With the Stop & Start system, never
refuel with the engine in STOP mode;
you must switch off the ignition using the key.
Fuel system cut off
In the event of an impact, a device automatically
cuts off the fuel supply to the engine and the
vehicle's power supply.
It triggers the hazard warning lamps and the
courtesy lamps, as well as the unlocking of the
doors.
After the impact and before restoring these power supplies, check that there
are no fuel leaks or sparks to avoid any risk of
fire.
► To restore the fuel supply, press the first
button, located on the front right-hand side.
► To then restore the power supply, press
the second button, located in the battery
compartment under the floor (Minibus).
Page 108 of 212
106
Practical information
Fitting the towball
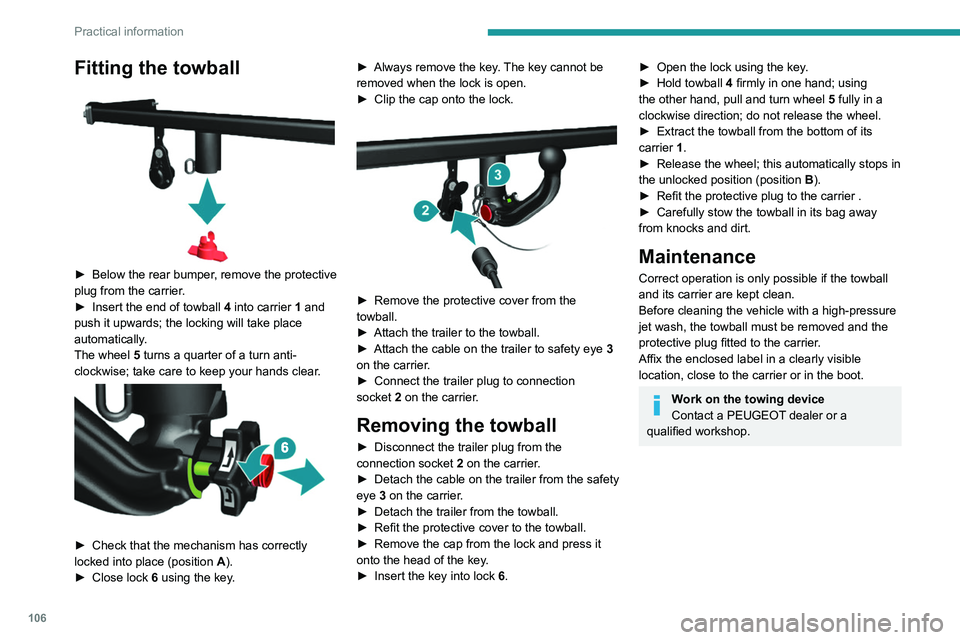
► Below the rear bumper, remove the protective
plug from the carrier.
►
Insert the end of towball
4 into carrier 1 and
push it upwards; the locking will take place
automatically.
The wheel 5 turns a quarter of a turn anti-
clockwise; take care to keep your hands clear.
► Check that the mechanism has correctly
locked into place (position A ).
►
Close lock 6
using the key. ►
Always remove the key
. The key cannot be
removed when the lock is open.
►
Clip the cap onto the lock.
► Remove the protective cover from the
towball.
►
Attach the trailer to the towball.
►
Attach the cable on the trailer to safety eye
3
on the carrier.
►
Connect the trailer plug to connection
socket
2 on the carrier.
Removing the towball
► Disconnect the trailer plug from the
connection socket 2 on the carrier.
►
Detach the cable on the trailer from the safety
eye
3 on the carrier.
►
Detach the trailer from the towball.
►
Refit the protective cover to the towball.
►
Remove the cap from the lock and press it
onto the head of the key
.
►
Insert the key into lock
6.
► Open the lock using the key .
► Hold towball 4
firmly in one hand; using
the other hand, pull and turn wheel 5 fully in a
clockwise direction; do not release the wheel.
►
Extract the towball from the bottom of its
carrier
1.
►
Release the wheel; this automatically stops in
the unlocked position (position
B
).
►
Refit the protective plug to the carrier .
►
Carefully stow the towball in its bag away
from knocks and dirt.
Maintenance
Correct operation is only possible if the towball
and its carrier are kept clean.
Before cleaning the vehicle with a high-pressure
jet wash, the towball must be removed and the
protective plug fitted to the carrier.
Affix the enclosed label in a clearly visible
location, close to the carrier or in the boot.
Work on the towing device
Contact a PEUGEOT dealer or a
qualified workshop.
Page 118 of 212
11 6
Practical information
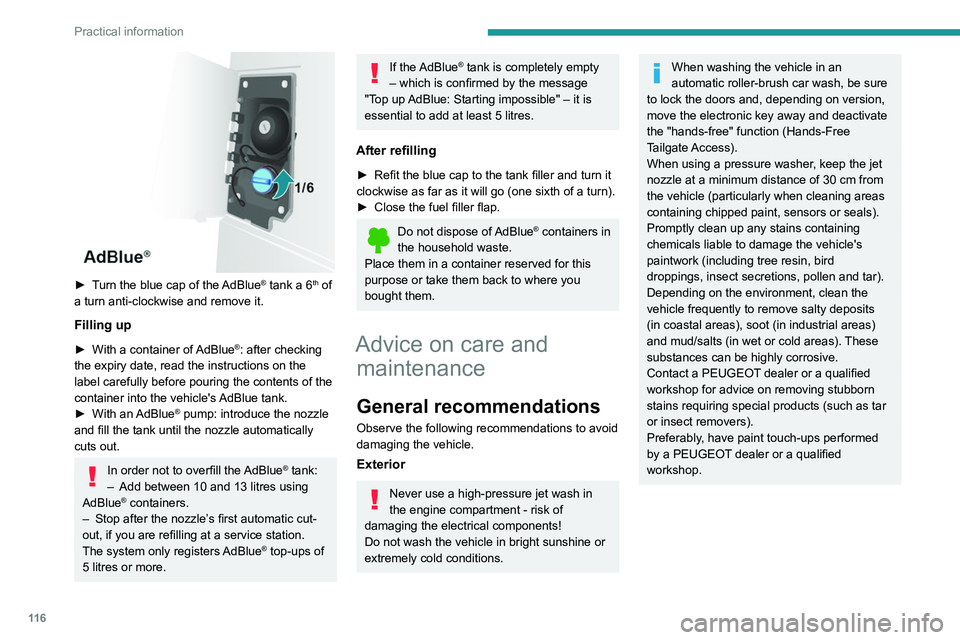
► Turn the blue cap of the AdBlue® tank a 6th of
a turn anti-clockwise and remove it.
Filling up
► With a container of AdBlue®: after checking
the expiry date, read the instructions on the
label carefully before pouring the contents of the
container
into the vehicle's AdBlue tank.
►
With an
AdBlue® pump: introduce the nozzle
and fill the tank until the nozzle automatically
cuts out.
In order not to overfill the AdBlue® tank:
–
Add between 10 and 13 litres using
AdBlue® containers.
–
Stop after the nozzle’ s first automatic cut-
out, if you are refilling at a service station.
The system only registers AdBlue
® top-ups of
5
litres or more.
If the AdBlue® tank is completely empty
– which is confirmed by the message
"Top up
AdBlue: Starting impossible" – it is
essential to add at least 5 litres.
After refilling
► Refit the blue cap to the tank filler and turn it
clockwise as far as it will go (one sixth of a turn).
►
Close the fuel filler flap.
Do not dispose of AdBlue® containers in
the household waste.
Place them in a container reserved for this
purpose or take them back to where you
bought them.
Advice on care and maintenance
General recommendations
Observe the following recommendations to avoid
damaging the vehicle.
Exterior
Never use a high-pressure jet wash in
the engine compartment - risk of
damaging the electrical components!
Do not wash the vehicle in bright sunshine or
extremely cold conditions.
When washing the vehicle in an
automatic roller-brush car wash, be sure
to lock the doors and, depending on version,
move the electronic key away and deactivate
the "hands-free" function (Hands-Free
Tailgate Access).
When using a pressure washer, keep the jet
nozzle at a minimum distance of 30 cm from
the vehicle (particularly when cleaning areas
containing chipped paint, sensors or seals).
Promptly clean up any stains containing
chemicals liable to damage the vehicle's
paintwork (including tree resin, bird
droppings, insect secretions, pollen and tar).
Depending on the environment, clean the
vehicle frequently to remove salty deposits
(in coastal areas), soot (in industrial areas)
and mud/salts (in wet or cold areas). These
substances can be highly corrosive.
Contact a PEUGEOT dealer or a qualified
workshop for advice on removing stubborn
stains requiring special products (such as tar
or insect removers).
Preferably, have paint touch-ups performed
by a PEUGEOT dealer or a qualified
workshop.