2021 PEUGEOT BOXER oil level
[x] Cancel search: oil levelPage 115 of 212

11 3
Practical information
7Manual gearbox
The gearbox does not require any maintenance (no oil change).
Brake pads
Brake wear depends on the style of
driving, particularly in the case of vehicles
used in town, over short distances. It may be
necessary to have the condition of the brakes
checked, even between vehicle services.
Unless there is a leak in the circuit, a drop in the
brake fluid level indicates that the brake pads
are worn.
If this warning lamp comes on, have the
brake pads checked by a PEUGEOT
dealer or a qualified workshop.
After washing the vehicle, moisture, or in wintry conditions, ice can form on the
brake discs and pads: braking efficiency may
be reduced. Gently dab the brakes to dry and
defrost them.
Brake disc wear
For information on checking brake disc
wear, contact a PEUGEOT dealer or a
qualified workshop.
Manual parking brake
If you notice excessive brake lever travel
or decreased effectiveness, the parking brake must be adjusted, even between two
services.
This system must be checked by a PEUGEOT
dealer or a qualified workshop.
Diesel fuel filter
The Diesel fuel filter is located in the engine
compartment near the brake fluid reservoir.
If this warning lamp comes on, bleed the
filter.
You can also bleed it regularly at each engine oil
change.
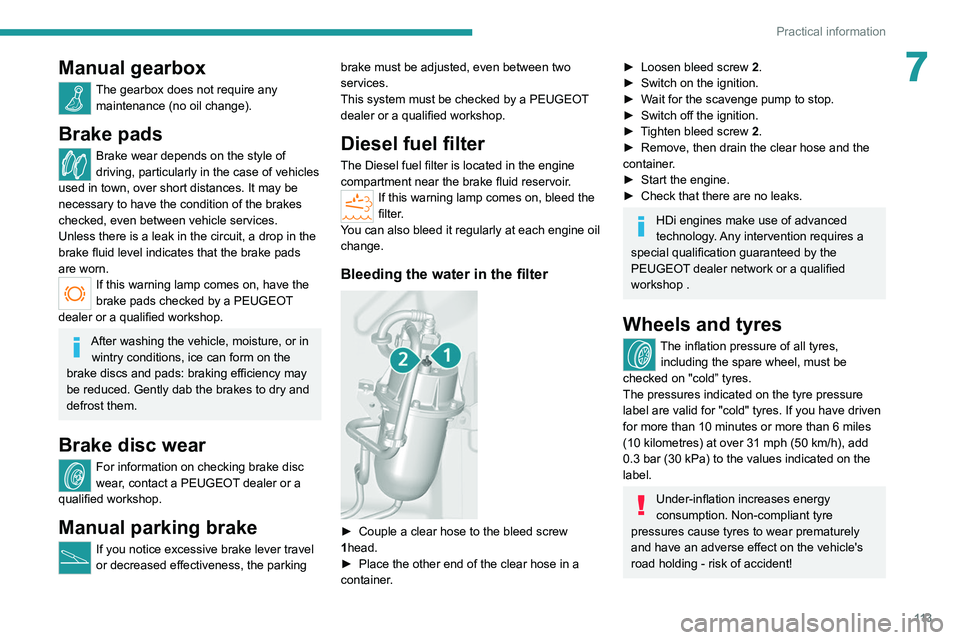
Bleeding the water in the filter
► Couple a clear hose to the bleed screw
1 head.
►
Place the other end of the clear hose in a
container
.
► Loosen bleed screw 2 .
► Switch on the ignition.
►
W
ait for the scavenge pump to stop.
►
Switch off the ignition.
►
T
ighten bleed screw 2.
►
Remove, then drain the clear hose and the
container
.
►
Start the engine.
►
Check that there are no leaks.
HDi engines make use of advanced
technology. Any intervention requires a
special qualification guaranteed by the
PEUGEOT
dealer network or a qualified
workshop .
Wheels and tyres
The inflation pressure of all tyres, including the spare wheel, must be
checked on "cold” tyres.
The pressures indicated on the tyre pressure
label are valid for "cold" tyres. If you have driven
for more than 10 minutes or more than 6 miles
(10 kilometres) at over 31 mph (50
km/h), add
0.3 bar (30 kPa) to the values indicated on the
label.
Under-inflation increases energy
consumption. Non-compliant tyre
pressures cause tyres to wear prematurely
and have an adverse effect on the vehicle's
road holding - risk of accident!
Page 162 of 212

160
Special features
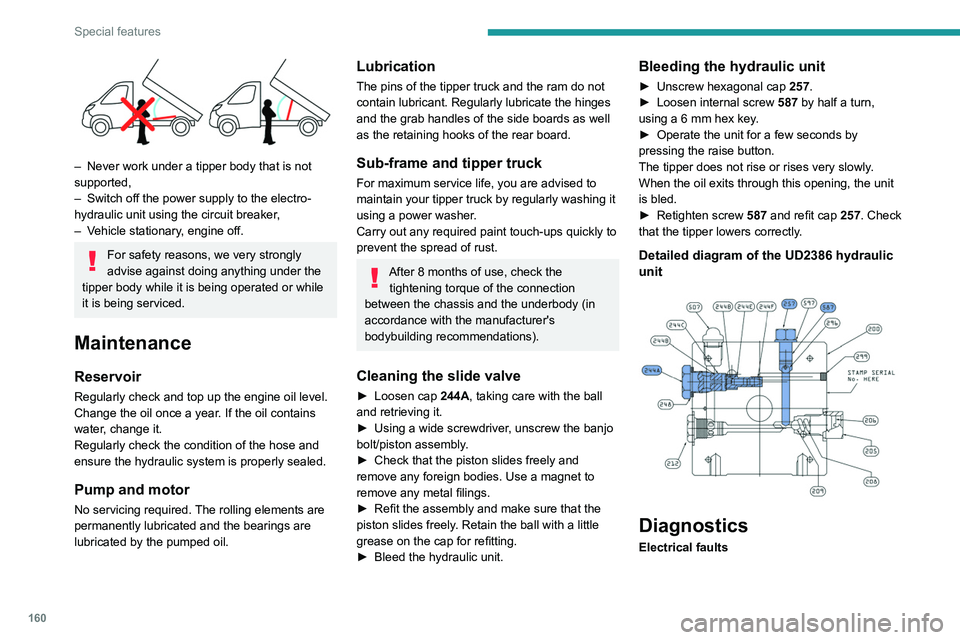
– Never work under a tipper body that is not
supported,
–
Switch off the power supply to the electro-
hydraulic unit using the circuit breaker
,
–
V
ehicle stationary, engine off.
For safety reasons, we very strongly
advise against doing anything under the
tipper body while it is being operated or while
it is being serviced.
Maintenance
Reservoir
Regularly check and top up the engine oil level.
Change the oil once a year. If the oil contains
water, change it.
Regularly check the condition of the hose and
ensure the hydraulic system is properly sealed.
Pump and motor
No servicing required. The rolling elements are
permanently lubricated and the bearings are
lubricated by the pumped oil.
Lubrication
The pins of the tipper truck and the ram do not
contain lubricant. Regularly lubricate the hinges
and the grab handles of the side boards as well
as the retaining hooks of the rear board.
Sub-frame and tipper truck
For maximum service life, you are advised to
maintain your tipper truck by regularly washing it
using a power washer.
Carry out any required paint touch-ups quickly to
prevent the spread of rust.
After 8 months of use, check the tightening torque of the connection
between the chassis and the underbody (in
accordance with the manufacturer's
bodybuilding recommendations).
Cleaning the slide valve
► Loosen cap 244A, taking care with the ball
and retrieving it.
►
Using a wide screwdriver
, unscrew the banjo
bolt/piston assembly.
►
Check that the piston slides freely and
remove any foreign bodies. Use a magnet to
remove any metal filings.
►
Refit the assembly and make sure that the
piston slides freely
. Retain the ball with a little
grease on the cap for refitting.
►
Bleed the hydraulic unit.
Bleeding the hydraulic unit
► Unscrew hexagonal cap 257 .
► Loosen internal screw 587
by half a turn,
using a 6 mm hex key.
►
Operate the unit for a few seconds by
pressing the raise button.
The tipper does not rise or rises very slowly
.
When the oil exits through this opening, the unit
is bled.
►
Retighten screw 587
and refit cap 257. Check
that the tipper lowers correctly.
Detailed diagram of the UD2386 hydraulic
unit
Diagnostics
Electrical faults
Page 163 of 212

161
Special features
10SymptomsVerification/Check
The hydraulic
unit does not
work. Power harness and unit
relay.
Control harness (control
unit).
Circuit-breaker.
The ram does
not lower. No, check the coil and the
electrical connections of
the valve.
The control unit
does not work. Check the connection and
contacts.
The fuse blows
while lowering. Replace the lowering coil.
Hydraulic faults
Symptoms Verification/Check
Very noisy unit,
rises slowly. Suction strainer clogged
or crushed at the bottom
of the tank.
Very noisy
new unit, rises
quickly. Pump alignment, change
the unit.
The ram lowers
by itself. Lowering valve crushed or
blocked.
Symptoms
Verification/Check
The ram does
not lower. Yes, check the slide valve
and bleed.
Refer to the
"Maintenance" section.
No, replace the solenoid
valve.
No, check the alignment
of the ram.
The unit works
but its pressure
does not
increase. Slide valve jammed if no
solenoid valve on the unit.
Refer to the
"Maintenance" section.
Pressure relief device,
setting, dirt.
Pump seal out of service.
Motor/pump coupling.
Pump loose from its
support.
The hydraulic
unit does not
work. Solenoid valve stuck,
replace it or retighten the
nut behind the strainer.
Emulsion in the
tank. Incorrectly positioned
return pipe.
Insufficient oil level.Symptoms
Verification/Check
The oil flows
back through
the oil breather
pipe. Oil level too high.
Tolerance of the oil
breather pipe membrane
too high, to be replaced.
Valid only for UD2386
units.
Page 193 of 212

191
Alphabetical index
Deactivating the passenger airbag 34, 37
Dimensions
11 3
Dipstick
81
Direction indicators
23
Display screen, instrument panel
8, 47
Domestic charging (Electric)
102–103
Drive selector (Electric)
47
Driving
69–70
Driving aids camera (warnings)
53
Driving aids (recommendations)
52
Driving economically
6
DSC
29
Dynamic stability control (DSC)
57–58
E
EBA 29
EBFD
29
Eco-driving (advice)
6
Electric motor
5, 6, 8, 69, 76,
81, 102, 105, 109
Electric windows
18
Electronic brake force distribution (EBFD)
29
Emergency warning lamps
28
Emissions control system, SCR
86
Engine compartment
108–109
Engine, Diesel
69, 80, 108
Engines
135–136
Environment
6, 42
ESP/ASR
30
F
Filling the AdBlue® tank 83, 87
Filling the fuel tank
68
Filter, air
84
Filter, Diesel fuel
85
Filter, oil
84
Filter, particle
84
Filter, passenger compartment
23, 84
Fittings, front
43–46
Fittings, interior
43–46
Flap, fuel filler
68
Flashing indicators
23
Fluid, brake
110–111
Fluid, engine coolant
110–111
Fluid, power steering
110–111
Foglamps, front
23
Foglamps, rear
23
Front doors
16
Fuel
6, 69
Fuel consumption
6
Fuel tank
68
Fuses
101
G
Gauge, fuel 68
Gearbox, manual
47, 49, 85
Glove box
43–45
H
Hazard warning lamps 28
Headlamp flash
23
Headlamps, dipped beam
23
Headlamps, main beam
23
Head restraints, front
18
Heating
35–36
Heating, additional
39–40
High voltage
69
Hill Descent Control
31
Hill start assist
77–78
Horn
28
I
Immobiliser, electronic 43
Indicator, coolant temperature
14
Indicator, engine oil level
13
Indicators, direction
23
Inflating tyres
85
Information, vehicle
151, 159
Infrared camera
53
Instrument panel
53
Instruments and controls
4
Intelligent Traction Control
31
J
Jack 136, 145
Page 194 of 212

192
Alphabetical index
K
Key with remote control 43
Kit, hands-free
137, 177–178
L
Lane Departure Warning System
(LDWS)
87–88
Level, AdBlue®
83
Level, brake fluid
82
Level, engine coolant
14, 82
Level, engine oil
81
Level, heating system fluid
83
Level, power steering fluid
82
Levels
110–111
Levels and checks
109–111
Lighting dimmer
8
Low fuel level
68
Lumbar
18
M
Mains socket (domestic network) 71
Maintenance (advice)
70, 88
Maintenance, routine
53, 83
Manoeuvring aids (recommendations)
52
Mat
53
Menu
15, 171–172, 146, 149, 151
Menus (audio)
171–172
Mirror, rear view 8
Mirrors, door
22, 61
Motor, electric
81, 109
O
Oil change 81
Oil consumption
81
OIl, engine
109–111
On-board tools
119–124
Opening the bonnet
79
Overhead storage
43–46
P
Pads, brake 85
Paint
89
Parking brake
46, 85
Pedestrian horn (Electric)
29, 42
Player, USB
163–164, 172–173
Port, USB
163–164, 172–173
Power indicator (Electric)
6
Pressures, tyres
85
Pre-tensioning seat belts
33
Protecting children
62–65
Public fast charging station
71
R
Radar (warnings) 53
Radio
135, 143, 145
Radio, digital (Digital Audio
Broadcasting - DAB)
144
Range, AdBlue®
14–15, 83
Recharging the traction battery
(Electric)
69, 101–103
Recovery
104
Regeneration of the particle filter
84
Remote control
13
Replacing bulbs
97
Replacing fuses
101
Replacing the air filter
84
Replacing the oil filter
84
Replacing the passenger compartment filter
84
Resetting the service indicator
13
Reversing camera
53
S
Safety, children 62–65
Screen, colour
143
Screen menu map
171–172, 146, 149, 151
Screenwash fluid
110–111
SCR (Selective Catalytic Reduction)
86
Seat belts
60–61
Seat belts, rear
33
Seats, heated
19
Seats, rear
36