2021 PEUGEOT 5008 lock
[x] Cancel search: lockPage 119 of 292
11 7
Driving
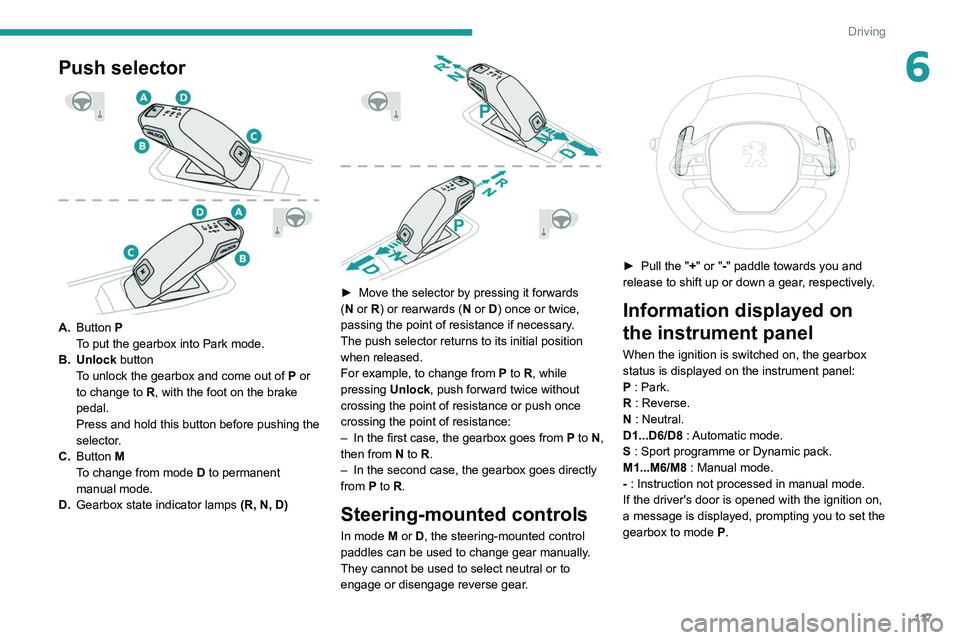
6Push selector
A.Button P
To put the gearbox into Park mode.
B. Unlock button To unlock the gearbox and come out of
P
or
to change to
R, with the foot on the brake
pedal.
Press and hold this button before pushing the
selector.
C. Button M
To change from mode
D
to permanent
manual mode.
D. Gearbox state indicator lamps (R, N, D)
► Move the selector by pressing it forwards
( N or R) or rearwards (N or D) once or twice,
passing the point of resistance if necessary.
The push selector returns to its initial position
when released.
For example, to change from
P to R, while
pressing Unlock, push forward twice without
crossing the point of resistance or push once
crossing the point of resistance:
–
In the first case, the gearbox goes from
P to N,
then from
N to R.
–
In the second case, the gearbox goes directly
from
P to R.
Steering-mounted controls
In mode M or D, the steering-mounted control
paddles can be used to change gear manually .
They cannot be used to select neutral or to
engage or disengage reverse gear.
► Pull the " +" or "-" paddle towards you and
release to shift up or down a gear, respectively.
Information displayed on
the instrument panel
When the ignition is switched on, the gearbox
status is displayed on the instrument panel:
P : Park.
R : Reverse.
N : Neutral.
D1...D6/D8 : Automatic mode.
S : Sport programme or Dynamic pack.
M1...M6/M8 : Manual mode.
- : Instruction not processed in manual mode.
If the driver's door is opened with the ignition on,
a message is displayed, prompting you to set the
gearbox to mode P.
Page 120 of 292
11 8
Driving
Operation
With the engine running, if it is necessary to
press the brake pedal and/or the Unlock button
in order to change mode, an alert message is
displayed in the instrument panel.
Only appropriate attempted changes of mode
are accepted.
With the engine running and the brakes
released, if R, D or M is selected, the
vehicle moves off, even without pressing the
accelerator pedal.
Never press the accelerator and brake
pedals at the same time - risk of damage
to the gearbox!
In the event of a battery failure, you must
place the chocks supplied with the vehicle
tools against one of the wheels to immobilise
the vehicle.
Unlocking the gearbox
– From mode P:
► Fully depress the brake pedal.
►
Press the
Unlock button.
►
While continuing to press the brake pedal
and the
Unlock button, select another mode.
–
From neutral
N, at a speed below 3 mph
(5
km/h):
►
Fully depress the brake pedal.
►
While continuing to depress the brake
pedal, select another mode.
Engaging reverse gear
► Slow down until you come to a stop.
► Depress the brake pedal, then press the
Unlock
button.
►
While maintaining the presses, select
mode
R.
Manual mode
Entering the mode:
► With mode D initially selected.
►
Press button
M; the green indicator lamp in
the button comes on.
Exiting the mode:
►
Push forwards once to return to
D.
or
►
Press button
M; the indicator lamp in the
button goes off.
Switching off the ignition
To switch off the ignition, the vehicle must be
stationary.
Changing to free-wheeling
For more information on Changing to free-
wheeling , refer to the corresponding section.
If you open the driver's door while mode
N is engaged, an audible signal will
sound. It will stop when you close the driver's
door again.
Special aspects of automatic mode
The gearbox selects the gear that provides
optimal performance based on ambient temperature, road profile, vehicle loading and
driving style.
For maximum acceleration, press the accelerator
fully down (kick-down). The gearbox changes
down automatically or holds the selected gear
until the maximum engine speed is reached.
Steering mounted controls allow the driver to
temporarily select a gear, if the vehicle speed
and engine speed conditions permit.
Special aspects of manual mode
The gearbox only changes from one gear to
another if the vehicle speed and engine speed
conditions permit.
Starting the vehicle
From mode P:
►
Fully depress the brake pedal.
►
Start the engine.
►
Maintaining pressure on the brake pedal,
press the
Unlock button.
►
Push once or twice rearwards to select
the automatic mode
D, or forwards to engage
reverse
R.
From neutral
N:
►
Fully depress the brake pedal.
►
Start the engine.
►
Maintaining pressure on the brake pedal,
push rearwards to select the automatic mode
D
,
or forwards, while pressing the Unlock
button to
engage reverse
R
.
Then, from
D or R:
►
Release the brake pedal.
► Accelerate gradually to automatically release
the electric parking brake.
The vehicle moves off immediately.
Automatic gearbox
Never try to start the engine by pushing
the vehicle.
Switching the vehicle off
Regardless of the current gearbox mode, mode
P is immediately engaged automatically when
the ignition is switched off.
However, in mode N, mode P will be engaged
after a delay of 5 seconds (time to enable free-
wheeling mode).
Check that mode P has been engaged and
that the electric parking brake was applied
automatically; if not, apply it manually.
The corresponding indicator lamps on the gear selector and the electric parking
brake control must be on, as well as the
indicator lamps on the instrument panel.
Gearbox malfunction
This warning lamp comes on, accompanied by an audible signal and the
display of a message.
Go to a PEUGEOT dealer or a qualified
workshop.
Do not drive faster than 62 mph (100 km/h),
keeping to the speed limit.
Page 121 of 292

11 9
Driving
6► Accelerate gradually to automatically release
the electric parking brake.
The vehicle moves off immediately
.
Automatic gearbox
Never try to start the engine by pushing
the vehicle.
Switching the vehicle off
Regardless of the current gearbox mode, mode
P is immediately engaged automatically when
the ignition is switched off.
However, in mode N, mode P will be engaged
after a delay of 5 seconds (time to enable free-
wheeling mode).
Check that mode
P has been engaged and
that the electric parking brake was applied
automatically; if not, apply it manually.
The corresponding indicator lamps on the gear selector and the electric parking
brake control must be on, as well as the
indicator
lamps on the instrument panel.
Gearbox malfunction
This warning lamp comes on, accompanied by an audible signal and the
display of a message.
Go to a PEUGEOT dealer or a qualified
workshop.
Do not drive faster than 62
mph (100 km/h),
keeping to the speed limit.
Switching of the gearbox to back-up mode
Mode D locks in third gear.
The paddles on the steering wheel do not work
and mode M is no longer accessible.
You may feel a significant jolt on engaging
reverse gear. This will not damage the gearbox.
Selector malfunction
Minor malfunction
This warning lamp comes on, accompanied by the display of a message
and an audible signal.
Drive carefully.
Go to a PEUGEOT dealer or a qualified
workshop.
In some cases, the selector indicator lamps may
no longer come on, but the gearbox state is still
displayed on the instrument panel.
Major malfunction
This warning lamp comes on, accompanied by the display of a
message.
You must stop the vehicle.
Stop as soon as it is safe to do so and
switch off the ignition.
Contact a PEUGEOT dealer or a qualified
workshop.
e-EAT8 electric automatic
gearbox (Rechargeable
hybrid)
Automatic 8-speed gearbox with a push selector and regenerative braking function.
With the exception of manual mode, the
“Sport” button and the regenerative braking,
the operation is identical to that of other EAT8
gearboxes.
For more information on the Operation or the
Malfunctions of the EAT8 gearbox, refer to the
corresponding sections.
Gearbox selector positions
P. Car park
For parking the vehicle: the front wheels
are blocked.
R. Reverse gear
N. Neutral
For moving the vehicle with the ignition
off: in certain car washing machines,
when towing the vehicle, etc.
Page 122 of 292
120
Driving
D/B.Automatic forward gear ( D) or automatic
forward gear with regenerative braking
(B)
The gearbox manages gear changes
according to the style of driving, the road
profile and the vehicle load. With the
regenerative braking function activated,
the gearbox also controls braking when
the accelerator pedal is released.
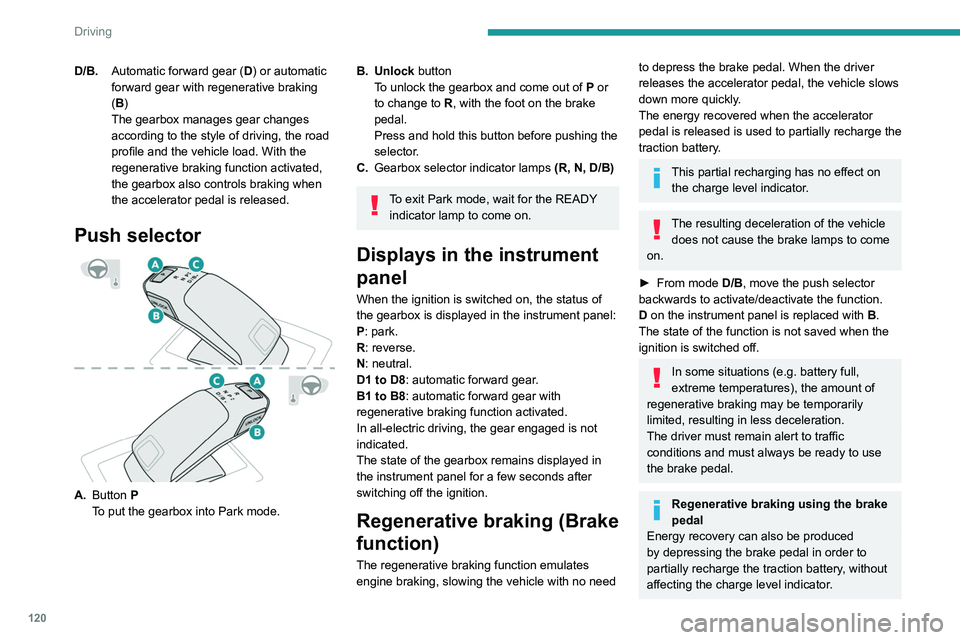
Push selector
A. Button P
To put the gearbox into Park mode.
B. Unlock button To unlock the gearbox and come out of P or
to change to
R, with the foot on the brake
pedal.
Press and hold this button before pushing the
selector.
C. Gearbox selector indicator lamps (R, N, D/B)
To exit Park mode, wait for the READY
indicator lamp to come on.
Displays in the instrument
panel
When the ignition is switched on, the status of
the gearbox is displayed in the instrument panel:
P: park.
R: reverse.
N: neutral.
D1 to D8: automatic forward gear.
B1 to B8: automatic forward gear with
regenerative braking function activated.
In all-electric driving, the gear engaged is not
indicated.
The state of the gearbox remains displayed in
the instrument panel for a few seconds after
switching off the ignition.
Regenerative braking (Brake
function)
The regenerative braking function emulates
engine braking, slowing the vehicle with no need
to depress the brake pedal. When the driver
releases the accelerator pedal, the vehicle slows
down more quickly.
The energy recovered when the accelerator
pedal is released is used to partially recharge the
traction battery.
This partial recharging has no effect on the charge level indicator.
The resulting deceleration of the vehicle does not cause the brake lamps to come
on.
►
From mode
D/B, move the push selector
backwards to activate/deactivate the function.
D on the instrument panel is replaced with B.
The state of the function is not saved when the
ignition is switched off.
In some situations (e.g. battery full,
extreme temperatures), the amount of
regenerative braking may be temporarily
limited, resulting in less deceleration.
The driver must remain alert to traffic
conditions and must always be ready to use
the brake pedal.
Regenerative braking using the brake
pedal
Energy recovery can also be produced
by depressing the brake pedal in order to
partially recharge the traction battery, without
affecting the charge level indicator.
Hill start assist
This system keeps the vehicle briefly stationary
(for approximately 2 seconds) when making a hill
start, while you transfer your foot from the brake
pedal to the accelerator pedal.
The system is only active when:
– The vehicle is completely stationary, with your
foot on the brake pedal.
– Certain slope conditions are met.
– The driver’s door is closed.
Do not leave the vehicle while it is being
held temporarily by hill start assist.
If someone needs to get out of the vehicle
with the engine running, apply the parking
brake manually. Then check that the parking
brake indicator lamp and the P indicator lamp
in the electric parking brake control are on
fixed.
The hill start assist function cannot be deactivated. However, using the parking
brake to immobilise the vehicle interrupts its
operation.
Page 131 of 292
129
Driving
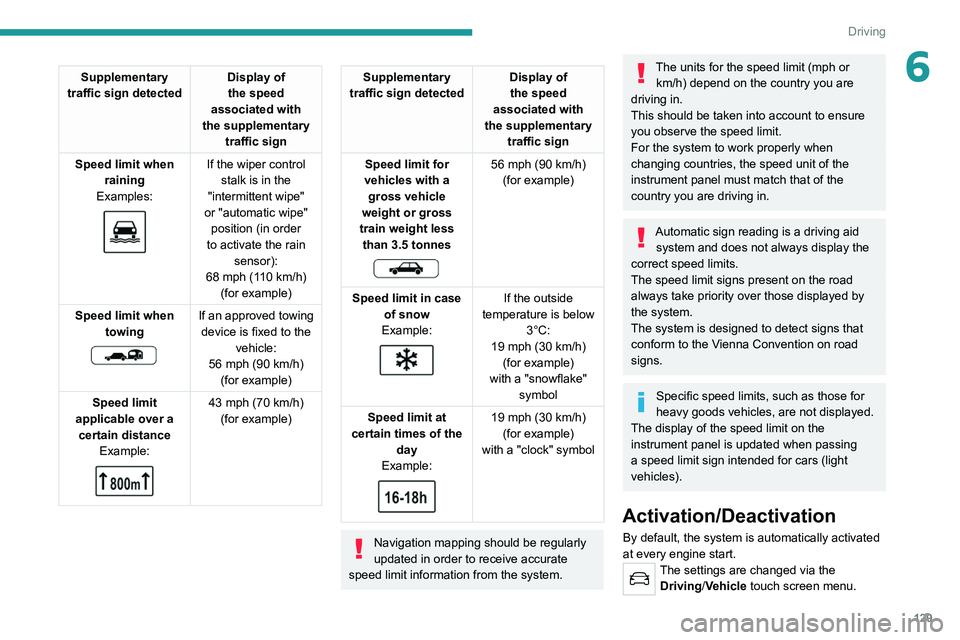
6Supplementary
traffic sign detected Display of
the speed
associated with
the supplementary traffic sign
Speed limit when raining
Examples:
If the wiper control stalk is in the
"intermittent wipe"
or "automatic wipe" position (in order
to activate the rain sensor):
68 mph (110
km/h)
(for example)
Speed limit when towing
If an approved towing device is fixed to the vehicle:
56 mph (90
km/h)
(for example)
Speed limit
applicable over a certain distance Example:
43 mph (70 km/h)
(for example)
Supplementary
traffic sign detected Display of
the speed
associated with
the supplementary traffic sign
Speed limit for
vehicles with a gross vehicle
weight or gross
train weight less than 3.5 tonnes
56 mph (90 km/h)
(for example)
Speed limit in case of snow
Example:
If the outside
temperature is below 3°C:
19 mph (30
km/h)
(for example)
with a "snowflake" symbol
Speed limit at
certain times of the day
Example:
19 mph (30 km/h)
(for example)
with a "clock" symbol
Navigation mapping should be regularly
updated in order to receive accurate
speed limit information from the system.
The units for the speed limit (mph or km/h) depend on the country you are
driving in.
This should be taken into account to ensure
you observe the speed limit.
For the system to work properly when
changing countries, the speed unit of the
instrument panel must match that of the
country you are driving in.
Automatic sign reading is a driving aid system and does not always display the
correct speed limits.
The speed limit signs present on the road
always take priority over those displayed by
the system.
The system is designed to detect signs that
conform to the Vienna Convention on road
signs.
Specific speed limits, such as those for
heavy goods vehicles, are not displayed.
The display of the speed limit on the
instrument panel is updated when passing
a speed limit sign intended for cars (light
vehicles).
Activation/Deactivation
By default, the system is automatically activated
at every engine start.
The settings are changed via the Driving/Vehicle touch screen menu.
Page 161 of 292
159
Driving
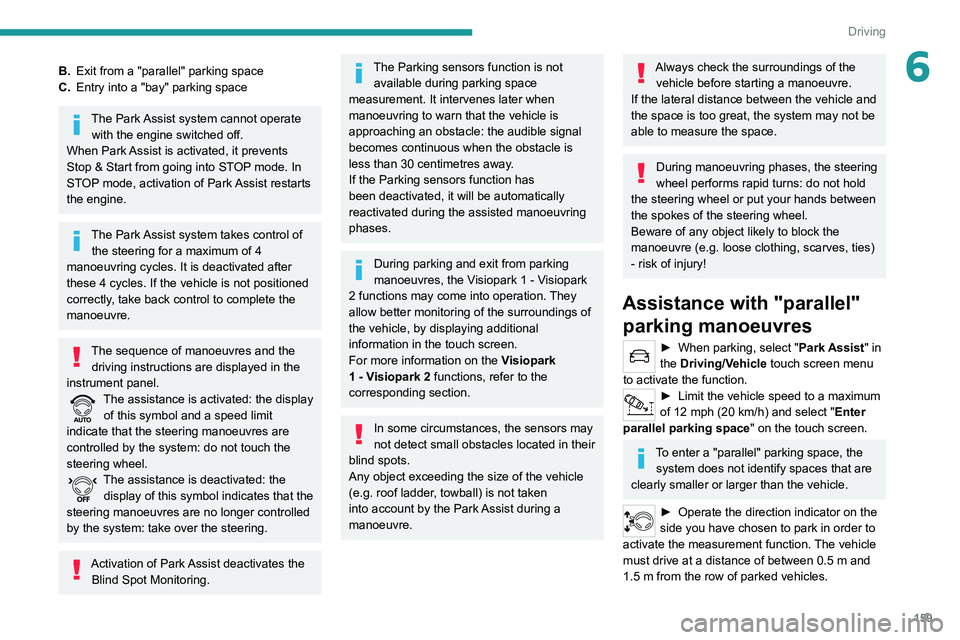
6B.Exit from a "parallel" parking space
C. Entry into a "bay" parking space
The Park Assist system cannot operate
with the engine switched off.
When Park Assist is activated, it prevents
Stop & Start from going into STOP mode. In
STOP mode, activation of Park Assist restarts
the engine.
The Park Assist system takes control of the steering for a maximum of 4
manoeuvring cycles. It is deactivated after
these 4 cycles. If the vehicle is not positioned
correctly, take back control to complete the
manoeuvre.
The sequence of manoeuvres and the driving instructions are displayed in the
instrument panel.
The assistance is activated: the display of this symbol and a speed limit
indicate that the steering manoeuvres are
controlled by the system: do not touch the
steering wheel.
The assistance is deactivated: the display of this symbol indicates that the
steering manoeuvres are no longer controlled
by the system: take over the steering.
Activation of Park Assist deactivates the Blind Spot Monitoring.
The Parking sensors function is not available during parking space
measurement. It intervenes later when
manoeuvring to warn that the vehicle is
approaching an obstacle: the audible signal
becomes continuous when the obstacle is
less than 30 centimetres away.
If the Parking sensors function has
been deactivated, it will be automatically
reactivated during the assisted manoeuvring
phases.
During parking and exit from parking
manoeuvres, the Visiopark 1 - Visiopark
2 functions may come into operation. They
allow better monitoring of the surroundings of
the vehicle, by displaying additional
information in the touch screen.
For more information on the Visiopark
1 - Visiopark 2
functions, refer to the
corresponding section.
In some circumstances, the sensors may
not detect small obstacles located in their
blind spots.
Any object exceeding the size of the vehicle
(e.g.
roof ladder, towball) is not taken
into account by the Park Assist during a
manoeuvre.
Always check the surroundings of the vehicle before starting a manoeuvre.
If the lateral distance between the vehicle and
the space is too great, the system may not be
able to measure the space.
During manoeuvring phases, the steering
wheel performs rapid turns: do not hold
the steering wheel or put your hands between
the spokes of the steering wheel.
Beware of any object likely to block the
manoeuvre (e.g.
loose clothing, scarves, ties)
- risk of injury!
Assistance with "parallel" parking manoeuvres
► When parking, select " Park Assist " in
the Driving/Vehicle touch screen menu
to activate the function.
► Limit the vehicle speed to a maximum
of 12 mph (20 km/h) and select " Enter
parallel parking space" on the touch screen.
To enter a "parallel" parking space, the system does not identify spaces that are
clearly smaller or larger than the vehicle.
► Operate the direction indicator on the
side you have chosen to park in order to
activate the measurement function.
The vehicle
must drive at a distance of between 0.5
m and
1.5
m from the row of parked vehicles.
Page 168 of 292
166
Practical information
In the event of damage to the traction
battery
It is strictly prohibited to work on the vehicle
yourself.
Do not touch liquids coming from the traction
battery; in the event of contact between the
skin and these products, wash abundantly
with water and contact a doctor as soon as
possible.
Charging flap
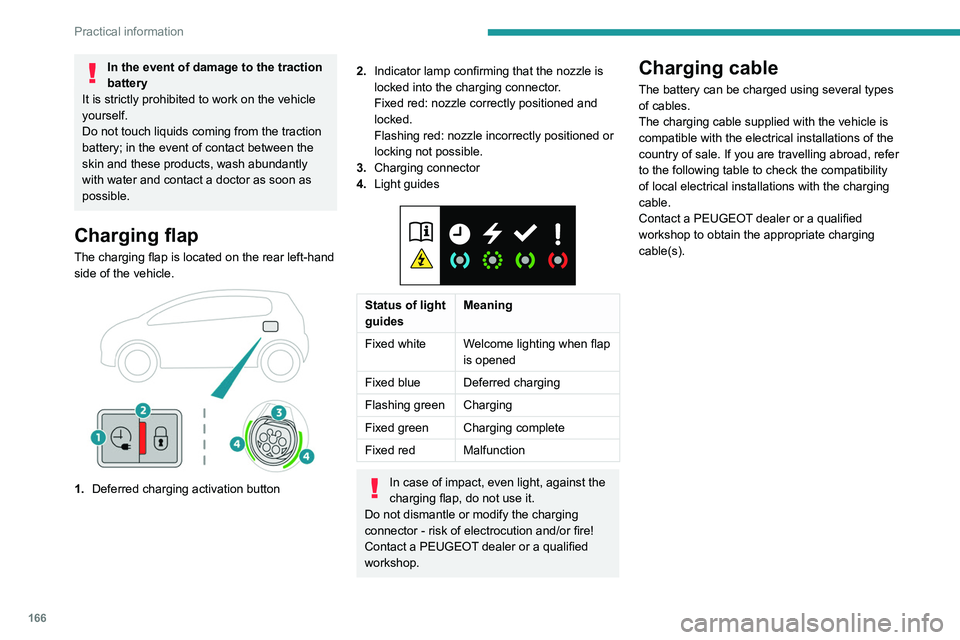
The charging flap is located on the rear left-hand
side of the vehicle.
1. Deferred charging activation button
2.Indicator lamp confirming that the nozzle is
locked into the charging connector.
Fixed red: nozzle correctly positioned and
locked.
Flashing red: nozzle incorrectly positioned or
locking not possible.
3. Charging connector
4. Light guides
Status of light
guides Meaning
Fixed white Welcome lighting when flap
is opened
Fixed blue Deferred charging
Flashing green Charging
Fixed green Charging complete
Fixed red Malfunction
In case of impact, even light, against the
charging flap, do not use it.
Do not dismantle or modify the charging
connector - risk of electrocution and/or fire!
Contact a PEUGEOT dealer or a qualified
workshop.
Charging cable
The battery can be charged using several types
of cables.
The charging cable supplied with the vehicle is
compatible with the electrical installations of the
country of sale. If you are travelling abroad, refer
to the following table to check the compatibility
of local electrical installations with the charging
cable.
Contact a PEUGEOT dealer or a qualified
workshop to obtain the appropriate charging
cable(s).
Page 170 of 292
168
Practical information
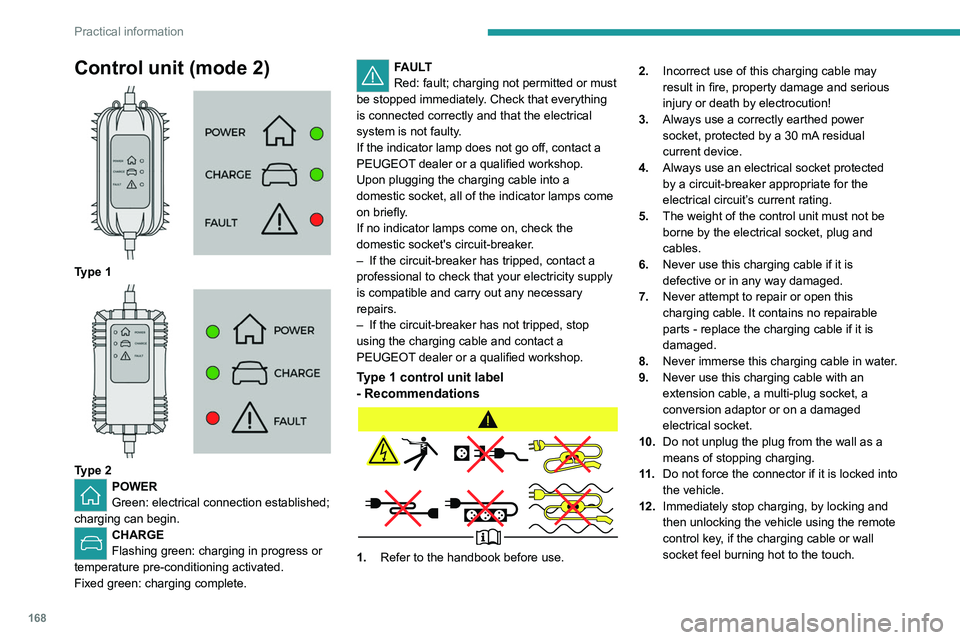
Control unit (mode 2)
Type 1
Type 2POWER
Green: electrical connection established;
charging can begin.
CHARGE
Flashing green: charging in progress or
temperature pre-conditioning activated.
Fixed green: charging complete.
FAULT
Red: fault; charging not permitted or must
be stopped immediately. Check that everything
is connected correctly and that the electrical
system is not faulty.
If the indicator lamp does not go off, contact a
PEUGEOT dealer or a qualified workshop.
Upon plugging the charging cable into a
domestic socket, all of the indicator lamps come
on briefly.
If no indicator lamps come on, check the
domestic socket's circuit-breaker.
–
If the circuit-breaker has tripped, contact a
professional to check that your electricity supply
is compatible and carry out any necessary
repairs.
–
If the circuit-breaker has not tripped, stop
using the charging cable and contact a
PEUGEOT
dealer or a qualified workshop.
Type 1 control unit label
- Recommendations
1. Refer to the handbook before use. 2.
Incorrect use of this charging cable may
result in fire, property damage and serious
injury or death by electrocution!
3. Always use a correctly earthed power
socket, protected by a 30 mA residual
current device.
4. Always use an electrical socket protected
by a circuit-breaker appropriate for the
electrical circuit’s current rating.
5. The weight of the control unit must not be
borne by the electrical socket, plug and
cables.
6. Never use this charging cable if it is
defective or in any way damaged.
7. Never attempt to repair or open this
charging cable. It contains no repairable
parts - replace the charging cable if it is
damaged.
8. Never immerse this charging cable in water.
9. Never use this charging cable with an
extension cable, a multi-plug socket, a
conversion adaptor or on a damaged
electrical socket.
10. Do not unplug the plug from the wall as a
means of stopping charging.
11 . Do not force the connector if it is locked into
the vehicle.
12. Immediately stop charging, by locking and
then unlocking the vehicle using the remote
control key, if the charging cable or wall
socket feel burning hot to the touch.
13.This charging cable includes components
liable to cause electrical arcing or sparks.
Do not expose to flammable vapours.
14. Only use this charging cable with PEUGEOT
vehicles.
15. Never plug the cable into the wall socket (or
unplug it) with wet hands.
Type 2 control unit label
- Recommendations
Refer to the handbook before use.
1.Incorrect use of this charging cable may
result in fire, property damage and serious
injury or death by electrocution!
2. Always use a correctly earthed power
socket, protected by a 30 mA residual
current device.