2021 PEUGEOT 5008 turn signal
[x] Cancel search: turn signalPage 78 of 292
76
Lighting and visibility
Headlamp beam height
adjustment
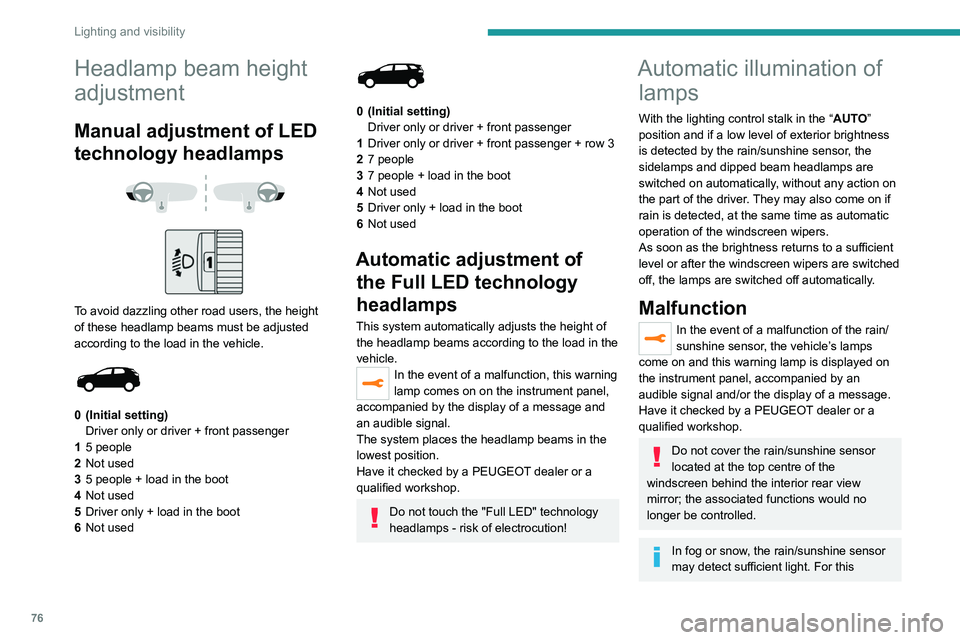
Manual adjustment of LED
technology headlamps
To avoid dazzling other road users, the height
of these headlamp beams must be adjusted
according to the load in the vehicle.
0 (Initial setting) Driver only or driver + front passenger
1 5 people
2 Not used
3 5 people + load in the boot
4 Not used
5 Driver only + load in the boot
6 Not used
0 (Initial setting)
Driver only or driver + front passenger
1 Driver only or driver + front passenger + row 3
2 7 people
3 7 people + load in the boot
4 Not used
5 Driver only + load in the boot
6 Not used
Automatic adjustment of
the Full LED technology
headlamps
This system automatically adjusts the height of
the headlamp beams according to the load in the
vehicle.
In the event of a malfunction, this warning
lamp comes on on the instrument panel,
accompanied by the display of a message and
an audible signal.
The system places the headlamp beams in the
lowest position.
Have it checked by a PEUGEOT dealer or a
qualified workshop.
Do not touch the "Full LED" technology
headlamps - risk of electrocution!
Automatic illumination of lamps
With the lighting control stalk in the “ AUTO”
position and if a low level of exterior brightness
is detected by the rain/sunshine sensor, the
sidelamps and dipped beam headlamps are
switched on automatically, without any action on
the part of the driver. They may also come on if
rain is detected, at the same time as automatic
operation of the windscreen wipers.
As soon as the brightness returns to a sufficient
level or after the windscreen wipers are switched
off, the lamps are switched off automatically.
Malfunction
In the event of a malfunction of the rain/
sunshine sensor, the vehicle’s lamps
come on and this warning lamp is displayed on
the instrument panel, accompanied by an
audible signal and/or the display of a message.
Have it checked by a PEUGEOT dealer or a
qualified workshop.
Do not cover the rain/sunshine sensor
located at the top centre of the
windscreen behind the interior rear view
mirror; the associated functions would no
longer be controlled.
In fog or snow, the rain/sunshine sensor
may detect sufficient light. For this
reason, the lighting will not come on
automatically.
The inner surface of the windscreen may become misted up and affect the proper
operation of the rain/sunshine sensor.
In humid and cold weather, demist the
windscreen regularly.
Guide-me-home and
welcome lighting
Guide-me-home lighting
With the ring of the lighting control stalk in the
"AUTO" position and when the light is poor, the
dipped beam headlamps come on automatically
when the ignition is switched off.
You can activate/deactivate this function and adjust the guide-me-home lighting
duration in the Driving/Vehicle touch screen
menu.
Welcome lighting
When the vehicle is unlocked, if the ambient
light is low and the "Automatic illumination of
headlamps" function is activated, this system
automatically turns on certain exterior lamps
as well as certain lamps in the passenger
compartment.
Page 90 of 292

88
Safety
In these situations, the system limits the amount
of wheel spin to provide the best traction and
trajectory control for the vehicle.
The use of snow tyres is strongly recommended on surfaces offering low
levels of grip.
Anti-slip regulation (ASR) / Dynamic stability control
(DSC)
Anti-slip regulation (or traction control) optimises
traction by using engine braking and by applying
the brakes on the driving wheels to avoid one
or more wheels spinning. It also enhances the
vehicle's directional stability.
If there is a difference between the vehicle’s
trajectory and the path desired by the driver, the
dynamic stability control system automatically
uses engine braking and the brakes on one or
more wheels to return the vehicle to the desired
path, within the limits of the laws of physics.
These systems are activated automatically every
time the vehicle is started.
These systems are activated in the event of a problem with grip or trajectory
(confirmed by this warning lamp flashing on the
instrument panel).
Deactivation/Reactivation
In exceptional conditions (starting a vehicle
which is bogged down, stuck in snow, on soft
ground, etc.), it may be advisable to deactivate
the ASR system, so that the wheels can turn
freely and regain grip.
Reactivate the system as soon as the level of
grip permits.
This function is set via the Driving/ Vehicle touch screen menu.
Deactivation is confirmed by the lighting
of this indicator lamp on the instrument
panel and the display of a message.
The ASR system is reactivated automatically
every time the ignition is switched off, or at
speeds over 31 mph (50
km/h).
Reactivation is manual below 31 mph (50 km/h).
Malfunction
In the event of a malfunction, this warning
lamp comes on on the instrument panel,
accompanied by the display of a message and
an audible signal.
Have it checked by a PEUGEOT dealer or a
qualified workshop.
ASR/DSC
These systems enhance safety during
normal driving, but should not encourage
the driver to take extra risks or drive at high
speed.
It is in conditions of reduced grip (rain, snow,
ice) that the risk of loss of grip increases. It
is therefore important for your safety to keep
these systems activated in all conditions, and
particularly in difficult conditions.
Correct operation of these systems depends
on compliance with the manufacturer's
recommendations relating to the wheels
(tyres and rims), braking and electronic
components, as well as the assembly and
repair procedures provided by PEUGEOT
dealers.
In order to ensure that these systems remain
effective in wintry conditions, the use of snow
or all-season tyres is recommended. All four
wheels must be fitted with tyres approved for
your vehicle.
All tyre specifications are listed on the
tyre/paint label. For more information
on Identification markings , refer to the
corresponding section.
Trailer stability assist (TSA)
When towing, this system reduces the risk of the
vehicle or trailer snaking.
Operation
The system is activated automatically when the
ignition is switched on.
The electronic stability control system (ESC)
must not have any faults.
The vehicle speed must be between 37 and 99
mph (60 and 160
km/h).
If the system detects that the trailer is
snaking, it applies the brakes to stabilise
the trailer and reduces engine power, if
necessary, to slow the vehicle (indicated by the
flashing of this warning lamp on the instrument
panel and the brake lamps coming on).
For information on weights and towed loads,
refer to the Engine technical data and towed
loads section or your vehicle’s registration
certificate.
To ensure safe driving with a Towing device,
refer to the corresponding section.
Malfunction
If a fault occurs, this warning lamp lights
up on the instrument panel, accompanied
by a message and an audible signal.
To continue towing a trailer, reduce speed and
drive carefully!
Have it checked by a PEUGEOT dealer or a
qualified workshop.
The trailer stability control system provides an extra safety feature under
normal driving conditions, when following the
recommendations for use of trailers and
current legislation in force in your country. It
must not encourage the driver to take extra
risks, such as using a trailer in unsuitable
conditions of operation (e.g. excessive load,
exceeded nose weight, worn or under-inflated
tyres, faulty braking system) or driving at
excessive speed.
In certain cases, the system may not detect
trailer snaking, particularly with a light trailer.
Page 102 of 292
100
Safety
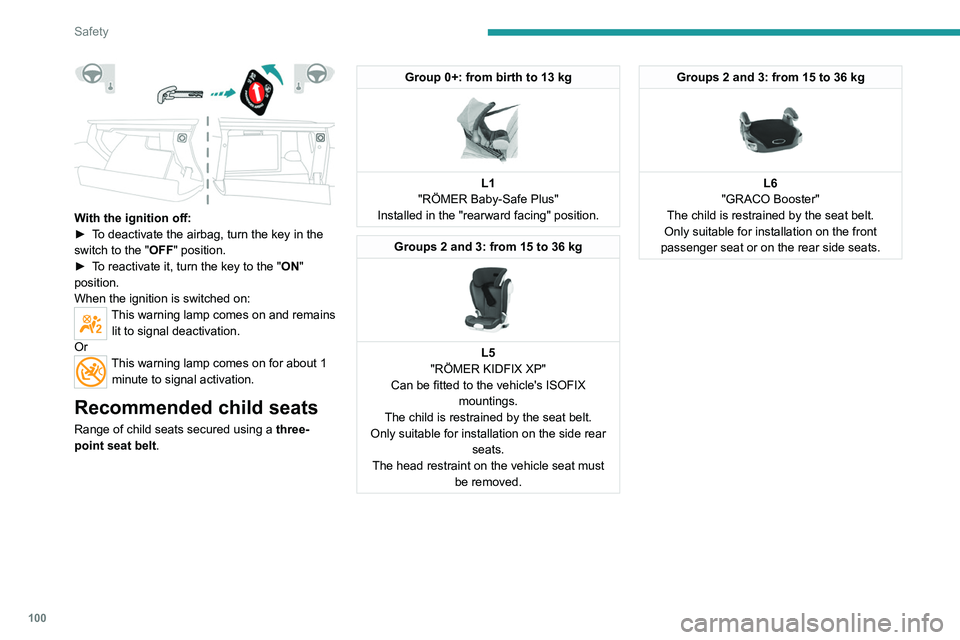
With the ignition off:
► T o deactivate the airbag, turn the key in the
switch to the "OFF " position.
►
T
o reactivate it, turn the key to the "ON"
position.
When the ignition is switched on:
This warning lamp comes on and remains lit to signal deactivation.
Or
This warning lamp comes on for about 1 minute to signal activation.
Recommended child seats
Range of child seats secured using a three-
point seat belt .
Group 0+: from birth to 13 kg
L1
"RÖMER Baby-Safe Plus"
Installed in the "rearward facing" position.
Groups 2 and 3: from 15 to 36 kg
L5
"RÖMER KIDFIX XP"
Can be fitted to the vehicle's ISOFIX mountings.
The child is restrained by the seat belt.
Only suitable for installation on the side rear seats.
The head restraint on the vehicle seat must be removed.
Groups 2 and 3: from 15 to 36 kg
L6
"GRACO Booster"
The child is restrained by the seat belt.
Only suitable for installation on the front
passenger seat or on the rear side seats.
Locations for child seats secured using the seat belt
In accordance with European regulations, this table indicates the option\
s for installing universally approved (a) child seats secured using the seat belt,
based on the child’s weight and the seat position in the vehicle.
Weight of the child/indicative age
Seat Front passenger
airbag Under 13 kg
(groups 0 (b) and 0+)
Up to about 1 year old From 9 to 18 kg
(group 1)
From about 1 to 3 years old From 15 to 25 kg
(group 2)
From about 3 to 6 years old From 22 to 36 kg
(group 3)
From about 6 to 10 years old
Row 1 (c) Passenger seat
with height adjustment (d)
without height
adjustment (e)
Deactivated: "OFF" U
UUU
Activated: "ON" XUF UFUF
Row 2 (f) Rear seats (c) (g)
U UUU
Row 3 (f)Rear side seats
UUUU
Page 114 of 292
11 2
Driving
► With an automatic gearbox, select mode P
or N and press the brake pedal.
►
Press the "
START/STOP" button while
maintaining pressure on the pedal until the
engine starts.
Diesel engines
In negative temperatures and/or when the
engine is cold, starting takes place only after the
preheating warning lamp goes out.
If this warning lamp comes on after
pressing the " START/STOP" button:
►
Keep the pedal fully depressed and do not
press the "
START/STOP" button again until the
engine is running.
In all circumstances, if one of the starting
conditions is not met, a message is displayed.
In some circumstances, a message indicates
that it is necessary to turn the steering wheel
while pressing the " START/STOP" button to
assist unlocking of the steering column.
Petrol engines
With Petrol engines, after a cold start,
pre-heating the catalytic converter can cause
noticeable engine vibrations, for anything up
to 2 minutes (accelerated idle speed).
If the engine stalls, release the clutch
pedal and fully depress it again, the
engine will restart automatically.
Starting rechargeable hybrid
vehicles
► Fully depress the brake pedal and press
the START/STOP button for approximately 2
seconds.
► Keep your foot on the pedal until this
indicator lamp comes on, indicating the
activation of the rechargeable hybrid system
(confirmed by an audible signal).
To exit Park mode, wait for the READY indicator lamp to come on.
By default, the system starts in Electric mode.
Depending on certain parameters (battery
charge level or outside temperature), the system
determines whether it is necessary to start the
petrol engine.
It is possible to change the driving mode at any
time using the mode selector.
When the vehicle starts in electric mode,
it makes no noise.
Pay particular attention to pedestrians and
cyclists who may not hear the vehicle coming
despite the pedestrian horn.
Switching off
► Immobilise the vehicle using the parking
brake.
►
With a
manual gearbox, ideally put the gear
lever into neutral.
► With an automatic gearbox, ideally select
mode P or N.
►
Press the "
START/STOP" button.
►
For rechargeable hybrid vehicles, before
leaving the vehicle, check that the READY
indicator lamp is switched off.
In some circumstances, it is necessary to turn
the steering wheel to lock the steering column.
On certain versions with an automatic gearbox
(EAT6/EAT8), the steering column does not lock,
but the gearbox locks in mode P.
If the vehicle is not immobilised, the
engine will not stop.
With the engine off, the braking and
steering assistance systems are also cut
off - risk of loss of control of the vehicle!
Never leave your vehicle with the
electronic key still inside.
Switching on the ignition
without starting the engine
With the electronic key in the passenger
compartment, pressing the " START/STOP"
button, without depressing any of the pedals ,
allows the ignition to be switched on without
starting the engine (the instrument panel and
accessories such as the audio system and the
lighting will come on).
► Press this button again to switch off the
ignition and allow the vehicle to be locked.
Key not detected
Back-up starting
A back-up reader is fitted to the steering column,
to enable the engine to be started if the system
fails to detect the key in the recognition zone, or
if the battery in the electronic key is flat.
Page 116 of 292
11 4
Driving
On certain versions with automatic gearbox
(EAT6/EAT8), the steering column does not lock.
Electric parking brake
In automatic mode, this system applies the
parking brake when the engine is switched off
and releases it when the vehicle moves off.
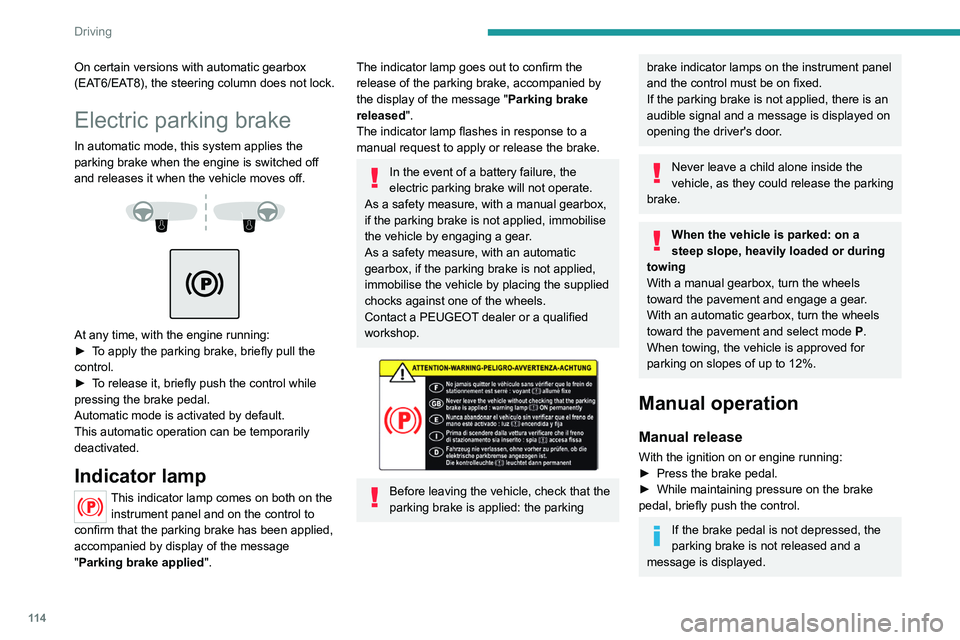
At any time, with the engine running:
► T o apply the parking brake, briefly pull the
control.
►
T
o release it, briefly push the control while
pressing the brake pedal.
Automatic mode is activated by default.
This automatic operation can be temporarily
deactivated.
Indicator lamp
This indicator lamp comes on both on the instrument panel and on the control to
confirm that the parking brake has been applied,
accompanied by display of the message
"Parking brake applied".
The indicator lamp goes out to confirm the
release of the parking brake, accompanied by
the display of the message " Parking brake
released ".
The indicator lamp flashes in response to a
manual request to apply or release the brake.
In the event of a battery failure, the
electric parking brake will not operate.
As a safety measure, with a manual gearbox,
if the parking brake is not applied, immobilise
the vehicle by engaging a gear.
As a safety measure, with an automatic
gearbox, if the parking brake is not applied,
immobilise the vehicle by placing the supplied
chocks against one of the wheels.
Contact a PEUGEOT dealer or a qualified
workshop.
Before leaving the vehicle, check that the
parking brake is applied: the parking
brake indicator lamps on the instrument panel
and the control must be on fixed.
If the parking brake is not applied, there is an
audible signal and a message is displayed on
opening the driver's door.
Never leave a child alone inside the
vehicle, as they could release the parking
brake.
When the vehicle is parked: on a
steep slope, heavily loaded or during
towing
With a manual gearbox, turn the wheels
toward the pavement and engage a gear.
With an automatic gearbox, turn the wheels
toward the pavement and select mode
P
.
When towing, the vehicle is approved for
parking on slopes of up to 12%.
Manual operation
Manual release
With the ignition on or engine running:
► Press the brake pedal.
►
While maintaining pressure on the brake
pedal, briefly push the control.
If the brake pedal is not depressed, the
parking brake is not released and a
message is displayed.
Manual application
With the vehicle stationary:
► Briefly pull the control.
The control indicator lamp flashes to confirm the
application request.
Automatic operation
Automatic release
First ensure that the engine is running and that
the driver's door is closed.
The electric parking brake gradually releases
automatically as the vehicle moves off.
With a manual gearbox
► Fully depress the clutch pedal and engage
first gear or reverse.
► Depress the accelerator pedal and release
the clutch pedal.
With an automatic gearbox
► Depress the brake pedal.
► Select mode D, M or R.
► Release the brake pedal and depress the
accelerator pedal.
If the brake does not release
automatically, check that the front doors
are fully closed.
When stationary with the engine running,
do not depress the accelerator pedal
unnecessarily. Risk of parking brake release.
Page 120 of 292
11 8
Driving
Operation
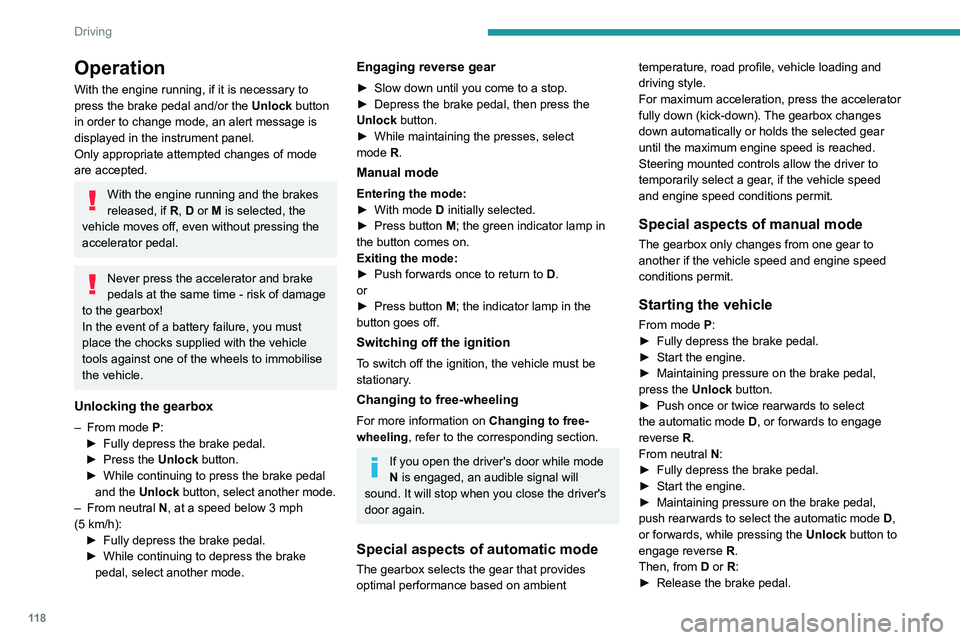
With the engine running, if it is necessary to
press the brake pedal and/or the Unlock button
in order to change mode, an alert message is
displayed in the instrument panel.
Only appropriate attempted changes of mode
are accepted.
With the engine running and the brakes
released, if R, D or M is selected, the
vehicle moves off, even without pressing the
accelerator pedal.
Never press the accelerator and brake
pedals at the same time - risk of damage
to the gearbox!
In the event of a battery failure, you must
place the chocks supplied with the vehicle
tools against one of the wheels to immobilise
the vehicle.
Unlocking the gearbox
– From mode P:
► Fully depress the brake pedal.
►
Press the
Unlock button.
►
While continuing to press the brake pedal
and the
Unlock button, select another mode.
–
From neutral
N, at a speed below 3 mph
(5
km/h):
►
Fully depress the brake pedal.
►
While continuing to depress the brake
pedal, select another mode.
Engaging reverse gear
► Slow down until you come to a stop.
► Depress the brake pedal, then press the
Unlock
button.
►
While maintaining the presses, select
mode
R.
Manual mode
Entering the mode:
► With mode D initially selected.
►
Press button
M; the green indicator lamp in
the button comes on.
Exiting the mode:
►
Push forwards once to return to
D.
or
►
Press button
M; the indicator lamp in the
button goes off.
Switching off the ignition
To switch off the ignition, the vehicle must be
stationary.
Changing to free-wheeling
For more information on Changing to free-
wheeling , refer to the corresponding section.
If you open the driver's door while mode
N is engaged, an audible signal will
sound. It will stop when you close the driver's
door again.
Special aspects of automatic mode
The gearbox selects the gear that provides
optimal performance based on ambient temperature, road profile, vehicle loading and
driving style.
For maximum acceleration, press the accelerator
fully down (kick-down). The gearbox changes
down automatically or holds the selected gear
until the maximum engine speed is reached.
Steering mounted controls allow the driver to
temporarily select a gear, if the vehicle speed
and engine speed conditions permit.
Special aspects of manual mode
The gearbox only changes from one gear to
another if the vehicle speed and engine speed
conditions permit.
Starting the vehicle
From mode P:
►
Fully depress the brake pedal.
►
Start the engine.
►
Maintaining pressure on the brake pedal,
press the
Unlock button.
►
Push once or twice rearwards to select
the automatic mode
D, or forwards to engage
reverse
R.
From neutral
N:
►
Fully depress the brake pedal.
►
Start the engine.
►
Maintaining pressure on the brake pedal,
push rearwards to select the automatic mode
D
,
or forwards, while pressing the Unlock
button to
engage reverse
R
.
Then, from
D or R:
►
Release the brake pedal.
► Accelerate gradually to automatically release
the electric parking brake.
The vehicle moves off immediately.
Automatic gearbox
Never try to start the engine by pushing
the vehicle.
Switching the vehicle off
Regardless of the current gearbox mode, mode
P is immediately engaged automatically when
the ignition is switched off.
However, in mode N, mode P will be engaged
after a delay of 5 seconds (time to enable free-
wheeling mode).
Check that mode P has been engaged and
that the electric parking brake was applied
automatically; if not, apply it manually.
The corresponding indicator lamps on the gear selector and the electric parking
brake control must be on, as well as the
indicator lamps on the instrument panel.
Gearbox malfunction
This warning lamp comes on, accompanied by an audible signal and the
display of a message.
Go to a PEUGEOT dealer or a qualified
workshop.
Do not drive faster than 62 mph (100 km/h),
keeping to the speed limit.
Page 135 of 292
133
Driving
6►Press and hold button 2 or 3 to change the
value in steps of + or - 5 mph (8 km/h).
To change the limit speed setting using memorised speeds, via the touch screen:
►
Press button 5 to display the memorised
speed settings.
►
Press the touch screen button for the desired
speed setting.
The selection screen closes after a few
moments.
This setting becomes the new limit speed.
To modify the cruise speed setting based on the speed
suggested by the Speed Limit Recognition
and Recommendation, as shown on the
instrument panel:
►
Press button 5 once; a message is displayed
to confirm the memorisation request.
►
Press button 5 again to save the suggested
speed.
The speed is immediately shown on the
instrument panel as the new speed setting.
Temporarily exceeding the
speed setting
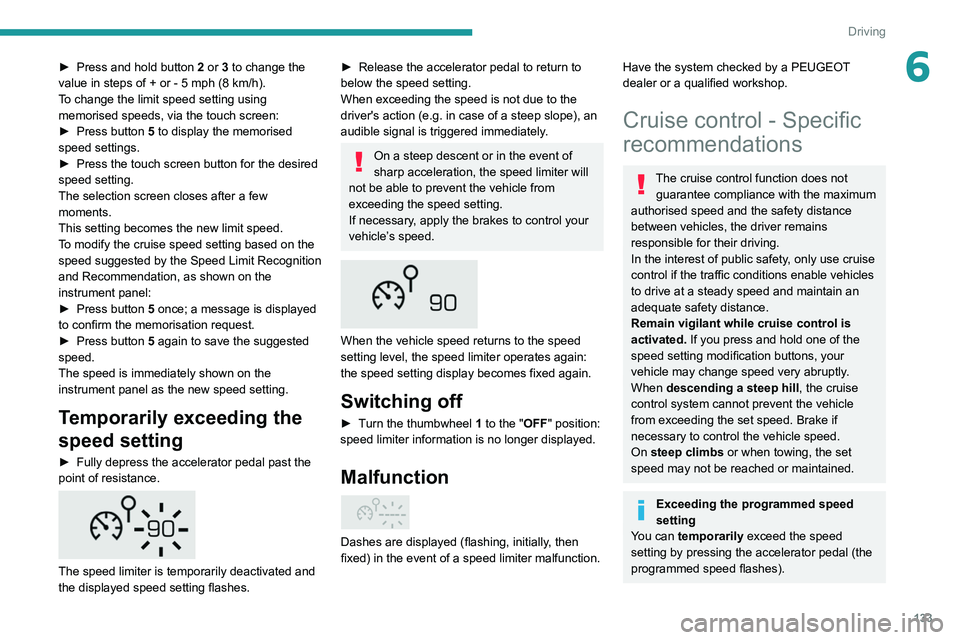
►Fully depress the accelerator pedal past the
point of resistance.
The speed limiter is temporarily deactivated and
the displayed speed setting flashes.
►Release the accelerator pedal to return to
below the speed setting.
When exceeding the speed is not due to the
driver's action (e.g.
in case of a steep slope), an
audible signal is triggered immediately
.
On a steep descent or in the event of
sharp acceleration, the speed limiter will
not be able to prevent the vehicle from
exceeding the speed setting.
If necessary, apply the brakes to control your
vehicle’s speed. When the vehicle speed returns to the speed
setting level, the speed limiter operates again:
the speed setting display becomes fixed again.
Switching off
►
Turn the thumbwheel 1 to the "OFF" position:
speed limiter information is no longer displayed.
Malfunction
Dashes are displayed (flashing, initially, then
fixed) in the event of a speed limiter malfunction.
Have the system checked by a PEUGEOT
dealer or a qualified workshop.
Cruise control - Specific
recommendations
The cruise control function does not guarantee compliance with the maximum
authorised speed and the safety distance
between vehicles, the driver remains
responsible for their driving.
In the interest of public safety, only use cruise
control if the traffic conditions enable vehicles
to drive at a steady speed and maintain an
adequate safety distance.
Remain vigilant while cruise control is
activated. If you press and hold one of the
speed setting modification buttons, your
vehicle may change speed very abruptly.
When descending a steep hill , the cruise
control system cannot prevent the vehicle
from exceeding the set speed. Brake if
necessary to control the vehicle speed.
On steep climbs or when towing, the set
speed may not be reached or maintained.
Exceeding the programmed speed
setting
You can temporarily exceed the speed
setting by pressing the accelerator pedal (the
programmed speed flashes).
Page 142 of 292
140
Driving
Malfunction
In the event of a malfunction,
dashes are displayed instead of
the speed setting.
This warning lamp comes on, accompanied by a message and an
audible signal, to confirm the malfunction.
Have it checked by a PEUGEOT dealer or a
qualified workshop.
Lane positioning assist
For more information, refer to the
General recommendations on the use
of driving and manoeuvring aids .
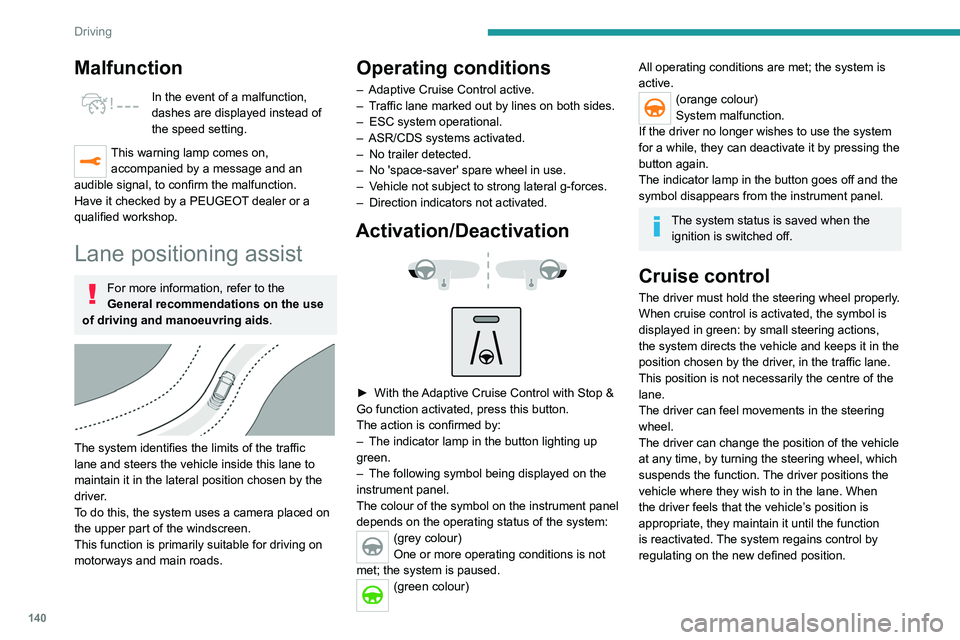
The system identifies the limits of the traffic
lane and steers the vehicle inside this lane to
maintain it in the lateral position chosen by the
driver.
To do this, the system uses a camera placed on
the upper part of the windscreen.
This function is primarily suitable for driving on
motorways and main roads.
Operating conditions
– Adaptive Cruise Control active.
– T raffic lane marked out by lines on both sides.
–
ESC system operational.
–
ASR/CDS systems activated.
–
No trailer detected.
–
No 'space-saver' spare wheel in use.
–
V
ehicle not subject to strong lateral g-forces.
–
Direction indicators not activated.
Activation/Deactivation
► With the Adaptive Cruise Control with Stop &
Go function activated, press this button.
The action is confirmed by:
–
The indicator lamp in the button lighting up
green.
–
The following symbol being displayed on the
instrument panel.
The colour of the symbol on the instrument panel
depends on the operating status of the system:
(grey colour)
One or more operating conditions is not
met; the system is paused.
(green colour)
All operating conditions are met; the system is
active.
(orange colour)
System malfunction.
If the driver no longer wishes to use the system
for a while, they can deactivate it by pressing the
button again.
The indicator lamp in the button goes off and the
symbol disappears from the instrument panel.
The system status is saved when the ignition is switched off.
Cruise control
The driver must hold the steering wheel properly.
When cruise control is activated, the symbol is
displayed in green: by small steering actions,
the system directs the vehicle and keeps it in the
position chosen by the driver, in the traffic lane.
This position is not necessarily the centre of the
lane.
The driver can feel movements in the steering
wheel.
The driver can change the position of the vehicle
at any time, by turning the steering wheel, which
suspends the function. The driver positions the
vehicle where they wish to in the lane. When
the driver feels that the vehicle’s position is
appropriate, they maintain it until the function
is reactivated. The system regains control by
regulating on the new defined position.
Pausing/Suspending the
system
The driver must act promptly if they believe that the traffic conditions or the
state of the road surface require their
intervention, by moving the steering wheel to
temporarily suspend system operation. Any
intervention on the brake pedal that causes
the Adaptive Cruise Control to pause will also
cause the system to pause.
If the system detects that the driver is not
holding the wheel firmly enough, it
Driving situations and related alerts
The tables below describe the displays associated with the main driving \
situations. The display of these alerts is not sequential.
Button indicator lamp Cruise control thumbwheelSymbols
Display Comments
Off CRUISE
(grey)
(grey)Cruise control paused; lane positioning
assist not active.
Off CRUISE
(green)
(grey)Cruise control active; lane
positioning assist not active.