2021 PEUGEOT 3008 reset
[x] Cancel search: resetPage 11 of 292

9
Instruments
1Head-up digital display
This digital instrument panel can be customised.
Depending on the display mode selected, certain
information is hidden or presented differently.
Example with the "DIALS"
display mode:
1.Fuel gauge
2. Analogue speedometer (mph or km/h)
3. Gear shift indicator
Selector position and gear engaged on
automatic gearbox
4. Digital speedometer (mph or km/h)
5. Cruise control or speed limiter settings
Display of speed limit signs
6. Rev counter (x 1,000 rpm)
7. Engine coolant temperature indicator (°C)
8. Trip distance recorder (miles or km)
9. Total distance recorder (miles or km)
A. Instrument panel ambient lighting on/off
B. Short press: start a manual test
Long press: reset the service indicator or trip
distance recorder (depending on the context)
Head-up digital display
(Rechargeable hybrid)
This digital instrument panel can be customised.
Depending on the display mode selected, certain
information is hidden or presented differently.
Example with the " ÉNERGIE"
display mode:
1.Fuel gauge and remaining range (miles or
km)
2. Digital speedometer (mph or km/h)
READY indicator lamp
3. Status of the gearbox
4. Energy flows
5. Driving mode selected
6. Power indicator
7. Battery charge level and remaining range
(miles or km)
8. Trip distance recorder (miles or km)
9. Total distance recorder (miles or km)
A. Instrument panel ambient lighting on/off
B. Short press: start a manual test
Long press: reset the service indicator or trip
distance recorder (depending on the context)
In all-electric driving mode, the speed is
displayed in blue.
Displays
Most warning and indicator lamps do not have a
fixed position.
The warning and indicator lamps in the second
line are displayed from right to left in order of
priority.
For certain functions that have indicator lamps
for both operation and deactivation, there is only
one dedicated location.
Permanent information
In the standard display, the instrument panel
shows:
–
in fixed locations:
•
Information related to the gearbox and gear
shift indicator
.
•
Fuel gauge.
•
Coolant temperature indicator (Petrol or
Diesel).
•
Charge level and range indicator
(Rechargeable hybrid).
•
Distance recorders.
–
in variable locations:
•
Digital speedometer
.
•
Status or alert messages displayed
temporarily
.
Optional information
Depending on the selected display mode and
active features, additional information may be
displayed:
–
Rev counter (Petrol or Diesel).
–
T
rip computer.
Page 19 of 292

17
Instruments
1Black/white warning lamps
Automatic gearbox or Electric automatic
gearbox (e-EAT8) (Rechargeable hybrid)
Fixed.
The automatic gearbox is locked.
You must press the Unlock button to unlock it.
eSave function (Rechargeable hybrid)Fixed, accompanied by the reserved
electric range.
The
eSave function is activated.
Indicators
Service indicator
The servicing information is expressed in terms
of distance (miles or kilometres) and time
(months or days).
The alert is given at whichever of these two
terms is reached first.
The servicing information is displayed in the
instrument panel. Depending on the version of
the vehicle:
–
The distance recorder display line indicates
the distance remaining before the next service
is due, or the distance travelled since it was due
preceded by the "-" sign.
–
An alert message indicates the distance
remaining, as well as the period before the next
service is due or how long it is overdue.
The value indicated is calculated according to the distance covered and
the time elapsed since the last service.
The alert may also be triggered close to a
due date.
Service spannerOn temporarily when the ignition is
switched on.
Between 620 and 1,860 miles (1,000 and 3,000
km) remain before the next service is due.
Fixed, when the ignition is switched on.
The next service is due in less than 620
miles (1,000 km).
Have your vehicle serviced very soon.
Service spanner flashingFlashing then fixed, when the
ignition is switched on.
(With
BlueHDi Diesel engines, associated with
the Service warning lamp.)
The servicing interval has been exceeded.
Have your vehicle serviced as soon as possible.
Resetting the service indicator
The service indicator must be reset after each
service.
If you have serviced your vehicle yourself:
►
Switch off the ignition.
► Press and hold the button located on the end
of the wiper control stalk.
►
Switch on the ignition; a temporary display
window appears and a countdown begins.
►
When the display indicates =0, release the
button; the spanner disappears.
If you have to disconnect the battery
following this operation, lock the vehicle
and wait at least 5 minutes for the reset to be
registered.
Reminder of the servicing information
You can access the servicing information at any
time.
► Press the trip distance recorder reset button.
The servicing information is displayed for a few
seconds, then disappears.
Engine oil level indicator
(Depending on version)
Page 23 of 292
21
Instruments
1Manual test on the
instrument panel
This function allows you, at any time, to check
certain indicators and to display the alerts log.
► With the engine running, briefly press this
button.
The following information is displayed on the
instrument panel:
–
Engine oil level.
–
Next service due.
–
Driving range associated with the
AdBlue® and
the SCR system (BlueHDi Diesel).
–
Current alerts.
This information is also displayed automatically every time the ignition is
switched on.
Distance recorders
With the ignition on, the distances are
permanently indicated. They are deactivated
about 30 seconds after switching the ignition
off. They are displayed when the driver's door
is opened, and when the vehicle is locked or
unlocked.
When travelling abroad, you may have to
change the distance units (km or miles):
the road speed must be displayed in the local
country’s official unit (km/h or mph).
The unit is changed via the screen
configuration menu, with the vehicle
stationary.
Total distance recorder
This recorder measures the total distance
travelled by the vehicle since its initial
registration.
Trip distance recorder
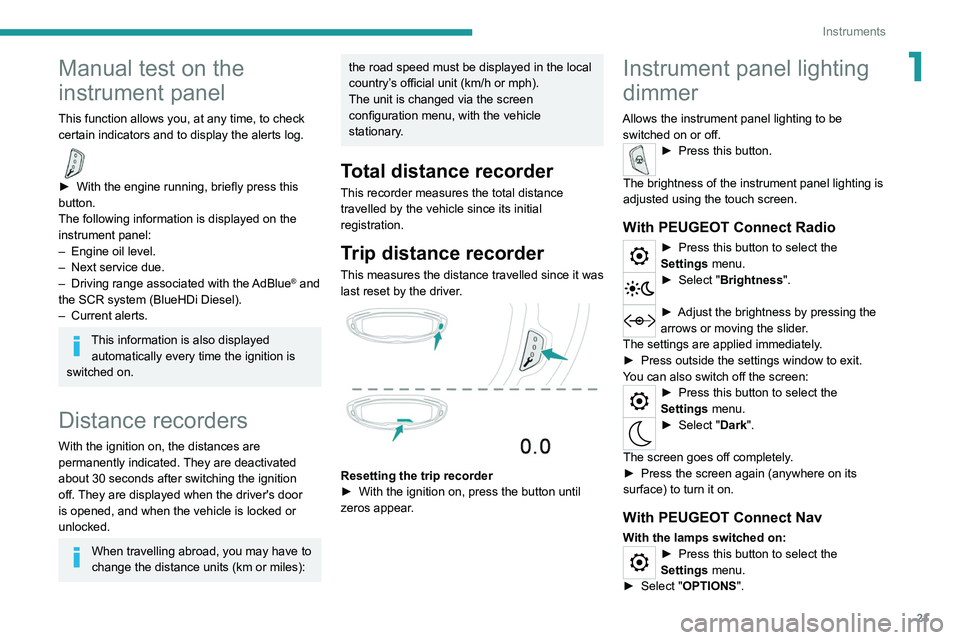
This measures the distance travelled since it was
last reset by the driver.
Resetting the trip recorder
► With the ignition on, press the button until
zeros appear
.
Instrument panel lighting
dimmer
Allows the instrument panel lighting to be switched on or off.
► Press this button.
The brightness of the instrument panel lighting is
adjusted using the touch screen.
With PEUGEOT Connect Radio
► Press this button to select the
Settings menu.
► Select " Brightness".
► Adjust the brightness by pressing the
arrows or moving the slider .
The settings are applied immediately.
►
Press outside the settings window to exit.
Y
ou can also switch off the screen:
► Press this button to select the
Settings menu.
► Select " Dark".
The screen goes off completely.
►
Press the screen again (anywhere on its
surface) to turn it on.
With PEUGEOT Connect Nav
With the lamps switched on:► Press this button to select the
Settings menu.
►
Select "
OPTIONS".
Page 24 of 292
22
Instruments
Average speed
(mph or km/h)Calculated since the last trip computer
reset.
Distance travelled
(miles or km)Calculated since the last trip computer
reset.
Stop & Start time counter
(minutes/seconds or hours/minutes)
If your vehicle is fitted with the Stop & Start
function, a time counter calculates the time spent
in STOP mode during a journey.
The time counter is reset each time the ignition is
switched on.
Touch screen
This system gives access to the following elements:
– Permanent display of the time and outside
temperature (a blue warning lamp appears if
there is a risk of ice).
– Heating/air conditioning system controls.
– Vehicle functions and equipment setting
menus.
– Audio system and telephone controls and
display of related information.
► Select " Screen configuration".
►
Select the "
Brightness” tab.
► Adjust the instrument panel and
screen brightness by using the arrows or
moving the slider
.
► Press this button to save and exit.
You can also switch off the screen:
► Press this button to select the
Settings menu.
► Select " Turn off screen".
The screen goes off completely.
►
Press the screen again (anywhere on its
surface) to turn it on.
Trip computer
Displays information related to the current trip
(range, fuel consumption, average speed, etc.).
Data displayed on the
instrument panel
Trip computer data is displayed permanently
when the "TRIP COMPUTER" or "PERSONAL"
display mode is selected, depending on version.
In all other display modes, pressing the end of
the wiper control stalk will cause this data to
appear temporarily in a specific window.
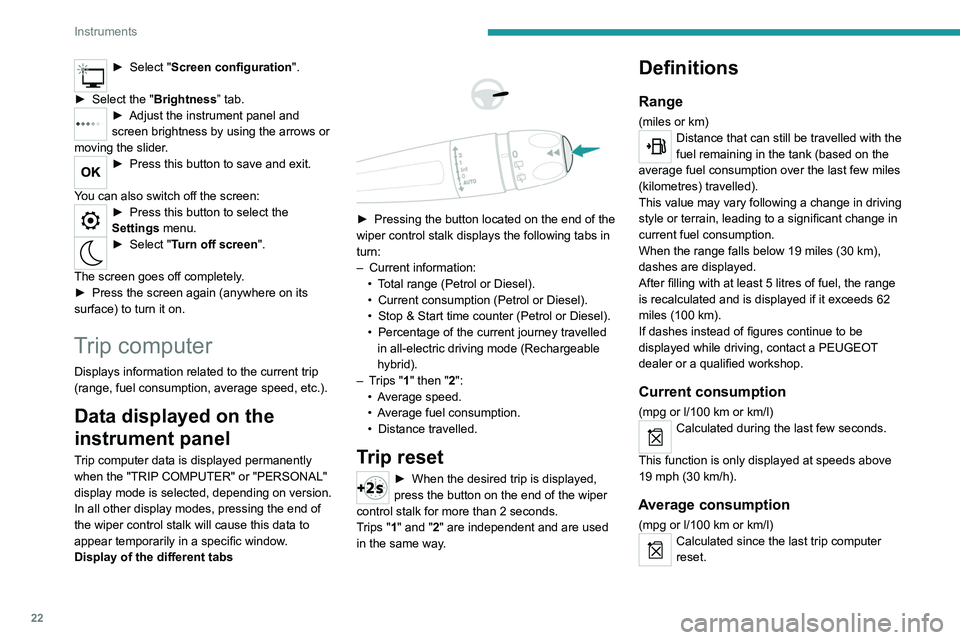
Display of the different tabs
► Pressing the button located on the end of the
wiper control stalk displays the following tabs in
turn:
–
Current information:
•
T
otal range (Petrol or Diesel).
•
Current consumption (Petrol or Diesel).
•
Stop & Start time counter (Petrol or Diesel).
•
Percentage of the current journey travelled
in all-electric driving mode (Rechargeable
hybrid).
–
T
rips "1" then "2":
•
A
verage speed.
•
A
verage fuel consumption.
•
Distance travelled.
Trip reset
► When the desired trip is displayed,
press the button on the end of the wiper
control stalk for more than 2
seconds.
Trips "1" and "2" are independent and are used
in the same way.
Definitions
Range
(miles or km)Distance that can still be travelled with the
fuel remaining in the tank (based on the
average fuel consumption over the last few miles
(kilometres) travelled).
This value may vary following a change in driving
style or terrain, leading to a significant change in
current fuel consumption.
When the range falls below 19 miles (30
km),
dashes are displayed.
After filling with at least 5 litres of fuel, the range
is recalculated and is displayed if it exceeds 62
miles (100
km).
If dashes instead of figures continue to be
displayed while driving, contact a PEUGEOT
dealer or a qualified workshop.
Current consumption
(mpg or l/100 km or km/l)Calculated during the last few seconds.
This function is only displayed at speeds above
19 mph (30
km/h).
Average consumption
(mpg or l/100 km or km/l)Calculated since the last trip computer
reset.
Page 25 of 292
23
Instruments
1Average speed
(mph or km/h)Calculated since the last trip computer
reset.
Distance travelled
(miles or km)Calculated since the last trip computer
reset.
Stop & Start time counter
(minutes/seconds or hours/minutes)
If your vehicle is fitted with the Stop & Start
function, a time counter calculates the time spent
in STOP mode during a journey.
The time counter is reset each time the ignition is
switched on.
Touch screen
This system gives access to the following elements:
–
Permanent display of the time and outside
temperature (a blue warning lamp appears if
there is a risk of ice).
–
Heating/air conditioning system controls.
–
V
ehicle functions and equipment setting
menus.
–
Audio system and telephone controls and
display of related information.
– Display of visual manoeuvring aid functions
(visual parking sensor information, Park Assist,
etc.).
–
Internet services and display of
related
information.
–
Navigation system controls and
display
of related information (depending on
version).
For safety reasons, always stop the
vehicle before performing operations
that require sustained attention.
Some functions are not accessible while
driving.
Recommendations
This screen is of the capacitive type.
– Do not use pointed objects on the touch
screen.
–
Do not touch the touch screen with wet hands.
–
Use a soft, clean cloth to clean the touch
screen.
Principles
► Use the buttons arranged below the touch
screen to access the menus, then press the
buttons that appear on the touch screen.
Some menus may display across two pages:
press the "OPTIONS" button to access the
second page.
After a few moments with no action on the second page, the first page is
displayed automatically.
To deactivate/activate a function, select " OFF"
or "ON".
Configuring a function
Access to additional information on the function
Confirm
Return to the previous page or confirm
Volume adjustment/mute.
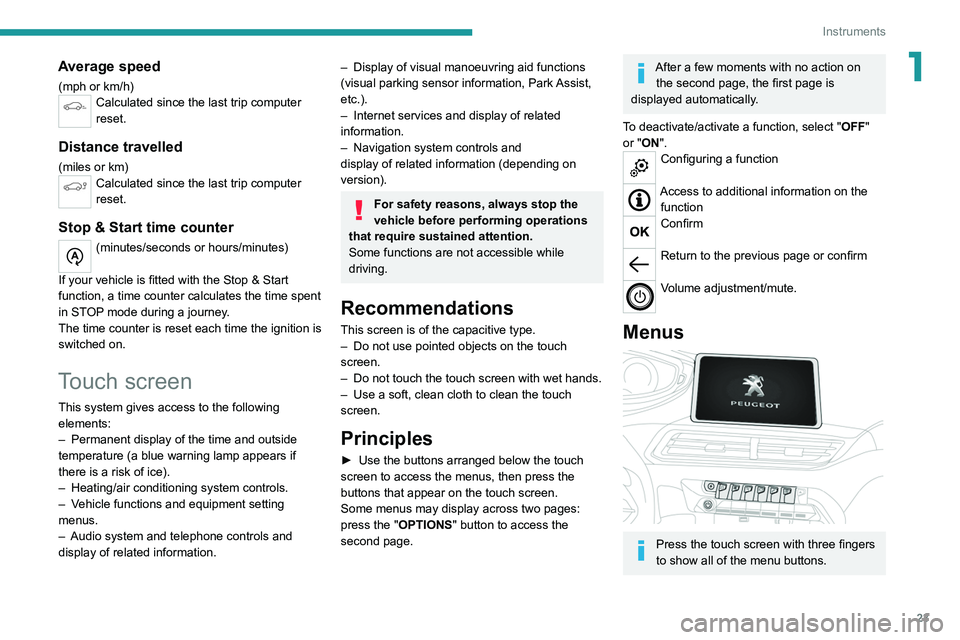
Menus
Press the touch screen with three fingers
to show all of the menu buttons.
Page 29 of 292
27
Access
2If motorised operation of the tailgate is
deactivated, pressing the button partially
opens the tailgate.
To lock the vehicle, it is necessary to close
the tailgate again.
Locking the vehicle
Normal locking
► Press the locking button.
The locking, and the activation of the alarm
depending on version, is confirmed by the
lighting of the direction indicators.
Depending on version, the door mirrors fold.
An access (door or boot) that is not properly closed prevents locking of the
vehicle. However, if the vehicle is fitted with
an alarm, it will be activated after 45
seconds.
If the vehicle is unlocked but the doors or boot
are not subsequently opened,
the vehicle
will automatically lock itself again after about
30
seconds. If the vehicle is fitted with an
alarm, it will be reactivated automatically.
Deadlocking
Deadlocking renders the interior door
controls inoperative. It also disables the
central locking button.
The horn remains operational.
Never leave anyone inside the vehicle
when it is deadlocked.
►
Press the locking button again within 5
seconds to deadlock the vehicle (confirmed by
the temporary lighting of the direction indicators).
Az ablakok felhúzása
A reteszelőgomb több mint 3 másodpercig történő lenyomva tartásával lehet felhúzni
az ablakokat.
Az ablakok felhúzásakor ügyeljen arra, hogy semmi ne akadályozza az ablakok
megfelelő záródását.
Ha riasztóval szerelt változatoknál résnyire
nyitva szeretné hagyni az ablakokat, először
kapcsolja ki a riasztó belső térvédelmi
funkcióját.
A riasztórendszerről a megfelelő részben
olvashat további tudnivalókat.
Locating the vehicle
Helps you to locate your vehicle from a distance,
with the vehicle locked:
–
The direction indicators flash for approximately
10 seconds.
–
The door mirror spotlamps come on.
– The courtesy lamps come on.► Press this button.
Remote lighting of the
lamps
Availability of this function depends on version.► Press this button. The sidelamps,
dipped beam headlamps, number plate
lamps and door mirror spotlamps come on for 30
seconds.
Pressing again before the end of the timed
period switches off the lamps immediately.
Advice
Remote control
The remote control is a sensitive, high-
frequency device; avoid handling it in your
pocket, due to the risk of unintentionally
unlocking the vehicle.
Avoid pressing the remote control buttons
while out of range of the vehicle, due to
the risk of rendering the remote control
inoperative. It would then be necessary to
reset it.
Anti-theft protection
Do not modify the electronic vehicle
immobiliser, as this might result in
malfunctions.
Remember to turn the steering wheel to
engage the steering lock.
Page 92 of 292
90
Safety
With manual gearbox
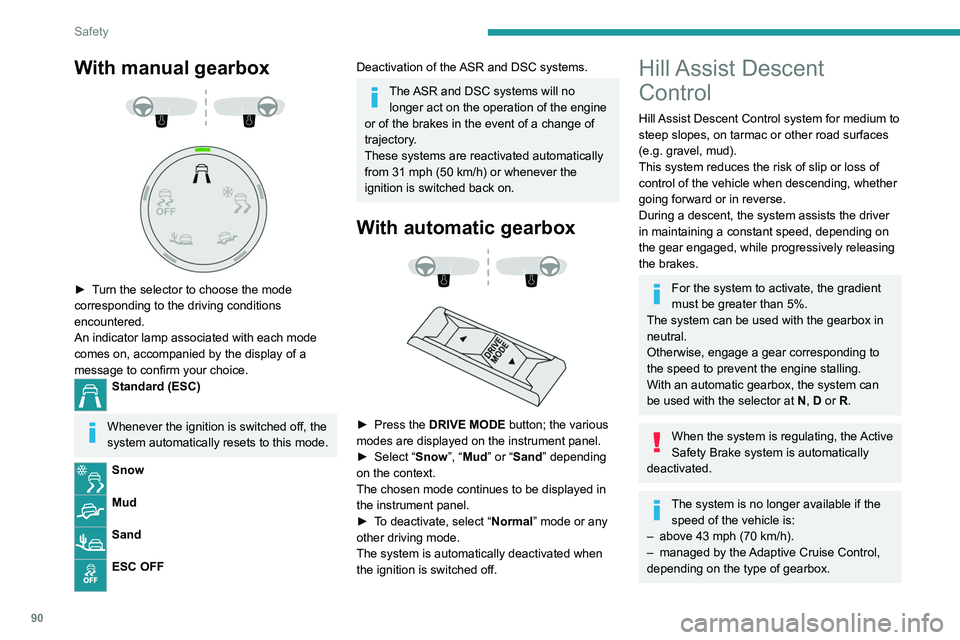
► Turn the selector to choose the mode
corresponding to the driving conditions
encountered.
An indicator lamp associated with each mode
comes on, accompanied by the display of a
message to confirm your choice.
Standard (ESC)
Whenever the ignition is switched off, the
system automatically resets to this mode.
Snow
Mud
Sand
ESC OFF
Deactivation of the ASR and DSC systems.
The ASR and DSC systems will no longer act on the operation of the engine
or of the brakes in the event of a change of
trajectory.
These systems are reactivated automatically
from 31 mph (50 km/h) or whenever the
ignition is switched back on.
With automatic gearbox
► Press the DRIVE MODE button; the various
modes are displayed on the instrument panel.
►
Select “
Snow”, “Mud” or “Sand” depending
on the context.
The chosen mode continues to be displayed in
the instrument panel.
►
T
o deactivate, select “Normal” mode or any
other driving mode.
The system is automatically deactivated when
the ignition is switched off.
Hill Assist Descent
Control
Hill Assist Descent Control system for medium to
steep slopes, on tarmac or other road surfaces
(e.g.
gravel, mud).
This system reduces the risk of slip or loss of
control of the vehicle when descending, whether
going forward or in reverse.
During a descent, the system assists the driver
in maintaining a constant speed, depending on
the gear engaged, while progressively releasing
the brakes.
For the system to activate, the gradient
must be greater than 5%.
The system can be used with the gearbox in
neutral.
Otherwise, engage a gear corresponding to
the speed to prevent the engine stalling.
With an automatic gearbox, the system can
be used with the selector at N, D or R.
When the system is regulating, the Active
Safety Brake system is automatically
deactivated.
The system is no longer available if the speed of the vehicle is:
–
above 43 mph (70
km/h).
–
managed by the
Adaptive Cruise Control,
depending on the type of gearbox.
Switching on
By default, the system is not selected.
The state of the function is not saved when the
ignition is switched off.
► To select the system, at speeds below
31 mph (50 km/h), press this button until
its green indicator lamp lights up; this lamp
appears in grey on the instrument panel.
► The system becomes active at speeds
below 19 mph (30 km/h); this lamp lights
up in green on the instrument panel.
► When the vehicle begins its descent, the
driver can release the accelerator and brake
pedals; the system regulates the speed:
– If the gearbox is in first or second gear,
the speed decreases and the
indicator lamp flashes rapidly.
– If the gearbox is in neutral or if the clutch
pedal is depressed, the speed decreases and
the indicator lamp flashes slowly; in this case,
the maintained descent speed is lower.
On a descent, with the vehicle stationary, if the
driver releases the accelerator and brake pedals,
Page 126 of 292
124
Driving
any risk of injury caused by the engine
restarting automatically.
Driving on flooded roads
Before entering into a flooded area, it is
strongly recommended that you deactivate
the Stop & Start system.
For more information on Driving
recommendations, particularly on flooded
roads, refer to the corresponding section.
Operation
Main conditions for operation
– The driver ’s door must be closed.
– The driver's seat belt must be fastened.
–
The level of charge in the battery must be
sufficient.
–
The temperature of the engine must be within
its nominal operating range.
–
The outside temperature must be between
0°C and 35°C.
Putting the engine into standby
(STOP mode)
The engine automatically enters standby mode
as soon as the driver indicates their intention to
stop: –
W
ith a manual gearbox,
at speeds below 2
mph (3 km/h) on 1.5 BlueHDi versions, or with
the vehicle stationary on 1.2 PureTech versions,
when you place the gear lever in neutral and
release the clutch pedal.
–
W
ith an automatic gearbox,
at speeds below
12 mph (20 km/h) on BlueHDi versions, or with
the vehicle stationary on other versions, when
you depress the brake pedal or place the gear
selector in mode N.
Time counter
A time counter adds up the time spent in standby
during the journey. It is reset to zero every time
the ignition is switched on.
Special cases:
The engine will not go into standby if the
conditions for operation are not met and in the
following cases:
–
Steep slope (ascending or descending).
–
V
ehicle has not exceeded 6 mph (10 km/h)
since the last engine start (with the key or the
START/STOP button).
–
Electric parking brake applied or being
applied.
–
Needed
to maintain a comfortable temperature
in the passenger compartment.
–
Demisting active.
In these cases, this indicator lamp flashes
for a few seconds, then goes off.
After the engine has restarted, STOP mode is not available until the vehicle
has reached a speed of 5 mph (8
km/h).
During parking manoeuvres, STOP mode
is not available for a few seconds after
coming out of reverse gear or turning the
steering wheel.
Restarting the engine (START mode)
The engine automatically restarts as soon as the
driver indicates the intention of moving off again:
With a manual gearbox: with the clutch pedal
fully depressed.
With an automatic gearbox:
–
With the selector in mode
D or M: with the
brake pedal released.
–
With the selector in mode
N and the brake
pedal released: with the selector at D or M.
–
With the selector in mode
P and the brake
pedal depressed: with the selector at R, N, D
or M.
–
With reverse gear engaged.
Special cases
The engine will restart automatically if the
conditions for operation are met again and in the
following cases:
–
V
ehicle speed exceeds 16 mph (25 km/h)
with
2.0 BlueHDi versions with automatic
gearbox in mode D, or 2 mph (3 km/h) with
other
versions.
– The electric parking brake is being applied.In these cases, this indicator lamp flashes
for a few seconds, then goes off.
Malfunctions
In the event of a fault with the system, this
warning lamp flashes for a few moments
on the instrument panel, then remains on,
accompanied by the display of a message.
Have it checked by a PEUGEOT dealer or a
qualified workshop.
The vehicle stalls in STOP mode
All of the instrument panel warning lamps come
on if there is a fault.
► Switch off the ignition then start the engine
again with the key or the " START/STOP" button.
12 V battery
The Stop & Start system requires a
12 V battery of specific technology and
specification.
All work must be carried out only by a
PEUGEOT dealer or a qualified workshop.
Tyre under-inflation detection
This system alerts the driver when one or more
tyres have a drop in pressure.
The alert is raised when the vehicle is moving,
not when stationary.